These seven New Year’s Eve dessert recipes include tropical fruit pavê, passion fruit mousse, dulce de leche rabanada, a chilled lemon tart, mini berry cheesecakes, spoonable brigadeiro and condensed milk flan. Find ingredient lists, methods and practical advice for preparing and serving them.
Looking for New Year’s Eve dessert recipes? This collection combines familiar chilled desserts with Brazilian favourites. Choose a few that suit your guests, allow enough chilling time and read the full method before shopping. The translated recipes have been checked for consistency but have not been kitchen-tested.
Choosing desserts for New Year’s Eve

For a New Year’s Eve dessert menu, consider flavour, preparation time, fridge space and your guests’ needs. A manageable selection is easier to serve well than a large number of complicated dishes.
What to consider
- Flavour and portion size: a small mousse, fruit pavê or chilled tart may suit guests after a substantial meal. Creamy desserts are not necessarily nutritionally light.
- Preparation: choose recipes that can be prepared ahead or assembled quickly near serving.
- Storage: check which desserts require refrigeration and plan to keep them chilled, rather than leaving dairy desserts on display for hours.
- Serving: small glasses or individual portions make serving easier and help guests take the amount they want.
- Dietary requirements: ask guests what they need. Lactose-free, dairy-free, gluten-free and vegan are different requirements.
Balancing flavours and textures
- Pair a creamy dessert with a crisp topping, checking nut and other allergies before using chopped nuts.
- Citrus or passion fruit provides a sharper contrast to sweet cream.
- A chocolate option and a fruit option offer a useful choice.
Planning the preparation
- List your chosen recipes and check their cooking, cooling and storage needs. For these perishable desserts, preparing the day before is a practical starting point.
- Measure ingredients before beginning and keep perishable items refrigerated until needed.
- Prepare individual portions the previous day where suitable, leaving crisp toppings until serving.
- Reserve fridge space. A cool box is useful only if ice packs and monitoring keep the food properly chilled.
Substitutions to consider
- Lactose-free condensed milk still contains milk protein. A plant-based condensed milk gives a different result and needs the rest of the recipe, including biscuits and fat, to be suitable too.
- Butter can sometimes be replaced with a suitable dairy-free baking fat, but oil is not an automatic one-for-one replacement in every base or filling.
- Demerara sugar changes flavour and texture. Do not substitute a sweetener for sugar in equal amounts without product-specific recipe guidance, particularly in caramel.
Simple presentation
- Clear glasses show off the layers in pavê and mousse.
- Finish with washed fruit, a little citrus zest or mint.
- Serve spoonable sweets in small dessert cups with spoons; use paper sweet cases only for fillings firm enough to hold their shape.
Problems to avoid
- Keep desserts that require chilling refrigerated until serving, bringing out small portions and replenishing as needed.
- Avoid making every complicated component on the day; plan cooking and chilling in advance.
- Tell guests about ingredients such as milk, eggs, nuts and cereals containing gluten. Lactose intolerance is not the same as a milk allergy.
Building a small dessert menu
- Choose, for example, a chilled lemon tart or mousse, a flan or spoonable brigadeiro, and a crisp accompaniment.
- Mini cheesecakes, small mousse cups and modest tart slices let guests try a little of different flavours.
Presentation, timing and organisation
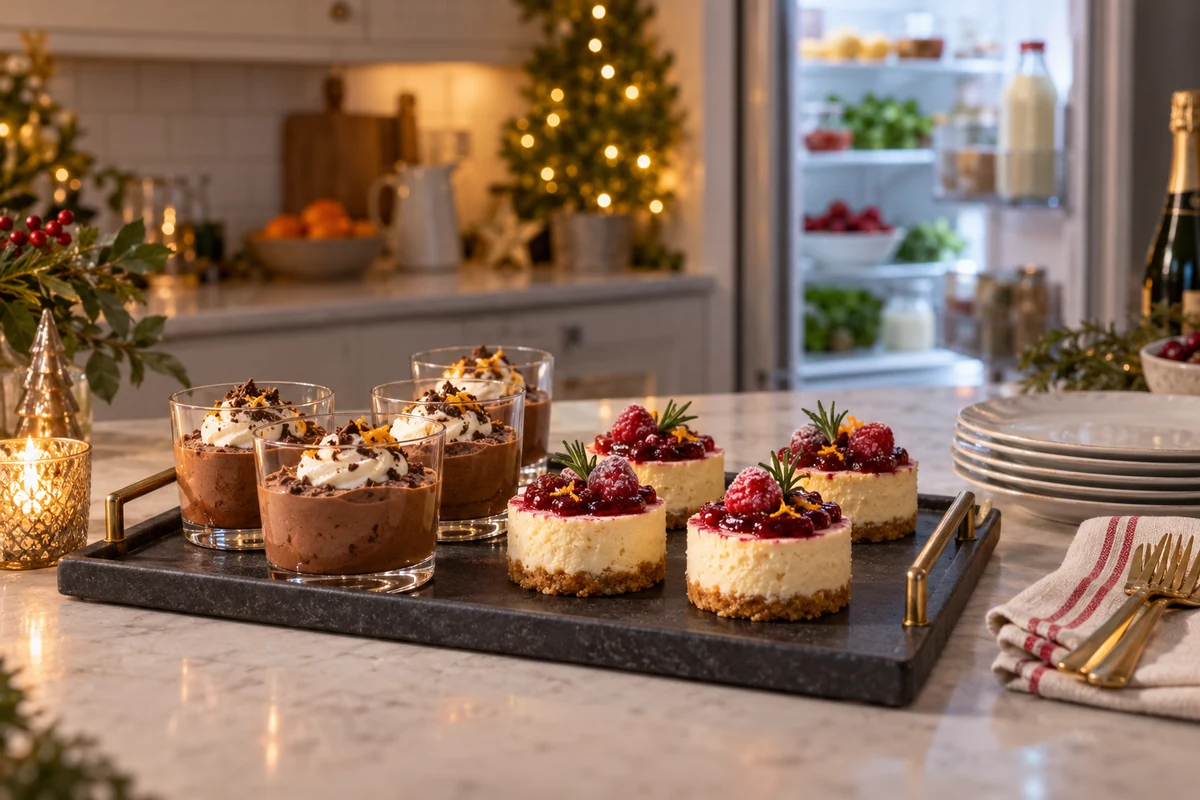
A clear preparation plan helps desserts reach the table looking good and at the right temperature.
Presentation ideas
- Individual portions: use small glasses or suitable moulds for easy serving.
- Colour and texture: contrast cream, fruit and a crisp garnish.
- Different heights: use stable cake stands or trays without obstructing access.
- Simple garnishes: citrus zest, mint or suitable chopped nuts provide a quick finish.
A preparation timetable
- Three days before: choose the menu, check ingredients and shop for what is missing.
- Two days before: organise tins, glasses and dry ingredients. Only prepare perishable components this early if they will be used within their safe storage limit.
- The day before: cook or assemble suitable desserts, cool promptly where needed and refrigerate covered.
- On the day: add toppings and garnishes close to serving. Leave chilled desserts in the fridge until needed.
Storage and service
- Reserve a shelf: keep desserts covered and separate from raw foods in a fridge at 5°C or below.
- Have utensils ready: put clean spoons, serving tools and napkins beside the dishes.
- Identify alternatives: accurately label suitable lactose-free, gluten-free or vegan options and keep serving utensils separate.
- Keep food cold: ice-packed containers can assist short service, but must maintain safe temperature. Replenishing small portions from the fridge is often simpler.
Quick styling tips
- Neutral plates let the dessert colours stand out.
- Space small serving dishes so guests can reach them easily.
- Keep crisp toppings separate from moist desserts until serving.
- Avoid large decorations that block access or could fall into food.
Final checklist
- Check fridge capacity and temperature.
- Set out portions and utensils.
- Plan chilled transport or extra storage if needed.
- Ask someone to replenish food and clear used dishes.
A quick guide to the seven desserts

The overview below matches the detailed recipes that follow. Timings and yields are estimates: tin size, portion size and equipment affect the result.
Tropical fruit pavê
Preparation: about 20 minutes, plus at least 2 hours chilling | Yield: about 10 portions
Ingredients:
- 395 g sweetened condensed milk – a lactose-free version can be used for lactose intolerance
- 200 g cream – matching the detailed recipe below; plant cream changes the result and does not by itself make the whole dessert vegan
- 200 g plain sweet biscuits – choose suitable gluten-free biscuits if required
- 2 ripe mangoes – peeled and diced; firm-ripe fruit holds its shape
- 100 g passion fruit pulp and ½ small pineapple – matching the fruit used in the detailed recipe; dice the pineapple
- 50 g sugar, optional – for caramelising fruit; also allow 120 ml milk for dipping biscuits and optional citrus zest and mint
Passion fruit mousse with a crisp nut topping
Preparation: about 15 minutes, plus at least 2–3 hours chilling until set | Yield: about 8 portions
Ingredients:
- 395 g sweetened condensed milk – use a suitable lactose-free version if needed
- 200 g cream – plant cream gives a different variation
- Up to 240 ml concentrated passion fruit juice or pulp – add according to the strength of the product; the detailed method also uses 12 g powdered gelatine and 60 ml cold water
- 100 g chopped nuts – such as almonds, cashews or walnuts, if suitable for your guests
- 2 tbsp sugar – for the nut topping, matching the detailed method rather than the butter in the original overview
Dulce de leche-stuffed rabanada
Preparation and cooking: about 35 minutes | Yield: roughly 12 slices, depending on the loaf
Ingredients:
- 500 g firm brioche or French-style bread – cut into 2–3 cm slices
- 400 g dulce de leche – jam is a different filling option
- 3 large eggs – matching the full method below; an egg-free version needs a separately tested coating
- 500 ml milk – a suitable plant drink changes the flavour
- 1 tsp vanilla extract – optional
- 100 g sugar and 1 tbsp ground cinnamon – divide the sugar between the egg mixture and coating as below; also have cooking oil and optional butter for frying
Chilled lemon and condensed milk tart
Preparation: about 25 minutes, plus at least 4 hours chilling until set | Yield: about 10 slices
Ingredients:
- 395 g sweetened condensed milk – plant-based condensed milk requires a suitable adapted recipe
- 200 g cream – check any plant alternative’s suitability
- Up to 120 ml lemon juice – add gradually to taste, plus zest of 2 lemons; the full method also uses 12 g powdered gelatine hydrated in 60 ml water
- 200 g plain sweet biscuit crumbs – oat biscuits give a different base; they are not automatically gluten-free
- 80 g melted butter – a suitable dairy-free baking fat needs a small trial because products differ
Mini berry cheesecakes
Preparation: about 30 minutes, plus roughly 18–22 minutes baking, cooling and at least 2 hours chilling | Yield: about 12 small portions, depending on mould size
Ingredients:
- 200 g cream cheese – this baked recipe uses dairy and egg
- 100 g sugar – substitutions change texture and need testing
- 1 large egg – required in this baked version, plus 60 g soured cream and optional 1 tsp vanilla
- 200 g mixed berries – for the topping, with 2 tbsp sugar, 1 tsp lemon juice and optional 1 tsp cornflour
- 150 g plain sweet biscuit crumbs – for the base
- 50 g melted butter – matching the detailed recipe
Spoonable brigadeiro with sparkling wine
Preparation and cooking: about 20 minutes, plus cooling and at least 30 minutes chilling | Yield: about 10 small portions
Ingredients:
- 395 g sweetened condensed milk – or a suitable lactose-free version
- 2 tbsp cocoa powder, optional – omit for a white brigadeiro
- 2 tbsp butter – matching the detailed method; a dairy-free alternative needs all the other ingredients checked too
- 30–50 ml sparkling wine – optional; for an alcohol-free version use an appropriate alcohol-free grape juice instead. Heating wine does not guarantee removal of all alcohol
- Chocolate sprinkles or shavings – optional decoration
Brazilian condensed milk caramel flan
Preparation: about 20 minutes, plus roughly 50–60 minutes baking, cooling and at least 4 hours chilling | Yield: about 8–10 slices
Ingredients:
- 395 g sweetened condensed milk
- 2 empty condensed-milk tins filled with milk – measure by the volume of the tin, not its 395 g product weight
- 3 large eggs
- 200 g sugar – for the caramel
Tropical fruit pavê: ingredients, method and variations
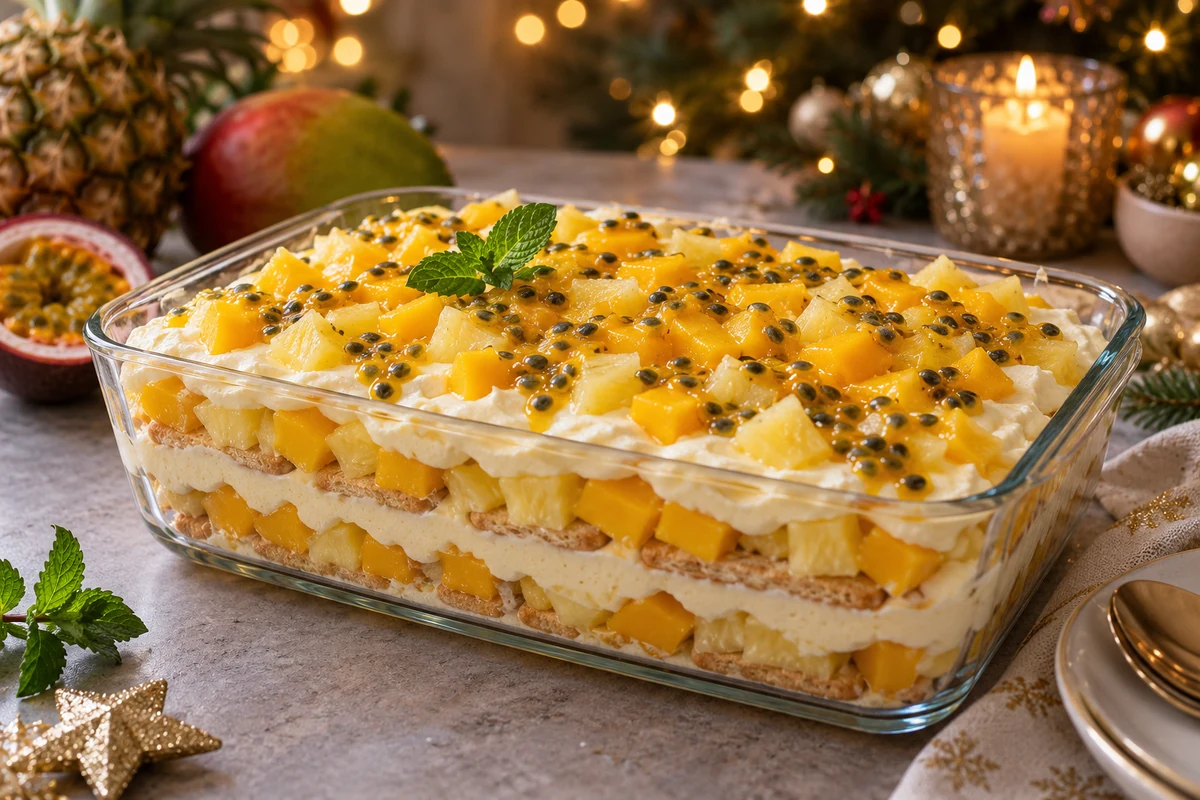
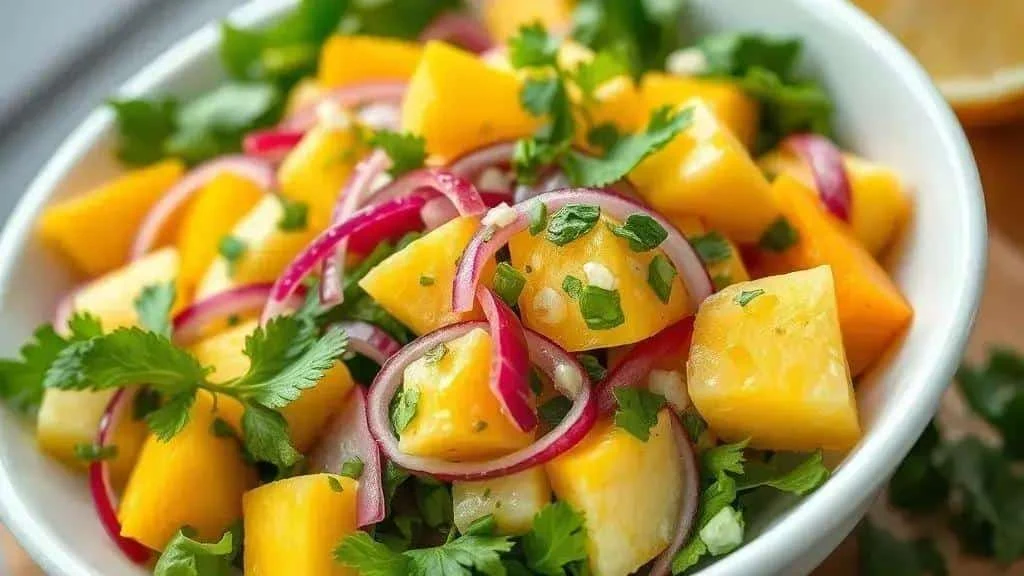
Tropical fruit pavê is a Brazilian-style layered biscuit dessert with cream and fruit. It can be assembled in a dish or individual glasses.
Tropical fruit pavê ingredients
- 395 g sweetened condensed milk – lactose-free dairy still contains milk protein; plant-based products give a different result
- 200 g cream – the source uses Brazilian creme de leite; check the consistency of your chosen cream or plant alternative
- 200 g plain sweet biscuits – use suitable gluten-free or vegan biscuits if needed
- 2 medium mangoes – peeled and diced, ripe but firm
- 100 g passion fruit pulp – fresh or suitable frozen pulp, following pack instructions
- ½ small pineapple – peeled and diced; drained tinned pineapple is an alternative
- 50 g sugar – optional, for caramelising fruit
- 120 ml milk – for dipping biscuits; use a suitable plant drink if required
- Lemon zest and mint leaves – optional finishing touches
Making the tropical pavê
- Prepare the fruit: dice the mango and pineapple evenly and set aside the passion fruit pulp.
- Optional caramelised fruit: gently melt the 50 g sugar to a pale caramel. Carefully add the mango and pineapple, watching for hot splashes, and stir for 1–2 minutes. Cool before layering.
- Make the cream: mix the condensed milk and cream until smooth. If wanted, add 1–2 tbsp taken from the measured passion fruit pulp for acidity.
- Dip the biscuits: pour the 120 ml milk into a shallow dish. Dip each biscuit briefly, around 1–2 seconds, without soaking until it falls apart.
- Start layering: cover the base of a suitable serving dish with dipped biscuits.
- Add cream: spread over roughly a third of the cream.
- Add fruit: distribute some mango, pineapple and the remaining passion fruit pulp over the cream. Any cooked fruit must be cool.
- Repeat: add further biscuit, cream and fruit layers, finishing with cream. The exact number of layers depends on the dish.
- Chill: cover and refrigerate for at least 2 hours. Add washed mint and lemon zest near serving; chopped nuts are an optional extra only if suitable for your guests.
- Serve: spoon into bowls or serve the individual glasses. This is a soft dessert, so neat slices are not guaranteed. Keep chilled until serving.
Variations
- Plant-based variation: use suitable plant condensed milk, cream, drink and biscuits. Check the consistency in a small trial; do not use honey if describing it as vegan.
- Less sweet variation: replacing some condensed milk with plain yoghurt changes flavour and consistency; try a small portion rather than assuming the same set.
- Chocolate layer: mix a little cocoa into part of the cream for a contrasting layer.
- Individual portions: assemble in small clear glasses for easier service.
- Crisp topping: add suitable toasted nuts or granola at serving so they do not soften.
Passion fruit mousse: ingredients, method and variations
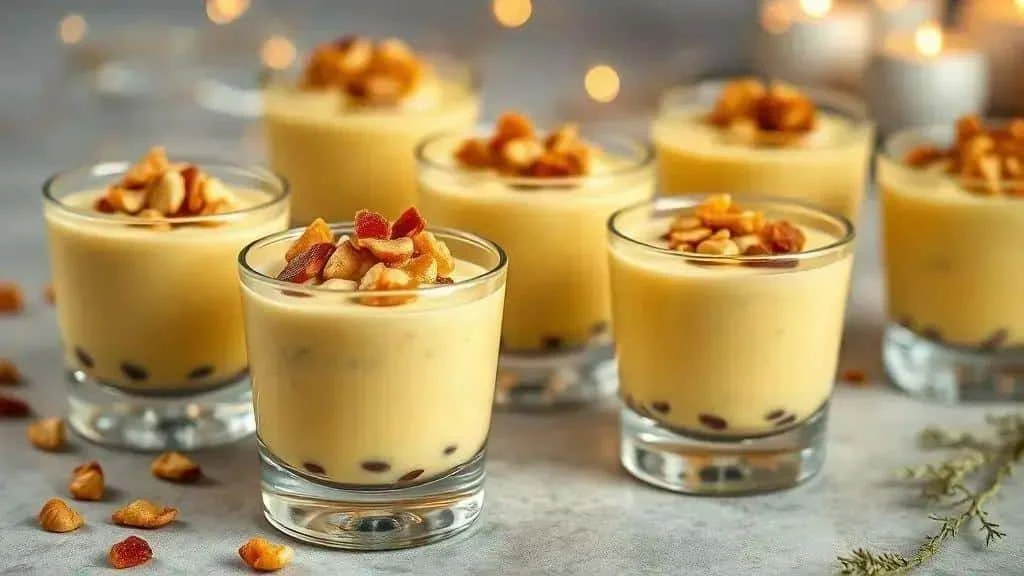
Passion fruit mousse with a crisp topping combines a tangy cream with sweet toasted nuts. The gelatine quantity below comes from the source recipe; check your product’s strength and directions.
Passion fruit mousse ingredients
- 395 g sweetened condensed milk – use a suitable lactose-free version for lactose intolerance; plant-based versions need an adapted method
- 200 g cream – plant cream changes the result
- Up to 240 ml concentrated passion fruit pulp or juice – add according to product strength and taste
- 12 g unflavoured powdered gelatine – check the product’s setting guidance; agar is not an equal-measure substitute and needs a different method
- 60 ml cold water – for hydrating gelatine, subject to its instructions
- 100 g chopped nuts – such as almonds, cashews or walnuts; omit or choose a suitable alternative for guests with allergies
- 2 tbsp sugar – for the nut topping
Making the passion fruit mousse
- Hydrate the gelatine: sprinkle it over the cold water and leave for the time specified on the pack.
- Dissolve: gently warm according to the gelatine instructions without boiling. Allow to cool slightly, remaining liquid.
- Blend the cream: combine the condensed milk, cream and passion fruit pulp, adding the pulp gradually to suit its concentration.
- Incorporate the gelatine: blend gently while adding the dissolved gelatine in a thin stream.
- Check the flavour: assess the acidity before setting. Avoid adding unmeasured extra liquid after the gelatine, which can change the set.
- Chill: transfer to small glasses or a serving dish, cover and refrigerate for at least 2–3 hours, until set.
- Make the topping: gently toast the chopped nuts with the sugar, stirring until golden. Spread on baking parchment and cool completely; hot sugar can burn.
- Finish: add the cooled topping immediately before serving to retain its crunch.
- For individual portions: divide the mixture between glasses before chilling, then add the topping at serving.
Variations
- Vegan option: use a tested plant-based mousse recipe with the correct setting agent and method. Coconut products and agar cannot simply be swapped into this gelatine method unchanged.
- Yoghurt variation: substituting some condensed milk with yoghurt changes sweetness and setting behaviour; trial it separately.
- White chocolate variation: 50 g melted, slightly cooled white chocolate can enrich the cream, but will also change sweetness and firmness.
- Citrus topping: add a little lemon zest to the cooled nut topping.
- An airy variation: a separately tested mousse may use whipped pasteurised egg white suitable for uncooked use. This base recipe does not need raw egg white added.
Useful tips
- Gelatine: follow its instructions and warm only as directed; different strengths can give different results.
- Crisp topping: keep it separate until serving so moisture does not soften it.
- Firmness: do not automatically add another half-packet. Check the manufacturer’s guidance for the volume and acidity of the mixture.
- Storage: keep covered at 5°C or below and use within 48 hours. Freezing may spoil the texture.
Stuffed rabanada: ingredients, method and variations
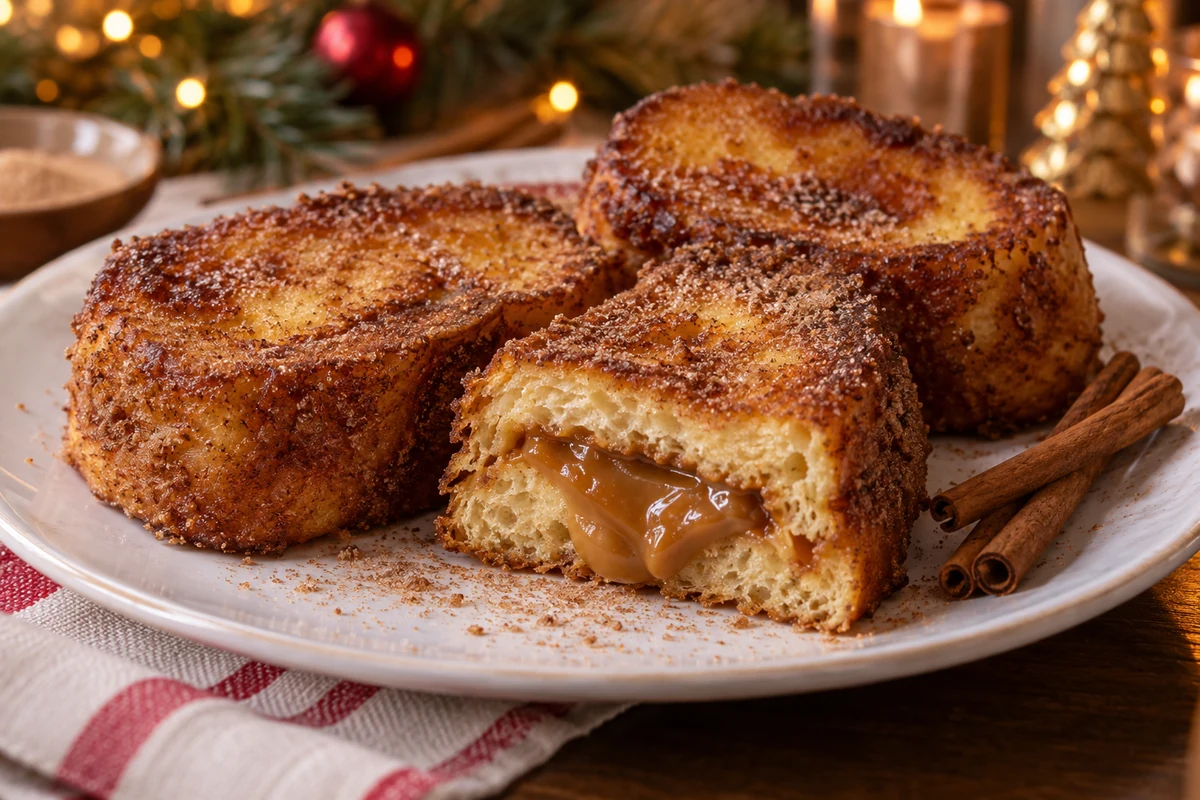
- 500 g firm brioche or French-style bread – cut into 2–3 cm slices; gluten-free bread behaves differently
- 400 g dulce de leche – a ready-made thick caramel-style milk spread
- 3 large eggs – an egg-free coating requires its own tested recipe
- 500 ml milk – a suitable plant drink is an alternative, but the bread and filling also need checking for a dairy-free version
- 1 tsp vanilla extract – optional
- 100 g sugar – reserve 1 tbsp for the egg mixture and use the remainder for coating
- 1 tbsp ground cinnamon – for the sugar coating
- Up to 50 g butter, optional – for pan-frying in batches; oil alone can be used
- Up to 250 ml neutral cooking oil – use only the amount needed for shallow-frying in your pan; adding oil does not stop butter solids burning
- A broad spatula – for turning filled slices carefully; avoid hidden toothpicks in food
Making the stuffed rabanada
- Slice the bread: cut into 2–3 cm slices. If very soft, leave the unfilled bread on a tray briefly to firm slightly.
- Make a pocket: carefully slit the side of each slice without cutting all the way through.
- Fill: Spoon 1–2 tablespoons of dulce de leche into each pocket. Avoid overfilling, as it can leak when the bread is dipped.
- Keep the pocket closed: Leave an uncut edge to hold the filling inside and handle gently with a broad spatula. Avoid hidden cocktail sticks or other fasteners.
- Mix the custard: Beat the eggs, milk and vanilla in a shallow dish. Add 1 tablespoon from the measured 100 g sugar and mix.
- Dip briefly: Dip each slice for about 1–2 seconds per side, depending on how dry the bread is. Do not soak it until it falls apart.
- Heat the fat: Heat enough oil for shallow frying over a medium heat, with a little of the optional butter for flavour. Do not let the butter scorch; oil does not stop it burning.
- Fry carefully: Cook for around 2–3 minutes per side as a starting point, turning with a spatula. The bread should be golden and the egg mixture cooked through, with a piping-hot centre; thick slices may need longer over a gentler heat.
- Drain and coat: Drain on kitchen paper. Mix the remaining measured sugar with 1 tablespoon cinnamon and sprinkle over the warm rabanadas.
- Serve: Let the hot filling cool slightly before eating. Serve warm with fruit, ice cream or a little sauce if liked.
Variations and Serving Ideas
- Baked version: Brush with a little melted butter and bake at 180°C, or 160°C fan, turning carefully. Check from about 10–12 minutes, but allow longer if needed: the egg-soaked centre must be cooked through and piping hot.
- Alternative fillings: Try cream cheese with lemon zest, chocolate ganache, berry jam or chocolate hazelnut spread. Check milk and nut allergens.
- Vegan version: Use a separately tested egg-free French toast recipe with suitable bread, plant-based milk and dairy-free filling. Aquafaba or flour and water are not established one-for-one replacements for the eggs here.
- Mini rabanadas: Make smaller pockets for individual party portions, adjusting the cooking time while still cooking the egg mixture through.
- Extra crunch: Add a little toasted desiccated coconut to the sugar coating if liked.
Practical Tips for Beginners
- Test the heat: Cook a small piece of bread first. It should sizzle gently and brown steadily, rather than darken before the centre cooks.
- Avoid soggy bread: Keep the dip brief. Firm slices hold their filling better.
- Use a modest filling: Excess dulce de leche can leak out and burn in the pan.
- Storage: Cool promptly and refrigerate within 1–2 hours in a covered container at 5°C or below. Eat within 48 hours. Reheat only once, until piping hot throughout.
Chilled Lemon and Condensed Milk Tart — Ingredients, Method and Variations

Chilled lemon and condensed milk tart combines a creamy filling with citrus sharpness. Here are the ingredients, method and some optional variations.
Ingredients
- 395 g sweetened condensed milk — a lactose-free version may suit lactose intolerance, but still contains milk protein.
- 200 g cream — changing this alone does not make the whole tart dairy-free.
- 120 ml lemon juice — add gradually and adjust to the fruit’s acidity.
- Finely grated zest of 2 lemons — reserve a little for decoration.
- 200 g plain biscuit crumbs — use labelled gluten-free biscuits if needed; oat biscuits are not automatically gluten-free.
- 80 g melted butter — alternative fats can change the firmness of the base.
- 12 g powdered gelatine and 60 ml cold water — check the manufacturer’s setting strength and preparation instructions. Agar is not a direct one-for-one substitute.
- Optional whipped cream for decorating — check any alternative topping’s ingredients and allergens.
Method
- Make the base: Mix the 200 g biscuit crumbs with 80 g melted butter until evenly coated. Press into the base and sides of a 22–24 cm tart tin. Chill for 15–30 minutes.
- Prepare the gelatine: Sprinkle the 12 g gelatine over 60 ml cold water. Let it bloom, then dissolve gently following the packet instructions, without boiling. Allow to cool until just warm.
- Make the filling: Blend the condensed milk, cream, lemon juice and zest until smooth. Add the juice gradually to judge the sharpness.
- Add the gelatine: With the blender on a low speed, pour in the dissolved gelatine slowly and blend briefly to distribute it evenly.
- Fill and chill: Pour over the chilled base, smooth the surface and refrigerate for at least 4 hours, or until properly set. Overnight chilling is convenient.
- Decorate and serve: Unmould carefully and decorate with the optional whipped cream, lemon zest, thin lemon slices or berries. Keep chilled until slicing.
- Transport and storage: Cover and transport in a cool box with ice packs. Keep at 5°C or below and eat within 48 hours.
Variations
- Vegan version: Use a tested vegan tart recipe with plant-based condensed milk, cream, biscuits, fat and the specified setting agent. Agar needs a different method and quantity from gelatine.
- Meringue topping: Use a tested cooked Swiss meringue method or suitable pasteurised egg products. Browning the surface with a blowtorch alone does not cook raw egg throughout.
- Crunchy base: Add 2 tablespoons chopped nuts or toasted coconut to the crumbs before pressing them into the tin. Declare any nut allergens.
- Passion fruit variation: Replacing half the lemon juice with passion fruit pulp changes the flavour, acidity and potentially the set. Treat this as a variation to test before serving to guests.
Practical Tips
- Measure the gelatine: Use the amount appropriate to your product’s strength; excess can make the tart rubbery.
- Balance the sharpness: Add lemon juice gradually and use only the coloured zest, avoiding bitter white pith.
- Unmould gently: Loosen the edge with a thin knife. A briefly applied warm, damp cloth around the outside can help release the base; do not heat the chilled tart directly.
- Individual portions: Assemble in small glasses or cups for easier serving without unmoulding.
Mini Berry Cheesecakes — Ingredients, Method and Variations
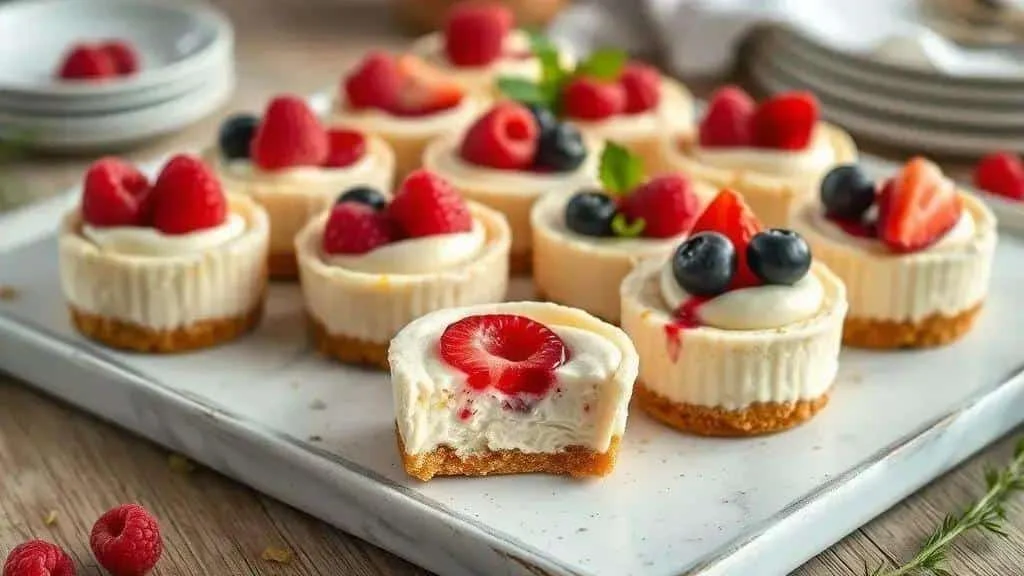
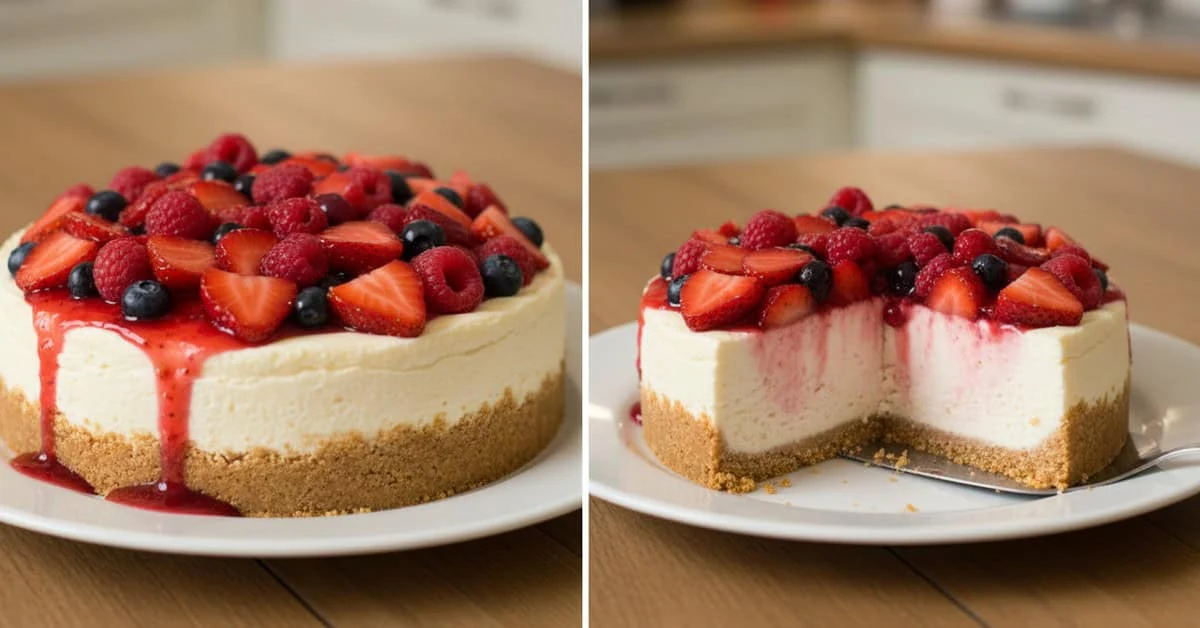
Mini berry cheesecakes make convenient small portions for a festive meal. This baked version has a biscuit base and a cooked fruit topping.
Ingredients
- 200 g cream cheese — soften briefly for mixing, without leaving it out for an extended period.
- 100 g sugar — coconut sugar is not a lower-calorie substitute; other sweeteners can affect the bake.
- 1 large egg — for an egg-free version, choose a separately tested recipe rather than replacing it with an unverified amount of apple purée or aquafaba.
- 1 teaspoon vanilla extract — optional.
- 60 g soured cream — cream or plain yoghurt are possible variations, with a different texture and acidity.
- 150 g plain biscuit crumbs or graham cracker crumbs — use labelled gluten-free biscuits when required.
- 50 g melted butter — a different fat may change the base’s texture.
- 200 g mixed berries — strawberries, raspberries or blueberries; follow any cooking instructions on frozen fruit.
- 2 tablespoons sugar for the fruit sauce — adjust to the berries’ sweetness.
- 1 teaspoon lemon juice — for the fruit topping.
- 1 teaspoon cornflour — optional, to thicken the sauce. Cornflour is already plant-based; no agar substitution is needed.
Method
- Heat the oven: Preheat to 160°C, or 140°C fan. Line a small 12-hole cupcake or mini cheesecake tin with suitable cases; the yield depends on the size of the moulds.
- Make the bases: Mix the 150 g crumbs with 50 g melted butter. Divide all the mixture between the 12 small moulds and press down evenly.
- Mix the cream cheese: Beat the 200 g cream cheese with 100 g sugar until smooth, using a hand whisk if preferred.
- Add the egg and cream: Mix in the egg, 60 g soured cream and optional teaspoon of vanilla just until combined. Do not overbeat or taste the raw egg mixture.
- Fill the moulds: Divide the filling evenly over the bases, leaving space at the top. Do not overfill small moulds.
- Optional water bath: If using a suitable watertight tin, place it in a larger roasting tin with hot water halfway up its sides. Keep water out of the cheesecake cases and handle carefully.
- Bake: Start checking after 18–22 minutes. The edges should be set and the centre gently wobble, rather than remain liquid. Time varies with mould size; the egg filling must be cooked through.
- Cool gradually: Switch off the oven and open the door for about 5 minutes, then remove the tin. Cool for around 30 minutes and refrigerate promptly, within 1–2 hours of cooking. Chill for at least 2 hours to firm up.
- Cook the berry topping: Heat the 200 g berries with 2 tablespoons sugar and 1 teaspoon lemon juice. If using cornflour, mix 1 teaspoon with 1 tablespoon water, stir in and simmer until thickened. Follow frozen berries’ cooking instructions. Cool before topping the cheesecakes.
- Finish: Unmould carefully, spoon over the fruit sauce and decorate with a few washed fresh berries or lemon zest. Refrigerate until serving.
Variations
- No-bake version: Use a separate, tested egg-free no-bake recipe with the correct setting-agent quantity. Do not simply omit baking this egg-containing filling.
- Vegan version: Choose a tested recipe using suitable plant-based cream cheese, biscuits and fat. Vegan and gelatine-set fillings require different methods.
- White chocolate topping: Replace the berry sauce with a little white chocolate ganache and raspberries, checking allergens.
- Extra crunch: Add 2 tablespoons granola or chopped nuts between the base and filling. Check gluten and nut ingredients.
Quick Tips
- Soften briefly: Let the cream cheese soften just enough to mix smoothly, keeping the time out of the fridge short.
- Avoid overmixing: Too much air can encourage cracks during baking.
- Unmould when chilled: Loosen the edges carefully. Suitable silicone moulds or removable cases can make this easier.
- Storage: Cover and refrigerate at 5°C or below; eat within 48 hours. If freezing, do so promptly without the fresh topping and expect some change in texture.
Spoonable Brigadeiro with Sparkling Wine — Ingredients, Method and Variations

Spoonable brigadeiro with sparkling wine is a creamy variation on the Brazilian condensed milk sweet, served in small cups. The wine version contains alcohol; a grape juice option is included.
Ingredients
- 395 g sweetened condensed milk — lactose-free condensed milk still contains milk protein.
- 2 tablespoons butter — replacing it with coconut oil changes the flavour and does not make dairy condensed milk vegan.
- 2 tablespoons cocoa powder — omit for a white brigadeiro.
- 30–50 ml sparkling wine — optionally reduce 50 ml to about 30 ml first. For an alcohol-free version, use grape juice confirmed to contain no alcohol.
- A pinch of salt — to balance the sweetness.
- Chocolate sprinkles, chocolate shavings or edible gold flakes — use only decorations explicitly sold as edible food products.
Method
- Optional wine reduction: Gently reduce 50 ml wine to around 30 ml in a small pan and allow to cool slightly. This does not make the wine alcohol-free.
- Combine: Put the condensed milk, 2 tablespoons butter and optional 2 tablespoons cocoa into a saucepan. Mix before heating.
- Cook: Stir continuously over a low heat for around 8–10 minutes, until thickened but still soft enough to spoon. Avoid scorching the base.
- Add the wine or juice: Remove from the heat and stir in the liquid gradually. It adds flavour; bubbles will not remain intact in the hot mixture.
- Adjust: Add the pinch of salt. If desired, an extra tablespoon of cream can soften the texture.
- Cool: Transfer to small cups and cool for about 20–30 minutes, then refrigerate promptly, within 1–2 hours of cooking. Chill for at least 30 minutes, or until the desired spoonable consistency is reached.
- Decorate: Add chocolate sprinkles, shavings, berries or food-grade edible gold just before serving.
Variations
- White brigadeiro: Omit the cocoa and add a little lemon zest. A vegan variation requires both plant-based condensed milk and suitable fat.
- Darker chocolate: Stir in an extra 50 g chopped dark chocolate at the end until melted.
- Fruit topping: Add a small spoonful of berry jam to contrast with the sweet cream.
- Alcohol-free: Use grape juice with no alcohol. A reduction or a flavouring described as champagne essence is not automatically alcohol-free; check its composition.
Tips and Storage
- Keep stirring: Low heat and regular scraping of the pan help prevent burning.
- Add wine off the heat: This preserves more aroma, but also means the dessert should be treated as containing alcohol.
- Adjust the texture: For a firmer spoonful, cook slightly longer before adding the liquid. For a softer finish, stop before it reaches the firm rolling consistency of traditional brigadeiro.
- Storage: Cover and refrigerate at 5°C or below; eat within 48 hours. Freezing may change the texture.
- Serving: Serve small cups with teaspoons and keep refrigerated until needed.
Brazilian Condensed Milk Crème Caramel — Ingredients, Method and Variations
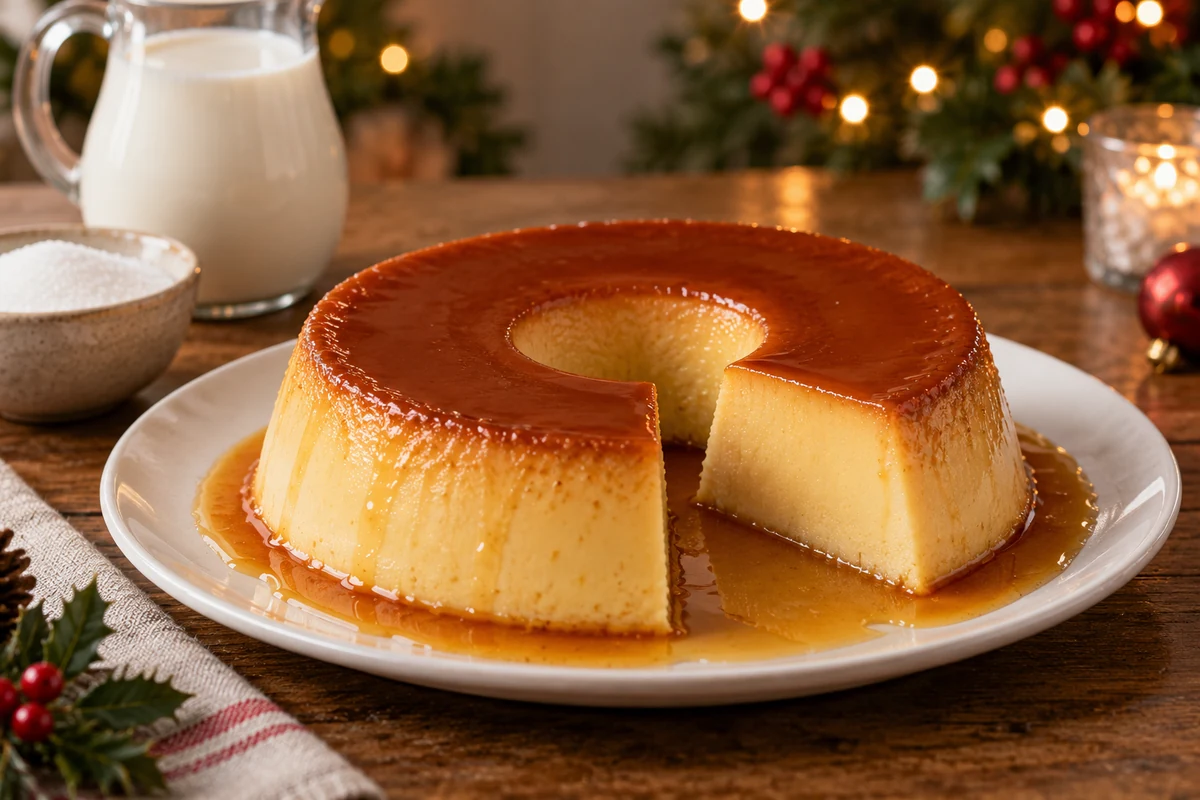
Brazilian condensed milk crème caramel, or pudim, is a creamy baked custard with a caramel sauce. Its simple ingredients need careful cooking and chilling.
Ingredients
- 395 g sweetened condensed milk — dairy-free adaptations require checking the entire recipe.
- 2 emptied condensed milk tins of milk — use the same tin as a volume measure. This is not 400 ml: the tin’s labelled grams describe the condensed milk’s weight, not its volume.
- 3 large eggs — an egg-free pudding needs a separate tested formula; cornflour is not a direct replacement here.
- 200 g sugar — for the caramel.
- 1 teaspoon vanilla extract, optional — for flavour.
Method
- Make the caramel: Heat the 200 g sugar with 2–3 tablespoons water in a small saucepan until golden. Avoid stirring once it boils, and watch closely so it does not burn.
- Coat the tin: Carefully pour into a 20–22 cm ring mould and tilt to coat the base and sides. Hot caramel can cause serious burns. Let it cool and harden.
- Mix the custard: Blend or whisk the condensed milk, 2 tinfuls of milk and 3 eggs for about 30–40 seconds, just until smooth. Add the optional vanilla.
- Strain if desired: Pass through a fine sieve to remove strands of egg white. Do not taste the raw mixture.
- Fill the mould: Pour over the cooled caramel, leaving space at the top. If your mould is small, bake any excess separately in a suitable ovenproof dish.
- Set up a water bath: Cover the mould with foil and place in a larger roasting tin. Carefully add hot water halfway up the mould’s sides.
- Bake: At 180°C, or 160°C fan, start checking after 50–60 minutes. The edges should be firm and the centre gently wobble, not remain liquid. Allow longer if needed to cook the egg custard through.
- Cool and chill: Remove from the water bath carefully. Cool promptly and refrigerate within 1–2 hours, then chill for at least 4 hours or overnight.
- Unmould: Run a thin knife around the edges. Briefly hold a warm, damp cloth against the outside if needed, then invert onto a plate with a rim to catch the caramel.
- Serve: Cut into slices and serve chilled. Keep covered at 5°C or below and eat within 48 hours.
Variations
- Coconut pudding: Replace one tinful of milk with coconut milk and add 50 g desiccated coconut. The texture will differ from the plain version.
- Chocolate pudding: Mix 2 tablespoons cocoa or chocolate powder into the milk before blending, allowing for any added sugar in the powder.
- Dulce de leche pudding: For this variation, use a tested caramel-flavoured custard recipe with balanced milk, sugar and egg quantities. Simply adding another tin of dulce de leche changes those ratios substantially.
- Pressure cooker version: Use only a tested pudding method compatible with your cooker, following its instructions for water levels, moulds and pressure release. Do not improvise with a sealed mould or a generic cooking time.
Practical Tips
- Fewer bubbles: Blend briefly rather than whipping in lots of air. Straining can help produce a smoother custard.
- Even caramel: Dissolve the sugar gently, then let it turn golden without constant stirring. Handle the hot caramel and coated mould with care.
- Avoid cracks: A gentle water bath helps the custard cook evenly. Handle the pudding carefully and avoid sudden temperature changes.
- Check the set: Judge the centre as well as the time. Do not shorten cooking arbitrarily for a creamier result if the egg mixture remains undercooked.
- Storage: Keep covered in the fridge at 5°C or below and eat within 48 hours. Freezing can make the custard watery.
These seven New Year desserts offer creamy, fruity and chocolate options for different tastes. Small portions and sensible preparation ahead can make the final stages of the meal easier.
If you make one, share a photograph and tag our social accounts. Follow along for more festive recipes and presentation ideas.
Thank you for reading! Visit the I Love Christmas blog for more ideas for the festive season.
Frequently Asked Questions About New Year Desserts
Can I prepare these desserts ahead?
Many chilled tarts, mousses, pavês and puddings can be made the day before. Keep perishable desserts at 5°C or below and eat within 48 hours. Add crunchy toppings and delicate decorations shortly before serving.
How should I store and transport them?
Keep them covered and refrigerated until departure, then use a cool box with ice packs. Maintain chilled storage at the destination and add delicate decorations just before serving.
How can I cater for dietary requirements?
Ask guests what they need, choose suitable tested recipes and check every ingredient. Lactose-free is not the same as milk-free. Label allergens accurately and use clean, separate utensils to prevent cross-contact.
What can replace sparkling wine?
Use grape juice confirmed to contain no alcohol, adding gradually so the dessert does not become too runny. Reducing wine does not reliably remove all its alcohol.
How many portions should I allow?
With several desserts, allow roughly one or two small tasting portions per person. With fewer choices, plan a full portion per guest and a modest allowance for seconds.
Sources and Further Reading
- UK Government: cooking food safely
- Food Standards Agency: chilling food
- UK Government: safe handling and use of eggs
- UK Government: handling flour safely
- Food Standards Agency: allergen guidance
- Dr. Oetker: Vege-Gel product instructions