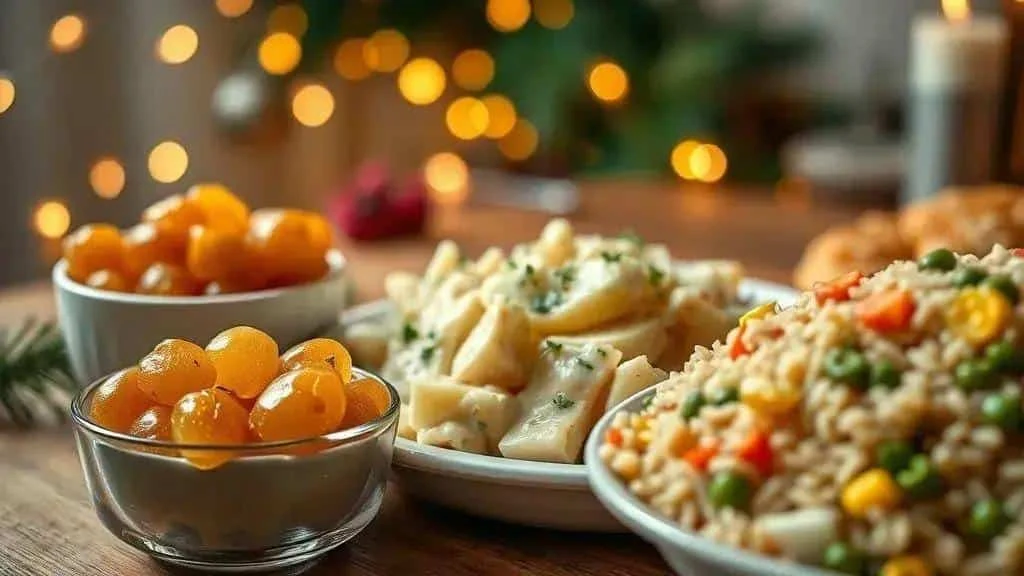
These easy festive appetisers combine practical recipes, advance preparation and serving ideas for Christmas and New Year. Choose from fresh, creamy and crunchy options, plan quantities around your guests and menu, and check the adaptations carefully for vegan or gluten-free needs.
Easy festive appetisers help when the house is full and time is short. These ideas offer plenty of flavour while leaving more time to enjoy the celebration.
Why Choose Easy Festive Appetisers?

Choosing easy festive appetisers can make hosting more enjoyable for the cook as well as the guests.
Simple dishes let you prepare suitable components ahead, manage costs and offer variety. They also make it easier to organise kitchen space and serving times.
Main Advantages
- Save time: quick recipes and suitable advance preparation reduce last-minute work.
- Manage the budget: accessible ingredients and realistic portion planning help avoid buying too much.
- Keep preparation manageable: straightforward dishes are easier to organise, even if you do not cook often.
- Offer variety: many recipes can be adapted, provided all ingredients and preparation methods suit the guest’s dietary needs.
- Make an attractive table: colourful, simple arrangements do not require advanced techniques.
Choose recipes with clear steps and a short ingredient list. Prioritise components that can be prepared safely ahead and assembled shortly before serving.
As a rough planning guide, allow 6–8 small pieces per person when other dishes will follow, or 10–12 when the appetisers are the main food. Piece size, appetites and party length matter, so these are estimates rather than fixed portions. Include something creamy, something crunchy and something fresh.
Identify ingredients and allergens, offer suitable vegetarian and gluten-free choices, and use herbs and sauces for flavour. For transport, keep chilled food cold with ice packs rather than relying on an insulated bag alone.
A thoughtful selection can reduce last-minute work and produce an inviting table without an overcomplicated menu.
Quick Planning: Quantities, Timing and Shopping
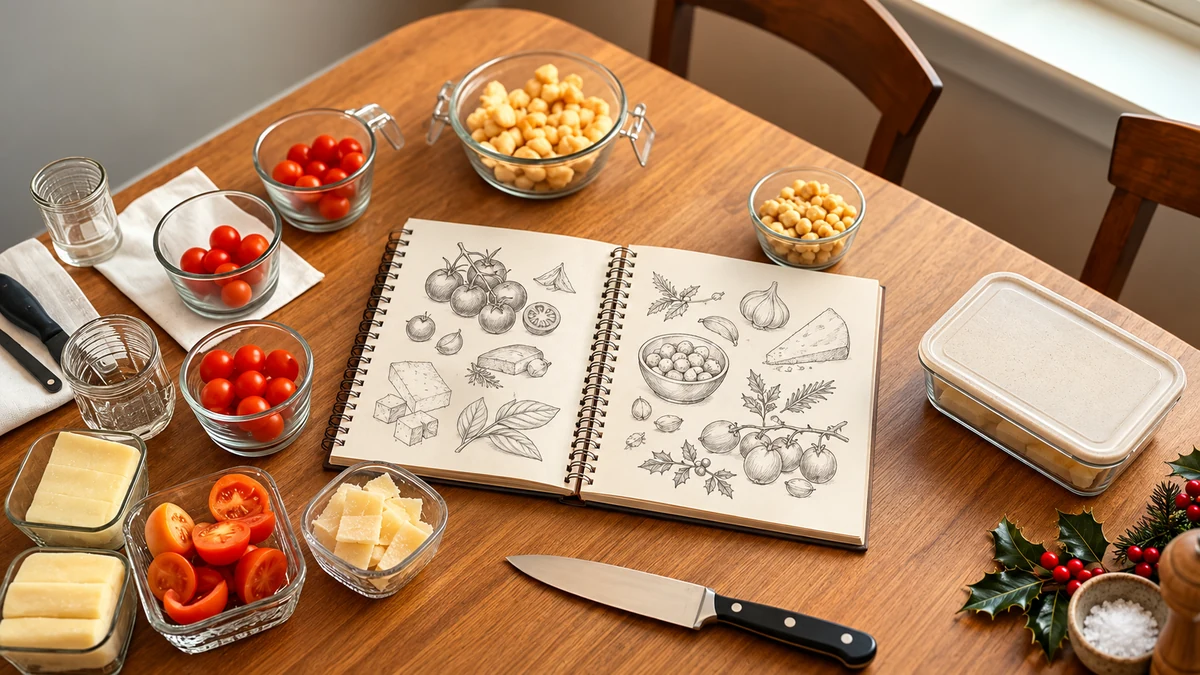
Planning helps your appetisers reach the table at the right time. Work backwards from serving and match your shopping to the recipes you actually choose.
Quantities per Person
Adjust the plan to the type of gathering:
- With other dishes: start with an estimate of 6–8 small pieces per person.
- As the main food: start with 10–12 small pieces per person, then adjust for size and party length.
- Drinks: provide water and alcohol-free choices throughout. Plan quantities around the duration and guests’ preferences, rather than prescribing a fixed hourly amount of alcohol.
For example, 10 guests × 10 small pieces gives 100 pieces in total. Divide them between four to six recipes; this is a planning example, not a guaranteed yield from the shopping list below.
Planning the Timing
- 48–24 hours before: decide the menu, check supplies and buy non-perishable ingredients.
- 24–8 hours before: make suitable salads, spreads and baked savoury items, then cool cooked food promptly and refrigerate. Check the storage guidance for every ingredient.
- 8–2 hours before: prepare cold ingredients, wash and cut vegetables, and keep sauces covered in the fridge.
- Around 1 hour before: start baking hot items to suit their cooking time, and finish cold assembly while keeping perishable dishes chilled until needed.
- Around 30 minutes before: organise serving dishes and utensils, finish any hot sauces and allow time for adjustments.
A Practical Shopping Checklist
These are example shopping items for a mixed menu, not a complete combined list for all ten recipes. Choose your recipes first, add up their ingredients and scale them for your guests:
- 1 large baguette for bruschetta or canapés, or ciabatta instead.
- 500 g ripe tomatoes as a shopping quantity; each bruschetta recipe below uses 300 g. Cherry tomatoes are an alternative, with the quantity adjusted to the recipe.
- 200 g mozzarella, grated or sliced, or a suitable melting cheese or vegan alternative.
- 200 g cream cheese for canapés or fillings, or well-mashed ricotta for a different texture.
- 200 g smoked salmon, thinly sliced, or well-drained tinned tuna for a variation. See the smoked-fish precautions below.
- 300 g sliced cooked ham or turkey for rolls. A plant-based replacement only makes the whole recipe vegan if the filling and accompaniments are vegan too.
- 2 × 400 g tins of chickpeas, to drain and rinse for salad; white beans are an alternative. The tin weight includes liquid.
- 200 g breadcrumbs and 2 eggs are example shopping items, not the total for every breaded recipe. Check the separate dough and coating requirements below; panko gives a different texture.
- Herbs and seasonings: basil, parsley, salad leaves, salt, pepper and olive oil. Add up the oil used in your chosen recipes; frying oil is separate.
- Sauces and dairy: crème fraîche, plain yoghurt and mustard, where needed for your chosen spreads and dips.
Preparation and Serving Tips
- Cook a test portion to check seasoning and texture before making a full batch.
- Group the dishes: use separate trays for hot, chilled and fresh items, making replenishment easier.
- Identify ingredients: provide clear information about allergens and dietary adaptations. Only describe a dish as gluten-free or vegan when all its ingredients and preparation support that claim.
- Keep utensils ready: set aside serving tongs, picks and spare clean dishes.
- Transport safely: use covered containers and suitable insulated carriers. Keep cold food chilled with ice packs and minimise travel time.
- Finish at the last minute: keep garnishes and sauces separate until serving to preserve texture.
- Prepare suitable ingredients ahead: store chopped ingredients in clean, covered containers at the appropriate temperature.
Useful Equipment
- Timer
- Measuring cups and spoons, and kitchen scales
- Covered serving and storage dishes
- Sharp knives and separate chopping boards for raw and ready-to-eat food
- Sauce containers, pastry brushes and a clean food thermometer
Ten Easy Appetisers: Ingredients, Methods and Variations

Practical recipes: each appetiser below has ingredients, a method and suggested variations. Several are expanded further down. Cooking times are guides: check doneness, particularly for chicken, eggs and flour-based mixtures.
Tomato and Basil Bruschetta Ingredients
- 1 baguette, cut into 12–16 slices, or ciabatta.
- 300 g ripe tomatoes, finely diced.
- 1 garlic clove, halved, for rubbing over toast.
- A handful of basil leaves, torn.
- 2 tbsp extra virgin olive oil.
- Salt and pepper, to taste.
- Optional: balsamic glaze to finish.
How to Make Tomato and Basil Bruschetta
- Toast the bread: bake the baguette slices at 200°C for about 6–8 minutes, until lightly golden. Watch closely as ovens and slice thickness vary.
- Add garlic: rub the cut face of the clove over the warm toast.
- Mix the topping: combine diced tomatoes, basil, olive oil, salt and pepper.
- Assemble: spoon topping onto each slice just before serving.
- Finish: drizzle with balsamic glaze if using.
Bruschetta Variations
- Add buffalo mozzarella or small cheese cubes for a creamy variation.
- Use halved cherry tomatoes for a different appearance.
- Replace basil with mint or rocket for a different flavour.
Mini Cheese and Spinach Quiche Ingredients
- Ready-made pastry: enough puff pastry to line 12 small tart tins, or 12 suitable ready-cut pastry discs. Sheet sizes vary.
- 3 eggs.
- 150 ml milk.
- 150 g grated cheese, such as mozzarella or another suitable melting cheese.
- 200 g cooked spinach, thoroughly drained and chopped.
- Salt, pepper and nutmeg, to taste.
How to Make Mini Cheese and Spinach Quiches
- Preheat the oven: set to 180°C.
- Line the tins: cut pastry circles and line 12 small tart tins, greasing if required.
- Prepare the spinach: squeeze excess moisture from the measured cooked spinach and chop it. It does not need to be cooked a second time before mixing.
- Mix the filling: whisk the eggs and milk, then stir in cheese, spinach, salt, pepper and nutmeg.
- Bake: fill the pastry cases about three-quarters full and bake for roughly 20–25 minutes, until the pastry is cooked and the filling is set and hot throughout. Extend the time if needed.
Mini Quiche Variations
- Add chopped, fully cooked bacon for a non-vegetarian version.
- Use cooked, well-drained mushrooms or drained sun-dried tomatoes instead of spinach.
- For a vegan version, use a separately tested vegan quiche filling with suitable pastry, milk and cheese alternatives. Chickpea cooking liquid alone is not a reliable direct replacement for the eggs in this recipe.
Crispy Cheese Ball Ingredients
- 300 g low-moisture mozzarella, grated.
- 2 tbsp grated Parmesan; use a vegetarian hard cheese if required, as traditional Parmesan contains animal rennet.
- 1 egg for the dough, plus a separate beaten egg for coating as needed. The original coating step requires additional egg; do not reuse the dough’s egg.
- ½ cup plain flour for the dough, plus extra flour for coating. The detailed version below specifies 60 g for the dough.
- 1 cup breadcrumbs for coating; panko can be used instead.
- Oil for frying, or a little oil for oven baking.
- Oregano or pepper, to taste.
How to Make Crispy Cheese Balls
- Mix the dough: combine mozzarella, Parmesan, the dough egg and measured flour until the mixture holds together. Do not taste raw flour or egg mixture.
- Shape: form small, walnut-sized balls.
- Coat: roll in extra flour, then the separate beaten coating egg, then breadcrumbs. Keep these coating ingredients separate from the measured dough ingredients.
- Cook: fry in small batches at 170–180°C, or bake at 200°C for approximately 15–20 minutes. The original 2–3 minute frying time is only a starting estimate: the centre must be thoroughly cooked, not just the outside golden. Test one ball before cooking the rest.
- Drain and serve: drain fried balls on kitchen paper and serve hot.
Cheese Ball Variations
- Enclose a little Brazilian Catupiry cheese spread or cream cheese in each ball, sealing well.
- Add mixed herbs or chilli flakes to the dough.
- For a gluten-free adaptation, use suitable gluten-free flour for both dough and coating, plus gluten-free breadcrumbs or panko. Check the rest of the ingredients and test a small batch, as binding can change.
Crispy Chicken Goujon Ingredients
- 500 g chicken breast, cut into strips.
- 1 cup breadcrumbs or panko.
- ½ cup plain flour.
- 2 eggs, beaten.
- 1 tsp paprika, plus salt and pepper to taste.
- Oil for frying, or oil spray for baking.
- Dip: 100 g mayonnaise, 1 tbsp ketchup, 1 tsp mustard and 1 tsp honey. Use pasteurised-egg mayonnaise; honey is unsuitable for babies under one.
How to Make Crispy Chicken Goujons
- Season: mix chicken strips with paprika, salt and pepper, then leave covered in the fridge for 10 minutes.
- Coat: dip each strip in flour, beaten egg and then breadcrumbs. Keep raw chicken and its coating station away from ready-to-eat food.
- Cook: fry in small batches at 170–180°C or bake at 200°C for around 20–25 minutes, turning halfway. Do not rely on the original 3–4 minute frying estimate or colour alone: check the thickest centre reaches 70°C for 2 minutes or 75°C for 30 seconds.
- Make the dip: use a clean bowl and utensils to mix mayonnaise, ketchup, mustard and honey until smooth. Refrigerate until serving.
- Serve: arrange the cooked goujons with the dip in a separate bowl.
Chicken Goujon Variations
- Use turkey breast, cooking it thoroughly, or firm tofu for a vegetarian alternative. Tofu alone does not make the coating or dip vegan.
- Try curry powder or mixed herbs instead of paprika.
- An air fryer can use less added oil; follow appliance guidance and check the chicken’s core temperature.
Quick Cheese and Charcuterie Board Ingredients
- 150 g sliced cooked ham.
- 150 g sliced salami.
- 200 g mixed cheeses, cubed or sliced.
- 100 g olives, green or black, preferably pitted.
- Grapes and dried fruit, to serve. Cut grapes lengthways into quarters for young children and adapt other foods to their age.
- Bread and toast, to accompany.
How to Assemble a Quick Board
- Choose a base: use a clean large board or platter.
- Arrange cheeses: place them in two or three areas for balance.
- Add meats: fold slices into fans or rolls and arrange beside the cheese.
- Add accompaniments: use small bowls for olives, grapes and dried fruit, or arrange them between other items where suitable.
- Finish: add bread and toast around the edges and garnish with edible herbs.
Board Variations
- For a vegetarian board, replace meats with grilled vegetables and choose vegetarian cheeses or vegan alternatives. Check rennet in dairy cheeses.
- Add suitable spreads and chutneys for sweet and savoury contrast; check dietary needs before choosing pâté.
- Offer walnuts and almonds separately for crunch, clearly identified for guests with allergies. Do not give whole nuts to children under five.
Smoked Salmon and Cream Cheese Canapé Ingredients
- 200 g smoked salmon, thinly sliced. Pregnant or immunocompromised guests should avoid ready-to-eat cold-smoked or cured fish unless thoroughly cooked; choose a suitable alternative.
- 200 g cream cheese.
- 12 blinis or 12 toasted baguette slices.
- Fresh dill, to garnish.
- ½ lemon, for juice and optional zest.
How to Make Smoked Salmon Canapés
- Prepare the bases: toast baguette slices or prepare blinis according to the pack, then cool before adding chilled toppings.
- Flavour the cream cheese: mix with a little lemon juice and pepper.
- Assemble: spread cream cheese over each base and top with a slice of salmon, dividing the filling evenly.
- Garnish: finish with dill, lemon zest and an optional little olive oil.
Salmon Canapé Variations
- Replace salmon with well-drained tinned tuna for a different flavour.
- Use cucumber slices instead of bread for a fresh, crisp base.
- Add small capers for a briny contrast.
Caprese Skewer Ingredients
- 300 g cherry tomatoes.
- 250 g mini buffalo mozzarella balls.
- Fresh basil leaves.
- 10–12 small food skewers, with extra if needed for the size of your ingredients.
- 50 ml balsamic vinegar to reduce, or ready-made balsamic glaze used sparingly to taste.
- 2 tbsp olive oil.
- Salt and pepper, to taste.
How to Make Caprese Skewers
- Assemble: thread cherry tomatoes, mozzarella and basil onto the skewers, dividing ingredients evenly.
- Reduce the vinegar: simmer balsamic vinegar in a small saucepan until reduced by about half and lightly syrupy, then cool. Skip this step with ready-made glaze.
- Finish: arrange on a plate, drizzle with oil and the cooled reduction, and season to taste.
Caprese Variations
- Add thin strips of cured ham for a non-vegetarian variation. Cold cured meats need separate consideration for pregnant guests; see NHS guidance.
- Use roasted tomatoes, cooled before assembly, for a sweeter flavour.
- Use vegan mozzarella and check that the glaze contains no animal-derived ingredients for a vegan version.
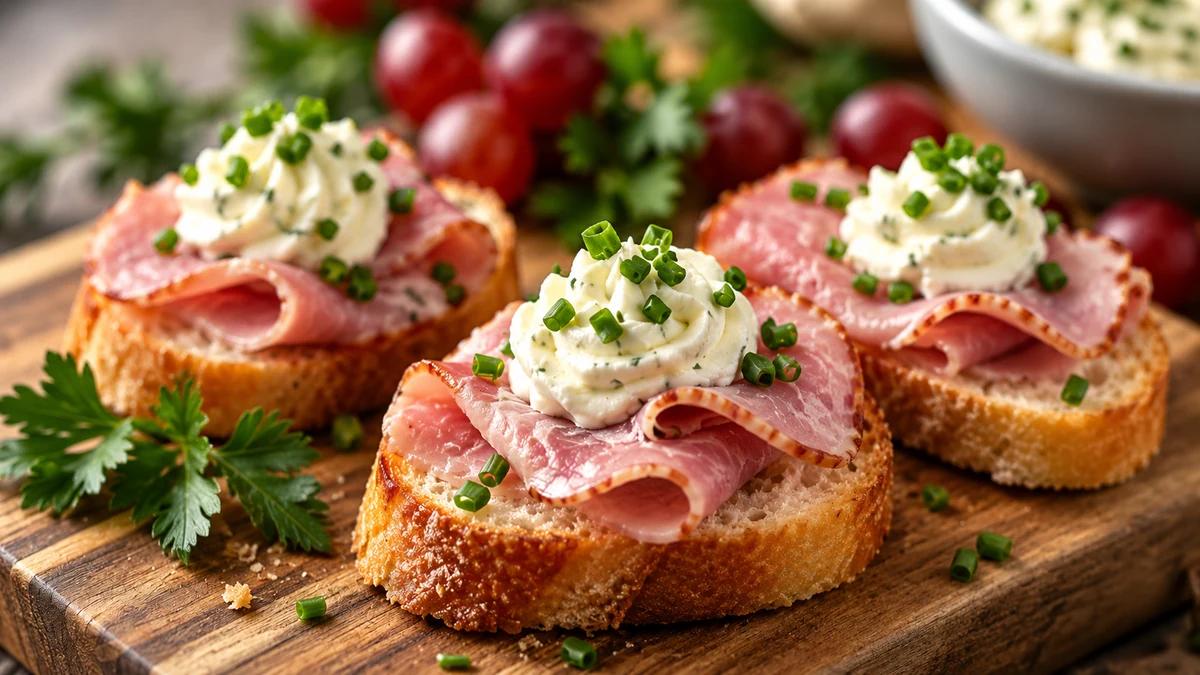
Ham, Cream Cheese and Herb Roll Ingredients
- 200 g sliced cooked ham.
- 200 g cream cheese.
- 1 tbsp chopped parsley.
- 1 tbsp chopped chives.
- Lemon zest, optional, for aroma.
How to Make Ham and Herb Rolls
- Make the filling: mix cream cheese, parsley, chives and optional lemon zest.
- Spread: divide a thin layer of filling between the ham slices, adjusting to their size.
- Roll: roll up and cut into two or three pieces if you want smaller portions.
- Secure and serve: use food picks if needed and arrange on a platter. Remove picks before offering portions to young children.
Ham Roll Variations
- Use sliced cooked turkey as a meat alternative, or grilled aubergine with suitable cheese for a vegetarian version. Turkey is not vegetarian.
- Add grated carrot for crunch.
- Try dill or basil instead of the other herbs.
Chickpea Salad Ingredients
- 2 × approximately 400 g tins of chickpeas, drained and rinsed. This is the tin weight, not the drained weight.
- 1 small red onion, finely chopped.
- 1 red pepper, diced.
- A handful of parsley, chopped.
- 3 tbsp olive oil.
- 2 tbsp lemon juice.
- Salt, pepper and cumin, to taste.
How to Make Chickpea Salad
- Prepare the chickpeas: drain and rinse under cold running water.
- Prepare the vegetables: finely dice the onion and pepper.
- Combine: mix chickpeas, onion, pepper and parsley in a bowl.
- Dress: add olive oil, lemon juice, salt, pepper and a pinch of cumin, then mix well.
- Chill: refrigerate for 30 minutes before serving.
Chickpea Salad Variations
- Add feta or drained tinned tuna for a different version; either addition means the salad is no longer vegan.
- Include cucumber and tomato for freshness.
- Use cooked white beans instead of chickpeas.
Olive Spread on Toast Ingredients
- 1 sliced, toasted baguette, or 24 crackers.
- 200 g pitted black olives, drained.
- 1 garlic clove.
- 2 tbsp olive oil.
- 1 tbsp capers, optional.
How to Make Olive Toasts
- Make the spread: pulse olives, garlic, optional capers and olive oil into a coarse tapenade-style paste.
- Adjust the texture: add a little extra olive oil if too thick.
- Toast the bread: bake baguette slices until lightly golden, watching closely.
- Serve: spread onto the toast just before serving.
Olive Toast Variations
- Add anchovies for a stronger flavour, remembering that the spread will no longer be vegetarian or vegan.
- Blend in sun-dried tomatoes and herbs for a different flavour.
- Serve on cucumber slices instead of bread for a fresh, crisp option.
Tomato and Basil Bruschetta: Detailed Recipe and Variations
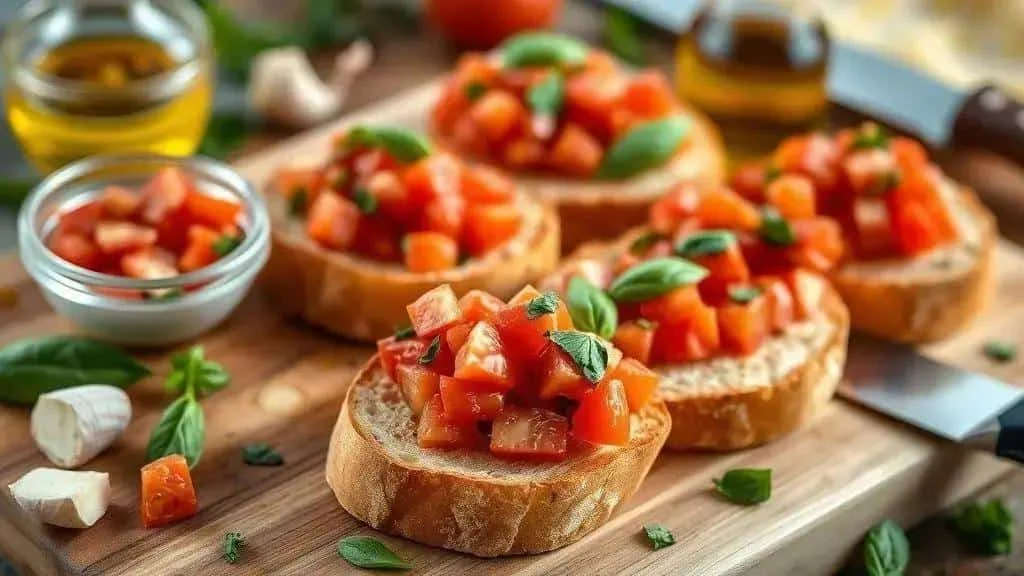
Tomato and basil bruschetta works best with fresh ingredients and last-minute assembly, so the toast stays crisp.
Ingredients
- 1 baguette, cut diagonally into 12–16 slices, or ciabatta or Italian bread.
- 300 g ripe tomatoes, finely diced. The original also suggests 200 g halved cherry tomatoes as a variation; this gives less topping, so divide it accordingly.
- 10–12 basil leaves, torn or chopped.
- 2 tbsp extra virgin olive oil for the topping, plus a little extra for the toast if desired.
- 1 garlic clove, halved, to rub over warm toast.
- Fine salt and black pepper, to taste.
- Optional: balsamic glaze or diced buffalo mozzarella to finish.
Method
- Preheat: set the oven to 200°C.
- Toast the bread: arrange baguette slices on a baking tray and bake for about 6–8 minutes until lightly golden, watching closely.
- Rub with garlic: rub the cut side of the clove over each warm slice.
- Mix the topping: gently combine tomatoes, basil, 2 tbsp olive oil, salt and pepper without crushing the tomatoes.
- Assemble: spoon the topping over the toast just before serving to preserve its crunch.
- Finish: add optional mozzarella cubes or a little balsamic glaze.
Variations
- Caprese style: add buffalo mozzarella and a little extra olive oil after assembly.
- Roasted garlic: mix mashed roasted garlic into the topping for a mellower flavour.
- Vegan version: omit mozzarella or replace it with smoked tofu. Check the bread and glaze are vegan too.
- Slow-roasted tomatoes: use cooled, slow-roasted or confit tomatoes for a more concentrated flavour.
Advance preparation: make the topping up to 2 hours ahead and refrigerate it. Toast and assemble shortly before serving.
Mini Cheese and Spinach Quiches: Detailed Recipe and Variations
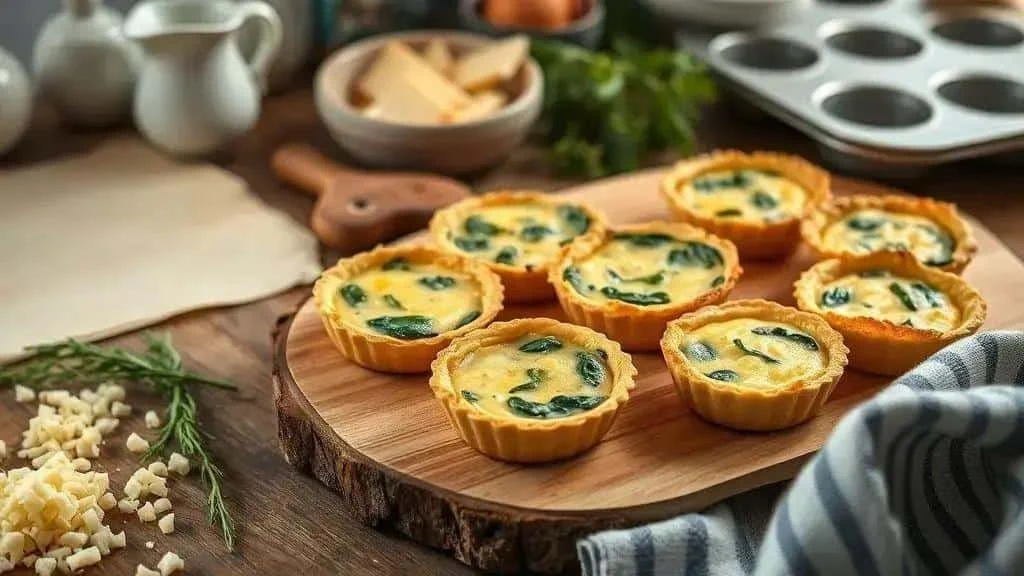
Mini cheese and spinach quiches make a convenient savoury appetiser or small party snack.
Ingredients
- Ready-rolled puff pastry, enough for 12 small cases, or 12 suitable pastry discs. Shortcrust or a gluten-free pastry can be used, following its baking instructions; pack sizes vary.
- 3 eggs, beaten.
- 150 ml milk, or an unsweetened plant-based drink. Replacing the milk alone does not make the cheese and pastry dairy-free.
- 150 g grated cheese, such as mozzarella or another suitable melting cheese. A vegan grated alternative changes this component only.
- 200 g cooked spinach, well drained and chopped, or cooked, drained chard or kale.
- Salt and black pepper, to taste.
- A pinch of nutmeg, optional.
- Oil or butter, for greasing the tins as needed.
Method
- Preheat: set the oven to 180°C.
- Line the tins: cut pastry circles to fit the small tins and line each one.
- Prepare the spinach: squeeze excess moisture from the 200 g cooked spinach and chop it. If starting with raw leaves, cook and drain them first, then measure the required cooked quantity; do not treat 200 g raw and cooked as equivalent.
- Mix the filling: whisk eggs and milk, then stir in grated cheese, drained spinach, salt, pepper and nutmeg.
- Fill: divide between the pastry cases, filling about three-quarters full to avoid overflow.
- Bake: allow around 20–25 minutes, until the pastry is cooked and the filling is set and hot throughout. Tin size and pastry affect timing; continue cooking if needed.
- Unmould: let stand for about 5 minutes before removing from the tins. Serve warm, or cool promptly and refrigerate for serving chilled later.
Variations
- Bacon: add 80 g chopped, fully cooked bacon for a non-vegetarian variation.
- Mushrooms: add 100 g sautéed mushrooms, draining excess liquid and avoiding overfilling the cases.
- Vegan quiche: use a separately tested vegan filling with vegan pastry, milk and cheese alternatives. The original suggestion of 200 g aquafaba as a direct replacement for three eggs has not been validated here. Aquafaba is chickpea cooking liquid, not chickpea cream, and may not set this filling reliably.
- Mediterranean flavours: add chopped sun-dried tomatoes and olives, reducing other additions if needed so the cases do not overflow.
Practical Tips
- Drain the spinach thoroughly to avoid a watery filling.
- Blind-bake if appropriate for your pastry, following the pack instructions; a universal five-minute pre-bake does not suit every pastry or tin.
- Make ahead: bake fully, cool and refrigerate within 1–2 hours, then use within 48 hours or sooner if ingredients require it. Reheat only once, until steaming hot throughout, rather than merely warming the surface.
Crispy Cheese Balls: Detailed Recipe and Variations
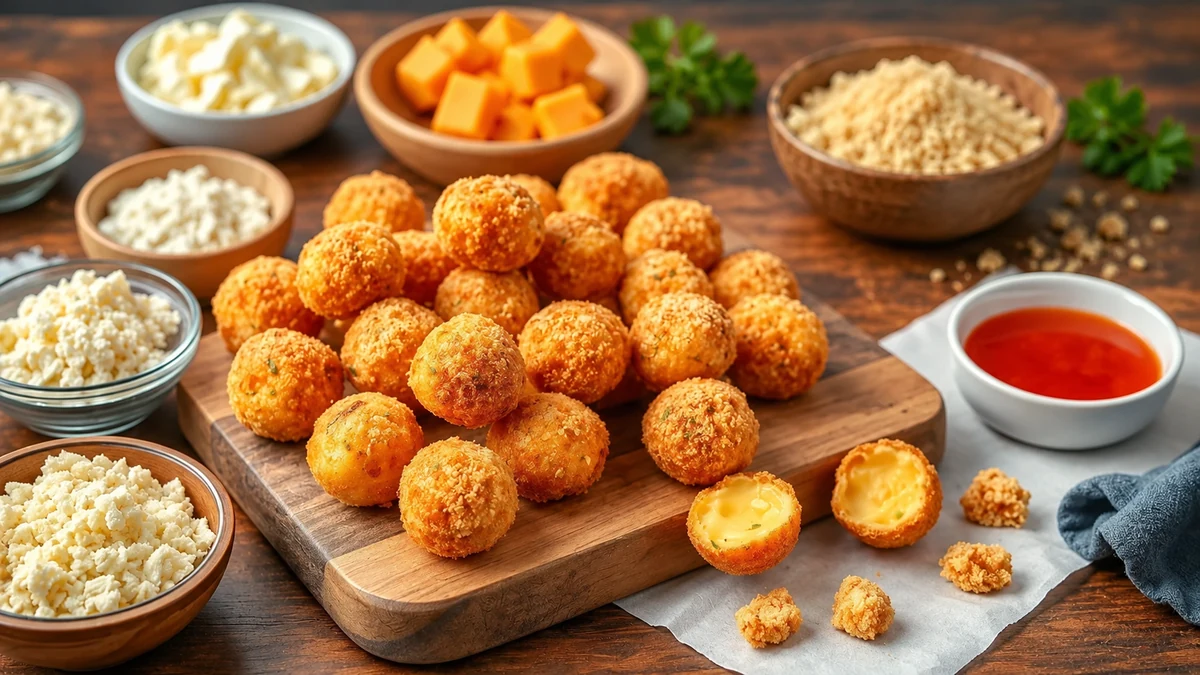
Crispy cheese balls combine a golden coating with a soft cheese centre. Make a small test batch to check the texture of the cheese and coating you use.
Ingredients
- 300 g grated low-moisture mozzarella; a wet fresh mozzarella can make the dough difficult to handle.
- 2 tbsp grated Parmesan, or vegetarian hard cheese if needed.
- 1 beaten egg for the dough, plus a separate beaten egg for coating as needed; the original coating method omitted this extra ingredient from its list.
- 60 g plain flour for the dough, plus extra for coating. A gluten-free adaptation needs suitable flour for both stages and a small trial to check binding.
- 120 g breadcrumbs, or panko for a different crunch; use suitable gluten-free breadcrumbs if required.
- Oil for frying, or a little oil spray for baking or air-frying.
- Oregano, black pepper and salt, to taste.
- Optional filling: 50 g Catupiry or cream cheese, divided between the balls.
Method
- Make the dough: mix mozzarella and Parmesan, then add the dough egg and 60 g flour to form a workable mixture. Do not taste it raw.
- Shape: lightly oil your hands and form walnut-sized balls.
- Fill if desired: flatten each portion, add a little of the optional cheese filling and seal completely. Divide the 50 g filling across the batch rather than overfilling individual balls.
- Chill: refrigerate for 15–20 minutes to firm up.
- Coat: roll each ball in extra flour, dip in the separate beaten egg, then coat with breadcrumbs. Do not take flour or egg back out of the prepared dough for this step.
- Fry: use a thermostatically controlled fryer if available, with oil at 170–180°C. Fry a few balls at a time and check that the centre is thoroughly cooked; 2–3 minutes is only an initial estimate. Drain on kitchen paper. Never leave hot oil unattended.
- Oven option: bake on a lightly oiled or lined tray at 200°C for approximately 15–20 minutes, turning halfway. Check the centre is cooked; results differ from frying.
- Air fryer option: use 200°C as a starting setting, checking after about 10–12 minutes and following appliance instructions. Extend cooking if needed; a golden coating alone does not confirm the centre is done.
- Serve hot: arrange on a platter with tomato sauce, chilli jam or seasoned mayonnaise in separate bowls.
Variations
- Filled with Catupiry: the Brazilian cheese spread adds a creamy centre; seal the balls well.
- Herbs and chilli: add parsley, chives or chilli flakes to the dough.
- Baked with panko: use panko and a little oil for a coarse, crisp coating.
- Gluten-free adaptation: replace all wheat flour and breadcrumbs, including the extra coating flour, with suitable gluten-free products. Check the complete recipe and avoid cross-contact.
- Vegan adaptation: a reliable version needs vegan cheese, an appropriate egg replacement in both dough and coating, and testing for binding and cooking. Chickpea flour mixed with water is not aquafaba. No validated replacement ratio is supplied in this recipe, so do not assume a direct swap will work.
Quick Tips
- Cook one test ball to check the coating, seasoning and fully cooked centre before cooking the rest.
- Avoid excess moisture: choose low-moisture cheese and pat away any surface liquid before grating.
- Do not overcrowd the fryer: small batches help maintain a steady oil temperature. Follow the fryer’s fill limits and safety instructions.
- Optional finish: brush baked balls with a little melted butter if desired, noting the added dairy.
Crispy Chicken Goujons: Detailed Recipe and Variations
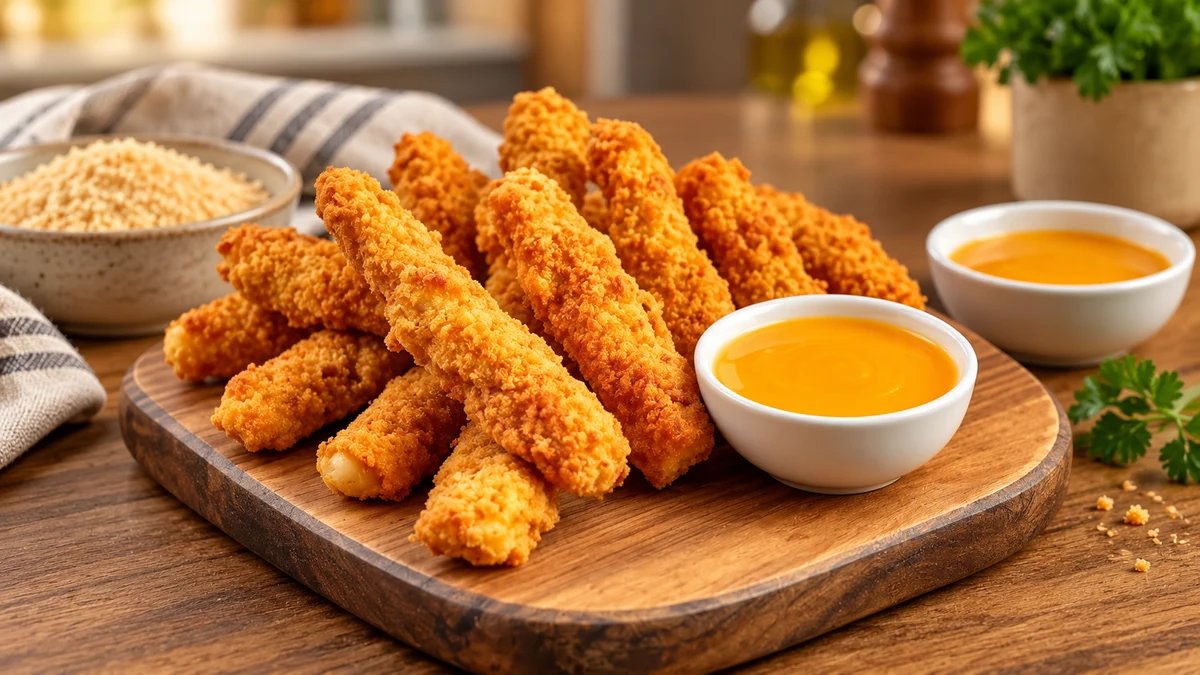
Crispy chicken goujons with a tangy dip offer a crunchy coating and a savoury centre. Check that the chicken is fully cooked before serving.
Ingredients
- 500 g chicken breast, cut into strips about 1.5 cm thick. Turkey breast is a meat alternative; firm tofu makes a vegetarian variation when the other ingredients are suitable.
- Up to 1 tsp salt, adjusted to taste and the other ingredients.
- ½ tsp freshly ground black pepper.
- 1 tsp sweet or smoked paprika, or curry powder for a variation.
- 60 g plain flour for coating, or a suitable gluten-free flour if required.
- 2 eggs, beaten, for coating. An egg-free coating needs a suitable tested replacement; changing the egg alone does not make chicken vegan.
- 120 g breadcrumbs or panko, choosing a gluten-free product where required.
- Oil for frying, enough for the appliance within its safe fill marks; do not assume 1 litre suits every pan. Alternatively, use a little oil spray for baking or air-frying.
- Dip: 100 g pasteurised-egg mayonnaise, 1 tbsp ketchup, 1 tsp mustard and 1 tsp honey, or agave syrup instead of honey. A vegan dip also requires vegan mayonnaise and other suitable ingredients.
Method
- Season: toss chicken strips with salt, pepper and paprika, cover and refrigerate for 10 minutes.
- Set up the coating: put flour, beaten eggs and breadcrumbs in three separate dishes, away from ready-to-eat food.
- Coat: dust each strip with flour, shake off excess, dip in egg and press into breadcrumbs. Wash hands and clean surfaces after handling raw chicken; discard unused contaminated coating ingredients.
- Heat the oil: use a controlled fryer or suitable deep pan and an oil thermometer to reach 170–180°C. Do not rely on a bread crumb to measure temperature. Keep water away from hot oil, avoid overfilling and never leave it unattended.
- Fry in small batches: cook until golden and fully cooked in the thickest part, then drain. The original 3–4 minute estimate is not a safety test: check 70°C for 2 minutes or 75°C for 30 seconds with a clean probe.
- Oven or air fryer: arrange in a single layer, spray lightly with oil and cook at 200°C, turning halfway. Start checking around 15–20 minutes; an oven may need around 20–25 minutes or longer. Follow appliance guidance and verify the same safe core temperature rather than relying on timing alone.
- Make the dip: with clean equipment, mix mayonnaise, ketchup, mustard and honey or agave. Taste and refrigerate until serving.
- Serve: arrange cooked goujons on a clean platter with the dip, optional parsley and lemon slices.
Variations
- Seasoning: try curry powder, garlic powder or mixed herbs instead of paprika.
- Cheese coating: add grated Parmesan to the breadcrumbs for flavour, noting the extra milk allergen.
- Spicy coating: add ½ tsp cayenne to the breadcrumbs, or less to taste.
- Alternative dips: try herby yoghurt, sweet-and-sour chutney or chilli jam mixed with cream cheese.
Practical Tips
- Check the centre: a crisp golden crust does not prove chicken is safely cooked. Use a clean food thermometer; if the coating browns too fast, adjust the heat and continue until the chicken is done.
- Maintain the oil temperature: monitor it and avoid overcrowding. Do not increase heat blindly or let the oil smoke.
- Prepare ahead: coated raw chicken can be kept covered in the fridge for up to 4 hours within its use-by limit, below ready-to-eat food. Cook shortly before serving.
Quick Cheese and Charcuterie Board: Details and Variations
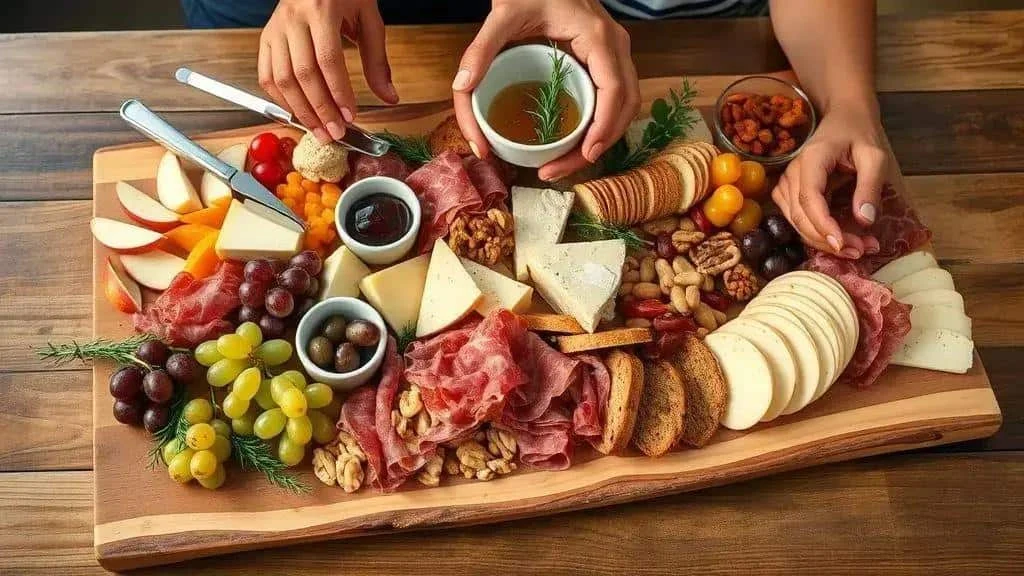
A quick cheese and charcuterie board brings together ready-to-serve ingredients with contrasting flavours and textures. The quantities here form an alternative board to the shorter version above; do not add the two lists together automatically.
What to Include
- 150 g firm cheese, such as Parmesan or provolone, cubed or shaved. Check rennet if catering for vegetarians.
- 150 g soft cheese, such as Brie or goat’s cheese. Pregnant guests should avoid uncooked mould-ripened soft cheese and soft blue cheese; a pasteurised rindless goat’s cheese is a different category. Follow NHS advice.
- 150 g sliced meats, such as cooked ham, salami or coppa. Check suitability of cold cured meats for pregnant guests.
- 100 g pitted olives, green or black.
- 100 g fresh fruit, such as grapes or sliced apple or pear, cut appropriately for the guests’ ages.
- 80–100 g nuts, such as almonds, walnuts or Brazil nuts, served separately and clearly identified. Whole nuts are unsuitable for children under five.
- 1 baguette or a bread selection, sliced or toasted.
- Accompaniments such as chutney, honey or mustard in small bowls. Do not offer honey to babies under one.
Assembly
- Choose a base: use a large clean, dry board or platter.
- Position cheeses: place them in two or three separate areas.
- Arrange meats: fold or roll slices and place them beside the cheeses.
- Add bowls: use small dishes for olives, chutney or honey.
- Add fruit and nuts: arrange fruit for colour and keep nuts in a separate labelled bowl where needed.
- Finish with bread: put bread and crackers around the edges for easy access.
- Add herbs and utensils: use edible rosemary or thyme for decoration, with serving tongs, cheese knives and suitable picks.
Presentation Tips
- Vary height: use stable food-safe bowls or small stands. Avoid improvised cardboard rolls in contact with food.
- Balance colours: alternate pale and darker ingredients.
- Show different textures: combine creamy, crunchy and soft foods.
- Make portions easy to pick up: cut cheese to an appropriate size for the guests, adapting it for young children rather than offering hard cubes or sharp picks.
- Leave space: avoid crowding the board so utensils and portions remain accessible.
Quick Variations
- Vegetarian: replace meats with grilled vegetables, pickles and carrot sticks, and choose vegetarian dairy cheeses or vegan alternatives.
- Mediterranean flavours: use fresh cheeses, olives, sun-dried tomatoes and hummus.
- Sweet and savoury: add dates, dried figs, honey or chutney alongside mature cheeses, where suitable for guests.
- For children: offer age-appropriate cheese pieces, cooked turkey, safely cut fruit and small sandwiches. Quarter grapes lengthways, avoid whole nuts under five and remove picks.
Balancing Flavours and Quantities
For 8–10 guests, 100–150 g of board ingredients per person is a rough starting estimate for a substantial shared selection, adjusted for bread, appetite and other dishes. It is not an amount to add automatically on top of the full appetiser allowance. One possible distribution is:
- 40% cheese, 40% meat or suitable alternatives and 20% accompaniments such as fruit, nuts and bread. This is an optional presentation split, not a nutritional recommendation.
- Flavour balance: combine something sharp, such as pickles or olives, something sweet, such as chutney, and a strongly savoury ingredient.
Ready-to-Use Combinations
- Classic: Brie, provolone, cured ham, grapes and honey, adjusted for dietary needs.
- Rustic: mature cheese, salami, pickles, walnuts and crusty bread.
- Fresh flavours: goat’s cheese, cooked turkey, pickled cucumber and wholegrain crackers.
Serving and Storage
- Assemble shortly before serving and keep perishable items chilled until needed. Serve small amounts and replenish, rather than leaving all the cheese and meat out for the whole party.
- Transport: use covered containers and ice packs for chilled food, keeping moist ingredients separate from bread.
- Refill: keep reserves covered in the fridge and use clean serving dishes when replenishing.
Smoked Salmon and Cream Cheese Canapés: Detailed Recipe
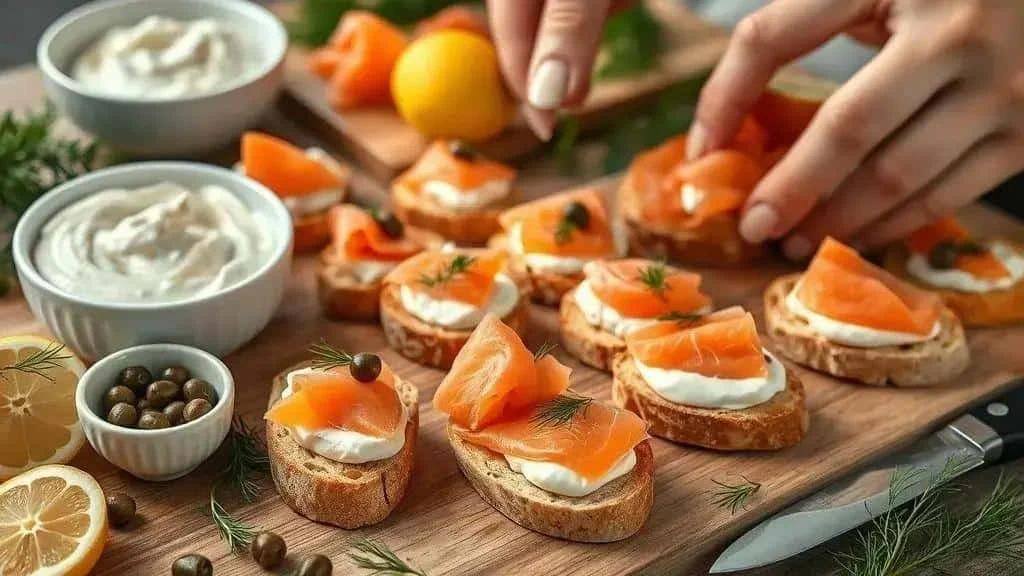
Smoked salmon and cream cheese canapés are simple to assemble. Ready-to-eat cold-smoked fish is unsuitable for pregnant or immunocompromised guests unless cooked until steaming hot; choose an appropriate alternative for those guests rather than assuming lemon makes it safe.
Ingredients
- 12 blinis or 12 thin toasted baguette slices. Crackers or cucumber slices offer alternative bases.
- 200 g smoked salmon, thinly sliced.
- 200 g cream cheese, softened briefly for spreading, or creamy ricotta. Vegan cream cheese replaces dairy only; the salmon remains fish.
- ½ lemon, juiced, adding gradually to flavour the cheese.
- 1 tbsp chopped fresh dill or chives.
- Salt and black pepper, to taste; smoked salmon may provide enough salt already.
- Optional: 1 tbsp capers, drained.
- Optional lemon zest or olive oil, to finish.
Method
- Prepare the bases: toast baguette slices lightly, or warm blinis according to the pack. Let them cool before adding the chilled cheese and fish.
- Season the cheese: mix cream cheese with lemon juice added gradually, chopped dill and a little pepper. Taste before adding salt.
- Portion the salmon: cut slices into strips or squares to fit the bases.
- Assemble: divide the cheese mixture between the 12 bases in an even layer, then add salmon. Adjust to the base size rather than piling on more than it can hold.
- Finish: add optional capers, lemon zest or a little olive oil, plus extra dill or chives.
- If assembling ahead: cover and refrigerate promptly for up to 4 hours, within the ingredients’ use-by and opened-pack limits. Keep chilled until shortly before serving; bread may soften while stored.
- Serve: arrange on clean platters with serving tongs or suitable food picks.
Variations
- Cucumber base: use thick cucumber slices instead of bread for a crisp alternative.
- Avocado: replace part of the cream cheese with mashed avocado seasoned with lemon and a little salt.
- Seasoned ricotta: use ricotta with herbs and an optional little honey for a sweet contrast. Honey is unsuitable for babies under one.
- Tuna: replace smoked salmon with drained tinned tuna mixed with pasteurised-egg mayonnaise and chives.
- Mini cones: use ready-baked savoury pastry cones and fill just before serving to preserve their texture.
Practical Tips
- Avoid overfilling: a balanced layer keeps the canapé easy to eat.
- Temperature: serve chilled or shortly after removing from the fridge; do not let fish sit out to warm through for flavour.
- Safe handling: refrigerate salmon until assembly. As a cautious home-serving limit, keep total time without effective chilling under two hours, and shorter in hot conditions. Discard food left out too long; putting it back in the fridge does not undo that exposure.
- Presentation: arrange canapés in rows and garnish with edible dill.
Caprese Skewers with Balsamic Glaze: Detailed Recipe
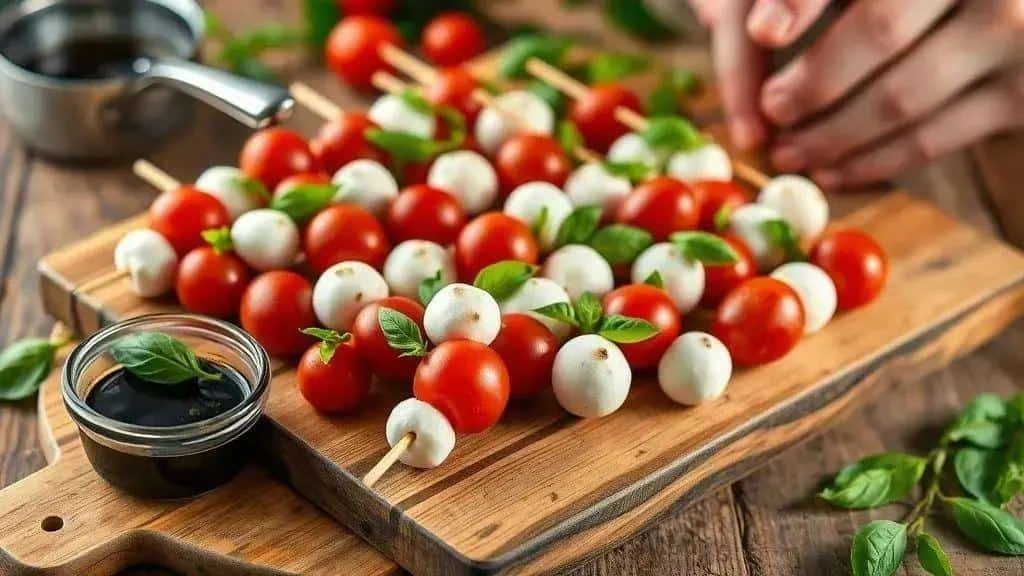
Caprese skewers with balsamic glaze bring colour and a fresh option to a festive appetiser menu.
Ingredients
- 300 g cherry tomatoes, washed and dried, or grape tomatoes.
- 250 g mini buffalo mozzarella balls, or cubes of mozzarella or a suitable vegan alternative.
- A handful of fresh basil leaves.
- 10–12 food skewers, with extras if needed for ingredient size. Remove skewers before serving portions to young children.
- 50 ml balsamic vinegar to reduce, or a little ready-made glaze to taste; 50 ml of thick glaze is not an exact equivalent to 50 ml of unreduced vinegar.
- 2 tbsp extra virgin olive oil, to drizzle.
- Salt and black pepper, to taste.
Method
- Make the reduction: simmer 50 ml balsamic vinegar in a small saucepan until lightly syrupy, watching closely so it does not scorch. The original 6–10 minutes is only a guide for a small pan; cool before use. Skip this step if using ready-made glaze.
- Assemble: alternate tomato, folded basil and mozzarella, repeating as needed and dividing the ingredients between skewers.
- Season: arrange on a plate, drizzle with olive oil and add salt and pepper.
- Finish: drizzle or brush with the cooled balsamic reduction just before serving.
- Roasted tomato variation: roast tomatoes at 200°C, checking after about 5 minutes and continuing until softened to your liking. Cool before combining with the cheese.
Variations
- Cured ham: add a thin rolled strip for a non-vegetarian option, checking the pregnancy precautions for uncooked cured meats.
- Vegan: use vegan mozzarella and a suitable balsamic glaze without honey or other animal ingredients.
- Pesto: brush a little pesto over the mozzarella. Check nuts, milk and rennet where relevant; many standard pestos are not vegetarian or nut-free.
- Confit tomatoes: use cooled confit or slow-roasted tomatoes for a sweeter, more concentrated flavour.
Practical Tips
- Assemble close to serving: make the skewers up to 30 minutes ahead for best texture and keep refrigerated until needed.
- Ready-made glaze: add sparingly and taste, as sweetness varies.
- Presentation: lay skewers in rows on a food-safe platter, with edible herbs. Keep chilled until serving rather than placing uncovered food in a decorative vase.
- Skewer safety: this is a cold-assembled dish, so no soaking is needed. If adapting it for heat, use heat-safe skewers and follow their instructions; a brief soak does not guarantee that wood will not burn.
Ham, Cream Cheese and Herb Rolls: Detailed Recipe

Ham, cream cheese and herb rolls are a simple chilled appetiser that can be prepared shortly ahead.
Ingredients
- 200 g sliced cooked ham, preferably thin, wide slices; cooked turkey or a suitable plant-based alternative can be used.
- 200 g cream cheese, softened briefly for spreading, or creamy ricotta. Choose vegan cream cheese as well as a vegan ham alternative for a vegan version.
- 1 tbsp chopped fresh parsley.
- 1 tbsp chopped chives.
- 1 tsp lemon zest, optional, or a little lemon juice for acidity.
- Freshly ground black pepper, to taste.
- Short food picks, if needed to secure the rolls.
Method
- Make the filling: mix cream cheese, parsley, chives, lemon zest and pepper until smooth.
- Taste: adjust lemon and seasoning, remembering that ham already contains salt.
- Spread: lay each ham slice on a clean board and spread with a thin layer of filling, leaving a small border. Divide the filling according to slice size rather than using a fixed spoonful that may overfill small slices.
- Roll: roll each slice into a neat cylinder and repeat.
- Cut if desired: slice each roll into two or three pieces for smaller portions, securing with picks if needed.
- Chill: refrigerate for at least 20 minutes to firm up and make slicing easier.
- Serve: arrange on a platter, garnish with edible herbs and serve chilled. Do not leave them sitting out for the whole party.
Variations
- Carrot: add a little grated carrot to the filling for crunch.
- Spicy filling: add chilli flakes or a little chilli sauce.
- Walnuts: add chopped walnuts for texture if suitable for your guests, and identify the added nut allergen.
- Vegan: use both a vegan ham alternative and vegan cream cheese, checking all garnishes too.
Quick Tips
- Do not overfill: a moderate layer makes rolling easier and prevents the filling squeezing out.
- Use visible food picks where needed, and remove them before serving children; avoid hidden or easily overlooked sharp pieces.
- Make ahead: store covered in the fridge for up to 24 hours, or less if an ingredient’s use-by or opened-pack instructions require it.
- Presentation: arrange in rows or circles, with lemon slices and herbs for colour.
Chickpea Salad: Detailed Recipe and Variations
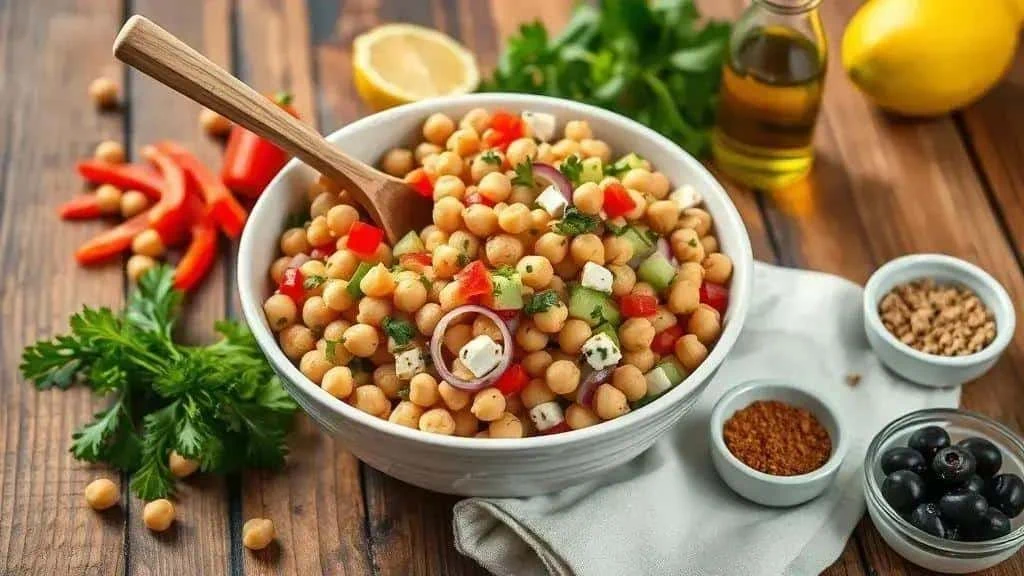
Chickpea salad can be served in small bowls as an appetiser or as a side dish for a festive meal.
Ingredients
- 2 × approximately 400 g tins of chickpeas, drained and rinsed. About 500 g cooked, drained chickpeas is the suggested alternative; actual drained tin weights vary, so check the label.
- 1 small red onion, finely diced, or another onion or chives for a different flavour.
- 1 red pepper, finely diced, or yellow or green pepper.
- 1 medium cucumber, deseeded and diced, optional.
- A handful of chopped parsley, or coriander or mint.
- 3 tbsp extra virgin olive oil, or a milder olive oil. Mild or light flavour does not mean fewer calories.
- 2 tbsp lemon juice, or white wine vinegar.
- 1 tsp ground cumin, optional.
- Salt and black pepper, to taste.
- Optional additions: 100 g diced feta, chopped olives or halved cherry tomatoes. Feta makes the salad non-vegan; check rennet for a vegetarian version.
Method
- Prepare chickpeas: drain the tins into a sieve, rinse under running water and drain thoroughly.
- Chop vegetables: dice onion, pepper and optional cucumber and tomatoes into evenly sized pieces.
- Combine: mix chickpeas, vegetables and parsley in a large bowl.
- Make the dressing: whisk olive oil, lemon juice, optional cumin, salt and pepper in a small bowl or jar.
- Dress: pour over the salad and mix gently until evenly coated.
- Taste: adjust salt, pepper or lemon as needed.
- Chill: refrigerate for at least 30 minutes and serve chilled or shortly after removing from the fridge.
- Finish: add optional feta and olives shortly before serving.
Variations
- Mediterranean flavours: add feta, Kalamata olives and dried oregano.
- With fish or chicken: add drained tinned tuna or fully cooked, promptly cooled chicken. Follow the shortest storage limit of any ingredient.
- Vegan crunch: omit feta and other animal ingredients, then add suitable toasted walnuts or pumpkin seeds, checking guests’ allergies.
- Curry and raisins: replace cumin with curry powder and add raisins for a sweet contrast.
Serving and Storage
- Small servings: use individual bowls for easy party service.
- Keep toast separate: serve it alongside the salad so it stays crisp.
- Storage: refrigerate in a covered container at 1–5°C and use within 48 hours, or sooner if an ingredient requires it. Do not try to reheat food by leaving it at room temperature; this salad can be served chilled.
- Advance preparation: making it up to 24 hours ahead is practical, within ingredient storage limits. Add delicate herbs and optional cheese near serving time.
Adapting Appetisers for Vegan and Gluten-Free Needs
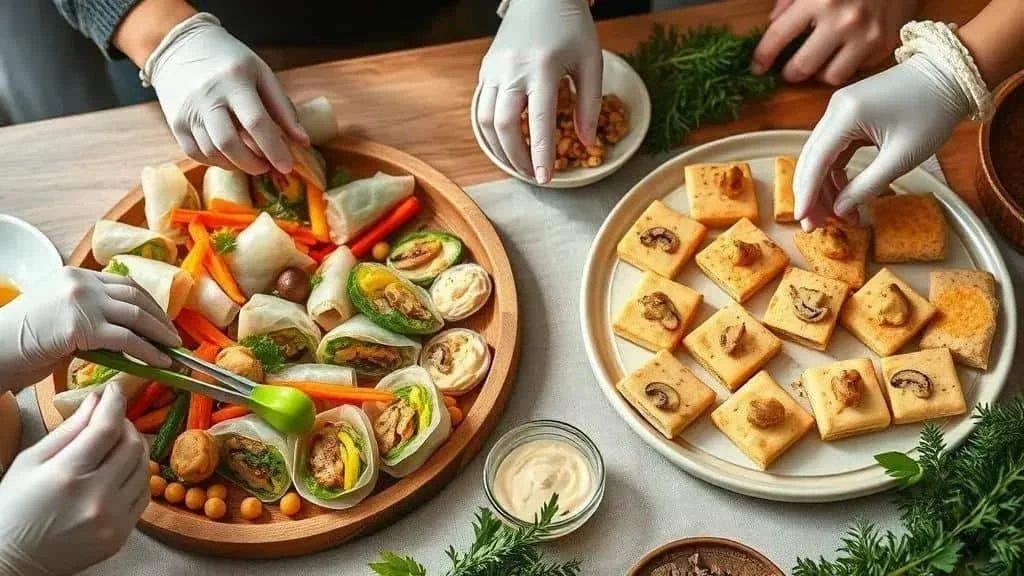
Careful planning can make vegan and gluten-free choices easier to offer. No simple substitution guarantees safety for every guest: confirm their requirements, check every ingredient and manage cross-contact.
Basic Principles
- Read clear ingredient and allergen labels, using appropriately labelled gluten-free products where needed. Vegan labelling concerns animal ingredients and is not a guarantee that a product is free from milk or other allergen traces.
- Vegetables, fruit and suitable plain grains such as rice or quinoa provide useful starting points. Nuts, soya and other plant foods can still be allergens; no ingredient group is safe for everyone.
- Offer variety across fresh, crunchy and creamy options while matching the actual needs of the people attending.
Practical Substitutions
- Bread and toast: try cucumber slices, cooked polenta rounds, suitable gluten-free crackers or sweet potato crisps, checking ingredients and shared preparation equipment.
- Creamy spreads: use vegan cream cheese, tofu-based ricotta alternatives or nut cream where suitable. Nuts and soya need their own allergen checks.
- Coatings and pastry: choose suitable gluten-free flour blends and breadcrumbs. Chickpea or rice flour may behave differently, so test recipes rather than assuming an equal swap gives the same result.
- Meat and fish: try grilled mushrooms, smoked tofu, tempeh or breaded courgette strips. Check coatings and sauces too, including egg, milk and honey.
- Sweet accompaniments: check jams, glazes, sweets and chocolate for the relevant ingredients. Honey is not vegan; gelatine is animal-derived, while pectin is normally plant-derived. Verify the complete product rather than relying on one ingredient.
Reducing Cross-Contact
- Separate preparation: use clean, separate boards, pans and knives for food that must avoid particular allergens. A separate area alone does not guarantee safety.
- Dedicated utensils: assign clearly identified tongs, spoons and spatulas to each dish.
- Clean thoroughly: wash hands, equipment and surfaces before preparing an adapted dish.
- Plan the order: prepare dishes that need to avoid relevant allergens first, after cleaning, and keep them covered while other food is prepared.
- Store separately: use closed, labelled containers, keeping raw meat below ready-to-eat dishes in the fridge.
Talking to Guests
- Ask in advance: request dietary information when guests confirm attendance so you can plan appropriately.
- Make choices clear: use separate dishes, dedicated utensils and readable labels, while keeping the relevant foods apart.
- Be honest about preparation: explain what is in each dish and any cross-contact limitations. Do not promise that food is safe for an allergy if you cannot establish that.
Example Menu Ideas
- Vegan ideas: vegetable rice-paper rolls, hummus with carrot sticks, and tomato-and-basil skewers, with suitable fillings and sauces.
- Gluten-free ideas: polenta with mushroom cream, cheese balls made with a tested gluten-free adaptation, and fruit and cheese with suitable accompaniments.
- Vegan and gluten-free ideas: chickpea salad without cheese, appropriately prepared baked falafel, and sweet potato crisps with guacamole. Verify all ingredients and preparation rather than assuming the names guarantee suitability.
Shopping and Preparation Tips
- Choose products clearly labelled gluten-free where necessary and check ingredient and allergen information each time, as formulations can change.
- Make suitable spreads and salads ahead within their storage limits, and leave toast and crisp coatings until nearer serving.
- Test unfamiliar adapted recipes before the party so you can assess flavour, binding and texture.
Serving and Keeping Food
- Use separate serving dishes and replenish from covered refrigerated containers, avoiding accidental mixing of utensils or leftovers.
- Keep chilled items at 1–5°C until needed. As a cautious home plan, limit perishable food’s total time without chilling to two hours, less in hot conditions, and discard portions that have been left out too long.
- Reheat previously cooked food only once, until steaming hot throughout: 70°C for 2 minutes or 75°C for 30 seconds is a suitable check. An oven or air fryer can restore some crispness, but cannot make poorly stored food safe.
Practical tip: a few dishes that suit more than one dietary preference can simplify the menu, provided they really meet the guests’ requirements.
Enjoying the Celebration
A manageable appetiser menu leaves more time for family and friends. A few well-chosen recipes and an organised serving plan can create an inviting table without unnecessary complexity.
Try the ideas that suit your gathering, adjust seasoning to taste and plan suitable options for the dietary needs your guests have shared.
Thank you for reading. Follow our social channels for more practical recipes and visit the I Love Christmas blog for more festive ideas.
Frequently Asked Questions about Festive Appetisers
How many appetisers should I plan per person?
As a rough starting point, allow 6–8 small pieces when other dishes follow or 10–12 when appetisers are the main food. Adjust for the size of each piece, appetite and party length; this is not a fixed serving requirement.
What can I prepare ahead?
Suitable spreads, salads, fillings and sauces can often be made the day before, provided they are kept chilled and within the shortest ingredient storage limit. Shape cheese balls ahead if appropriate, but follow the shorter raw-chicken guidance above for goujons. Cook crisp items close to serving.
How can I adapt recipes for vegan or gluten-free guests?
Check the entire recipe. Vegan versions need replacements for meat, fish, dairy, eggs and honey where present. Gluten-free versions need suitable flour and crumbs at every coating stage, plus checks on sauces and other ingredients. Use tested adaptations, clear labels and cross-contact controls.
How can I keep appetisers hot and crisp?
Serve small freshly cooked batches where possible. If holding food hot, keep the food itself at 63°C or above and check with a thermometer; a low oven setting alone does not prove this. Reheat safely stored food only once until hot throughout, then hold or serve it. Keep it protected from contamination while avoiding unnecessary trapped steam.
How should I transport appetisers?
Use covered containers, insulated carriers and ice packs for chilled items. Hot food needs effective hot holding at 63°C or above; otherwise use a suitable planned chilling and reheating method. Minimise travel time, keep sauces separate and assemble delicate items on arrival where practical.
How do I make a quick, attractive cheese board?
Choose a small selection of cheeses, meats or vegetarian alternatives, fruit and bread. Place cheeses in separate areas, fold meat slices, add bowls of olives or chutney and vary colours. Keep perishable reserves chilled and account for allergies, pregnancy needs and children’s choking risks when selecting and cutting ingredients.
Sources and Further Reading
- Food Standards Agency: chilling and storing food
- NHS: foods to avoid during pregnancy
- NHS: foods to avoid for babies and young children
- Food Standards Agency: cooking and reheating
- London Fire Brigade: deep-fat fryer safety
- NHS: listeriosis and higher-risk foods
- Food Standards Agency: hot holding food