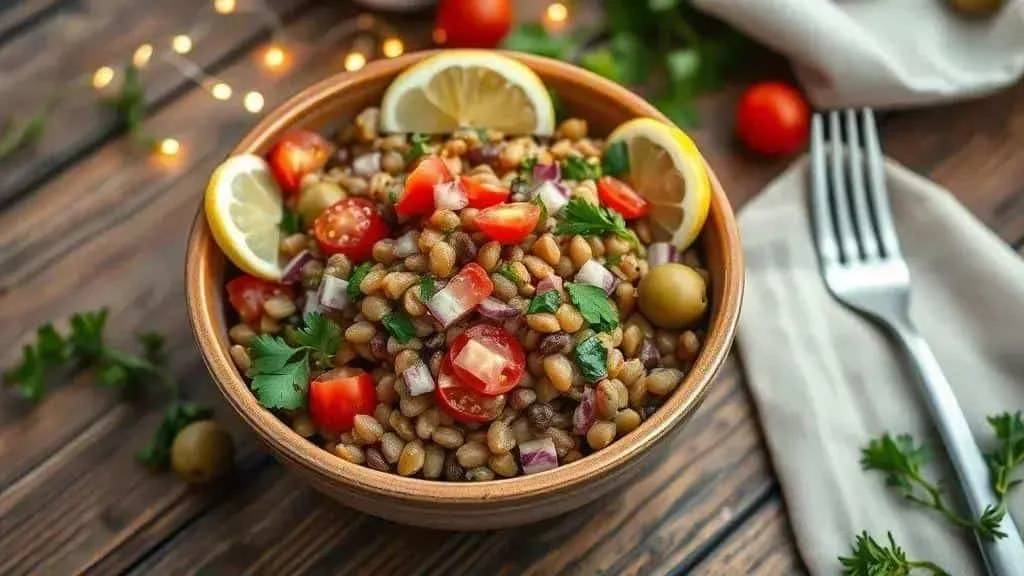
These 15 Christmas party food ideas combine Brazilian favourites, familiar canapés and vegetable options. Explore recipes, portion planning, advance preparation and presentation, with notes on checking dietary substitutions and serving food safely. The selection is a collection of ideas, not a ranking based on sales or popularity data.
Looking for Christmas party food ideas? This selection includes fifteen savoury and sweet options, with detailed methods for most and ideas for arranging the table. Choose a manageable menu and check the needs of your guests. Oven temperatures below are conventional unless stated otherwise.
What to look for in Christmas party food

Useful Christmas party food ideas combine good flavour with practical preparation. Seasonal ingredients, manageable portions and carefully planned dietary options make it easier to cater for a mixed group.
Flavours and ingredients
You can combine familiar recipes with a few different flavours. Consider:
- Fresh herbs and citrus to balance rich dishes.
- Well-seasoned seafood in small, safely prepared portions.
- Plant-based choices using pulses, nuts or suitable cheese alternatives, with allergens clearly identified.
- Sweet-savoury combinations such as fruit with cheese or a little honey; do not give honey to children under one year.
Portion size and format
Small individual portions are convenient for guests who are standing. Finger food can reduce the need for cutlery, but provide forks or spoons for anything awkward to eat.
Presentation
Contrasting textures and colours make the table inviting. Fresh herbs, citrus zest and suitable seeds can add a finishing touch without complicated decoration.
Dietary needs
Ask about allergies and dietary requirements before planning the menu. Gluten-free, lactose-free and vegan mean different things, so check the whole recipe and label each option accurately.
Preparing ahead
Choose some components that can be made ahead and stored safely, leaving delicate assembly or final cooking until shortly before serving.
Shopping and reducing waste
Compare seasonal ingredients and buy quantities you can use. Reusable containers reduce disposable packaging; compostable items are useful only where appropriate composting facilities exist.
Drinks pairings
Offer drinks that suit the food and your guests, including appealing alcohol-free options. Lighter flavours can complement delicate bites, while sparkling drinks contrast with richer cheese or fried snacks.
Different culinary influences
Mediterranean, Asian and Latin American flavours can add variety. Keep the identity of Brazilian recipes such as bolinhos de bacalhau, explaining unfamiliar ingredients rather than changing their origin.
Self-service stations
Bowls and boards with separate toppings let guests choose their own combinations. Provide separate utensils and keep perishable reserves at the correct temperature.
Practical tip: choose food that holds its texture during short serving periods, but do not judge safety by appearance. Put out small batches and keep cold reserves at 5°C or below and hot-held food at 63°C or above.
Choosing party food: portions and guests
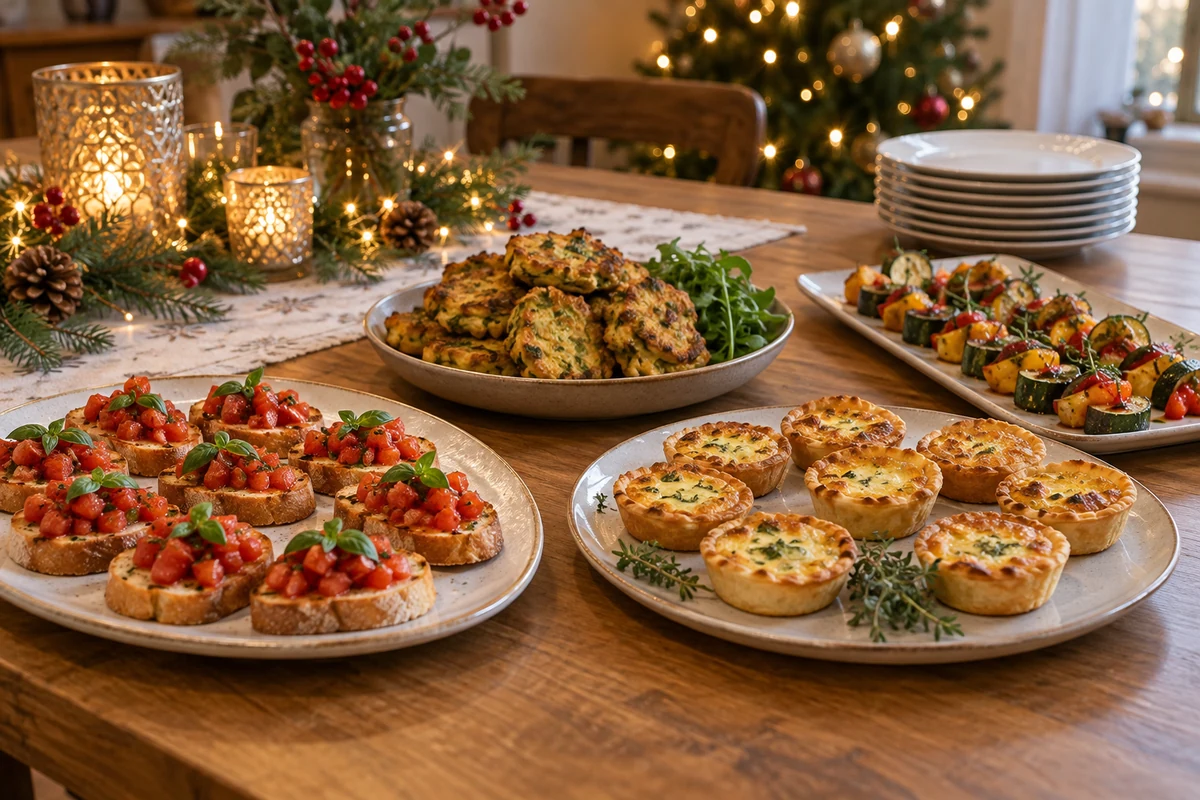
Estimating portions helps avoid both shortages and waste. Adapt the quantities to the size of each item, guests’ appetites, event length and other dishes.
Starting points for portions
- Before Christmas dinner: around 6–8 small pieces per adult may suit a longer drinks reception; reduce this if dinner follows shortly afterwards.
- Party food as the main meal: 10–12 small pieces may be a starting point, but very small canapés or only 150–200 g of food are not necessarily a full meal. Include more substantial dishes and adjust to the event.
- Children: around 3–5 small portions may be a starting point for some children, but age and appetite vary greatly. Choose appropriate textures and avoid choking hazards and sharp picks.
- Older guests: ask about appetite and chewing needs rather than automatically allocating a smaller portion based on age. Include softer options where helpful.
- Vegetarian and vegan guests: provide enough suitable food for the people attending. A general 20–30% plant-based allocation is only a menu idea, not a substitute for checking actual requirements.
Balancing the selection
Choose a mix that suits your guests. For example, the following ranges could become a 40% meat-and-fish, 30% cheese and 30% plant-based menu; select figures that add up to 100%:
- 40–50% meat or seafood options, if appropriate for the group.
- 25–35% cheese and other dairy-based options, counted separately from meat items.
- 20–30% plant-based bites or individual salads, increased where needed.
Allowing for a longer party
For an event lasting more than three hours, an extra 20–30% may be a useful initial allowance, but consider timing and whether it replaces a meal. Do not assume alcohol consumption determines how much fried or salty food guests will need.
Dietary planning and labels
Confirm allergies and restrictions in advance. Label options clearly and keep full ingredient information available. Lactose-free food may still contain milk protein, and a vegan label alone does not guarantee suitability for every allergy.
Serving arrangements
- Use small platters so food can be replenished frequently and kept at the appropriate temperature.
- Keep hot reserves at 63°C or above after thorough cooking or reheating, and bring out small batches.
- Use small dishes or tasting cups for standing guests. Remove cocktail sticks before eating and avoid sharp picks for young children.
- Have suitable cutlery available, preferably reusable where practical.
A shopping tip
Multiply your planned portions by the number of guests. An optional 15–20% reserve may help if attendance is uncertain, but do not add several buffers on top of one another. Favour safely stored spare components rather than overbuying perishables.
A simple planning method
- List the guests and note appetite, age-related texture needs and dietary requirements where relevant.
- Choose the format: drinks reception, buffet or snacks before dinner, then estimate suitable portions.
- Choose the proportions of meat, cheese and plant-based food, making sure the allocation totals 100%.
- Add up the portions and convert them into recipe batches, units or ingredient weights.
- Consider a 15–20% reserve only if useful for your event, adjusting for uncertain attendance and particular dietary needs rather than adding it automatically.
- Plan replenishment, fridge space and safe heating before the event.
Learn from each gathering: note which dishes ran short and which were left over to improve the next estimate.
The full selection: 15 Christmas party food ideas

- Classic bruschetta: crisp bread with seasoned tomatoes, basil and olive oil. Alternative: suitable gluten-free bread or grilled aubergine slices.
- Salt cod fritters: small Brazilian-style bolinhos de bacalhau, served hot with a mild chilli sauce. Variation: bake them with a little oil instead of deep-frying; texture will differ.
- Mini cheese and herb quiches: crisp pastry with a savoury filling, suitable for preparing ahead with proper cooling and storage.
- Garlic prawns: small portions on tasting spoons or skewers, with a citrus finish. Alternative: sautéed mushrooms for a vegetarian version, using separate utensils where shellfish allergy is relevant.
- Cheese and charcuterie board: combine cheese, cured meats, fruit, nuts and preserves. Offer a separate plant-based board if needed, checking allergens in cheese alternatives.
- Caprese skewers with pesto: cherry tomatoes, mozzarella and basil with a little pesto.
- Beef croquettes with dipping sauce: a crisp coating around a savoury filling, served in freshly heated small batches.
- Smoked salmon canapés: toast or blinis with cream cheese, dill and lemon. Vegan alternative: replace both the fish and dairy toppings, and check the base. Follow the smoked-fish precautions for vulnerable guests below.
- Cheese and herb bites: small fried or baked portions served with mild chilli jam; adapt size and texture for children.
- Walnut and date spread: a creamy sweet-savoury topping for toast or suitable gluten-free crackers. Serving it in a cup does not make an otherwise gluten-containing recipe gluten-free.
- Mini baked pasties: Brazilian-style pastelzinhos with cheese, meat or vegetable fillings.
- Mini roast pork sandwiches: soft rolls with shredded pork leg, onions and a little sauce.
- Pear and Gorgonzola bruschetta: a sweet-savoury combination; a vegan version needs plant-based cheese and syrup instead of honey.
- Chocolate-dipped fruit skewers: seasonal fruit partly coated in chocolate, served separately from savoury food. Prepare safer, unskewered portions for young children.
- Vegetable crisps: sweet potato or beetroot crisps offer another option. Use only properly prepared commercial cassava products cooked according to their instructions; raw cassava must not be treated like an ordinary raw potato. Check seasoning and cooking arrangements for vegan or gluten-free suitability.
Serving strategies
Offer individual portions in small dishes or on suitable bases. Serve hot food in small batches and keep reserves properly heated; chilled toppings need refrigeration until serving.
Drinks ideas: light wines or sparkling drinks can suit varied snacks, while beer may complement richer flavours. Include water and alcohol-free alternatives.
Menu planning: several plant-based and gluten-free choices can be useful, but the number and quantity should reflect the guests’ actual needs rather than an arbitrary minimum.
Classic bruschetta: ingredients, method and variations
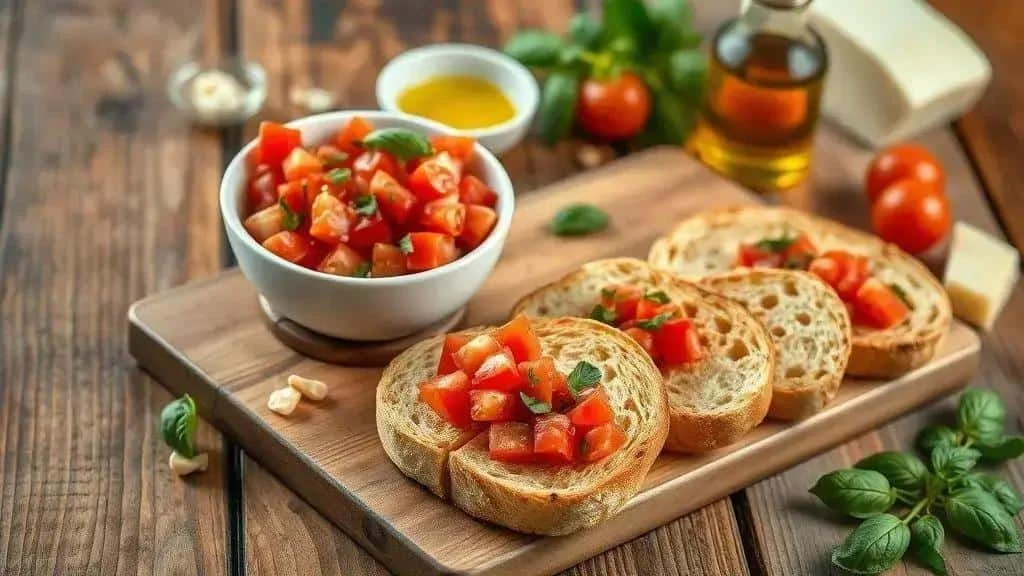
Make classic bruschetta with the ingredients and steps below, assembling just before serving.
Ingredients
- 1 baguette or 12 slices of Italian-style bread, cut 1–1.5 cm thick. Alternative: suitable gluten-free bread or grilled aubergine slices for a vegetable base.
- 4 medium ripe tomatoes, deseeded and finely diced; choose firm tomatoes to avoid a watery topping.
- ½ cup loosely packed basil leaves – torn by hand. Alternative: mint for a different flavour.
- 2 garlic cloves, one halved for rubbing the bread and one finely chopped for the tomatoes. Alternative: roasted garlic for a gentler flavour.
- 4 tbsp extra virgin olive oil in total: 2 tbsp for the tomatoes and 2 tbsp shared between the toast and finishing drizzle.
- Up to 1 tsp salt, adjusted to taste, and ½ tsp freshly ground black pepper.
- 1 tbsp balsamic vinegar or glaze, optional. Alternative: lemon juice for a citrus finish.
- Optional: 100 g buffalo mozzarella or grated Parmesan. Use a vegetarian hard cheese if required; a vegan version needs a suitable plant-based topping.
Method
- Prepare the tomatoes: wash, dry, deseed and finely dice them, then place in a bowl.
- Season: add 2 tbsp oil, the chopped garlic, basil, pepper and salt to taste. Stir gently.
- Toast the bread: brush the 1–1.5 cm slices with some of the remaining 2 tbsp oil, reserving a little to finish. Bake at 200°C for around 5–8 minutes until golden, or toast in a suitable frying pan for around 1–2 minutes per side.
- Rub with garlic: rub the cut garlic clove over the warm toast.
- Assemble: divide the tomato mixture between the slices. Add the optional mozzarella or grated cheese if using.
- Finish: use the oil reserved from the listed total and a little optional balsamic vinegar or glaze. Serve immediately.
- Preparing ahead: the tomato topping can be covered and refrigerated for up to two hours before serving. Keep it separate from the toast.
Variations
- Pear and Gorgonzola: replace the tomato mixture with thin pear slices, Gorgonzola and chopped walnuts. For pregnant guests, soft blue cheese must be cooked until steaming hot; see the detailed version below.
- Sautéed mushrooms: use button or shiitake mushrooms cooked with garlic and thyme, with suitable vegetarian ingredients.
- Caprese: combine cherry tomatoes, buffalo mozzarella and pesto, checking cheese and pesto suitability where needed.
- Vegan version: use a smooth cashew spread with lemon and salt, plus roasted tomatoes, on a vegan-suitable base. This contains nuts.
- Sweet bruschetta: top toast with sweetened ricotta, figs or strawberries and a little honey; honey is unsuitable under one year.
Quick tips
Toast the bread well and use firm, drained tomatoes. Assemble shortly before serving to avoid soggy bases.
Salt cod fritters: ingredients, method and variations

These Brazilian-style bolinhos de bacalhau combine salt cod, potato and herbs. Desalt the fish according to its supplier’s instructions before cooking; the time depends on the thickness and form of the fish.
Ingredients
- 500 g desalted salt cod, to be cooked and flaked; if already cooked, follow the appropriate storage and reheating limits.
- 600 g potatoes, weighed after peeling; an alternative is 500 g fully cooked, properly prepared cassava, with moisture adjusted as needed.
- 1 medium onion, finely chopped.
- 2 garlic cloves, chopped or crushed.
- 2 eggs to bind the mixture. An egg-free binder is a separate adaptation requiring a trial batch; it does not make fish fritters vegan.
- ½ cup chopped parsley, or chives.
- ¼–½ cup plain flour, added according to moisture; use a suitable gluten-free flour blend if required and check every other ingredient.
- Salt and black pepper to taste, allowing for the salt remaining in the fish.
- Vegetable oil for frying, plus 1 tbsp olive oil for the onion and garlic; for baking, use a little extra oil to brush the fritters.
- Lemon zest and mild chilli sauce, optional, to serve.
Method
- Desalt if needed: follow the packet or fishmonger’s instructions, soaking in plenty of cold water in the fridge at 5°C or below and changing the water as directed. Flakes may need far less time than thick pieces, which can require several days. A generic 6–8-hour shortcut is not reliable for every cut; cook a small sample to check the salt rather than tasting raw fish.
- Cook the potatoes: simmer in water until tender, checking from around 20–25 minutes depending on size. Drain thoroughly and mash while warm.
- Cook and flake the fish: gently poach the desalted cod until fully cooked, opaque and flaking; thickness affects timing. Remove skin and bones, drain well and flake. Do not rely on a fixed five-minute boil or further boiling to replace proper desalting.
- Cook the aromatics: heat the listed 1 tbsp olive oil and soften the onion and garlic, then mix with the flaked fish.
- Combine: let the potato and fish mixture cool enough not to scramble the eggs, then mix with the parsley, eggs and some of the flour. Add pepper and salt cautiously. Add flour gradually until the mixture can hold its shape, without making it unnecessarily dry.
- Test a portion: cook one small fritter thoroughly before tasting and adjusting the seasoning or binding. Do not taste the raw egg-and-flour mixture.
- Shape: with clean, lightly floured hands, form small walnut-sized portions and place on a tray. Keep waiting batches chilled.
- Fry: use suitable frying equipment and an oil thermometer, heating the oil to 170–180°C. Cook small batches until golden and fully heated through; 2–4 minutes is only a guide. Check the centre reaches 70°C for 2 minutes or 75°C for 30 seconds. Drain on kitchen paper.
- To bake: brush with a little oil and bake at 200°C, turning halfway. Check from around 15–20 minutes and continue until thoroughly cooked to the same centre-temperature standard; size and starting temperature affect timing.
- Serve crisp: cook small batches close to serving. If holding hot, keep at 63°C or above. Cooking and cooling the fish before frying already creates a reheating stage, so do not repeatedly cool and reheat the finished fritters.
Variations
- Baked with Parmesan: add 50 g grated Parmesan and bake with a little oil. This changes the flavour and adds dairy; it is not automatically a lower-fat recipe overall.
- Cheese-filled fritters: enclose a small cube of cheese while shaping and make sure the centre is thoroughly heated.
- Plant-based variation: replace the fish with well-drained ready-to-eat hearts of palm or cooked chickpeas and use a suitable egg-free binder. A mixture of 1 tbsp ground flaxseed and 3 tbsp water can replace one egg in some mixtures, but test the consistency before scaling up. Check all ingredients and avoid dairy cheese.
- Citrus and herbs: add lemon zest and thyme to the mixture.
Quick tips: drain ingredients well and chill a soft mixture for around 20 minutes before shaping. Measure frying temperature with a suitable thermometer rather than judging it by a breadcrumb. Never leave hot oil unattended or use water on an oil fire.
Mini cheese and herb quiches: ingredients, method and variations

- Yield: approximately 12 mini quiches in 5–6 cm tins, depending on their depth. Do not overfill; bake excess filling separately in a suitable ramekin.
- Homemade pastry, if not using ready-made: 250 g plain flour. For gluten-free pastry, use a suitable blend and its manufacturer’s pastry guidance rather than assuming identical binding.
- 125 g cold butter, cubed; firm plant-based baking fat is an alternative for the pastry, but the standard filling still contains dairy and eggs.
- 1 egg for the pastry. For an egg-free pastry variation, 1 tbsp ground flaxseed mixed with 3 tbsp water may work, but test the dough and use a suitable egg-free filling too.
- 2–3 tbsp cold water, only as needed to bring the pastry together.
- 200 g grated cheese, such as mozzarella, Gruyère or Cheddar; check vegetarian suitability if needed. A plant-based cheese is one part of a fully vegan adaptation.
- 200 ml cream, or 150 ml whole milk plus 50 ml single cream. A cashew cream made from 100 g cashews and 100 ml water is a different dairy-free alternative; it does not replace the eggs or guarantee the same set.
- 3 large eggs for the filling.
- 1 small onion, chopped and softened in a little cooking oil; a shallot is an alternative.
- 2 tbsp chopped fresh herbs, such as parsley, chives and thyme, or up to 1 tbsp dried herbs, adjusted to taste.
- Salt and black pepper to taste.
- A pinch of nutmeg, optional.
- Butter or oil for greasing the tins.
Method
- Make the pastry: mix the flour with a little salt, then rub in the cold butter until the mixture resembles coarse breadcrumbs.
- Bring together: add the pastry egg and enough cold water to form a dough, handling lightly so the butter stays cool.
- Chill: flatten into a disc, cover and refrigerate for 30 minutes.
- Preheat: heat the oven to 200°C for the pastry cases.
- Cook the onion: soften it in the small amount of cooking oil listed, then set aside to cool promptly.
- Mix the filling: beat the three filling eggs with the cream, then stir in the cheese, herbs, optional nutmeg, seasoning and cooled onion.
- Line the tins: roll the pastry on a lightly floured surface, cut circles slightly larger than the greased tins and press gently into place.
- Pre-bake the cases: prick the bases and line with baking paper and suitable baking weights if needed. Bake for around 6–8 minutes until starting to set, then remove paper and weights. Follow packet guidance if using ready-made pastry.
- Fill: divide the mixture between the cases, filling no more than about three-quarters full. Bake any excess separately.
- Bake: lower the oven to 180–190°C and check from around 15–20 minutes. Continue until the pastry is cooked and the filling is set and steaming hot throughout, reaching 70°C for 2 minutes or 75°C for 30 seconds.
- Unmould and serve: let the quiches settle for around five minutes before removing them carefully. Serve promptly, or cool in shallow containers and refrigerate within 1–2 hours for later use; do not leave them out for the whole party.
Variations
- Spinach and ricotta: replace part of the cheese with 150 g ricotta and add 100 g cooked, well-drained spinach. Check vegetarian suitability and allow for extra filling volume.
- Bacon and Cheddar: add 100 g thoroughly cooked chopped bacon and use Cheddar for some or all of the cheese; do not overfill the cases.
- Sun-dried tomato and rocket: add 70 g chopped, drained sun-dried tomatoes and garnish with washed rocket after baking.
- Gluten-free: use appropriate gluten-free pastry and check every filling ingredient and preparation surface; follow the pastry maker’s baking guidance.
- Vegan adaptation: use egg-free pastry with plant-based baking fat and a separately tested tofu-and-plant-cream filling with nutritional yeast and vegan cheese. Replacing cream alone leaves eggs and dairy cheese in the recipe; tofu is not a direct, quantified swap established by this recipe.
Quick tips
Leave room in the tins: the filling may rise slightly. If the pastry softens or begins to shrink while lining the tins, chill it again for around ten minutes before pre-baking.
Garlic prawns: ingredients, method and variations

Ingredients
- 500 g medium raw prawns, peeled and deveined, fresh or safely thawed according to the packet. For a different plant-based dish, use shiitake mushrooms or drained ready-to-eat hearts of palm, with separate equipment where allergies require it.
- 4 garlic cloves, finely chopped or crushed; roasted garlic gives a milder flavour.
- 4 tbsp (60 ml) olive oil in total, divided between the marinade and pan; half may be replaced with butter if desired.
- 1 tbsp (15 ml) lemon juice, or white wine vinegar.
- 1 tsp lemon zest, optional.
- 1 tbsp chopped fresh parsley, or chives.
- Salt and freshly ground black pepper to taste.
- ½ tsp chilli flakes, optional, adjusted to taste.
- Short food-safe skewers, if using. Follow their instructions if they will be heated; soaking wooden skewers does not make them fireproof. Tasting spoons are an alternative.
Method
- Dry the prawns: pat dry with kitchen paper, then discard it and wash hands and contaminated surfaces.
- Make the marinade: mix 3 tbsp of the oil with the garlic, lemon juice, optional zest, seasoning and chilli. Reserve a little of this mixture in a clean bowl for finishing before adding any raw prawns. Marinate the prawns in the rest for 10–15 minutes in the fridge.
- Prepare portions: thread three or four prawns onto each suitable skewer without packing them tightly, or cook loose prawns for serving on spoons.
- Heat the pan: heat a large frying pan over medium-high heat and add the remaining 1 tbsp oil from the listed total.
- Cook thoroughly: lift the prawns from the marinade and cook in a single layer. Around 1–2 minutes per side may suit small prawns, but cook until steaming hot and opaque throughout; size affects timing. A clean probe can confirm 70°C for 2 minutes or 75°C for 30 seconds.
- Finish the sauce: discard marinade that touched raw prawns. Briefly cook the clean reserved mixture in the pan so the garlic softens, then spoon over the cooked prawns and add the parsley. Do not use raw-contact marinade after only a token 30-second warming.
- Serve promptly: arrange on a platter or tasting spoons with optional lemon wedges. Remove skewers before eating.
- Cook in small batches: this helps preserve texture and lets you serve freshly cooked prawns without long periods on display.
Variations
- Bacon-wrapped: wrap each prawn in a thin strip of bacon and bake at 200°C, checking from around 8–10 minutes. Both bacon and prawns must be thoroughly cooked; browning alone is not enough, and thicker pieces need longer.
- Citrus and honey: add extra zest and finish with ½ tsp honey if desired; do not serve honey to children under one year.
- Piri-piri: add a little piri-piri sauce or hot paprika to the marinade, checking ingredients and adjusting the heat.
- Breaded prawns: use a suitable breadcrumb coating and cook until the centre is thoroughly done, not merely until the crumbs brown. This needs its own tested coating and cooking method rather than an assumed quick fry.
Quick tips
Aim for cooked but succulent prawns: avoid unnecessary extra cooking once the safe endpoint is reached. Make the marinade before handling raw seafood, reserving a clean portion for sauce. For a party, cook small batches; if holding hot, check the food stays at 63°C or above rather than relying only on the oven setting. Identify crustaceans as an allergen and prepare alternatives separately.
A festive cheese and charcuterie board
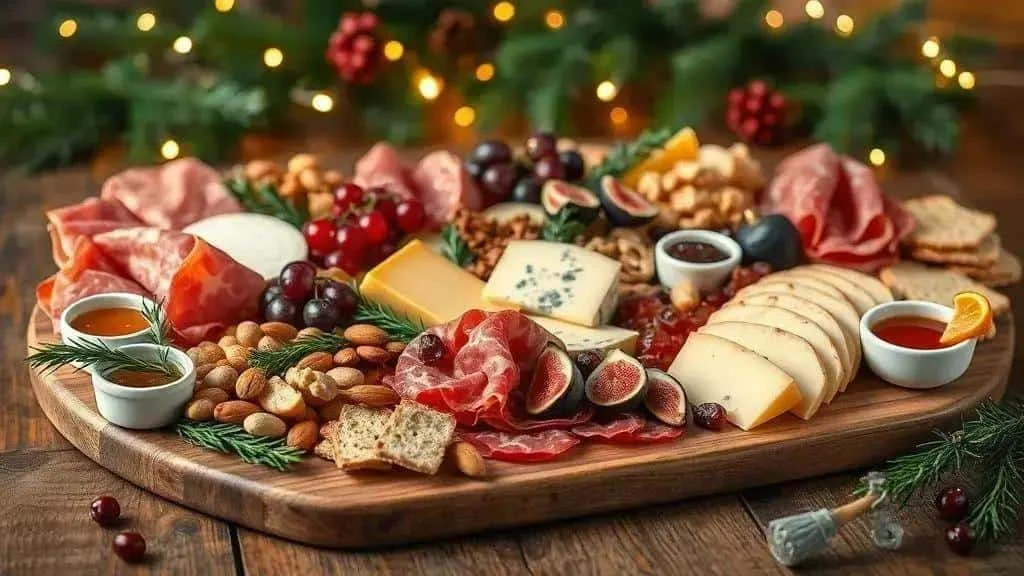
A festive cheese and charcuterie board can combine contrasting flavours, textures and colours. Choose a few cheeses, savoury items and fruit, with separate alternatives for guests who need them.
Choosing the ingredients
- Cheese: choose three or four types, for example 150 g brie, 120 g goats’ cheese, 100 g Parmesan and 150 g Gouda. For pregnant guests, mould-ripened soft or soft blue cheese needs cooking until steaming hot; suitable pasteurised cream cheese or hard cheese offers a simpler cold alternative.
- Cured meats: choose two or three varieties such as prosciutto, salami or coppa. An allowance of 50–80 g of each type for ten people provides only a small tasting portion alongside other food. Pregnant guests should have cured meats cooked until steaming hot or an appropriate alternative.
- Fresh and dried fruit: grapes, figs, pomegranate, dates and dried fruit add sweet or sharp contrasts. Remove stones and adapt shapes for young children.
- Crunch: walnuts, almonds and suitable vegetable crisps add texture. Keep allergen-sensitive alternatives separate and avoid whole nuts for young children.
- Condiments: serve preserves, honey, mustard, pickles or spreads in small dishes with separate utensils. Honey is unsuitable for children under one year.
- Bread and crackers: offer baguette slices, toast and crackers, with separately served gluten-free options if needed.
- Plant-based options: include suitable cheese alternatives, chickpea spreads and nut spreads, checking each product’s allergens.
Arranging the board
- Choose the base: use a clean, dry food-safe board or porcelain platter.
- Place small dishes first: contain preserves, honey and spreads to prevent spills.
- Position the cheese: leave space around each variety for cutting and provide suitable separate knives.
- Add the meats: arrange in small folded groups that guests can lift easily.
- Add fruit and nuts: group by colour, keeping allergy requirements and appropriate child-sized preparation in mind.
- Keep bread convenient: place it in a separate basket or dry section of the platter.
- Add festive details: use food-safe rosemary, washed orange zest or pomegranate seeds for colour and aroma.
Festive presentation
Use festive colours such as green herbs, red fruit and golden nuts. Edible fruit and herbs can decorate the board, but keep non-edible ornaments and decorative greenery away from food.
Serving and labelling
- Temperature: some cheeses taste better after a short 20–30-minute tempering period, but include this in their total time out of refrigeration. Keep reserves chilled and serve perishable food in small batches.
- Portions: around 80–120 g combined cheese and meat per person may suit a substantial starter, and 150–200 g a larger board with bread, fruit and other accompaniments. Adjust to the full menu; the small example quantities above are not a main meal for ten people.
- Labels: identify allergens accurately, including milk rather than only lactose, as well as nuts and any other relevant ingredients.
- Replenishment: replace small platters from chilled reserves rather than leaving the whole supply out.
Dietary adjustments
Provide enough food for each guest’s requirements, including suitable gluten-free choices where needed. A separate vegan board can use plant-based cheese and grilled aubergine instead of meat. Smoked turkey remains meat and is not a vegan substitute; lactose-free dairy is not necessarily suitable for milk allergy.
Final touches
Vary the height with stable bowls and serving stands, and create groups of colour with fruit. Provide enough knives and tongs for guests to serve themselves without mixing utensils between dishes.
Caprese skewers with pesto: ingredients, method and variations
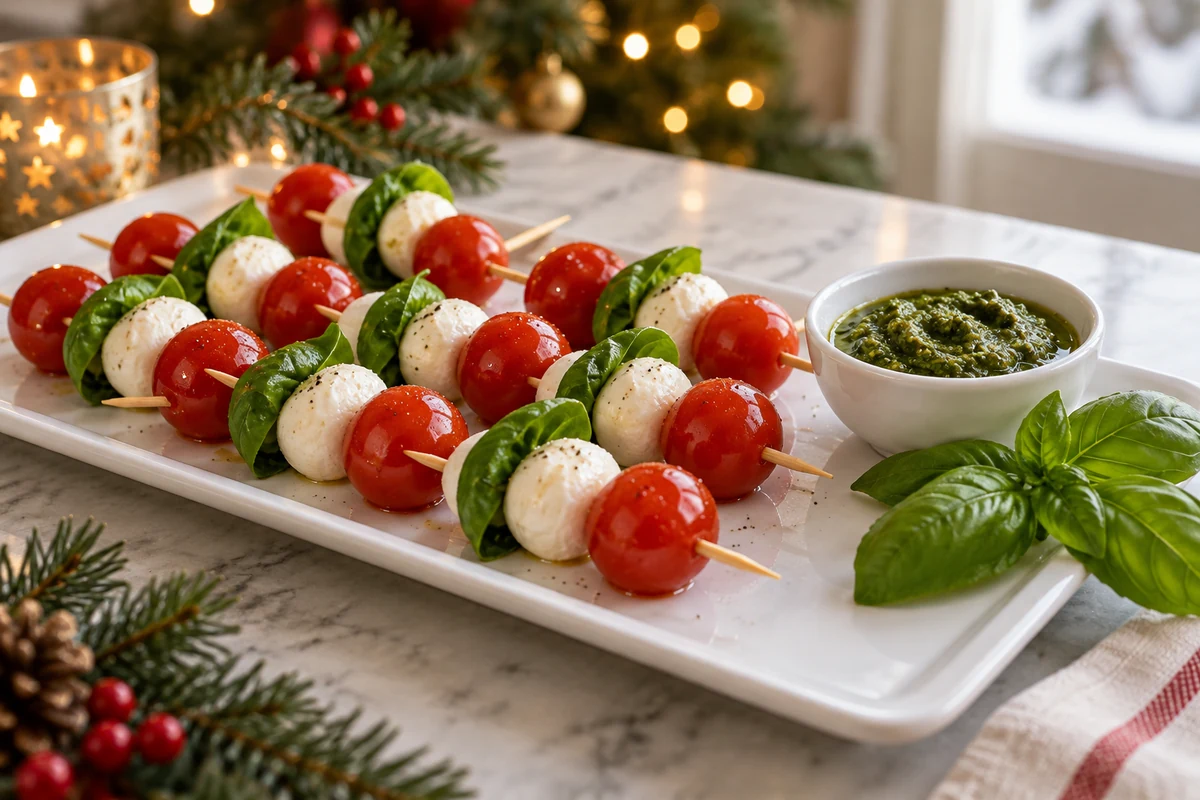
These small tomato, mozzarella and basil skewers are simple to assemble. Keep the ingredients chilled and check pesto and cheese labels for dietary requirements.
Ingredients
- 24 cherry tomatoes, firm and ripe; small plum tomatoes are an alternative.
- 24 small mozzarella pearls, drained; their weight varies by size, so use the count rather than assuming every pack weighs 200–250 g. Plant-based cheese cubes or suitable ready-to-eat marinated tofu can replace them.
- 24 large basil leaves, washed and gently dried.
- 6–8 tbsp pesto, bought or homemade; rocket pesto or a suitable olive spread changes the flavour. Check cheese, nuts and other allergens.
- 2 tbsp extra virgin olive oil for a light drizzle, using only as much as needed.
- Salt and black pepper to taste.
- Balsamic glaze or vinegar, optional: 1–2 tbsp in total.
- 24 small food-safe skewers; use suitable heat-resistant skewers and follow their instructions for any grilled variation. Remove before eating.
Method
- Optional homemade pesto: blend 2 cups basil leaves, ¼ cup pine nuts or walnuts, 1 garlic clove, ½ cup olive oil and ¼ cup grated Parmesan or suitable vegetarian hard cheese. Season to taste, with optional lemon juice. This makes more than the 6–8 tbsp needed; refrigerate the extra promptly and use within its safe storage life. Use vegan cheese or nutritional yeast for a vegan pesto.
- Prepare the ingredients: drain and pat the mozzarella dry, wash the tomatoes and season lightly. For young children, serve without skewers and cut small round foods appropriately rather than leaving whole tomatoes or cheese balls.
- Assemble: thread one tomato, one folded basil leaf and one mozzarella pearl onto each skewer, giving 24 portions.
- Add pesto: spoon a little over each portion or provide a separate dipping bowl. The 6–8 tbsp total supplies about ¾–1 tsp per skewer.
- Finish: drizzle lightly with the listed oil and optional balsamic glaze or vinegar.
- Chill until serving: if assembling up to two hours ahead, cover and refrigerate at 5°C or below. Bring out small batches shortly before eating.
- Optional grilling: suitable skewers can be briefly griddled for colour, but mozzarella may melt quickly. This is a texture variation using ready-to-eat ingredients, not a method for cooking raw meat or seafood.
Variations
- With prosciutto: wrap a small strip around the mozzarella. For pregnant guests, cold cured ham needs thorough cooking until steaming hot or an appropriate alternative.
- Griddled caprese: briefly griddle suitable portions and add pesto afterwards; expect the cheese to soften and watch closely.
- Vegan version: use plant-based mozzarella or suitable marinated tofu and vegan pesto, replacing the Parmesan as well. Check the whole recipe rather than only the main cheese.
- With fruit: replace some tomatoes with grapes or grilled peach pieces; cut grapes lengthways into quarters for young children and serve without sharp sticks.
- Caprese toasts: arrange the toppings on small toasted baguette slices instead of skewers.
Quick tips
Keep ingredients chilled until assembly and choose fresh, unblemished basil. For a larger event, assemble in batches and add pesto near serving time. Label dietary options accurately and keep separate utensils where needed.
Beef croquettes with dipping sauce: ingredients, method and variations

These croquettes use a cooked beef mixture that is chilled, shaped and fried. Moisture and binding matter: make a small test portion before shaping the whole batch, and cook the egg-and-flour centre thoroughly.
Croquette ingredients
- 500 g minced beef, or 400 g safely cooked shredded beef that has not already been reheated. With leftovers, account for their existing storage time and avoid repeated heating stages.
- 1 medium onion, finely chopped.
- 2 garlic cloves, chopped or crushed.
- 2 tbsp vegetable or olive oil for cooking the onion and beef.
- Up to ½ cup (120 ml) tomato sauce, optional; alternatively, dilute 1 tbsp tomato purée in some of the liquid below.
- Up to ½ cup (120 ml) water or stock, added only as needed. Do not automatically add all the liquid: the mixture must become firm enough to shape.
- 2 tbsp plain flour to start, with more only if needed for binding after reducing excess moisture. A suitable gluten-free flour or cornflour behaves differently and needs testing.
- 1 egg for the cooled mixture, separate from the egg used for coating. Replacing this egg alone does not make beef croquettes vegan.
- Salt and black pepper to taste.
- ¼ cup chopped parsley or chives.
- Plain flour, additional beaten egg and breadcrumbs for coating; a gluten-free version needs suitable flour, breadcrumbs and all other ingredients.
- Vegetable oil for frying in suitable equipment.
Dipping sauce ingredients
- ½ cup mayonnaise, preferably commercially prepared; plain yoghurt gives a different, tangier sauce. Check the product rather than assuming an exact cup-to-weight conversion.
- 1–2 tbsp Dijon mustard, adjusted to taste.
- 1 tbsp honey or agave syrup, optional. Honey is unsuitable for children under one year.
- 1 tbsp lemon juice.
- 1 small garlic clove, grated or crushed, optional.
- Chopped parsley or chives to taste.
- Salt and pepper to taste.
Making the croquettes
- Soften the aromatics: heat the 2 tbsp oil in a pan and cook the onion and garlic until softened, stirring to avoid burning.
- Cook the beef: add the mince, break it up and cook thoroughly, not just until its colour changes. Check it reaches 70°C for 2 minutes or 75°C for 30 seconds. If using already cooked shredded beef, keep it chilled to fold into the cooled thickened base later, rather than reheating and cooling it again at this stage.
- Control the moisture: add the optional tomato sauce and only enough water or stock to help the mixture combine. Simmer to reduce excess liquid; it should not be soupy.
- Thicken: stir in the flour and cook it thoroughly while stirring, continuing until the mixture is thick. If using cornflour, first blend it with a little of the measured cold liquid. Different flours and moisture levels may require adjustment.
- Season: add salt, pepper and herbs. Taste only once the meat and flour are thoroughly cooked, before adding raw egg later.
- Cool and add the binder: spread in a shallow container and cool promptly, refrigerating within 1–2 hours. Once cool, mix in the binding egg and, if using, the cold cooked shredded beef. Refrigerate for at least an hour until firm enough to shape; keep within the oldest ingredient’s storage life.
- Shape: with clean, lightly oiled hands, form small croquettes, around 30 g each. If the mixture cannot hold its shape, adjust the binding and cook a test portion before continuing.
- Coat: roll in flour, then the additional beaten egg, then breadcrumbs. Use suitable gluten-free equivalents where required and keep waiting batches chilled.
- Fry thoroughly: heat the frying oil to 170–180°C and cook small batches until golden and steaming hot in the centre. A 2–4-minute estimate is not a guarantee; check 70°C for 2 minutes or 75°C for 30 seconds. Drain on kitchen paper.
- Serve freshly cooked: bring out small batches and hold hot reserves at 63°C or above if necessary. The cooked, cooled meat has been reheated during frying, so do not plan another cooling-and-reheating cycle for the finished croquettes.
Making the dipping sauce
- Mix the base: stir the mayonnaise, mustard, optional honey or agave and lemon juice together.
- Add flavour: mix in the optional garlic and herbs, then season to taste.
- Adjust the texture: a small splash of water or spoonful of yoghurt can thin it if needed. Adjust the acidity or sweetness cautiously.
- Chill: cover and refrigerate for at least 15 minutes before serving, keeping spare sauce chilled and observing the shortest ingredient storage limit.
Variations
- Cheese-filled: enclose a small cheese cube when shaping, then ensure the centre is thoroughly heated during cooking.
- Baked: brush with a little oil and bake at 200°C, turning halfway. Start checking after around 15–20 minutes and continue to the same safe centre temperature; the texture will differ from frying.
- Plant-based adaptation: use a tested lentil-and-potato or chickpea mixture instead of beef, with an appropriate binder and vegan coating. Both binding and coating eggs need replacing, as do mayonnaise and honey in the sauce where used. Test a small batch because this is not an identical swap.
- Shredded beef: use safely stored cooked beef that has not already been reheated, adding it cold to the cooled base as described above, then heat thoroughly during the final cooking stage.
Quick tips
Test one portion: cook a small croquette fully to check flavour and binding before shaping the remainder. Measure the oil temperature and check the centre so the coating does not brown while the filling remains undercooked. Label allergens and keep adapted batches separate.
Smoked salmon canapés: ingredients, method and variations

These canapés combine smoked salmon, a creamy topping and a simple base. Cold-smoked fish needs particular care for pregnant guests and others at increased risk of listeriosis; offer a thoroughly cooked alternative where appropriate.
Ingredients
- 24 blinis or crackers, or small toasts. Prepare blinis according to their packet; they are soft pancakes, not necessarily crisp crackers.
- 200 g smoked salmon, cut into thin strips. A plant-based carrot or beetroot alternative changes the flavour; a fully vegan version also needs suitable cream and bases.
- 150 g cream cheese, kept refrigerated and stirred until spreadable; suitable plant-based cream cheese is a dairy-free alternative.
- 2 tbsp soured cream or plain yoghurt, optional, to loosen the cheese. Use a suitable dairy-free product if required.
- 2 tbsp capers, drained and rinsed if very salty; finely diced pickled cucumber is an alternative.
- 1 lemon, washed, for zest and a little juice.
- ¼ cup chopped fresh dill, or parsley.
- Black pepper and a little olive oil to finish.
Method
- Prepare the bases: cook or heat blinis if the packet requires it, then cool. Arrange the ready-to-eat bases on a clean platter.
- Mix the cream: stir the cream cheese with the optional soured cream or yoghurt until spreadable, without leaving it warm for a prolonged period.
- Season: add half the dill and a little pepper. Taste before adding extra salt, as the fish and capers are already salty.
- Spread the bases: divide the cream mixture between the 24 bases in a thin layer, using roughly a teaspoon or a little more according to their size.
- Add the salmon: divide the strips between the canapés, folding them loosely rather than piling them too high.
- Finish: add the capers, lemon zest, a little lemon juice to taste, a light drizzle of oil and the remaining dill.
- Serve chilled: keep covered in the fridge until shortly before serving, then bring out small batches.
- Prepare ahead: the cream can be mixed ahead and kept chilled. If spreading bases up to two hours ahead, refrigerate them and expect some softening; add fish and garnishes close to serving.
Variations
- With cucumber: add a thin washed cucumber slice between the cream and salmon.
- With quail egg: top with half a fully cooked quail egg, with both white and yolk set.
- Sweet-savoury: add a small amount of chilli jam or sweet-and-sour sauce beneath the salmon.
- Hot version: if serving cooked smoked fish, heat until steaming hot throughout rather than merely taking the chill off. Brief warming alone does not meet the advice for pregnant or otherwise vulnerable guests.
Quick tips
Use thin fish slices for easy eating. Assemble close to serving to protect the bases. Identify fish, milk and any other allergens; a lactose-free dairy product can still contain milk protein.
Cheese and herb bites: ingredients, method and variations
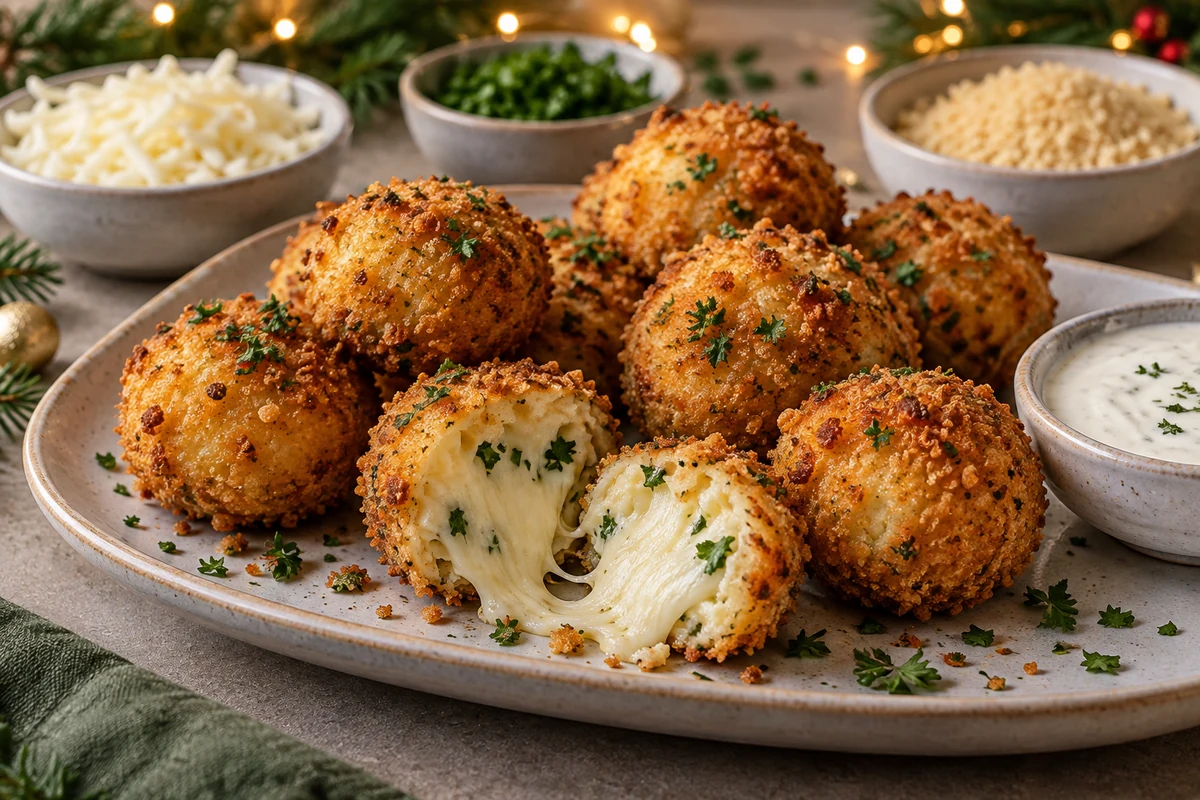
These small cheese bites can be fried or baked. Make a test portion first, as moisture and melting behaviour vary between cheeses and substitutes.
Ingredients
- 500 g grated mozzarella, preferably a low-moisture variety. A 400 g mixed-cheese version is a different ratio and needs its binding tested rather than being treated as an exact substitute.
- 2 tbsp grated Parmesan, or a suitable vegetarian hard cheese. Nutritional yeast is an option only as part of a fully plant-based adaptation.
- 2 eggs to bind the mixture. Egg-free versions need a suitable binder and a trial batch; replacing two eggs with an arbitrary single flax mixture may not give the same result.
- ½ cup (about 60 g) plain flour, adjusted to the mixture’s texture; a suitable gluten-free blend can be tested where needed.
- ¼ cup chopped parsley and chives, or up to 1 tbsp dried herbs, adjusted to taste.
- 1 tsp dried oregano.
- Salt and black pepper to taste; cheese may already provide enough salt.
- Vegetable oil for frying, or a little olive oil for baking.
- Breadcrumbs for coating, such as panko or suitable gluten-free crumbs.
Method
- Combine the cheese and herbs: mix the grated mozzarella, Parmesan or alternative hard cheese, chopped herbs and oregano.
- Add the eggs: lightly beat them and stir into the cheese mixture.
- Add flour gradually: mix in enough to allow small portions to hold together. Chill for around ten minutes if needed. Do not taste the uncooked egg-and-flour mixture.
- Shape: with clean, lightly oiled hands, form small balls of around 20–25 g each.
- Coat: roll in breadcrumbs, pressing gently so they adhere. Keep waiting batches refrigerated.
- Fry: heat suitable frying oil to 170–180°C and cook small batches. Start checking from around 2–3 minutes, but continue until the coating is golden and the centre is fully cooked, reaching 70°C for 2 minutes or 75°C for 30 seconds. Drain on kitchen paper.
- To bake: brush lightly with oil and bake at 200°C, turning carefully halfway. Check from around 12–15 minutes and continue until fully cooked to the same centre-temperature standard; the cheese and portion size affect timing.
- Serve: bring out small fresh batches with dips served separately.
Variations
- Cheese-filled: enclose a small cube of cheese while shaping, without making the bites so large that the outside browns before the centre cooks.
- Citrus herbs: add a little washed lemon zest to the mixture.
- With bacon: add thoroughly cooked, promptly cooled chopped bacon. Account for its previous cooking and storage when planning the final heating stage.
- Vegan adaptation: replace both cheeses, the eggs and any non-vegan coating ingredients. Choose a tested plant-based cheese-and-binder combination: different products melt and bind differently, so a direct swap is not guaranteed.
- Gluten-free: use suitable flour and breadcrumbs, check all seasonings and prevent cross-contact during preparation and frying.
Quick tips
Chill a soft mixture before shaping and cook one test portion fully. Fry small batches to keep the oil temperature stable. If preparing ahead, cook fully, cool promptly and refrigerate, then reheat only once until steaming hot throughout; do not partially cook egg-and-flour bites for finishing later.
Walnut and date spread: ingredients, method and variations
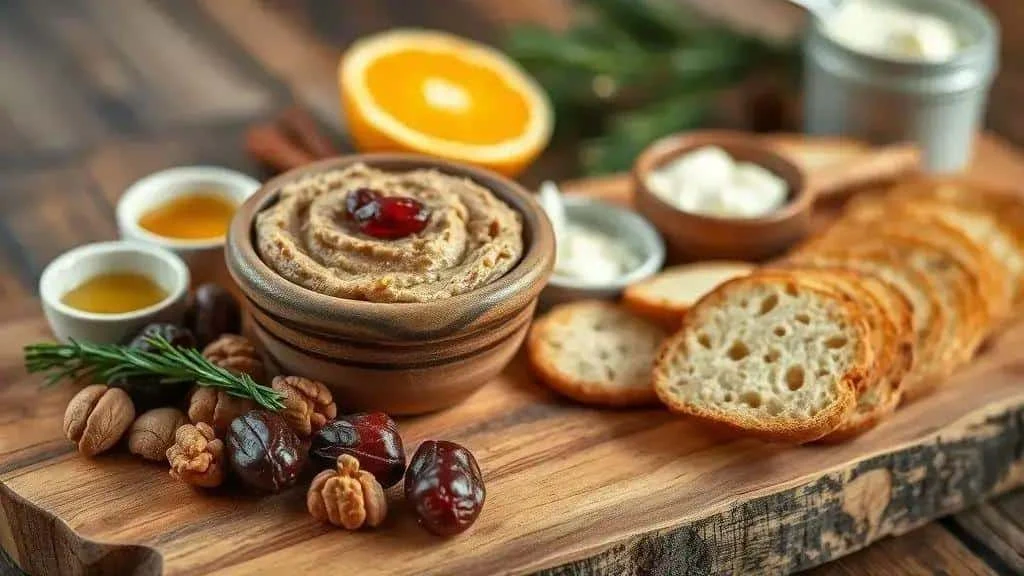
Walnut and date spread is a creamy sweet-savoury topping for toast, crackers or vegetable sticks. It contains nuts and may contain dairy, depending on your choice of ingredients.
Ingredients
- 200 g walnuts, lightly toasted; almonds or Brazil nuts give a different flavour. Check guests’ allergies before choosing a substitute.
- 180–200 g pitted dates, such as soft Medjool dates; alternatively, try 150 g rehydrated dried apricots for a different sweetness and texture.
- 2 tbsp (30 ml) extra virgin olive oil, or sunflower or avocado oil.
- 2 tbsp cream cheese, or 100 g prepared smooth cashew cream. These alternatives have different volumes and textures, so add water only as needed. A suitable plant-based cream cheese is another dairy-free option.
- 1 tbsp (15 ml) lemon juice, or mild cider vinegar.
- 1 small garlic clove, optional, or up to ½ tsp garlic granules.
- ¼ tsp salt, adjusted to taste.
- Freshly ground black pepper to taste.
- 1–2 tbsp water, only if needed for texture.
- Optional: 1 tsp orange zest and ¼ tsp cinnamon for a festive flavour.
Method
- Toast the nuts: stir them in a dry frying pan over medium heat for around 3–5 minutes until aromatic, watching closely, then cool.
- Prepare the dates: check for stones. If very dry, soak in warm water for ten minutes, then drain well.
- Chop the nuts: pulse in a food processor until coarsely ground.
- Blend the spread: add the dates, cream cheese or cashew cream, oil, lemon juice and optional garlic. Process until combined and reasonably smooth.
- Adjust thickness: add the water a little at a time if necessary, stopping when the spread is creamy rather than runny.
- Season: add salt, pepper and optional orange zest and cinnamon, then briefly blend again.
- Taste: use a clean spoon and adjust the seasoning or lemon cautiously.
- Chill: transfer to a covered container and refrigerate for at least 30 minutes before serving.
- Serve: spoon into a small bowl with optional chopped nuts and orange zest, alongside toast, crackers or washed vegetable sticks.
Variations
- Blue cheese: add 50 g crumbled blue cheese for a salty contrast. A cold spread made with soft blue cheese is not suitable for pregnant guests unless the cheese has been appropriately cooked until steaming hot; choose a suitable alternative for them.
- Vegan version: use suitable cashew cream or plant-based cream cheese and no dairy. Optional maple syrup or molasses adds sweetness, but the dates may already be sweet enough. This is not automatically a lower-fat spread.
- Festive spices: add ¼ tsp nutmeg and a pinch of ground cloves if desired.
- With port: soak the dates in 2 tbsp port for 15 minutes, then drain before blending. Alcohol remains in this uncooked version; omit it for guests avoiding alcohol.
- Individual portions: serve in small cups with a little chopped nut garnish. Honey is optional only for non-vegan versions and must not be given to children under one year.
Quick tips
Texture: aim for a spreadable paste, adding water gradually. Preparing ahead: make up to 24 hours in advance and keep covered at 5°C or below, within the shortest ingredient storage limit. Allergens: identify nuts and any dairy. A sunflower-seed alternative needs checking with the guest and separate preparation; seeds are not universally allergy-safe.
Mini baked pasties: ingredients, method and variations

These mini baked pasties are inspired by Brazilian pastelzinhos de forno. Choose one filling or divide the dough between smaller quantities of several fillings; the alternatives below are not all required for one batch.
Ingredients: approximately 24, depending on size
- Homemade pastry: 500 g plain flour. For a gluten-free version, choose a suitable pastry blend or ready-made pastry and follow its instructions for binding.
- 125 g cold butter, cubed; firm plant-based baking fat can replace it for a dairy-free pastry.
- 1 egg for the dough. An egg-free dough can be tested with 1 tbsp ground flaxseed mixed with 3 tbsp water, or use suitable ready-made egg-free pastry.
- 120 ml cold water, added gradually as needed.
- 1 tsp salt for the pastry.
- Beef filling option: 400 g minced beef, ½ chopped onion, 2 garlic cloves, up to ½ cup (120 ml) tomato sauce, a little cooking oil as needed, salt and pepper. Reduce excess moisture before filling the pastry.
- Chicken filling option: 400 g fully cooked shredded chicken that has not already been reheated, ¼ cup Brazilian requeijão or cream cheese, ½ onion softened in a little oil and cooled, plus parsley.
- Cheese filling option: 300 g grated mozzarella or mixed cheese with 1 tbsp requeijão or cream cheese. A dairy-free version needs both components replaced, as well as dairy-free pastry.
- Vegetable filling option: 300 g cooked, well-drained courgette, carrot and peas with 100 g ricotta or suitable seasoned tofu. Tofu can make the filling vegan only when the pastry and glaze are also suitable.
- A little flour or cornflour for rolling, suitable for the chosen pastry.
- 1 additional beaten egg for glazing, or suitable plant-based milk for an egg-free or vegan version.
- Optional breadcrumbs for a textured edge; check dietary suitability.
Method
- Make the pastry: mix flour and salt, then rub in the cold butter until the mixture resembles coarse breadcrumbs.
- Bring together: add the dough egg and cold water gradually, handling lightly until combined. If using ready-made pastry, follow its preparation instructions instead.
- Chill: flatten into a disc, cover and refrigerate for 30 minutes.
- Prepare the chosen filling: cook mince thoroughly and reduce its sauce; cook vegetables until tender and drain. Cool cooked fillings promptly in shallow containers, refrigerating within 1–2 hours. For chicken, mix the safely chilled cooked meat with cooled onion and cream cheese without reheating it at this stage. Keep all fillings chilled until assembly.
- Roll and cut: roll pastry about 2–3 mm thick on a lightly floured surface and cut 8–10 cm circles. The exact yield depends on the size and thickness.
- Fill and seal: add a small amount of filling, starting with about 1 tbsp and using more only if the circle closes easily. Leave a clear border, moisten with a little water or suitable glaze, fold into a half-moon and press the edges with a fork.
- Glaze and vent: make a small slit in the top and brush with the additional beaten egg or suitable plant-based milk. Add optional crumbs to the edge if desired.
- Bake: space on a lined tray and bake at 200°C, checking from around 18–25 minutes. Continue until the pastry is cooked and the filling is steaming hot throughout, reaching 70°C for 2 minutes or 75°C for 30 seconds where applicable. Browning alone does not confirm the centre is hot.
- Rest briefly: let the pasties settle for a few minutes before serving; fillings can be very hot.
- Storage and reheating: cool leftovers promptly and refrigerate within 1–2 hours, using within 48 hours or the oldest ingredient’s shorter limit. Only reheat food once: meat fillings cooked, cooled and heated during baking have already been reheated. Do not give those pasties another reheating cycle; a fixed five-minute warming is not a safety check.
Variations
- Part-wholemeal pastry: replace half the plain flour with wholemeal flour and adjust water cautiously, as absorption changes.
- Puff pastry: use ready-made puff pastry for a flakier result. Follow the packet and cook until both pastry and filling are ready; 12–18 minutes may not be enough for every size.
- Gluten-free: use a pastry blend or prepared pastry designed for the purpose. Follow the manufacturer’s binder instructions; do not automatically add an extra tablespoon of xanthan gum, especially to a blend that already contains it.
- Vegan: use egg-free pastry with plant-based fat, a cooked seasoned jackfruit or tofu filling, and plant-based milk for the glaze. Check any optional coating too.
- Sweet filling: try a modest amount of dulce de leche, banana with cinnamon or jam. Avoid overfilling and allow the hot filling to cool slightly before eating.
Tips and troubleshooting
- Drain fillings well: excess sauce or vegetable liquid can make the pastry soggy or cause it to split.
- Seal firmly: keep filling away from the edge and press or crimp the border securely.
- Bake one test pasty: check the seal, pastry thickness and centre temperature before baking the full batch.
- Freezing ahead: freeze assembled unbaked pasties with safely prepared cold fillings, separated by baking paper. Use a suitable tested cook-from-frozen method and verify the centre; an extra 5–8 minutes is not a reliable universal allowance.
- Serving: use small platters and offer chimichurri, tomato sauce or seasoned mayonnaise separately, keeping perishable dips chilled.
Mini roast pork sandwiches: ingredients, method and variations

These mini roast pork sandwiches use shredded Brazilian-style pernil, meaning roast pork leg, with onions and a creamy spread. They are a more substantial option for a festive buffet.
Ingredients: around 24 small sandwiches
- 24 mini rolls or small brioche buns, or suitably sized ciabatta rolls.
- 1.2 kg fully cooked roast pork leg, shredded and safely stored, not previously reheated. Follow the packet if using bought cooked pork.
- 2 medium onions, thinly sliced; pickled red onions can replace the caramelised onions for a sharper flavour.
- 200 g requeijão, cream cheese or seasoned mayonnaise. Choose a suitable dairy-free spread if needed and check the rolls and cooking fat too.
- 100 g sliced pickles, or thin fresh cucumber slices.
- 50 g rocket or other salad leaves, washed and dried, such as watercress or lettuce.
- 2 tbsp butter in total, divided between onions and rolls; a suitable plant-based fat is a dairy-free alternative, but the pork sandwich remains a meat dish.
- 1 tbsp chimichurri or suitable herbs in total, divided between pork and spread. Start with less if using strongly flavoured dried herbs.
- Salt and black pepper to taste.
- Optional toppings: 150 g Cheddar or mozzarella and up to 100 ml barbecue sauce.
Method
- Heat the pork: season the shredded cooked pork with about 2 tsp of the chimichurri or herbs and heat once until steaming hot throughout, checking 70°C for 2 minutes or 75°C for 30 seconds. Keep at 63°C or above if holding briefly for service.
- Cook the onions: use 1 tbsp of the butter to cook the onions gently until soft and golden. Start checking around 12–15 minutes, allowing longer for deeper caramelisation without burning.
- Mix the spread: stir the remaining approximately 1 tsp chimichurri or herbs into the requeijão, cream cheese or mayonnaise with a little pepper. Keep chilled until assembly.
- Toast the rolls: split them, brush lightly with the remaining 1 tbsp butter and toast the cut sides until lightly golden, watching closely.
- Assemble: divide the spread, pork, onions, pickles and rocket between the 24 rolls. Using all the listed pork gives about 50 g per sandwich; use less if the rolls are very small and keep any unused pork safely hot for immediate service.
- Add optional cheese: place it over the hot pork and melt briefly before adding chilled salad ingredients and closing the roll. This is part of the same serving stage, not a further cooling-and-reheating cycle.
- Serve promptly: arrange in small batches. If using cocktail sticks, remove them before eating and avoid them for young children.
- Preparing ahead: shred safely cooked pork and prepare onions ahead, cooling and refrigerating promptly within their storage limits. Reheat once for service and assemble close to eating, rather than leaving completed sandwiches warm for a long period.
Variations
- Sweet-savoury: divide a little of the optional barbecue sauce between the sandwiches; it pairs with Cheddar if used.
- Spicy: add a little chilli to the spread or offer a separate mild chilli sauce.
- Vegetarian: replace pork with cooked mushrooms or prepared jackfruit seasoned with chimichurri, and check sauces and any cheese. A vegan version also needs suitable rolls, fat and spread.
- Gluten-free: use suitable mini rolls and check sauces, seasonings and pickles, with separate preparation surfaces and utensils.
- Small tasting portions: serve pork, onion and rocket in suitable little dishes with forks instead of rolls, assembling just before serving.
Quick tips
Avoid soggy rolls: drain wet fillings and assemble shortly before eating. Serve freshly heated pork and keep hot reserves at 63°C or above; do not repeatedly warm sandwiches that have already cooled.
Pear and Gorgonzola bruschetta — ingredients, method and variations

- 12 slices of Italian bread or baguette – cut 1–1.5 cm thick. Alternatively, use suitable gluten-free bread or grilled pear slices as the base.
- 2 firm, ripe pears – thinly sliced; tart apple is an alternative. If pan-frying the fruit, you will also need a little butter or suitable plant-based fat.
- 150 g Gorgonzola – crumbled. For a vegan version, choose plant-based blue-style cheese or a cashew spread flavoured with nutritional yeast.
- 3 tablespoons honey – for drizzling, to taste; use maple or agave syrup for a vegan version. Do not give honey to babies under one year.
- 50 g chopped walnuts – lightly toasted; almonds or pistachios are alternatives, but are also tree nuts.
- 1 tablespoon extra virgin olive oil – for toasting the bread.
- 1 teaspoon lemon zest – optional, for a fresh finish.
- Freshly ground black pepper to taste.
- Balsamic glaze, optional – start with a few drops on each bruschetta and adjust to taste; it should complement rather than swamp the topping.
Method
- Toast the bread: brush with the olive oil and toast in a frying pan or an oven at 200°C for roughly 4–6 minutes, until lightly golden.
- Prepare the pears: wash, core and thinly slice. If you prefer softer fruit, briefly pan-fry in a little butter or plant-based fat until lightly coloured.
- Prepare the cheese: crumble the Gorgonzola into fairly even pieces using clean hands or a knife.
- Assemble: divide the pear, cheese and chopped walnuts between the toasts. During pregnancy, soft blue cheese such as Gorgonzola should only be eaten after cooking until steaming hot throughout: bake the assembled toasts thoroughly, rather than merely softening the cheese.
- Finish: drizzle with honey or maple syrup to taste, add lemon zest and pepper, and finish with a little balsamic glaze if using.
- Serve: arrange on a platter and serve promptly while the bread is crisp.
Variations
- Vegan: use suitable plant-based cheese, maple syrup and bread, with plant-based fat if cooking the pears. Toasted nuts add texture where suitable for your guests.
- Sweet and savoury with cured ham: add a thin slice before the final drizzle. During pregnancy, cook cured ham until steaming hot throughout as well as following the cheese guidance above.
- With preserve: replace the honey with a little fig or apricot preserve, adjusting the amount to its sweetness.
- Gratin finish: add a thin layer of grated Parmesan or vegetarian hard cheese and bake until golden. For guests who need the cheese thoroughly cooked, browning the surface alone is not enough.
Quick tips
Assemble shortly before serving so the bread does not soften. Firm pears hold their shape well. Toast bread ahead and store separately from chilled toppings, then assemble just before serving or baking. Adjust the honey to the sweetness of the fruit and cheese.
Chocolate-dipped fruit skewers — ingredients, method and variations

These chocolate-dipped fruit skewers bring colour to a party platter, with straightforward preparation and several possible variations.
Ingredients
- 300 g strawberries – washed and dried thoroughly; raspberries are a more delicate alternative.
- 2 medium bananas – cut into thick slices; alternatively use sliced apple, with a little lemon juice if needed to limit browning.
- 2 kiwis – peeled and cut into slices or quarters; sliced peach is another option.
- 200 g seedless grapes – choose firm fruit; blueberries are an alternative. For young children, cut grapes and other small round fruit into quarters lengthways and serve without skewers.
- 200–250 g dark or milk chocolate – chopped. For a vegan or milk-free version, check the ingredients and allergen information rather than assuming dark chocolate is suitable.
- Up to 2 tablespoons coconut oil, optional – add only a little at a time if a thinner coating is wanted. Added oil makes the set coating softer; butter and cream are not direct substitutes for a firm chocolate shell.
- Short wooden skewers – this recipe does not involve grilling, so there is no need to soak them. Serve young children’s fruit in a bowl without sharp sticks.
- Optional toppings: sprinkles, finely chopped nuts, desiccated coconut or a little flaky sea salt, as suitable for your guests.
Method
- Prepare the fruit: wash, dry thoroughly and cut into manageable pieces of similar size. Adjust the shape and size for children’s age and eating ability.
- Assemble: alternate the fruit colours and textures, leaving enough clear handle to hold safely. Do not overcrowd the skewers; serve portions without sticks for young children.
- Melt over water: put the chopped chocolate in a dry heatproof bowl over gently simmering water, with the bowl clear of the water. Stir gently and keep water and steam out of the chocolate. If needed, add coconut oil gradually until the coating is fluid enough.
- Microwave alternative: melt at reduced power in short intervals of about 20 seconds, stirring each time to prevent scorching. Add a little coconut oil only if wanted.
- Coat the fruit: hold each skewer securely and partly dip the fruit into the chocolate, or spoon chocolate over it.
- Add toppings: sprinkle on suitable sprinkles, finely chopped nuts or coconut before the coating sets. Do not give whole nuts to children under five.
- Leave to set: place on baking paper on a tray and refrigerate until firm enough to handle, starting with 10–15 minutes. Setting time and firmness depend on the chocolate and any added oil.
- Keep chilled: store covered in the fridge at 5°C or below for up to 24 hours, and bring out small batches shortly before serving. Removing them early does not reliably prevent condensation, especially in a warm room.
- For bananas and apples: a light brushing of lemon juice can slow browning, but pat the surfaces dry before coating: water can make melted chocolate seize. Alternatively, cut these fruits just before assembling.
Variations
- With marshmallows: alternate fruit with marshmallows for older guests. Marshmallows are a choking risk for young children, and those containing gelatine are unsuitable for vegetarians or vegans.
- Crunchy topping: scatter suitable finely chopped toasted nuts or granola over the soft chocolate, checking allergens and age suitability.
- Tropical: use mango and pineapple with desiccated coconut and white chocolate; check for milk and other allergens.
- Vegan: use verified vegan chocolate, suitable fat and plant-based toppings. Seeds and dried fruit are possibilities, but still need checking against guests’ allergies and children’s needs.
- Festive flavour: add finely grated orange zest or a little cinnamon to the chocolate.
Quick tips
Dry the fruit thoroughly before dipping, and keep water out of melted chocolate. Work in small batches and use baking paper to keep the skewers separate as the coating sets.
Presentation tips and adapting recipes for allergies

Thoughtful presentation makes party food inviting and helps guests choose. Combine contrasting colours and textures with clearly labelled individual portions where practical.
Visual principles
- Colour: combine light and dark foods, such as white cheese and red fruit.
- Different heights: use stable bowls and purpose-made serving stands that guests can reach easily, keeping hot dishes and sharp skewers secure.
- Texture: include crisp, creamy and refreshing bites for variety.
- Individual portions: small dishes and cases can make eating while standing easier. Provide forks where appropriate and keep sharp sticks away from young children.
Practical organisation
- Group hot, cold and sweet dishes separately to make the buffet easier to navigate.
- Provide dedicated serving utensils for each dish, including tongs for cold foods and spoons for spreads. Do not share them between foods with different allergen requirements.
- Put out small amounts and replenish from safely stored reserves. Hold hot food at 63°C or above, and keep chilled reserves at 5°C or below; a warm-looking platter is not a temperature check.
Adapting recipes for allergies
Plan around each guest’s actual allergies and requirements. A substitution or a vegan label does not automatically make a dish safe: check every ingredient, its packaging and how the food is prepared and served.
- Identify relevant allergens: these recipes may contain cereals containing gluten, milk, eggs, nuts, fish, crustaceans or molluscs, among others. Sauces and seasonings can also contain allergens such as soya, mustard, celery, sesame or sulphites. This is not an exhaustive checklist.
- Choose suitable replacements: gluten-free flour blends, plant-based drinks and cheeses, or egg substitutes may work in particular recipes. Check whether the substitute introduces another allergen, and use a recipe suited to it rather than assuming a universal one-for-one swap.
- Prepare separate versions: when feasible, make clearly identified portions for guests with particular requirements, using ingredients and preparation arrangements agreed with them.
- Prevent cross-contact: clean surfaces and equipment thoroughly, use separate utensils, trays and serving dishes, and avoid shared frying oil contaminated by unsuitable foods. Do not claim a dish is allergen-free unless you can support that claim.
- Trial the recipe: a small batch helps check flavour and texture after substitutions. Tasting cannot establish that a food is safe for someone with an allergy.
Practical substitution ideas
- Gluten: suitable rice flour, a gluten-free flour blend or gluten-free breadcrumbs may work, depending on the recipe. Check other ingredients and prevent cross-contact too.
- Milk: suitable vegan cream cheese, coconut yoghurt or cashew cream can add creaminess, but cashews introduce a nut allergen and products vary. Lactose-free dairy still contains milk proteins and is not a substitute for a milk allergy.
- Eggs: 1 tablespoon ground flaxseed mixed with 3 tablespoons water is sometimes used in place of one egg for binding; fruit purée can work in some sweet bakes. These are not universal replacements for quiche custard, coatings or other egg-dependent recipes.
- Nuts: toasted sunflower or pumpkin seeds may provide crunch if suitable for the guest, but seeds can also cause allergies. Check ingredients and cross-contact information rather than describing them as allergen-free.
- Fish and shellfish: seasoned mushrooms or prepared shredded jackfruit can offer a different savoury texture in some recipes; they are not nutritionally equivalent substitutes.
Clear, helpful communication
- Labels: use readable dish names and written allergen information. Colours or icons can supplement the wording, but should not replace it. Keep labels separate from the food.
- Ingredient details: retain packaging and a list of the ingredients and substitutions used, so guests can make informed decisions.
- Suitable choices: provide options that match the people attending. One gluten-free dish and one vegan dish will not necessarily cover every allergy or dietary requirement.
Final tips
Plan ahead to trial substitutions and judge quantities. Keep food at safe temperatures and the serving area clean, with clear labels and separate utensils, so guests can enjoy the buffet with confidence.
We hope these ideas help you plan a varied Christmas spread. Choose recipes that suit your guests, prepare manageable quantities and make the final assembly as straightforward as possible.
Thank you for reading! Follow us on social media for more festive recipes and ideas, and visit the I Love Christmas blog for more Christmas inspiration.
Share your photos and experiences — we would love to see your festive spread. Happy Christmas!
Christmas party food FAQ
How many party food pieces should I allow per person?
As a starting point, allow around 6–8 small pieces per adult before a meal. Around 10–12 pieces or 150–200 g may suit a light spread, but is not a reliable allowance for a full meal: adjust for portion size, the menu, appetites and the length of the event.
How should I adapt recipes for guests with allergies?
Ask about their specific requirements, check every ingredient and prevent cross-contact with clean, separate equipment and serving utensils. Label dishes clearly. Vegan, gluten-free and lactose-free describe different things and do not automatically mean a dish is safe for a particular allergy.
Which foods can I prepare ahead?
Quiches, spreads, some cooked fillings and separately packed cheese-board ingredients can be prepared ahead. Cool cooked foods promptly, refrigerate at 5°C or below and generally use within 48 hours, or sooner where the recipe, ingredient or use-by instructions require. Reheat cooked food only once until steaming hot throughout. Leave frying and assembly on crisp bases until close to serving.
How can I keep party food crisp?
Serve small batches and replenish regularly. Keep wet toppings separate from bread bases until assembly, and hold hot reserves at 63°C or above using suitable equipment. A low oven setting alone does not establish that the food is being held safely.
What can I use instead of seafood or nuts?
Mushrooms or prepared jackfruit can replace seafood for texture in some recipes, while suitable toasted seeds may replace nuts for crunch. Check the complete recipe and the guest’s requirements: these swaps are not automatically allergen-free or nutritionally equivalent.
Sources and Further Reading
- NHS: foods to avoid during pregnancy
- UK Government: cooking and reheating food
- UK Government: chilling and defrosting food safely
- NHS: foods to avoid for babies and young children
- Norwegian Seafood Council: desalting salt cod