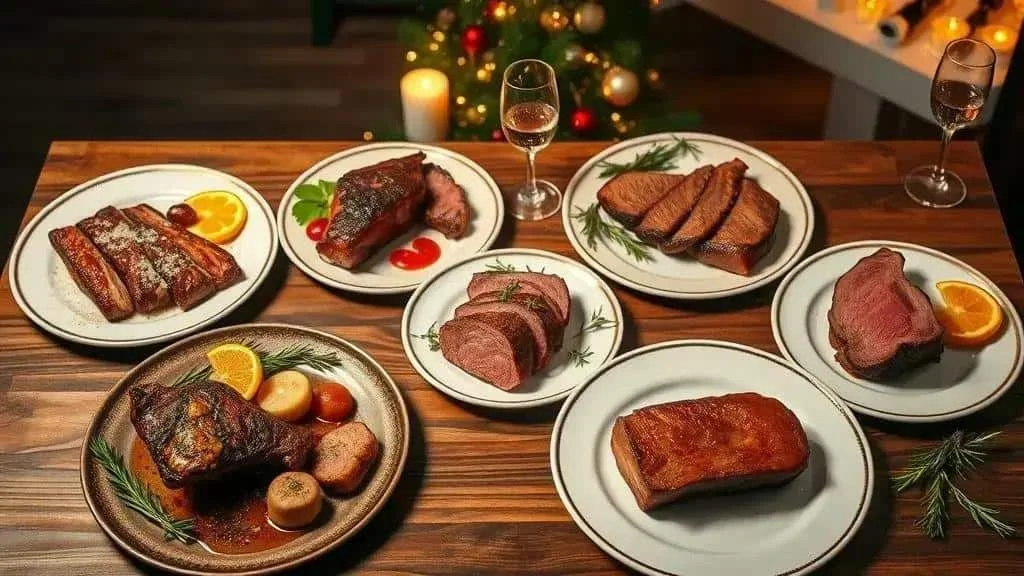
Five New Year’s Eve meat recipes: roast picanha, citrus-marinated pork leg, glazed ham, beef fillet in red wine sauce and rack of lamb. Find ingredients, preparation steps, variations and practical advice on portions, cooking and serving your festive meal.
These New Year’s Eve meat recipes offer five flavoursome centrepieces, with preparation advice and variations to help you plan your celebration. Which would you choose?
Choosing Meat for New Year’s Eve
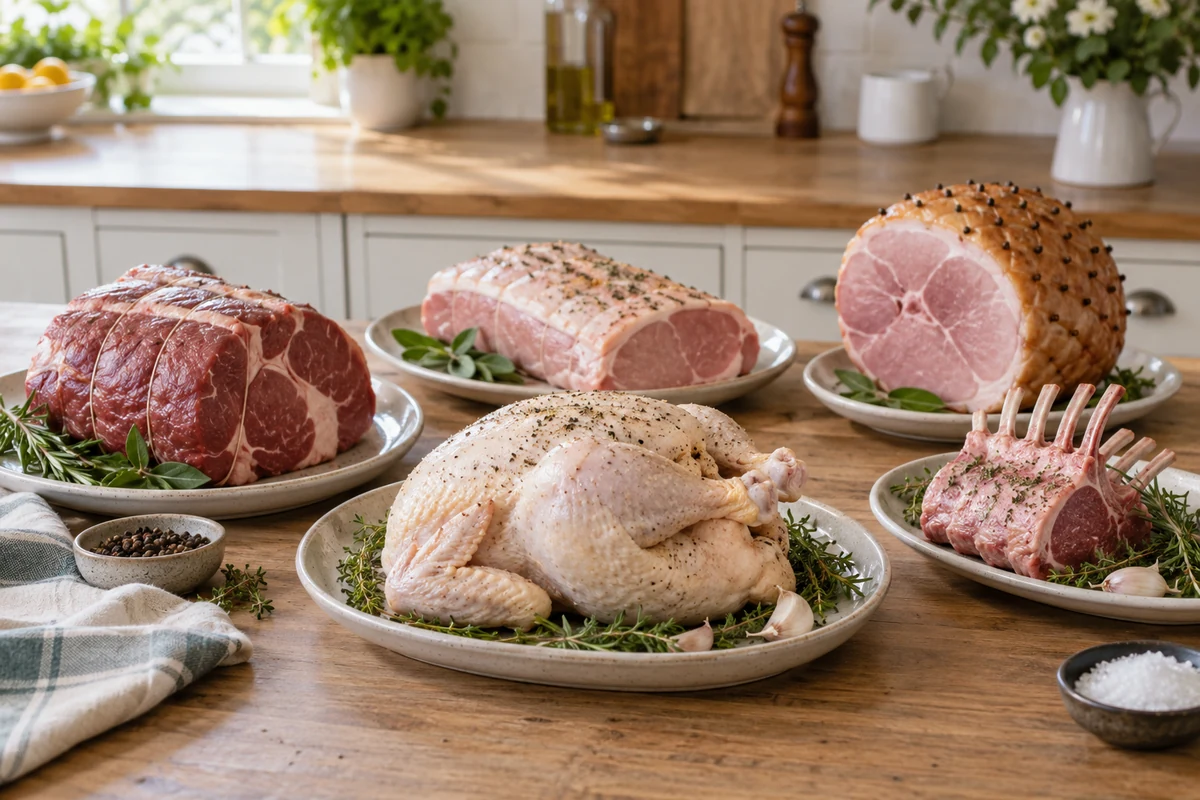
Practical tip: work out portions and choose cuts that suit your available cooking time and number of guests.
What to Consider When Choosing a Cut
- Marbling: fat within the meat can contribute flavour and juiciness. Match the cut’s structure to the cooking method rather than choosing on marbling alone.
- Freshness: check the use-by date, packaging and storage instructions. Colour alone cannot establish safety; reject meat with a sour smell or sticky surface, but do not rely on smell to override a use-by date.
- Portions: as a shopping guide, allow 200–250 g of raw boneless meat per adult with plenty of sides, or 300–350 g when meat is the main attraction. Adjust for appetites, bones and other dishes.
- Budget: balance premium cuts such as picanha or fillet with economical shoulder or chuck. These cuts need different cooking methods and should not simply share one roasting time.
- Cooking time: fillet medallions and sirloin steaks cook relatively quickly. A large pork leg needs much longer; rack of lamb is generally a quicker roast.
- Guests’ needs: provide suitable alternatives for vegetarians, children and anyone with allergies or other dietary requirements.
Shopping Step by Step
- Make a list: note the cuts and quantities before visiting the butcher or supermarket.
- Ask the butcher: explain your cooking method and request appropriately sized cuts.
- Check the source: buy from a reputable supplier and inspect the labelling, including use-by and storage information.
- Compare prices per kilogram: compare similar cuts and account for bones and trimming when judging value.
- Plan ahead: buying fresh meat a day or two before cooking can be convenient, provided its use-by date allows it. Freeze earlier purchases promptly if suitable, following the label.
Storage and Preparation Ahead
- Refrigeration: keep raw meat covered on the bottom shelf, separate from ready-to-eat food, in a fridge at 5°C or below. Follow any stricter label instructions.
- Freezing: wrap securely, label with the cut and date, and thaw in a leakproof container in the fridge. A large joint can take longer than 24 hours; allow enough time for complete thawing.
- Marinating: a few hours can add surface flavour. Longer marinating does not reliably tenderise a tough cut throughout; slow cooking may still be necessary. Keep the meat refrigerated within its use-by date.
- Preparing ahead: do not partially cook meat and store it to finish later. Either cook continuously until done, or cook fully, cool promptly, refrigerate and reheat thoroughly once when needed.
Cuts and Cooking Methods
- Picanha: roast this Brazilian rump-cap cut whole or barbecue thick steaks; serve with chimichurri.
- Pork leg: slow-roast with citrus flavours and glaze towards the end.
- Cooked ham: a honey and fruit glaze gives a festive finish. Brazilian tender is a prepared ham product; check that yours is fully cooked.
- Beef fillet: sear and finish cooking in the oven or pan for a tender centrepiece.
- Rack of lamb: roast with garlic and herbs for an aromatic alternative.
Substitutions and Alternatives
- If picanha is unavailable, try sirloin or flank steak for grilling, adjusting the preparation and cooking time to the cut.
- For a more economical meal, choose shoulder or chuck and a suitable slow-roasting or braising method.
- Smoked cooked ham offers another flavour with relatively little preparation. Read the label: raw gammon needs a full cooking method and cannot replace ready-to-eat ham in a short glazing recipe.
Before You Start
- Confirm quantities for your guests and side dishes.
- Allow time for seasoning or refrigerated marinating.
- Plan oven space, equipment and cooking schedules.
- Identify and prepare alternatives for dietary requirements.
Final planning tip: combine straightforward dishes with one or two more elaborate choices, rather than trying to cook every centrepiece at once.
Essential Techniques: Searing, Roasting and Grilling
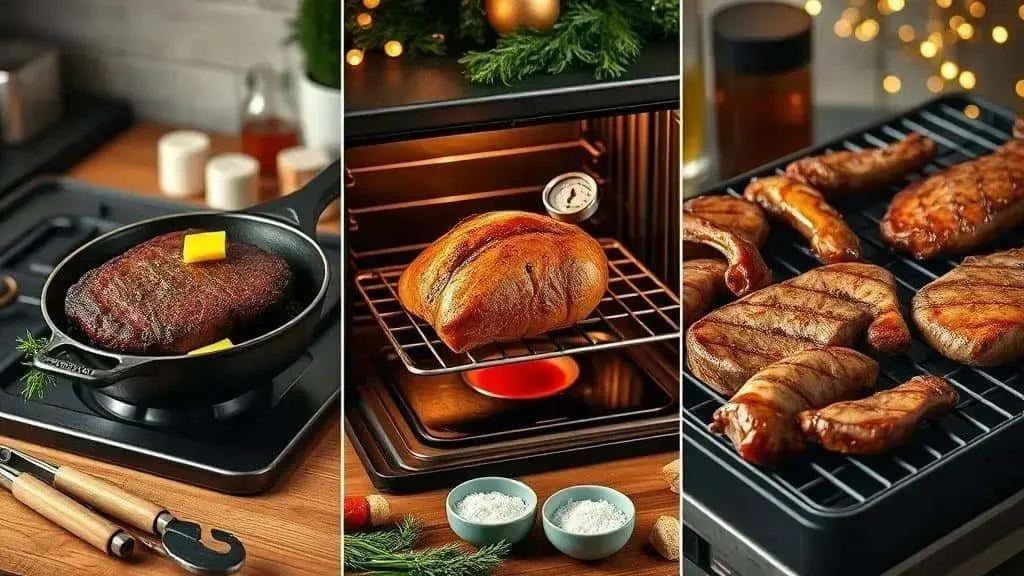
These practical cooking techniques help you develop flavour and control doneness. Use the correct method for each cut, check its temperature and allow an appropriate resting time.
Searing: Why and How
Searing creates a browned, flavoursome crust; it does not seal juices inside the meat. It can be the first stage before roasting or part of cooking a thin cut in a pan.
- Pat dry: remove surface moisture with kitchen paper to encourage even browning.
- Season: add salt and pepper shortly before cooking, or use a planned dry-brining method in the fridge. Salting ahead is not automatically a cause of dry meat.
- Heat the pan: use a heavy frying pan suitable for high heat. It should be hot enough to brown the meat without producing clouds of smoke.
- Choose suitable fat: rapeseed oil, sunflower oil or clarified butter can help with browning. Avoid overheating any fat.
- Allow browning: give each surface time to colour, often around 1–3 minutes depending on the cut and heat. Reduce the heat if the fat or seasoning starts to burn.
- Finish cooking: transfer thicker cuts to the oven, or finish in the pan, adding butter, herbs and garlic at a lower heat if using them.
- Rest: leave the cooked meat for roughly 5–15 minutes, according to size, before carving.
Roasting: Timing and Technique
Roasts can make planning easier, but cooking time depends on the cut, size and oven. A clean food thermometer is more useful than time alone.
- Preheat: long, slow roasts may use roughly 140–170°C conventional oven heat, while smaller roasts may use 180–200°C. Follow the specific recipe and adjust for a fan oven.
- Use a roasting rack: where appropriate, place the meat above the tray so heat can circulate.
- Season ahead: marinate or dry-brine in the fridge within the meat’s use-by date. Marinades add flavour but do not replace the cooking needed to soften tough connective tissue.
- Sear if required: brown the meat in a hot pan, then transfer it directly to the oven to continue cooking.
- Baste or cover as needed: use the hot roasting juices and cover with foil during part of cooking if the surface is colouring too quickly.
- Check the centre: insert a clean probe into the thickest part, avoiding bone. Reach the required temperature and holding time before removing meat that must be cooked through; do not assume resting will make up a shortfall.
- Rest: loosely cover the cooked joint with foil for about 10–20 minutes before carving.
Grilling: Managing the Heat
A barbecue adds charred flavour, while a kitchen grill provides strong overhead heat. Both require close attention to avoid a burnt exterior and undercooked centre.
- Create two heat zones: on a barbecue, use direct heat for browning and indirect heat to finish thicker cuts.
- Clean the grate: remove residue and any loose brush bristles before cooking; oil lightly if needed, following the equipment instructions.
- Brown the surfaces: thin cuts may colour in 1–3 minutes per side. Turn as needed for even cooking; there is no requirement to turn only once.
- Move thicker cuts: finish over indirect heat until cooked appropriately throughout.
- Use tongs: turn meat carefully. Checking with a clean temperature probe is still important and should not be avoided for fear of losing juices.
- Indoor alternative: use the kitchen grill, adjusting distance and time to its power. Never use an outdoor barbecue indoors.
- Rest and carve: rest cooked meat briefly and slice across the grain where appropriate.
Internal Temperatures: Doneness and Food Safety
- Rare beef: about 50–52°C describes culinary doneness, not a universal safe cooking target. Pink centres are only an option for intact whole beef or lamb cuts whose entire outside has been properly cooked.
- Medium-rare beef: about 55–57°C is another culinary guide for those suitable whole cuts, not for minced, rolled, mechanically tenderised or skewered meat.
- Medium beef: about 60–63°C describes doneness but does not by itself establish that food requiring thorough cooking is safe. Serve thoroughly cooked meat to pregnant or otherwise vulnerable guests.
- Thorough cooking: use a centre temperature of 70°C held for 2 minutes, or 75°C for 30 seconds, where the meat must be cooked through.
- Pork: cook through using the temperature-and-time guidance above, rather than relying on a brief reading of 63°C followed by resting.
- Poultry: also cook thoroughly; check the thickest parts away from bone using the same temperature-and-time guidance.
Equipment and Food Hygiene
- Digital food thermometer: use a clean probe to check cooking accurately, cleaning it between checks.
- Long tongs and a spatula: useful for handling meat safely around hot surfaces.
- Roasting trays and racks: choose sizes that allow heat to circulate without crowding.
- Hygiene: keep raw meat and its utensils away from cooked food. Wash hands and clean work surfaces thoroughly; do not wash raw meat.
Serving Tips
- Slice across the grain: shortening the muscle fibres can make meat easier to chew.
- Serve sauces separately: let guests add wine sauce or chimichurri to taste.
- Serve promptly: warmed plates help presentation, but a plate or foil does not provide controlled hot holding. If keeping food hot for service, maintain it at 63°C or above.
The Five Recipes at a Glance
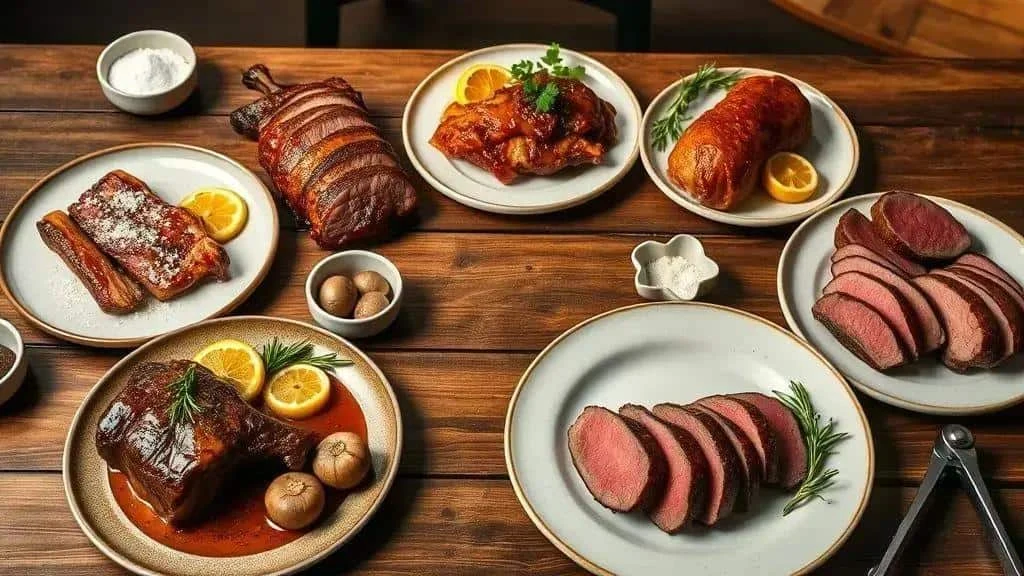
Roast picanha
Roast Picanha Ingredients
- 1.5 kg whole picanha — a rump-cap joint with its fat cap attached.
- Up to 2 tbsp coarse salt — season to taste; if using fine salt, use substantially less rather than substituting spoon for spoon.
- 1 tbsp olive oil — or rapeseed oil, for browning.
- Chimichurri, to serve — or chopped parsley and garlic with lemon juice.
How to Make Roast Picanha
- Prepare: pat the joint dry and score only the fat cap, without cutting into the flesh.
- Season: rub with oil and salt. Keep refrigerated until you are ready to cook.
- Brown all sides: start with the fat side for about 2–3 minutes, then cook every outside surface, including the ends.
- Roast: transfer to an oven preheated to 180°C, or 160°C fan. Allow roughly 30–45 minutes as an initial guide, checking doneness with a thermometer. The whole-cut guidance above applies only to intact meat; rolled or tenderised meat must be cooked through.
- Rest: loosely cover for 10–15 minutes, then carve across the grain.
Picanha Variations
- Cut into thick steaks, season with coarse salt and barbecue, cooking every outside surface properly.
- Add garlic, oil and pepper for a short refrigerated marinade.
- Try a mustard and herb crust for a different finish; check mustard and breadcrumb allergens if using them.
Citrus-roasted pork leg
Citrus Pork Ingredients
- 2.5–3.5 kg pork leg — bone-in or boneless; cooking time varies with size and shape.
- 240 ml orange juice — reserve a tablespoon before it touches raw meat for the glaze.
- 120 ml lime or lemon juice.
- 8 garlic cloves, crushed, plus 120 ml olive oil for the marinade.
- 2 tbsp honey — or 3 tbsp brown sugar, reserved for glazing.
- Salt and black pepper to taste, with optional sweet paprika and rosemary or thyme, as detailed below.
How to Make Citrus-Roasted Pork
- Marinate: mix the remaining juices with garlic, oil and seasoning. Coat the pork and refrigerate, covered, for 8–12 hours. Keep the honey and reserved orange juice separate for glazing.
- Preheat: set the oven to 150–160°C, or 130–140°C fan.
- Slow-roast: place on a rack over a roasting tray with the marinade and loosely cover with foil. Allow about 3–4 hours as a guide, checking temperature and tenderness. Baste with hot roasting juices; do not add cold raw marinade near the end.
- Glaze: towards the end, brush with honey mixed with the reserved juice. Increase the oven to 200°C, or 180°C fan, and watch closely as the surface colours, for up to about 30 minutes.
- Rest and serve: once the pork is thoroughly cooked, rest for 15–20 minutes. Bring the pan juices to a full boil before reducing and serving as sauce.
Citrus Pork Variations
- Add cumin and paprika for a more pronounced spice flavour.
- Replace some orange juice with pineapple juice for a tropical flavour; do not assume it will tenderise the whole joint.
- A longer, slow cook may produce a softer texture, but temperature and tenderness must still be checked.
Glazed cooked ham
Glazed Ham Ingredients
- 1–1.5 kg fully cooked, ready-to-eat ham — not raw gammon.
- 4 tbsp honey — or 3 tbsp apricot jam, plus 3 tbsp brown sugar.
- 2 tbsp Dijon mustard.
- 6–8 whole cloves — count them and remove before serving.
- Pineapple slices and preserved cherries — optional decoration.
How to Make Glazed Ham
- Preheat: set the oven to 180°C, or 160°C fan, unless the ham’s instructions specify otherwise.
- Score: make shallow diamond cuts in the surface and insert the cloves.
- Mix the glaze: combine honey, mustard and brown sugar, then brush over the ham.
- Heat and glaze: follow the ham’s reheating instructions. A 20–30-minute glazing period may colour the surface but is not a reliable heating time for a large cold joint; check it is steaming hot throughout.
- Rest and decorate: leave for 5–10 minutes, remove all cloves and serve with pineapple or the heated glaze.
Glazed Ham Variations
- Try marmalade or chilli jam for a sweet, tangy or gently spicy finish.
- A little rum or brandy can flavour the glaze, but cooking does not guarantee removal of all alcohol. Omit it for an alcohol-free dish; flambéing is unnecessary.
Beef fillet in red wine sauce
Beef Fillet Ingredients
- 1 kg beef fillet — as one piece or five medallions of about 200 g each.
- 200 ml dry red wine — or suitable beef or vegetable stock for an alcohol-free sauce.
- 2 tbsp butter for finishing, plus 2 tbsp olive oil for searing.
- 1 small onion, chopped, and 2 garlic cloves, crushed.
- Salt and pepper to taste, plus 150 g sliced mushrooms if desired.
How to Make Beef Fillet in Red Wine Sauce
- Season and brown: season the beef and sear every outside surface in the oil, allowing roughly 1–2 minutes per side as a guide.
- Cook the aromatics: transfer the beef directly to the oven to continue cooking while you soften the onion and garlic in the pan.
- Add the wine: deglaze the pan, scraping up the browned residue, and reduce by about half. Use stock instead if avoiding alcohol.
- Finish cooking: an oven at 180°C, or 160°C fan, can finish the beef. Medallions may need around 6–12 minutes after searing; a whole kilogram joint can need longer. Check with a thermometer and apply the whole-cut guidance above.
- Finish the sauce: rest the cooked beef. Off the heat, stir butter into the reduced sauce, adjust seasoning and serve with the sliced fillet or medallions.
Beef Fillet Variations
- Sauté mushrooms before adding the wine for an earthy sauce.
- Use port for a sweeter, richer reduction; it still contains alcohol.
Herb-roasted rack of lamb
Rack of Lamb Ingredients
- 1.2–1.5 kg rack of lamb — the number of ribs varies; ask the butcher to trim it if desired.
- 3 tbsp olive oil.
- 2 sprigs fresh rosemary and 4 crushed garlic cloves.
- Salt, pepper and the zest of 1 lemon, plus 2 tbsp butter for basting.
How to Make Herb-Roasted Rack of Lamb
- Season: rub with oil, garlic, rosemary, zest, salt and pepper, then marinate in the fridge for 1–2 hours.
- Brown all sides: sear every outside surface, allowing around 1–2 minutes per side. Add butter towards the end at a lower heat so it does not burn.
- Roast: transfer to an oven at 180°C, or 160°C fan. Start checking after roughly 15–20 minutes; thickness and starting temperature affect the time. Apply the whole-cut guidance above rather than relying on a fixed duration.
- Rest and carve: rest for 8–10 minutes, then cut between the ribs and serve with fresh herbs.
Rack of Lamb Variations
- Add an herb and breadcrumb crust, checking wheat and other allergens.
- Try a refrigerated yoghurt and spice marinade for a Mediterranean-inspired variation.
For all five recipes: check cooking with a thermometer and slice across the grain where appropriate.
Roast Picanha: Detailed Recipe and Variations
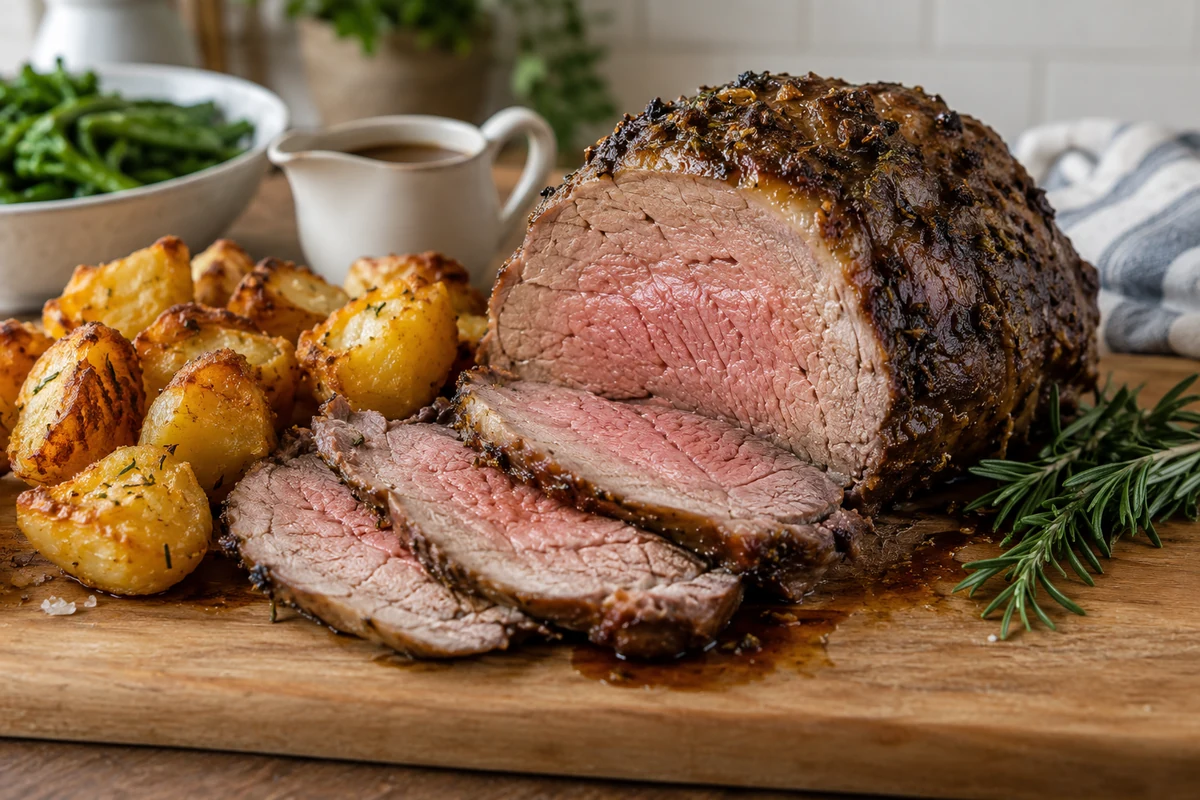
Roast picanha is a Brazilian rump-cap joint with a distinctive fat cap. Here is the preparation in more detail.
Picanha Ingredients
- 1.5 kg whole picanha — with its fat cap attached.
- Up to 2 tbsp coarse salt — adjust to taste. Fine salt packs more densely, so use much less rather than an equal spoon measure.
- 1 tbsp olive oil — or rapeseed or sunflower oil.
- 1 tsp ground black pepper — optional.
- Chimichurri or chopped herbs, to serve.
How to Make Roast Picanha
- Prepare: pat the joint dry with kitchen paper. Keep it chilled until ready to cook; there is no need to leave it out to reach room temperature.
- Score the fat: make shallow diamond cuts through the fat cap without cutting into the meat.
- Season: coat lightly with oil and rub salt over the surface. Add the optional pepper.
- Brown: place the fat side in a hot, heavy pan for about 2–3 minutes, then brown every other outside surface, including the ends.
- Roast: place fat-side up on a roasting rack at 180°C, or 160°C fan. Around 30–45 minutes is a guide only; check the joint rather than relying on the clock.
- Check doneness: use a clean probe in the centre. An intact whole beef joint may be served pink only after all external surfaces are properly cooked. For meat requiring thorough cooking, reach the stated safe temperature and holding time before removing it.
- Rest: cover loosely with foil and leave for 10–15 minutes before carving.
- Carve: cut thin, even slices across the grain.
Picanha Variations
- Herb crust: combine breadcrumbs, garlic and herbs and press over the fat before roasting.
- Barbecued steaks: cut thick picanha steaks, season with coarse salt and grill, properly cooking every outside surface.
- Garlic and lemon: marinate in crushed garlic, lemon zest and juice for 1–2 hours in the fridge.
- Chimichurri: serve the sauce separately so guests can add their preferred amount.
Quick Tips
- Quantity: allow roughly 200–250 g raw boneless meat per adult when serving several side dishes, adjusting to appetite.
- Thermometer: use a clean probe to check the centre accurately.
- Handling: use tongs to turn the meat, but do not skip necessary temperature checks.
Citrus-Roasted Pork Leg: Detailed Recipe and Variations
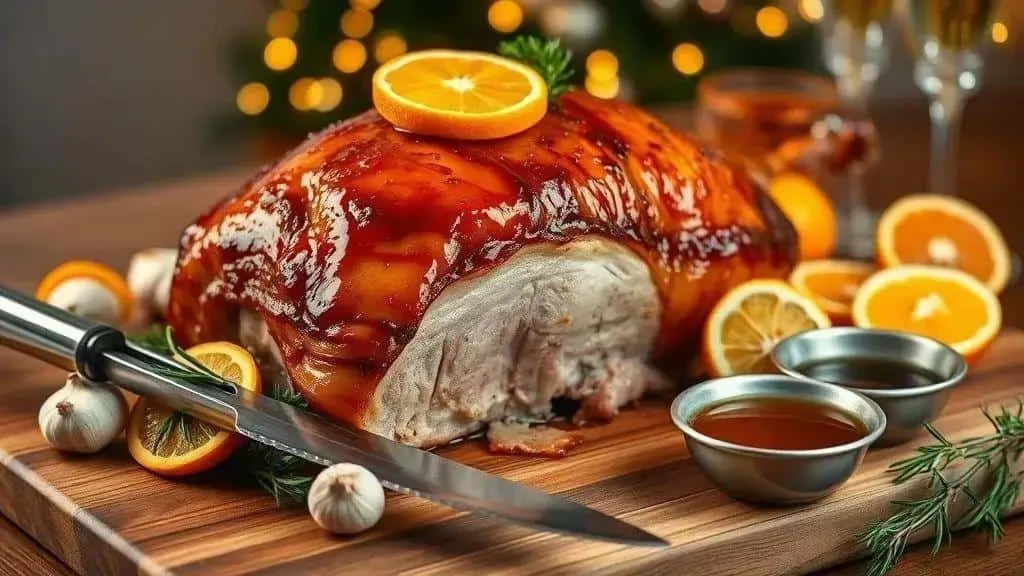
Citrus-roasted pork leg
Citrus Pork Ingredients
- 2.5–3.5 kg pork leg — bone-in or boneless, with a layer of fat.
- 240 ml orange juice — reserve 1 tbsp separately for glazing before mixing the rest with raw meat.
- 120 ml lime or lemon juice.
- 8 garlic cloves, crushed — garlic paste can be used according to its strength and label.
- 120 ml olive oil — for the marinade.
- 2 tbsp honey — or 3 tbsp brown sugar, kept aside for glazing.
- Up to 1 tbsp coarse salt — adjust to taste.
- 1 tsp ground black pepper.
- 1 tbsp sweet paprika — optional, for colour and flavour; sweet paprika is not necessarily smoked.
- Rosemary or thyme sprigs — for the roasting tray.
How to Make Citrus-Roasted Pork
- Prepare the pork: pat dry with kitchen paper without washing it. There is no need to pierce the flesh for the marinade.
- Mix the marinade: combine the orange juice, apart from the reserved tablespoon, with lime or lemon juice, garlic, oil, paprika, salt and pepper. Keep the honey separate.
- Marinate: coat the pork in a covered container or food-safe bag and refrigerate for 8–12 hours on the bottom shelf, turning once. Stay within the use-by date.
- Preheat: set the oven to 150–160°C, or 130–140°C fan.
- Slow-roast: set the joint on a rack above its marinade and herbs. Loosely cover with foil and allow around 3–4 hours as an initial guide, basting with hot tray juices every 40–60 minutes. Larger or bone-in joints may need longer.
- Check cooking: probe the thickest part away from bone. Pork must be cooked through: use 70°C held for 2 minutes or 75°C for 30 seconds, rather than a brief 63°C reading.
- Glaze: near the end, remove the foil and brush with honey mixed with the reserved clean orange juice. Increase to 200°C, or 180°C fan, and watch carefully for up to about 30 minutes, preventing the sugar from burning.
- Rest: once properly cooked, loosely cover with foil for 15–20 minutes.
- Carve and serve: slice across the grain. Bring the tray juices to a full boil, reduce and strain for a sauce; add fresh orange segments if desired.
Citrus Pork Variations
- Spicy variation: add a chopped mild red chilli to the marinade.
- Tropical variation: replace some orange juice with pineapple juice and add pineapple pieces during the final 20 minutes.
- Extra spices: add ground cumin and coriander for a different aroma.
Practical Tips
- Portions: allow around 300–350 g raw meat per adult if it is the main attraction, increasing the purchase weight where necessary to account for bone and trimming.
- Check with a thermometer: reach the safe temperature and holding time before removing the pork. Resting is not a substitute for completing the cooking.
- Use the pan juices: boil thoroughly before reducing to concentrate their flavour.
- Food safety: thaw fully in the fridge, prevent raw meat juices reaching other food and clean surfaces and utensils after use.
Glazed Ham: Detailed Recipe and Variations
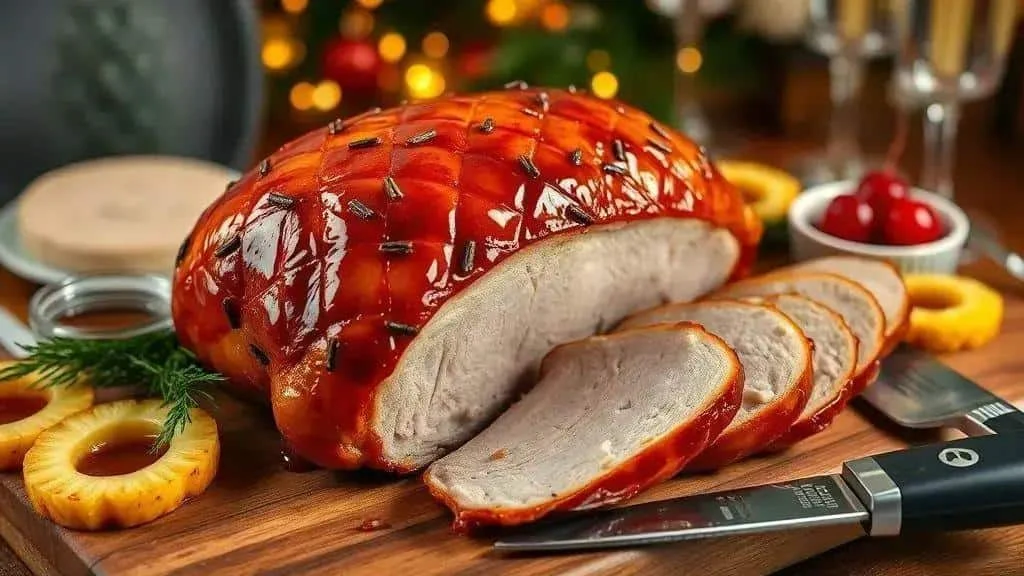
Glazed ham offers a straightforward festive centrepiece. This recipe uses fully cooked ham, similar to Brazilian tender, rather than raw gammon.
Glazed Ham Ingredients
- 1–1.5 kg fully cooked, ready-to-eat ham — follow its heating instructions.
- 4 tbsp honey — or 3 tbsp apricot jam.
- 2 tbsp Dijon mustard — or another prepared mustard to taste.
- 3 tbsp brown sugar — or 2 tbsp granulated sugar.
- 6–8 whole cloves — count them so all can be removed before eating.
- Pineapple slices and preserved cherries — or orange slices, for decoration.
- 2 tbsp rum or brandy, optional — for flavouring the glaze, without flambéing. Omit if avoiding alcohol.
How to Make Glazed Ham
- Preheat: set the oven to 180°C, or 160°C fan, with a shelf in the centre, unless the ham’s instructions specify otherwise.
- Prepare: remove packaging, pat the ham dry and lightly score the surface in diamonds.
- Add cloves: insert them at the intersections, keeping count for removal later.
- Make the glaze: stir together honey, mustard and brown sugar. Add the optional rum or brandy if using.
- Brush: coat the ham with about half the glaze before placing it in the oven.
- Heat and glaze: use a foil-lined roasting tray and follow the ham’s reheating instructions. Brush with more glaze every 8–10 minutes towards the end. A 20–30-minute glazing period alone may not heat a large cold ham thoroughly.
- Colour the surface: if necessary, finish at 200°C, or 180°C fan, or briefly under the grill, watching closely. Do not place baking paper under a hot grill.
- Rest: leave for 5–10 minutes, loosely covered with foil.
- Slice and decorate: remove every clove, carve even slices and decorate with fruit. Serve any remaining glaze only after heating it thoroughly.
Glazed Ham Variations
- Sweet and tangy: replace some honey with marmalade or pineapple jam and adjust the mustard to taste.
- Rum or brandy: use the optional spirit in the glaze for flavour. Do not flambé, and do not assume cooking removes all alcohol.
- Barbecue finish: a brief 5–10 minutes on an outdoor barbecue can add charred flavour to the heated ham. Watch the sugary glaze carefully.
- Mustard and herb crust: mix mustard, breadcrumbs and herbs and press over the ham before its final cooking stage.
Practical Tips
- Portions: 150–200 g cooked ham per adult is a generous guide; allow less if several other meats are served.
- Avoid burning the sugar: apply the glaze in thin layers rather than one thick coating.
- Check reheating: follow the packet and make sure the ham is steaming hot throughout. A centre temperature of 70°C for 2 minutes or 75°C for 30 seconds provides a thorough-heating check.
- Extra glaze: heat any remainder until bubbling, then reduce as needed to serve as a sauce.
- Hygiene: keep work surfaces clean and avoid transferring contamination from raw ingredients or used utensils to the cooked ham.
Beef Fillet in Red Wine Sauce: Detailed Recipe and Variations
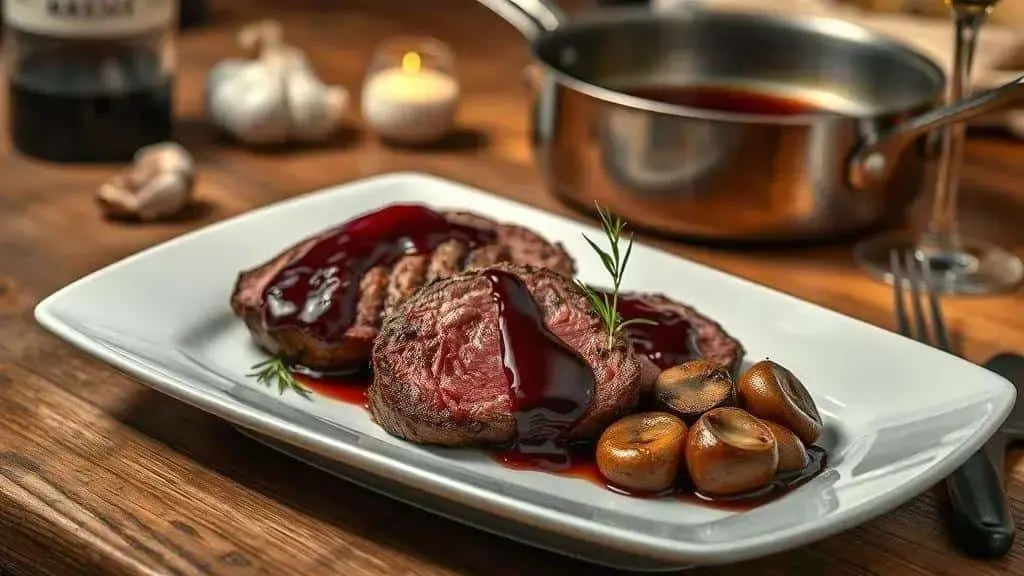
Beef fillet in red wine sauce makes an elegant centrepiece. Choose a whole joint or medallions, allowing for their different cooking times.
Beef Fillet Ingredients
- 1 kg beef fillet — whole or divided into five medallions of about 200 g each.
- 200 ml dry red wine — port gives a sweeter sauce; stock provides an alcohol-free alternative.
- 2 tbsp butter — for finishing the sauce. Oil does not provide the same texture or automatically make it lower in calories.
- 2 tbsp olive oil — for searing.
- 1 small onion, chopped — or 2 shallots.
- 2 garlic cloves — crushed or finely chopped.
- 150 g sliced mushrooms — optional; choose a suitable fresh variety.
- Salt and black pepper to taste.
How to Make Beef Fillet in Red Wine Sauce
- Season: keep the beef refrigerated until ready to cook, then season with salt and pepper.
- Heat the pan: heat the oil in a large, heavy frying pan over a medium-high heat.
- Brown the beef: sear all outside surfaces, allowing roughly 1–2 minutes per side as a guide. Use tongs to handle it.
- Continue cooking: transfer straight to an oven preheated to 180°C, or 160°C fan, while making the sauce. Do not leave partly cooked meat waiting for later preparation.
- Soften the aromatics: reduce the pan heat, soften the onion until translucent, then add garlic for about 30 seconds.
- Add mushrooms: if using, sauté until their released moisture evaporates and they begin to brown.
- Deglaze: pour in the wine or stock, scrape up browned cooking residue and reduce by about half.
- Reduce: let the sauce bubble thoroughly and reach a light coating consistency before tasting and adjusting seasoning.
- Finish with butter: take off the heat and stir in cold cubes of butter until glossy.
- Check the beef: medallions may need roughly 6–12 minutes in the oven after searing; a whole joint generally takes longer. Check with a thermometer using the guidance above rather than assuming a short warming period completes cooking.
- Rest: leave the cooked beef loosely covered for 5–10 minutes before carving.
- Serve: slice across the grain, spoon over the sauce and add fresh herbs if desired.
Beef Fillet Variations
- Mushroom and port sauce: use port instead of red wine for a richer, sweeter finish.
- Mustard sauce: replace some wine with cream and add 1 tbsp Dijon mustard, checking the resulting dairy and mustard allergens.
- Herb and roasted garlic finish: add freshly roasted garlic and a little oil. Do not store homemade garlic in oil at room temperature; refrigerate prepared leftovers and use promptly.
Practical Tips
- Thermometer: medium-rare and medium temperatures are culinary preferences for intact beef with every outside surface properly cooked. Choose thorough cooking for vulnerable guests and for meat that has been rolled or tenderised.
- Pan choice: a heavy cast-iron or stainless-steel pan helps with even browning.
- Seasoning: season just before searing, or use a deliberate dry-brining method under refrigeration.
- Glossy sauce: cold butter stirred in off the heat adds shine and rounds out the wine flavour.
Herb-Roasted Rack of Lamb: Detailed Recipe and Variations
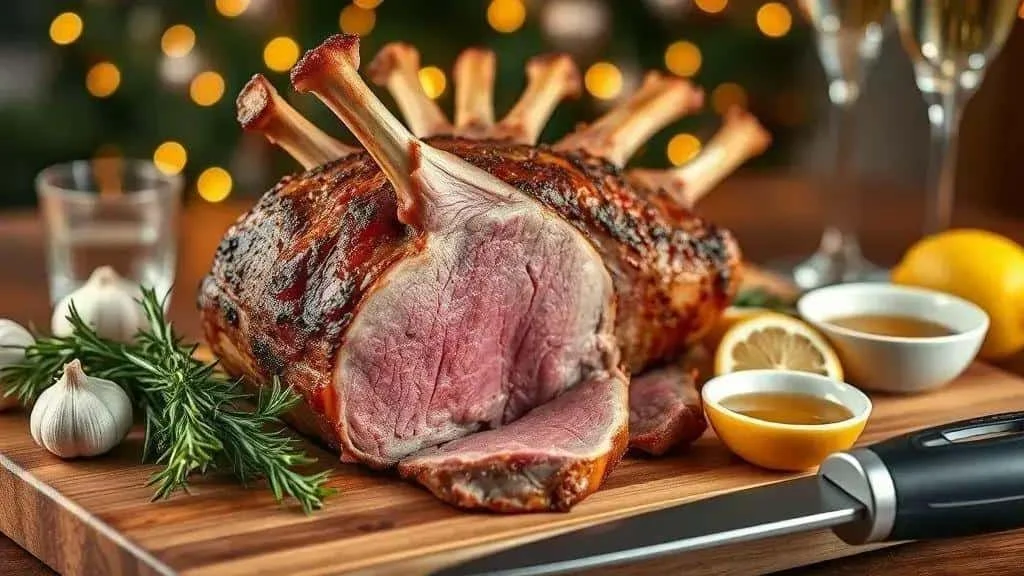
Rack of lamb combines garlic, rosemary and citrus in a festive roast. Follow the steps below and adjust cooking to the actual rack.
Rack of Lamb Ingredients
- 1.2–1.5 kg rack of lamb — rib count varies with size; a French-trimmed rack gives a neat presentation.
- 3 tbsp olive oil — for coating and browning.
- 4 garlic cloves, crushed — or garlic paste adjusted according to its strength.
- 2 sprigs fresh rosemary — chop some leaves for the marinade; thyme is an alternative.
- Zest of 1 lemon — orange zest gives a different citrus aroma.
- Salt and black pepper to taste.
- 2 tbsp butter — for basting during the final part of searing.
How to Make Herb-Roasted Rack of Lamb
- Marinate: rub the rack with oil, garlic, chopped rosemary, zest, salt and pepper. Cover and refrigerate for 1–2 hours.
- Get ready: keep the lamb chilled until the oven and pan are ready; it need not be left out to reach room temperature.
- Preheat: set the oven to 180°C, or 160°C fan, with a shelf in the centre.
- Sear: brown all outside surfaces in a heavy pan, using the oil coating already on the lamb. Lower the heat before adding butter to baste, avoiding burnt butter or garlic.
- Roast: transfer to a roasting rack in the preheated oven. Start checking after about 15–20 minutes, but allow longer where required by size and desired doneness.
- Check temperature: probe the thickest meat without touching bone. Only intact whole lamb with properly cooked outer surfaces is suitable for serving pink; otherwise cook thoroughly using the guidance above. Do not deduct degrees from a safety target in anticipation of resting.
- Rest: loosely cover with foil for 8–10 minutes.
- Carve: cut between the ribs and serve with fresh herbs, a light sauce or herb butter.
Rack of Lamb Variations
- Herb and breadcrumb crust: combine chopped herbs, garlic and breadcrumbs and press over the meat before roasting.
- Wine sauce: deglaze the pan with red wine, boil and reduce, then finish with butter. Use stock if avoiding alcohol.
- Mediterranean-inspired marinade: try yoghurt, lemon, garlic, cumin and coriander for surface flavour, keeping the lamb refrigerated.
Practical Tips
- Check accurately: a clean digital food thermometer helps avoid guessing at doneness.
- Carve before serving: keep the cooked rack whole during its short rest, then slice for the table.
- Side dishes: mashed potatoes, roasted vegetables and a salad of bitter leaves work well.
- Portions: 250–300 g raw bone-in rack per adult is a starting point; account for bone size, trimming, appetites and side dishes.
Planning Your Celebration
These five recipes offer different ways to build a New Year’s Eve menu. Choose cuts that suit your budget, equipment and guests, and give each one the cooking time and checks it needs.
Thank you for reading. Explore the I Love Christmas blog for more festive recipes, ideas and step-by-step guides, and follow our social channels for updates.
Adjust the seasonings to your taste and share your finished dishes with us. Wishing you a delicious celebration and a happy New Year!
Frequently Asked Questions About New Year’s Eve Meat Recipes
How much meat should I buy per person?
As a shopping guide, allow 200–250 g raw boneless meat per adult with several sides, or 300–350 g if meat is the main attraction. Adjust for bones, trimming, appetites and other dishes.
How can I stop roast or grilled meat becoming dry?
Choose an appropriate cut, avoid cooking longer than needed and use a thermometer. Searing adds flavour rather than sealing in juices. Reach any required safe cooking temperature before resting, then carve across the grain.
Can I prepare the meat ahead?
You can marinate in the fridge within the use-by date. Do not partially cook and store meat to finish later. Cook it fully, cool and refrigerate within 1–2 hours, use within 48 hours or freeze, and reheat thoroughly only once.
Which cuts suit roasting and which suit grilling?
Pork leg suits a longer roast, while rack of lamb and whole picanha use shorter roasting methods. Picanha steaks, fillet medallions and sirloin steaks suit quicker grilling, with cooking adjusted to their thickness.
Which internal temperatures should I use?
For pork, poultry, minced or rolled meat and reheating, check for 70°C held for 2 minutes or 75°C for 30 seconds. Intact whole beef and lamb may be pink inside only if every external surface is properly cooked; vulnerable guests should have meat cooked through. Use a clean probe and do not rely on resting to complete an inadequate cook.
Sources and Further Reading
- UK Government: cooking food safely
- Food Standards Agency: chilling food
- Food Standards Agency: allergen guidance
- UK Government: cooking and hot holding