
A Christmas decorating schedule brings together your inventory, spending, craft projects and setup dates. Spreading suitable tasks over time can reduce last-minute pressure, while condition checks and clear responsibilities help you prepare a practical display. Treat the dates as suggestions, not a requirement to spend the whole year decorating.
A Christmas decorating schedule can turn a rushed job into a more enjoyable activity. This month-by-month guide helps you decide what to reuse, what genuinely needs replacing and when to make or put up decorations. Start wherever you are in the year and skip tasks you do not need.
Illustrations in this article are conceptual images, not documentary photographs or evidence of a particular historical event, destination, venue or access route.
Why make a Christmas decorating schedule?

A Christmas decorating schedule keeps decisions and tasks in one place. It can help your display feel coordinated and your workload manageable, without promising that every early purchase will be cheaper or every plan will run perfectly.
Practical benefits
- Less last-minute pressure: spreading work over suitable weeks leaves more room for unexpected changes.
- Better spending decisions: a list and budget help you compare prices instead of buying hurried replacements.
- Time for creativity: try a colour combination or one craft project before committing to a larger display.
- Easier setup: checking condition and arranging materials beforehand can prevent avoidable interruptions.
- Less waste: plan around usable decorations you already own before buying more.
- Shared participation: clear, suitable tasks make it easier for household members to contribute.
What to include
- Inventory: list ornaments, lights and supports, noting their condition.
- Style and colours: choose a broad direction, such as traditional, rustic or minimal.
- Shopping list: record genuine priorities, approximate costs and when they are needed.
- Craft timetable: allow time for cutting, assembly and the full drying or curing time of any products used.
- Condition checks: inspect disconnected lights and other equipment before setup, replacing faulty products appropriately.
- Setup plan: choose convenient dates for the tree, table and any outdoor display.
- Storage: plan how to protect and label everything after the festivities.
How to begin
- Choose a review date: set aside time to check what you already have.
- Make the inventory: record usable items, missing essentials and suitable non-electrical repairs.
- Set a style and spending limit: use these to guide purchases and craft choices.
- Prioritise: identify essentials before considering decorative extras or sale offers.
- Map out the year: for example, review storage in January, compare needed items in spring, make crafts in September, check lighting in November and finish setup in December. You can compress this into a few weeks if that suits you better.
- Reserve craft time: choose manageable sessions rather than filling every weekend.
- Share tasks: agree responsibilities with willing household members.
- Check equipment in advance: allow time to replace damaged lights before your planned setup day. Leave electrical installation work to a competent professional.
- Prepare storage: reuse suitable boxes and labels, buying replacements only where needed.
January to November: a flexible monthly plan

This month-by-month plan spreads optional tasks across the year. There is no need to follow every step or buy something each month; use it as a menu of useful jobs.
January
- Take stock: separate ornaments and lights by condition as you take them down, and note quantities.
- Pack thoughtfully: clean and fully dry suitable items, label boxes and photograph their contents.
- Record repairs: note minor ornamental repairs and electrical products that need replacement, keeping faulty lights out of the usable collection.
February
- Collect ideas: save a few photographs of arrangements or colours you like.
- Make an inspiration board: group those images digitally or on paper.
- Choose priorities: decide what to retain from last year and whether anything needs refreshing.
March
- Measure useful spaces: note the room for a tree, table displays and outdoor decorations, leaving exits and walkways clear.
- Choose a palette: select colours that work with your existing ornaments.
- Shortlist crafts: choose realistic projects and estimate the time and materials needed.
April
- Set the budget: allocate spending for any necessary tree, lighting, ornament and gift purchases.
- Compare prices: record normal prices so a discount can be assessed meaningfully.
- Plan larger purchases: consider delivery, storage and returns before buying bulky items far in advance.
May
- Buy only what is needed: a suitable artificial tree, light set or stand may be worth buying if it meets your requirements and budget. There is no guaranteed best-price month.
- Deal with faulty lighting: replace damaged sets rather than repairing cables yourself. Replace individual lamps only where the manufacturer permits it, using the specified type with power disconnected.
- Gather craft supplies: check existing fabric, ribbons and paint before buying more.
June
- Start a simple project: make a wreath or a few ornaments in manageable stages.
- Try one sample: check whether the idea works before making a whole set.
- Arrange suitable sessions: fit craft work around your normal commitments.
July
- Make matching pieces: if you need several ornaments, group similar tasks together.
- Review lighting locations: decide which areas need lights and whether each product is suitable for indoor or outdoor use.
- Update the list: remove unnecessary purchases and note any genuine gaps.
August
- Check outdoor supports: assess suitable hooks and access from a safe position. Arrange competent help for work at height or electrical concerns.
- Choose suitable equipment: outdoor lighting and connections must be intended for the conditions and installed as instructed, with appropriate RCD protection. Do not assume any extension lead is weatherproof.
- Store finished pieces: group them by room, protected from damp and damage.
September
- Clean the areas you will decorate: attend to curtains, cushions and rugs according to their care instructions where needed.
- Inspect before testing: check light sets while disconnected. Only test undamaged sets as directed, and handle batteries and permitted lamp replacements according to the product instructions. Source: Electrical Safety First — Christmas safety
- Finish suitable ornamental repairs: secure loose hangers or touch up appropriate surfaces without disguising sharp or structural damage.
October
- Plan access: identify displays that need professional help or safe access equipment. Do not climb on furniture or install lights in difficult places simply to get ahead of the schedule.
- Review gifts: update the list and buy selected items if the timing and budget suit you.
- Prepare room kits: put each area’s decorations together in labelled boxes.
November
- Check the arrangement: assemble an artificial tree if useful and inspect its stand. Plan a real tree’s purchase closer to the intended display period, allowing for care and freshness.
- Confirm help: agree suitable setup dates with family, friends or professional installers as needed.
- Complete essential purchases: compare any missing items with the budget rather than buying just because a sale is advertised.
- Choose final setup dates: decide when to decorate the tree, table and outdoor areas according to your own traditions.
December: a week-by-week checklist

- Week one: review the final inventory and separate anything damaged before setup.
- Clean the immediate area: clear the entrance, living room or dining area so decorations can be placed without clutter.
- Check lighting safely: inspect disconnected sets first; do not plug in visibly damaged lights. Follow the manufacturer’s instructions for testing sound products.
- Arrange the boxes: keep the tree, table and outdoor supplies separate and easy to reach.
Week two:
- Position the tree: secure it in its final place, away from heat sources and exits. Arrange suitable lights with power disconnected before checking the effect.
- Choose a practical order: complete one area at a time so materials do not spread across the whole home.
- Begin wrapping: wrap gifts when convenient and store them where they will not block access or overheat near lights.
- Check meal supplies separately: review shelf-stable ingredients and plan any freezer preparation according to a reliable recipe and food-safety guidance. Do not wash or freeze food indiscriminately as a decorating task.
Week three:
- Finish the tree: balance ornaments and bows, keeping fragile pieces and unsuitable small parts out of young children’s reach.
- Try the table arrangement: leave room for serving dishes and use LED candles where lighting is placed amongst foliage or other decorations. Source: London Fire Brigade — Christmas fire safety
- Complete crafts: finish the pieces you actually need and allow full curing time. Avoid making unnecessary extras just to fill the schedule.
- Coordinate helpers: confirm who is available and which tasks they want to take on.
- Electrical checks: avoid overloaded sockets and daisy-chained extensions, following the equipment’s ratings and instructions.
- Useful spares: keep appropriate batteries, permitted replacement lamps and ornamental fixings available. Electrical tape is not a remedy for damaged Christmas-light wiring.
Week four: Christmas week
- Final details: finish accessible decorations and check that weather has not affected outdoor equipment. Stop using anything damaged rather than improvising a repair.
- Prepare the table: set out clean crockery and suitable decorations when practical, keeping them protected until use.
- Buy perishable ingredients thoughtfully: follow use-by dates, refrigeration needs and any thawing time required. Buying everything exactly two days beforehand is not a universal freshness rule.
- Check the evening appearance: adjust brightness and trailing cables safely, then switch lights off before bed or leaving home.
After Christmas: 26–31 December
- Record what worked: photograph the display and note improvements for next year.
- Plan removal: choose suitable dates, including January if that matches your tradition, and arrange help where needed.
- Clean and store: follow material-specific care instructions, dry items fully and pack with suitable protection.
- Record replacements: note broken or worn items before the details are forgotten.
Quick reminders: use suitable timers to limit operating hours, keep displays accessible for checks and maintain a small kit for non-electrical adjustments. A timer does not replace safe switching-off habits.
Shopping priorities and ways to save
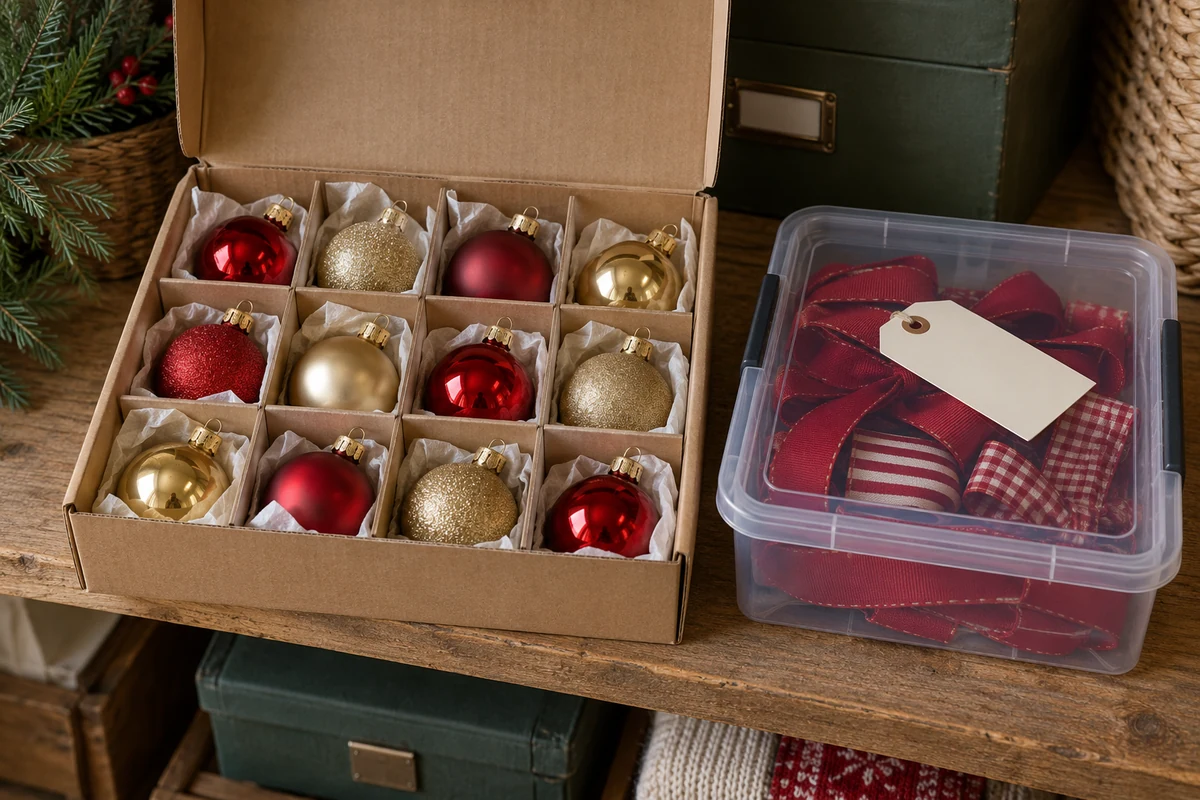
A shopping list based on priorities helps distinguish essentials from attractive extras. The cheapest option is often to keep a sound item you already own.
Building the list
- Start with your inventory: identify existing items and actual replacements.
- Group by purpose: tree, lighting, table, hanging ornaments, outdoor displays and storage.
- Estimate quantities: measure the area and check product dimensions rather than guessing from a photograph.
- Set category limits: record a spending ceiling and realistic target price.
Comparing prices
- Seasonal sales: after-Christmas reductions may be useful for needed items, provided storage, condition and return terms are suitable.
- Discount shops and outlets: compare the actual product and total cost, not just the displayed reduction.
- Online comparisons: check seller identity, product details and returns. Reviews alone do not establish electrical safety.
- Charity shops and second-hand stalls: inspect ornaments carefully, especially fragile or older pieces. Do not assume vintage electrical decorations are suitable for use.
- Craft fairs: compare handmade items on their quality and usefulness, respecting the maker’s prices.
- Bulk supplies: buy a larger pack only if you will use it; a low unit price is not a saving when most is left over.
- Discount codes and loyalty offers: check the final price and conditions. Treat cashback as uncertain until received, rather than extra spending money.
Lower-cost alternatives
- Instead of new baubles: try paper ornaments or sound pine cones, displayed away from heat and flames.
- Instead of real candles in decorations: use suitable flameless LED candles with secure battery compartments.
- A reused wreath base: refresh it with existing ribbon and suitable greenery rather than buying a complete new wreath.
- Scrap-material crafts: use fabric offcuts and card for simple ornaments. Keep buttons and other small parts away from young children.
Saving without sacrificing suitability
- Prioritise dependable essentials: buy lighting from reputable sellers and choose a stable tree stand. Durability depends on quality, use and storage, not price alone.
- Spread necessary spending: buy when it suits your budget rather than creating a purchase for every month.
- Rearrange existing pieces: a different layout or ribbon can refresh the display without a new collection.
- Make a sample first: check a craft project’s appearance and practicality before making several.
A sample list to adapt
- Tree: one suitable tree, if you want one, with a stable stand and space to keep routes clear.
- Lights: enough appropriately rated lighting for the chosen area. The number of sets depends on their length and power requirements; do not connect sets together unless explicitly designed for it.
- Ornaments: the original suggestion of 20–40 tree pieces and 6–8 table details is only a starting point. Use fewer or more according to size, weight and available space.
- Wreath: one for the entrance if there is a suitable fixing and it does not interfere with the door.
- Craft materials: ribbon, suitable glue, scissors and only the paints or other supplies your selected project needs.
- Storage: sound boxes, labels and suitable protective paper or fabric.
Final shopping reminders
- Track normal prices: keep a short list rather than relying on a sale label.
- Compare promotional offers: Black Friday or clearance prices are not automatically the year’s lowest.
- Ask politely about available offers: accept that a local seller may have a fixed price, especially for handmade work.
- Put suitability first: choose electrical products from reputable sources and check their intended use, instructions and outdoor requirements.
Planning handmade ornaments

Handmade decorations are easier to manage when you separate preparation, assembly and finishing. Leave enough time for drying and avoid turning a relaxing activity into a production quota.
An optional craft calendar
- May–June: choose projects, make samples and list required materials.
- July: gather suitable supplies and begin cutting or painting where needed.
- August: assemble matching pieces in small groups.
- September: check fixings and finishes, and adjust anything awkward.
- October: pack fully dry items and label room kits.
- November: review the finished collection and setup arrangements.
A sample week for a larger craft project
- Monday: prepare and sort suitable materials.
- Tuesday: paint selected pieces if the project calls for it.
- Wednesday: allow drying time and inspect the result.
- Thursday: assemble pieces with appropriate fixings or adhesive.
- Friday: finish and pack only when products have fully cured, even if that takes longer than this sample week.
- Weekend: leave time for a relaxed extra session or a break, rather than automatically adding more work.
Organising materials
- Group similar supplies: fabric, ribbon, ornaments and adhesives are easier to find when separated.
- Label by project: a small photograph can help identify a box’s contents.
- Prepare a project kit: put the appropriate materials together when making several matching ornaments.
- Use suitable alternatives: spare fabric, legally collected clean cones and flameless candles can be useful, depending on the project.
Example project: a fabric wreath
Materials:
- A wreath ring about 30 cm across – a reusable wire ring works for tied fabric strips; a foam base needs a compatible adhesive and method.
- Fabric scraps or lengths, approximately 2 m in total – the actual amount depends on fabric width, ring thickness and fullness. Wide spare ribbon is another option.
- Suitable adhesive or thread – tied strips on a wire ring may need no glue. Hot glue is not suitable for every foam base; check material compatibility.
- Scissors, measuring tape and small pliers if needed – handle sharp tools and wire carefully.
Method:
- Cut strips: start with strips about 4–6 cm wide and 20–30 cm long, adjusting one sample to suit the ring and desired fullness.
- Secure the first strip: tie it around a wire ring, or attach it to a suitable base using the chosen compatible method.
- Wrap or tie: cover the base evenly. For a rag-style wire wreath, secure each strip with a firm knot that does not damage the fabric.
- Work in small groups: add five to ten strips at a time, checking the colour distribution as you go.
- Add a few details: attach lightweight bows or sound small ornaments with suitable fixings, without overloading the ring.
- Finish the joins: tuck or secure the last ends and add a bow if wanted.
- Check the result: gently check for loose strips and fit a hanger suitable for the weight. Keep the fabric wreath away from heaters and flames; it does not need a coating of varnish.
Making several pieces
- Organise the workspace: keep cutting, assembly and drying areas separate where practical.
- Use realistic sessions: estimate time from a sample and take breaks rather than rushing to meet an hourly target.
- Check each piece: inspect attachments, sharp ends and finish before packing.
- Use simple templates: paper guides and suitable punches can make repeated shapes more consistent.
- Keep brief notes: record materials and useful steps so others can help without guessing.
Craft safety and storage
- Use tools and products as instructed: hot glue can burn, and aerosol paint requires suitable ventilation and protection specified by its label. A generic mask or pair of gloves is not a universal safeguard.
- Store dry pieces carefully: use suitable dividers and a dry location. Any sealed desiccant sachets should be kept away from children and pets.
- Label the box: add a small photograph or description for next year.
Sharing tasks with the household

Sharing the decorating can make it more enjoyable, provided tasks are agreed rather than imposed and match people’s interests and abilities.
Agree responsibilities
- Choose clear roles: decide who wants to help with the tree, table, crafts or shopping.
- Use manageable time slots: avoid giving one person all the work on a busy day.
- Agree the essentials: explain safety requirements while allowing room for different creative choices.
A simple way to divide the work
- Have a brief discussion: show the plan and invite suggestions.
- Write clear tasks: for example, sort ribbon, label boxes or choose table ornaments.
- Ask about preferences: let each person choose something they would enjoy.
- Agree realistic dates: check availability before assigning a deadline.
- Confirm materials: make sure the person has what they need and knows where to find it.
- Check in lightly: a brief conversation is usually enough to identify missing supplies or changed plans.
Matching activities to people
- Young children: choose supervised, age-appropriate tasks such as arranging large paper shapes. Keep small parts, magnets, glass and batteries out of reach. Source: Child Accident Prevention Trust — Christmas safety
- Teenagers: they may enjoy choosing music, photographing the process, wrapping gifts or preparing craft kits.
- Adults: take responsibility for hot or sharp tools and suitable equipment checks. Being an adult does not make electrical work or difficult work at height safe without the necessary competence and equipment.
- Anyone who prefers seated tasks: bow-making, sorting ornaments and reviewing lists can be comfortable options. Choose by preference and ability rather than assuming limitations from age alone.
Simple planning tools
- Shared checklist: use paper, a spreadsheet or a familiar app to track tasks and volunteers.
- Room kits: keep each area’s materials together for easier setup.
- Household calendar: mark agreed craft and decorating dates.
- Useful reminders: set a few alerts for important dates rather than making the plan intrusive.
Keeping it enjoyable
- Make it playful: try a friendly bow-making challenge if everyone enjoys the idea, without making participation competitive.
- Acknowledge help: thank people for their contribution and take photographs with their agreement.
- Take a break together: tea, coffee and biscuits can mark the end of a useful session.
Avoiding unnecessary friction
- Stay flexible: reduce the plan if time or energy becomes limited.
- Allow creative freedom: keep essential safety requirements clear without controlling every decorative choice.
- Communicate calmly: a clear, short explanation usually works better than repeated reminders.
- Have a simpler alternative: if materials or helpers are unavailable, scale down rather than improvising an unsafe fix.
A plan that serves your celebration
A decorating schedule is useful when it reduces pressure and unnecessary work. It should leave room for enjoyment, changes of plan and the decorations you already love.
Use the monthly ideas, shopping list and craft timetable selectively. A smaller display completed comfortably can be more satisfying than a year-long project that exceeds your time or budget.
Thank you for reading. Visit the I Love Christmas blog for more practical festive decorating ideas and seasonal inspiration.
Enjoy preparing your home for Christmas!
Frequently asked questions about Christmas decorating schedules
Why create a Christmas decorating schedule?
It helps organise decisions, spread suitable tasks and avoid unnecessary purchases. It can make preparation calmer, but should remain flexible rather than becoming another demanding commitment.
When should I start planning and buying decorations?
Review what you own when taking decorations down, or whenever you decide to begin. Buy only genuine replacements or planned additions after comparing prices; there is no universally cheapest month, and a few weeks of preparation may be enough.
How can children and teenagers take part?
Offer activities suited to their age, interests and abilities, with supervision where needed. Keep hot tools, sharp objects, batteries and small hazardous parts away from young children, and let participation remain enjoyable.
How can I save without sacrificing suitability?
Reuse sound ornaments, compare total prices and test one craft sample before buying materials in bulk. Choose lighting from reputable sellers and never keep faulty electrical products simply to save money.
How should I store decorations after Christmas?
Clean and fully dry suitable items, protect fragile pieces in divided boxes and label the contents. Follow light-set storage instructions and choose a dry location; sealed desiccant sachets cannot compensate for damp storage.
Sources and Further Reading
- Electrical Safety First — Christmas safety
- London Fire Brigade — Christmas fire safety
- Child Accident Prevention Trust — Christmas safety