Explore 12 homemade panettone ideas, from fruit and chocolate-chip versions to filled breads and miniatures. Learn about mixing, proving, mould capacity, storage and gift packaging. Vegan and gluten-free formulas need separate testing; the source’s recipes have not been independently kitchen-tested for this translation.
Homemade panettone ideas can inspire Christmas baking for the family, gifts or a small business. This guide covers 12 flavours and formats, with a shared dough approach and several variations, rather than 12 independently tested recipes. The original contains uncertain yields and dietary substitutions: these are identified below so that they are not mistaken for guaranteed results. Try a small batch before a celebration or sale.
Essential ingredients for homemade panettone
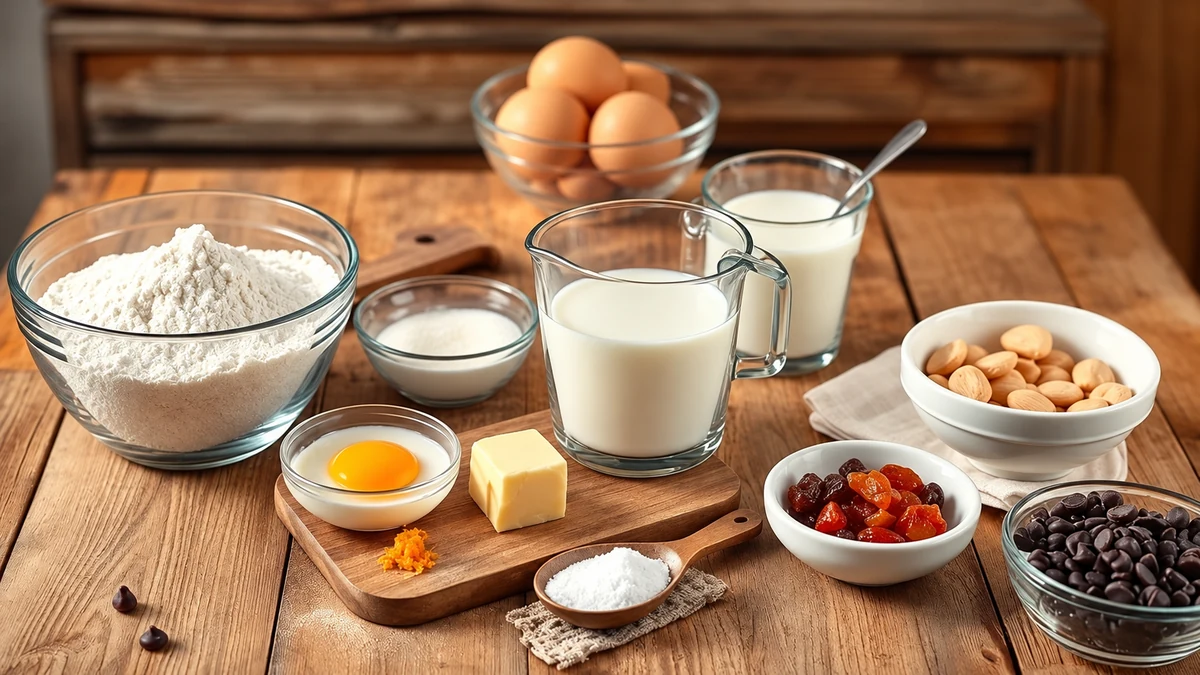
Start with fresh ingredients, accurate weights and suitable baking moulds. The following is the source’s enriched-dough formula. It makes substantially more dough than a single 1 kg mould should receive, so weigh and divide it according to the mould manufacturer’s loading guidance.
- 500 g wheat flour — use flour suitable for enriched bread. Brazilian type 1 flour is not an exact UK flour grade; a gluten-free blend requires a separate formula, not a simple replacement.
- 120 g sugar — includes the teaspoon used in the starter. Sugar changes fermentation and texture, so test reductions rather than assuming 80 g gives the same result.
- 8 g salt — weigh it; teaspoon equivalents vary with the salt.
- 7 g dried yeast — or the source’s suggested 20 g fresh yeast, checking the product’s directions and expiry date.
- 200 ml lukewarm milk — divided between starter and dough. Follow the yeast packet’s liquid-temperature guidance; plant drinks need a suitable variation.
- 4 eggs, about 200 g without shells in the source formula — weigh the egg rather than assuming four UK large eggs equal 200 g. Flaxseed or aquafaba is not a verified equal replacement in this rich dough.
- 160 g softened butter — not melted. A dairy-free baking block changes the formula and needs testing; check that it is suitable for baking.
- 20 g milk powder, optional — omit in a suitable dairy-free version, but the milk and butter also need attention.
- 1 teaspoon vanilla extract or the seeds from a vanilla pod.
- 1 tablespoon finely grated orange zest — lemon zest provides a different citrus flavour.
- 250–300 g candied fruit and/or raisins — soak raisins briefly in warm water or optional rum, then drain and dry well. For chocolate-chip panettone, use 200–250 g chocolate chips instead; rum adds alcohol.
- 1 extra egg for glazing — a little sweetened plant drink is an alternative glaze but does not make an egg-and-butter dough vegan.
- Suitable panettone moulds — choose enough moulds for the weighed dough and the manufacturer’s recommended loading. Do not put the whole batch into one nominal 1 kg mould.
Temperature and texture
Use softened butter and ingredients prepared as the recipe requires. Milk should be lukewarm, never hot; the source suggests 37–40°C, but follow the yeast manufacturer’s directions. Keep eggs and dairy refrigerated until needed rather than leaving them out for long periods.
Substitution notes and quick tips
- Gluten-free baking: choose a complete gluten-free enriched-bread recipe. Adding an arbitrary tablespoon of xanthan gum to any flour blend is not a reliable adaptation.
- Vegan baking: use a formula designed without eggs or dairy, including suitable chocolate and glaze. Replacing each ingredient separately does not guarantee the same structure.
- Preparing fruit: soaking hard raisins for 10–20 minutes can soften them. Drain and pat dry; candied fruit may not need soaking, and exposed fruit can still scorch.
- Accurate measurements: weigh dry ingredients and egg in grams and measure liquids consistently for repeatable batches.
- Yeast: fresh yeast is usually dispersed in liquid; instant and active dried yeast may require different handling. Follow the packet instead of treating all dried yeast identically.
- Dough texture: wheat-based dough should become soft, tacky and elastic after mixing and resting; enriched dough can take longer than lean bread.
These ingredients provide a starting point for the wheat-and-egg version. Vegan and gluten-free breads need their own tested proportions and methods; they are not guaranteed by a few simple swaps. Fruit and chocolate quantities also affect dough strength and yield.
Kneading and proving panettone dough
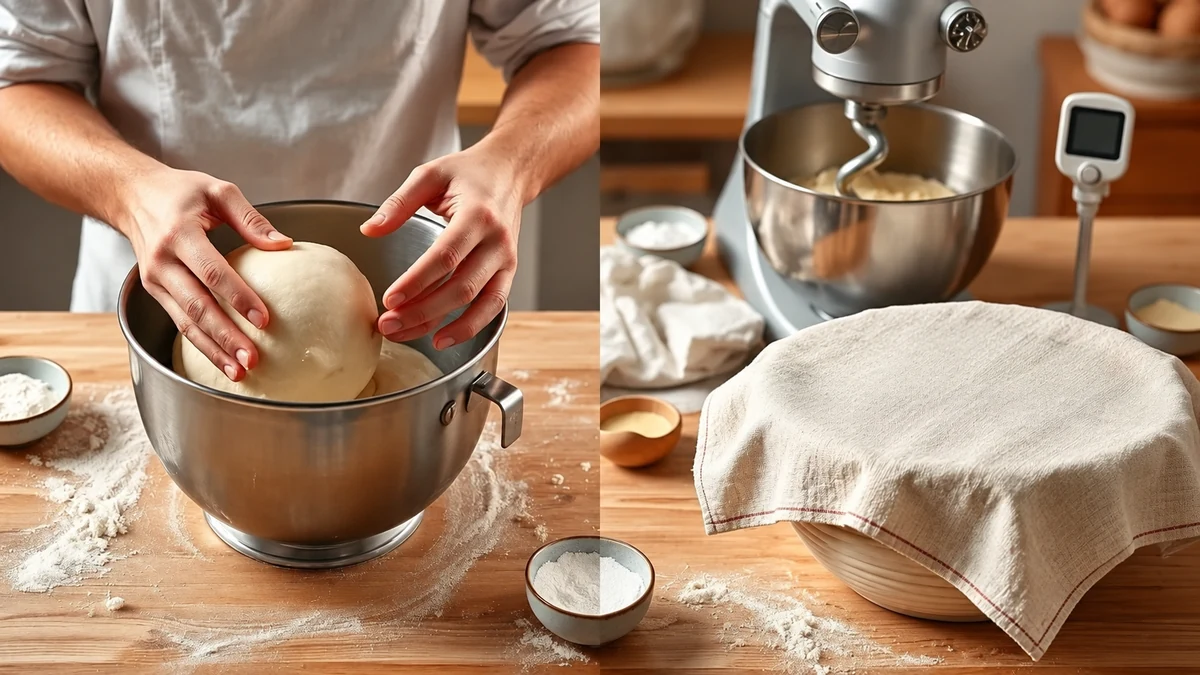
Careful mixing and proving help create a soft, aerated crumb. Watch the dough’s development as well as the clock; room temperature, flour and yeast all affect timing.
Preparing the starter
A short sponge or starter can begin fermentation before the final dough is mixed. Reserve its ingredients from the overall recipe quantities rather than adding them twice.
- Mix the yeast: combine the 7 g dried yeast with 50 ml of the milk and one teaspoon taken from the measured sugar, following the yeast’s preparation instructions.
- Add flour: mix in 100 g taken from the 500 g flour. With only 50 ml milk this is a stiff starter, not the thick liquid described in the source.
- Leave to ferment: cover and allow roughly 45–60 minutes in a gently warm place, looking for expansion and signs of fermentation; a stiff starter may not show large surface bubbles.
Kneading step by step
Kneading wheat dough develops the gluten network that holds gas during proving. Use the following as a guide, adapting timing to the dough and mixer.
- Initial mixing: combine the starter with the remaining flour, sugar, salt, eggs, milk and flavourings, including optional milk powder, before adding butter.
- Begin kneading: work for about six to eight minutes until evenly combined and tacky; more time may be needed before sufficient strength develops.
- Add the butter gradually: knead in small pieces, allowing each addition to incorporate. Continue until smooth, elastic and lightly glossy; the source’s eight to twelve minutes is only a guide.
- Windowpane check: stretch a small piece gently. A thin membrane that does not tear immediately indicates gluten development; this check does not apply to gluten-free dough.
First rise: temperature and timing
Avoid overheating or rushing the dough. Treat times as estimates and use the signs specified for your formula.
- Dough temperature: roughly 24–28°C after mixing is a useful guide for this type of enriched dough; avoid excessive heat.
- First rise: the source suggests 60–90 minutes, until approximately doubled. A rich dough may take longer, so assess its volume rather than baking to a fixed timetable.
- Final proof in the mould: allow approximately 60–90 minutes or as needed. An overnight refrigerated schedule requires a suitable recipe and a final proof after chilling; do not assume dough can go straight from an eight-hour fridge rest to the oven.
Hand kneading or a mixer?
Both can work, but enriched dough is demanding and equipment has different limits.
- By hand: allow extra time and use short rests if necessary. Avoid adding lots of flour simply because the dough is sticky.
- With a dough hook: use the speed and batch size permitted by the mixer manufacturer. The source estimates 14–20 minutes overall, but judge development and temperature rather than forcing that timing.
Signs to watch during proving
- Volume: the dough should expand substantially, approximately doubling at the first rise in this approach.
- Texture: wheat dough should feel soft, elastic and slightly tacky.
- Gas formation: a small sample can show bubbles within the dough; avoid repeatedly cutting or deflating the whole batch.
- Aroma: a yeasty or lightly fermented smell is normal. Smell alone cannot confirm food safety or the correct proof.
Common problems
- Little or no rise: check yeast age, liquid temperature and room conditions. Allow more time in a gently warm place instead of heating the dough aggressively.
- Rise followed by collapse: overproving or weak structure may be involved. Review timing and dough development for the next trial; chilling does not undo collapse.
- Heavy crumb: possible causes include insufficient gluten development, underproving, too much fruit or underbaking. Change one factor at a time rather than arbitrarily removing liquid.
- Dough overheating: stop the mixer and let the dough cool briefly; respect the machine’s operating limits.
Useful final reminders
- Weigh ingredients and record the result so that later batches can be compared.
- A thermometer helps monitor dough and liquid temperatures; follow the yeast instructions and avoid hot liquid.
- Drain prepared fruit thoroughly and fold it in after gluten development to limit damage to the dough.
Twelve panettone flavours and formats
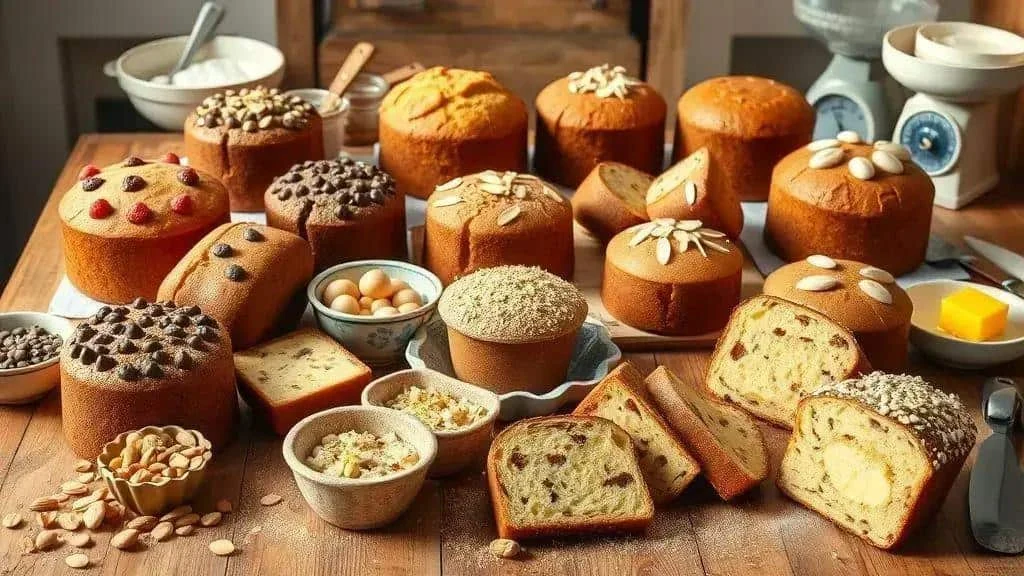
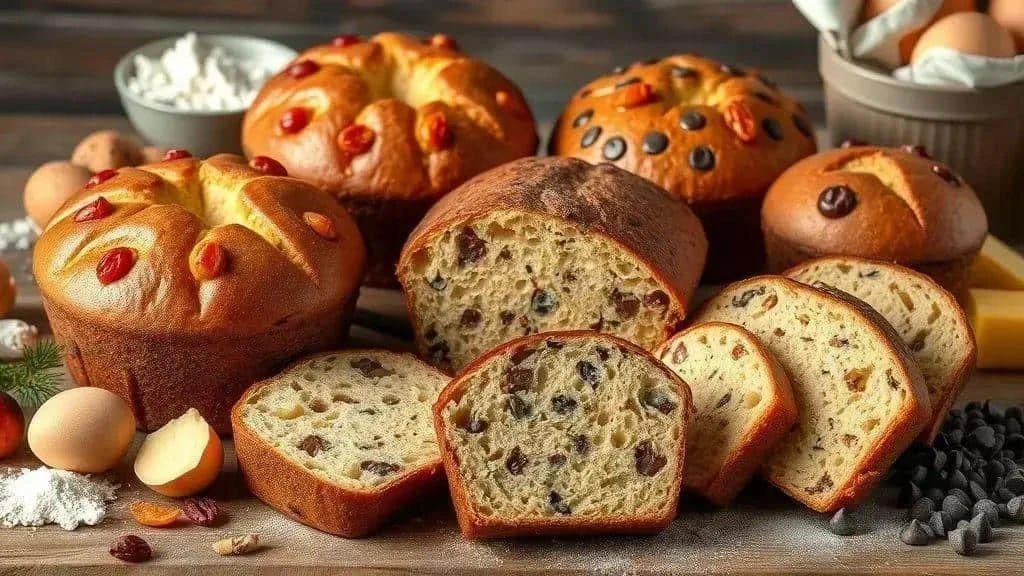
- Traditional panettone: a soft enriched bread with candied fruit, raisins, vanilla and orange zest.
- Classic chocotone: the Brazilian chocolate-chip version, with chocolate throughout the crumb and a golden crust.
- Mixed candied-fruit panettone: a variation emphasising colourful fruit and citrus peel.
- Brigadeiro-filled panettone: bread filled after baking with a cooked chocolate and condensed-milk cream.
- Dulce de leche panettone: a caramel-flavoured filling with optional icing or almonds.
- Mini panettone: individual portions for gifts or sale; smaller moulds need shorter, carefully checked baking times.
- Gluten-free panettone-style bread: requires a dedicated flour and binder formula, with a different mixing and proving method.
- Vegan panettone-style bread: made without eggs or dairy using a suitable formula. Vegan does not mean free from wheat, nuts, soya or other allergens.
- Part-wholemeal panettone: wholemeal flour adds flavour and fibre but changes hydration and structure; develop it as a separate variation.
- Orange and almond panettone: fragrant zest with toasted flaked almonds for contrast.
- Pistachio and white chocolate panettone: chopped pistachios and white chocolate give colour, flavour and texture.
- Pastry-cream-filled panettone: a chilled vanilla custard filling added only after the bread is completely cool.
Choosing a version
- Decide whether you are baking for home, gifts or sale, and plan portions accordingly.
- Allow enough time for mixing, proving, baking, cooling and any filling; specialist versions may take longer.
- For dietary restrictions, use an appropriate complete recipe and test a small batch first.
- Weigh ingredients and dough portions for consistency between batches.
Traditional panettone ingredients
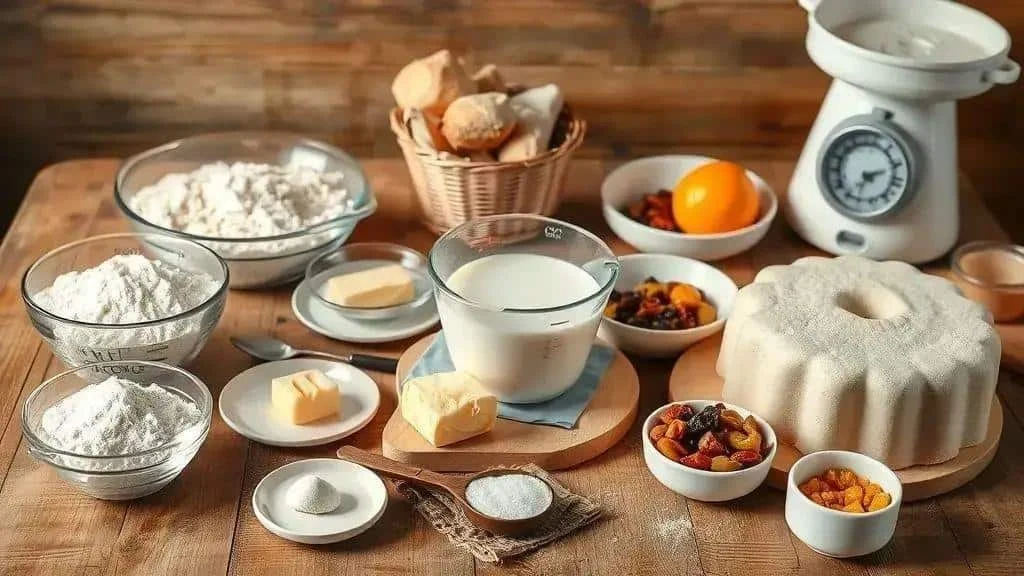
- 500 g wheat flour suitable for enriched bread — the source specifies Brazilian type 1; choose flour according to dough strength rather than assuming an exact UK equivalent.
- 120 g sugar — reserve one teaspoon from this total for the starter; reductions need testing.
- 8 g salt — weigh rather than relying on a spoon conversion.
- 7 g dried yeast — or the source’s suggested 20 g fresh yeast; follow the product instructions.
- 200 ml lukewarm milk — 50 ml for the starter and 150 ml for the main dough.
- About 200 g beaten egg without shells — the source calls this four large eggs, but UK egg sizes may give a different weight. Vegan replacements need a separate formula.
- 160 g softened butter — not melted; a plant-based baking block is a separately tested variation.
- 20 g milk powder, optional — omitting it alone does not make the dough dairy-free.
- 1 teaspoon vanilla extract — or vanilla seeds.
- Zest of 1 orange — finely grated, avoiding bitter white pith.
- 250–300 g candied fruit and/or raisins — soak hard raisins for 10–20 minutes if desired, then drain and dry well. For chocotone, replace with 200–250 g chocolate chips.
- 1 extra egg for glazing — use only as much as needed and discard leftover glaze that has contacted raw dough.
- Enough panettone moulds for the batch — the ingredients total roughly 1.5–1.6 kg before baking, excluding glaze. Weigh the actual dough and divide according to each mould’s recommended loading.
Practical notes and alternatives
- Vegan version: use a developed vegan enriched-bread recipe rather than replacing four eggs with an unverified amount of flaxseed or aquafaba.
- Gluten-free version: use a recipe designed for the chosen flour blend and binder; extra xanthan gum is not automatically needed if the blend already contains it.
- Alternative sweeteners: coconut sugar and erythritol behave differently from ordinary sugar. Test a separate formula rather than swapping equal amounts without adjustment.
- Preparing fruit: soak hard raisins briefly if needed, then drain and pat dry. Soaking does not prevent all scorching of exposed fruit.
- Temperatures: use lukewarm milk according to the yeast instructions and butter that is soft enough to incorporate but not melted.
- Weighing: accurate gram measurements make the dough and final portions more consistent.
- Adding fruit: fold it in after the dough has developed, keeping pieces evenly distributed without tearing the dough excessively.
Ingredient and dough checks
- Check the yeast’s expiry date and the condition of dried fruit before starting.
- Develop wheat dough until elastic and tacky; a sticky rich dough does not necessarily need more flour.
- Brush gently with egg for colour before baking. A plant-drink glaze is an alternative finish, not a change to the dough’s dietary status.
Traditional panettone: step-by-step method
- Prepare the starter: combine the 7 g yeast, one teaspoon taken from the 120 g sugar, 50 ml of the milk and 100 g of the flour, following yeast-packet directions. Cover for roughly 45–60 minutes until expanded. This ratio produces a stiff starter, not a liquid batter.
- Mix the dough: combine the remaining 400 g flour, remaining sugar, 8 g salt, optional 20 g milk powder and orange zest. Add the measured beaten egg, remaining 150 ml milk, vanilla and starter; mix until the dry ingredients are incorporated.
- Begin kneading: knead by hand or with a dough hook on the manufacturer’s recommended speed until the dough becomes cohesive. Six to ten minutes is a starting guide, not a fixed endpoint.
- Incorporate butter: add the 160 g softened butter in small pieces, kneading between additions. Continue until the dough is smooth, elastic and glossy; this may take longer than eight to twelve minutes.
- Check development: gently stretch a small piece into a thin membrane. If it tears immediately, allow a short rest and continue developing it without overheating.
- First rise: place in a lightly greased bowl, cover and leave in a gently warm place until approximately doubled. Allow around 60–90 minutes or longer as needed.
- Add fruit: transfer to a lightly floured surface and gently fold in 250–300 g prepared, drained fruit, or 200–250 g chocolate chips, until distributed.
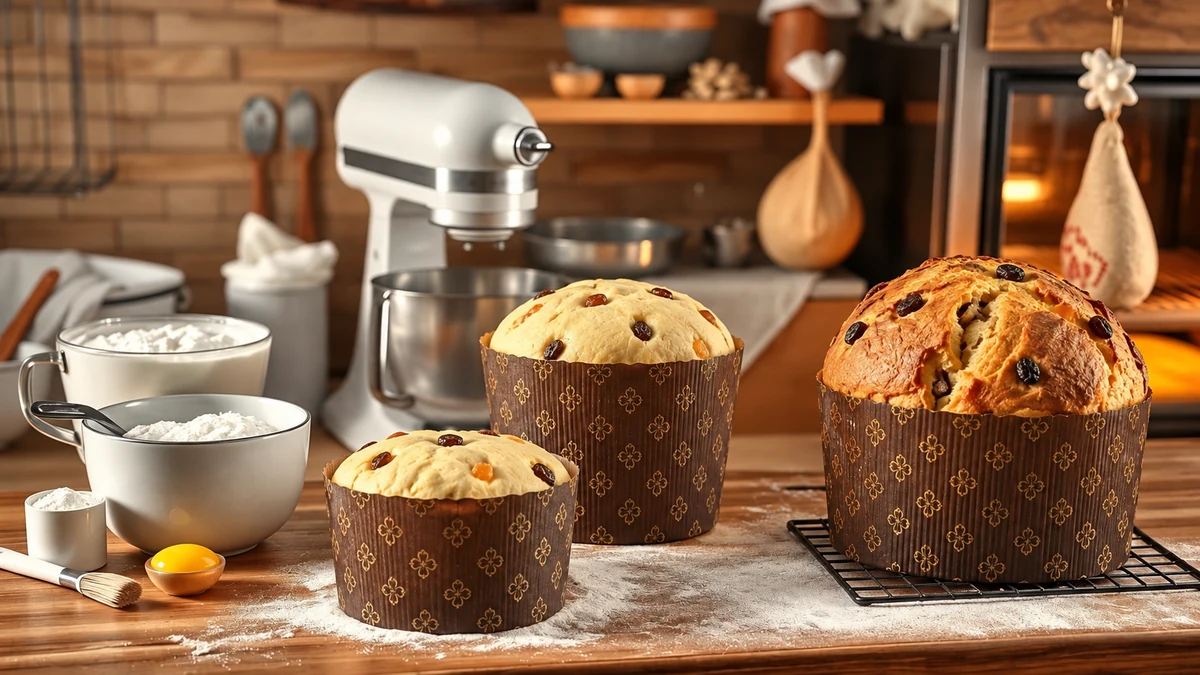
- Divide and shape: weigh the dough and divide it between suitable moulds according to their recommended dough capacity. Do not use the whole roughly 1.5–1.6 kg batch in one 1 kg mould. Shape each portion with surface tension and place centrally.
- Final proof: cover loosely and let rise until the dough approaches the mould’s rim, roughly one to two centimetres below it for the intended loading. Timing may exceed 60–90 minutes; avoid overproving or overfilled moulds.
- Glaze and optionally score: gently brush with beaten egg. A shallow cross and a small extra piece of butter are optional; avoid deflating the dough.
- Bake: preheat to 180°C conventional. The source suggests 35–45 minutes, but this is not a reliable fixed time for all mould sizes, especially a large loaf. Bake until the centre is cooked, tenting with foil or reducing to 170°C if browning too quickly.
- Check the centre: look for a properly set crumb and no wet dough on a skewer. A core temperature around 92–95°C is used in some panettone formulas, but follow the complete recipe and assess the loaf rather than relying on crust colour alone.
- Cool securely: tall, delicate panettone is often cooled upside down. Use suitable food-safe skewers and a stable purpose-built support, following the mould and recipe guidance; do not balance hot bread precariously on bottles. Cool completely before wrapping, which can take several hours.
- Pack and store: once completely cool, remove skewers and wrap in food-safe packaging. For this untested homemade formula, aim to eat plain bread within two to three days for quality or freeze it fresh; this is not a validated commercial shelf life. Cream-filled bread needs refrigeration.
Quick reminders
- Weigh all ingredients and the finished dough for repeatable batches and correct mould loading.
- Use lukewarm liquid as directed by the yeast manufacturer, never hot liquid.
- Monitor mixer and dough temperature, pausing when necessary.
- Soften hard raisins briefly if desired, then drain and dry. Rum-soaked fruit is not automatically alcohol-free after baking.
- For vegan baking, use a separate tested formula; milk, butter, eggs, chocolate and glaze all matter.
Classic chocotone: ingredients and method
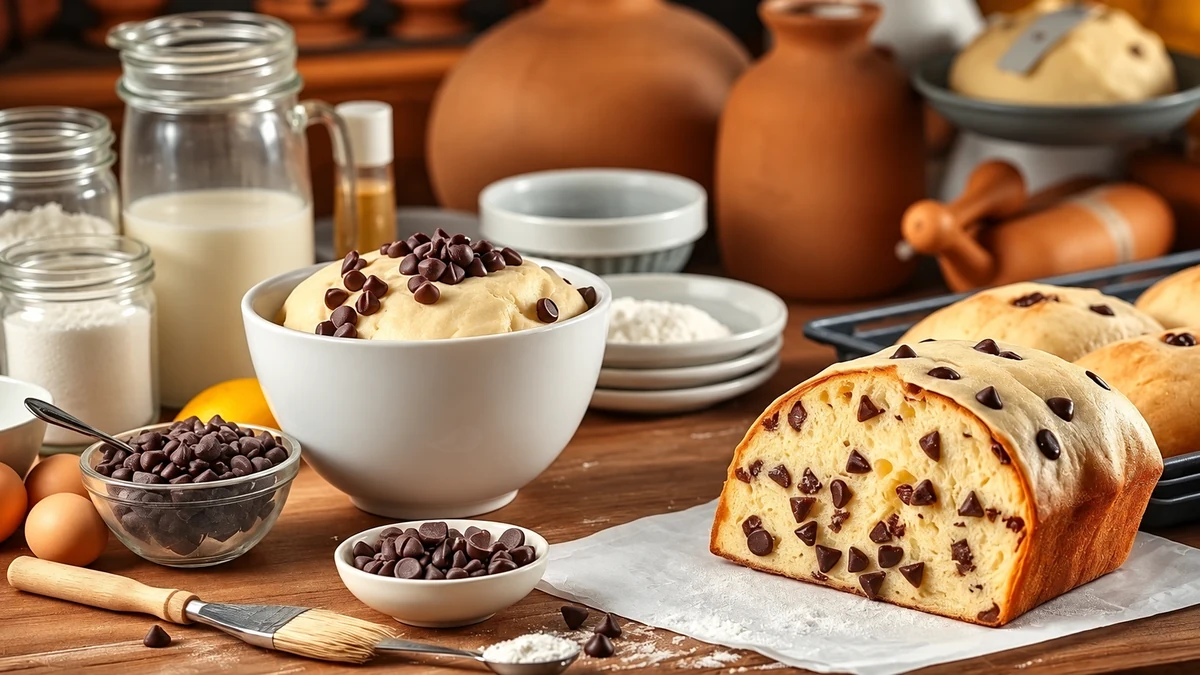
- 500 g wheat flour — suitable for enriched bread.
- 120 g sugar — including the teaspoon reserved for the starter. Reducing it changes the dough and needs testing.
- 8 g salt — weighed accurately.
- 7 g dried yeast — or the source’s suggested 20 g fresh yeast, following the product instructions.
- 200 ml lukewarm milk — 50 ml for the starter and 150 ml for the final dough.
- About 200 g beaten egg without shells — weigh rather than assuming four UK large eggs match the source’s weight. Flaxseed and aquafaba are not verified equivalents.
- 160 g softened butter — a dairy-free variation requires a suitable formula.
- 20 g milk powder, optional — included with the dry ingredients if used.
- 1 teaspoon vanilla extract — for flavour.
- Cocoa variation, optional — the source suggests adding 50 g cocoa, but that changes hydration and dough strength. The method here follows the plain chocolate-chip dough; develop a cocoa dough separately rather than adding it without adjustment.
- 200–250 g milk or dark chocolate chips — check allergens and choose dairy-free chocolate only as part of a complete vegan recipe.
- 1 extra egg for glazing — a little sweetened plant drink is an alternative finish.
- Panettone baking moulds with sufficient capacity — weigh the batch and follow the recommended loading for each mould, rather than filling a single nominal 1 kg mould with all the dough.
Step-by-step method
- Prepare the starter: combine the yeast with 50 ml of the milk, one teaspoon from the measured sugar and 100 g of the flour, as the yeast packet directs. Cover for about 45–60 minutes until expanded; this is a stiff starter.
- Mix the dry ingredients: combine the remaining 400 g flour, remaining sugar, 8 g salt and optional 20 g milk powder. Leave out the untested cocoa addition for this basic chocolate-chip version.
- Add liquids: combine the measured beaten egg, remaining 150 ml milk and vanilla, then mix into the dry ingredients with the starter until cohesive and sticky.
- Start kneading: work by hand or with a dough hook at an approved speed until the mixture develops strength; six to ten minutes is an initial guide.
- Add butter: incorporate the 160 g softened butter gradually in pieces, continuing to knead until smooth and elastic. Eight to twelve minutes may not be sufficient for every mixer or flour.
- Check the dough: stretch a small piece gently into a thin membrane to assess gluten development.
- First rise: place in a lightly greased bowl, cover and leave in a gently warm place until approximately doubled, allowing about 60–90 minutes or longer as needed.
- Add chocolate chips: fold 200–250 g chips gently through the developed dough on a lightly floured surface, distributing them without excessive kneading.
- Divide and shape: weigh the dough, divide according to mould capacity and shape each portion with a smooth surface. The whole batch is too large for one 1 kg mould.
- Final proof: cover loosely and allow the correctly loaded dough to rise towards the rim, roughly one to two centimetres below it. Use volume as well as the suggested 60–90 minutes.
- Glaze: brush gently with egg or your chosen glaze. A shallow score and small extra piece of butter on top are optional.
- Bake: start in a 180°C conventional oven and monitor browning. The original 35–45 minutes is an estimate that depends on loaf size; continue until properly baked, tenting with foil or lowering to 170°C if necessary.
- Check doneness: a skewer should show no raw dough, although melted chocolate may mark it. Around 92–95°C at the centre is a guide used for some panettone formulas; check structure and the complete recipe too.
- Cool carefully: use appropriate skewers and a secure support for inverted cooling where the recipe and mould allow it. Leave until completely cool rather than packing after a fixed number of hours.
- Pack: wrap cooled, unfilled bread in food-safe packaging. Aim to enjoy within two to three days for quality or freeze fresh; filled versions need shorter refrigerated storage.
Chocolate and dietary variations
- Chocolate choice: baking chips hold their shape differently from chopped bars. Choose milk, dark or a mixture according to taste and the desired texture.
- Vegan version: use a dedicated vegan dough and check chocolate, glaze and fillings as well as eggs and dairy.
- Gluten-free version: use a complete gluten-free formula. A bread blend plus an arbitrary tablespoon of xanthan gum is not a guaranteed substitute.
- Keeping chips intact: add cool chips to dough that is not hot and fold gently; chilling them can reduce smearing during mixing, but they still soften in the oven.
- Portion weights: weigh dough to match each mould and help similar-sized loaves bake evenly.
Chocotone method recap and flavour variations
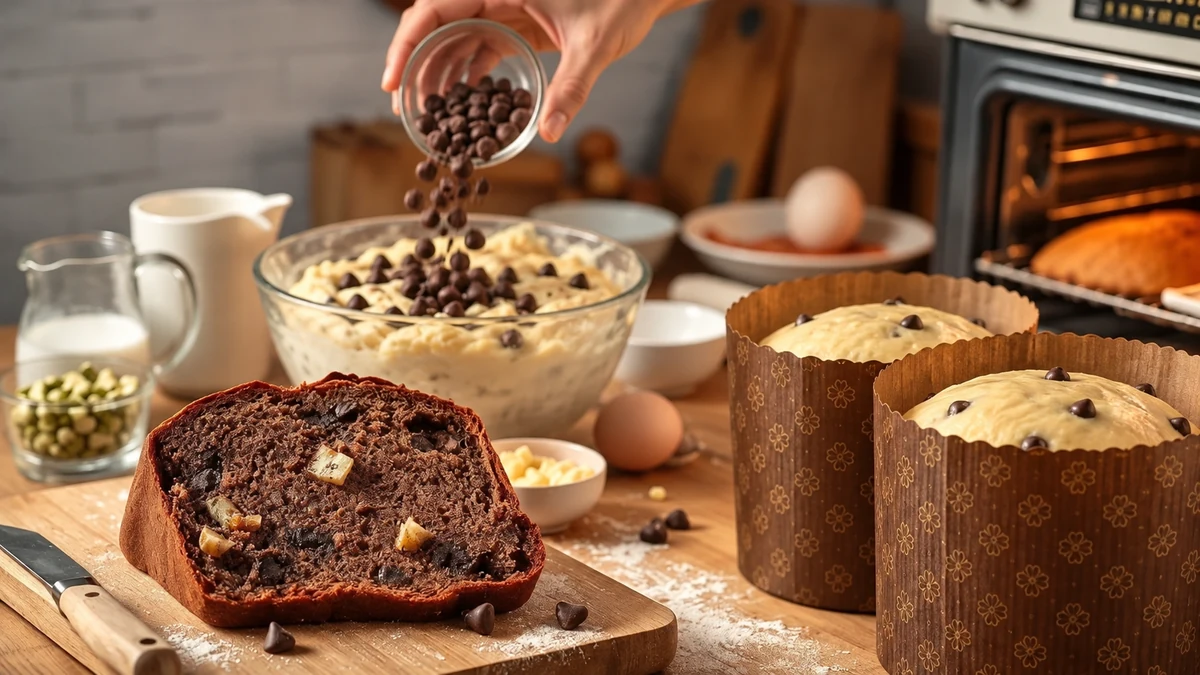
- Starter: combine 7 g dried yeast, one teaspoon taken from the sugar, 50 ml of the milk and 100 g of the flour according to the yeast instructions. Cover until expanded, approximately 45–60 minutes; it will be a stiff mixture.
- Main mixture: combine the remaining 400 g flour, remaining sugar, 8 g salt and optional 20 g milk powder. Add about 200 g beaten egg, the starter, 150 ml milk and vanilla.
- Initial kneading: knead by hand or mixer until cohesive and beginning to strengthen, using six to ten minutes as an initial guide rather than a guarantee.
- Butter: gradually incorporate 160 g softened butter, then continue until smooth, elastic and glossy without overheating the dough.
- Optional cocoa dough: the original separately suggested 30–50 g cocoa. This changes the flour-to-liquid balance, so use a developed cocoa dough recipe instead of adding it to this formula at random.
- First rise: cover in a lightly greased bowl until approximately doubled, allowing 60–90 minutes or more according to conditions.
- Chocolate chips: gently fold in 200–250 g chips once the dough has developed and risen.
- Shaping: divide the weighed batch into suitable portions for the moulds, shape and place centrally. Do not put the entire batch in one 1 kg mould.
- Final proof: cover loosely until risen towards the mould’s rim, allowing more time than the suggested 60–90 minutes if the dough needs it.
- Glazing: brush with beaten egg or an alternative glaze. A shallow score and a little extra butter are optional.
- Baking: preheat to 180°C conventional, monitor browning and bake until the centre is properly cooked. The original 35–45-minute estimate is not valid for every portion size; tent or lower to 170°C if needed.
- Doneness: check for a set crumb with no wet dough; distinguish melted chocolate from raw batter. Temperature and structure should be assessed together.
- Cooling: where appropriate, use food-safe skewers and a stable inverted-cooling support for tall loaves. Cool completely before wrapping.
- Storage: keep plain, fully cooled bread wrapped in a cool, dry place for short-term quality, preferably two to three days, or freeze fresh. Do not apply this to perishable filled versions.
Flavour ideas
- Brigadeiro filling: use around 300 g prepared, cooled chocolate condensed-milk filling for a suitably sized loaf. Fill only after baking and cooling, then refrigerate.
- Dulce de leche filling: around 300 g spreadable dulce de leche may suit a loaf, depending on its size. Avoid unnecessary warming and refrigerate after filling.
- Pistachio and white chocolate: the source suggests 150 g chopped toasted pistachios and 150 g white chocolate instead of the standard chips. This heavier addition needs testing for dough strength and mould loading.
- Mixed chocolate chips: use 150 g milk-chocolate chips and 100 g dark-chocolate chips within the 250 g total.
- Pastry cream: fill a cooled loaf with around 250–300 g properly prepared cold pastry cream, adjusting to its size; keep refrigerated.
- Vegan adaptation: replacing the milk and butter does not resolve the four-egg structure. Use a separately tested vegan recipe rather than relying on an assumed flaxseed or aquafaba equivalent.
- Gluten-free adaptation: use a recipe designed for its specific flour blend, binder and liquid. Longer proving is not automatically the answer to a weak gluten-free dough.
- Mini chocotones: portion according to the mini mould’s loading guidance; 80–100 g is the source’s suggested dough range. Start checking small loaves around 18–25 minutes, adjusting to size and doneness.
Troubleshooting
- Smearing chocolate: cool the dough if necessary and fold in cool chips gently.
- Very soft dough: check ingredient weights, flour strength and gluten development before adding more flour. Large unrecorded additions can produce dry bread.
- No rise: check yeast and liquid temperature, and allow sufficient time in a gently warm place. Adding water to an already mixed dough is not a general solution.
- Uneven baking: leave space around moulds and position them appropriately in the oven. Rotate only if needed and once the structure is sufficiently set, avoiding jolting a fragile loaf.
- Testing changes: trial small batches and record alterations, particularly for vegan and gluten-free versions.
Candied-fruit panettone: ingredients and variations
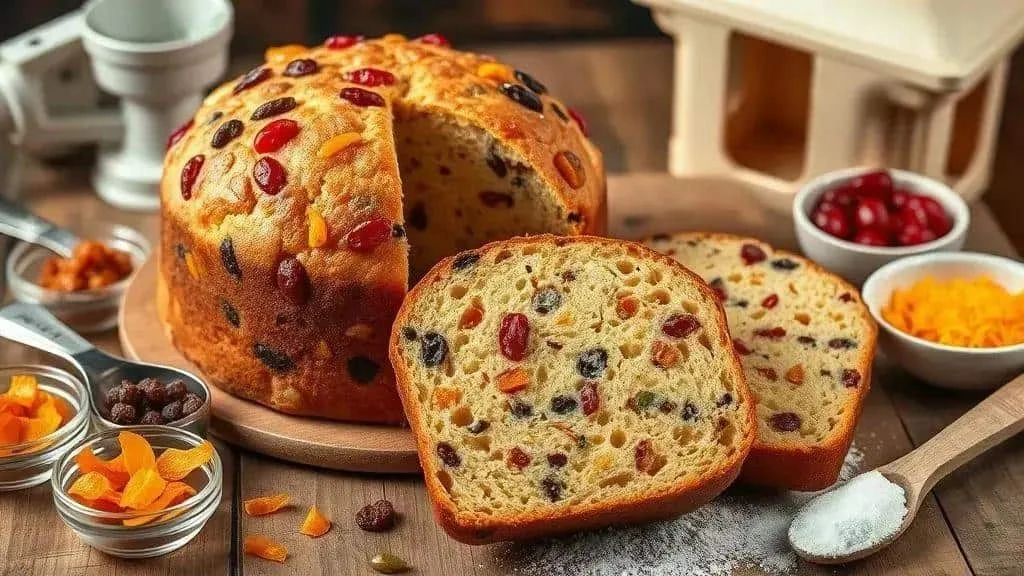
- 500 g wheat flour suitable for enriched bread — a gluten-free version needs its own formula.
- 120 g sugar — including the starter’s teaspoon; changes to amount or type need testing.
- 8 g salt — weighed accurately.
- 7 g dried yeast — or the source’s suggested 20 g fresh yeast, following packet directions.
- 200 ml lukewarm milk — divided as in the traditional method.
- About 200 g beaten egg without shells — use weight to avoid differences in national egg-size labels; vegan alternatives need a dedicated recipe.
- 160 g softened butter — not melted.
- 20 g milk powder, optional — omit only as part of an appropriately adapted dairy-free recipe.
- 1 teaspoon vanilla extract — or vanilla seeds.
- Zest of 1 orange — finely grated.
- 250–300 g candied fruit and/or raisins — prepare and drain as needed. Chopped dates, apricots or dried cranberries can replace part of the fruit, with a different moisture level and flavour.
- 1 extra egg for glazing — or an alternative glaze; the dough still contains eggs and dairy.
- Suitable panettone moulds — follow the traditional method and divide the batch by the recommended dough load, not the original single-mould claim.
Candied-fruit variations
- Classic mixture: try 60% candied fruit and peel with 40% raisins within the overall fruit allowance.
- More citrus: add a little extra orange or lemon zest to taste, avoiding the bitter pith.
- Tropical fruit: replace part of the fruit with small pieces of candied pineapple or papaya.
- Dried-fruit version: chopped apricots and dates offer a different flavour and moisture balance. Test the variation rather than assuming it always needs less liquid.
- Colourful mixture: chopped glacé cherries and candied orange peel add festive colour; drain and dry sticky fruit as needed.
Preparing and incorporating fruit
- Soften if needed: soak hard raisins for 10–20 minutes in warm water or optional rum, then drain and pat dry. Ready-to-use candied fruit may not need soaking.
- Light dusting: if useful for separating sticky pieces, use a little flour reserved from the recipe rather than adding several unmeasured spoonfuls. Dusting does not guarantee fruit will stay suspended.
- Add after development: follow the traditional method, folding fruit into developed dough gently.
- Even distribution: gently spread the wheat dough, scatter fruit and fold until distributed without excessive tearing.
Gluten-free and vegan alternatives
- Gluten-free: use a dedicated recipe and binder quantity for the particular flour blend; do not assume extra gum and longer proving will reproduce wheat dough.
- Vegan: choose a developed egg-free, dairy-free formula and check chocolate, fruit coatings and glaze if used.
Serving and storage
- Gift packaging: wrap only when fully cool in food-safe material, then place in a decorative box with ingredients and storage instructions.
- Storage: keep unfilled bread well wrapped in a cool, dry place and aim to eat within two to three days for quality, or freeze fresh. Do not claim a validated shelf life for this untested formula.
- Serving: slice unfilled bread at room temperature to enjoy its crumb and fruit. Perishable filled versions should remain chilled until needed.
Gluten-free panettone: formula notes and precautions
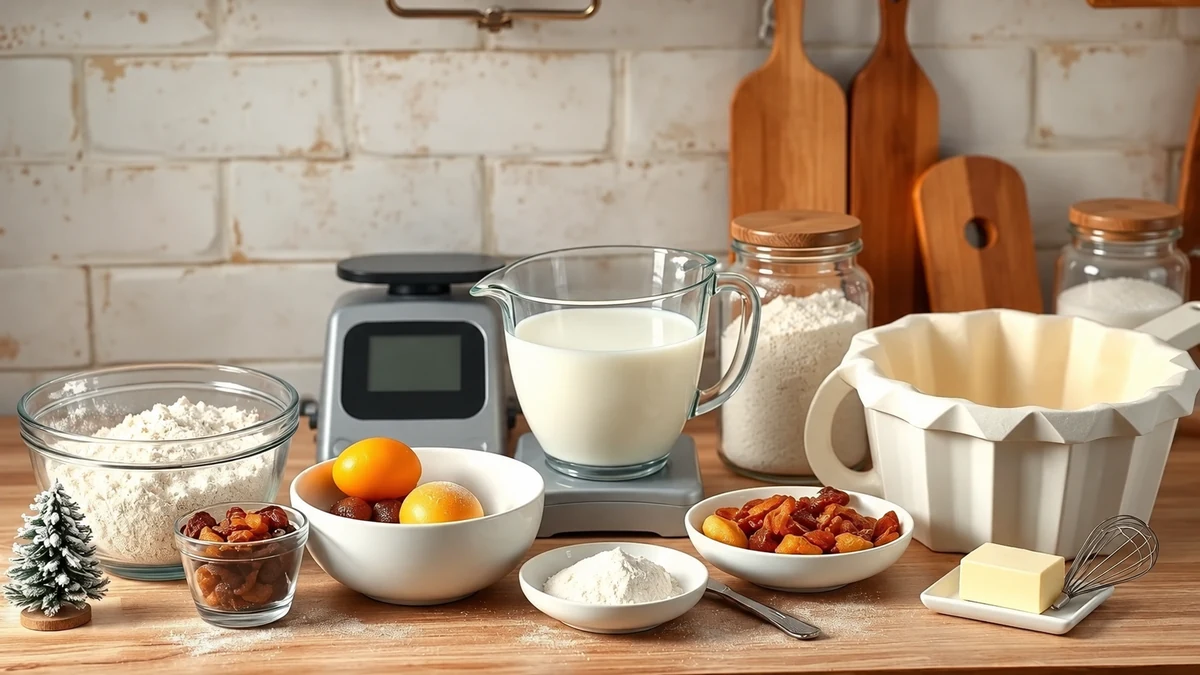
- 500 g gluten-free flour blend — the source suggests 300 g rice flour plus 120 g tapioca starch and 80 g sweet cassava starch. The latter two are effectively the same type of starch, not distinct binders. This untested blend should be checked against a complete gluten-free bread recipe before use.
- Xanthan gum: quantity requires validation — the source specifies about 10 g, but blends may already contain gum. Psyllium is not an equal-spoon substitute. Use the binder and dose in a tested formula for your blend.
- 120 g sugar in the source outline — do not reduce before establishing a workable formula.
- 8 g salt — weigh it.
- 7 g dried yeast — or the source’s suggested 20 g fresh yeast, with preparation according to the product.
- 250 ml lukewarm milk in the source outline — liquid requirements vary significantly with gluten-free flour and binder; this is not a validated universal amount.
- About 200 g beaten egg without shells — eggs contribute structure. Flaxseed or 180–220 ml aquafaba is not a verified replacement in this gluten-free formula.
- 160 g softened butter — a dairy-free baking fat needs a compatible recipe.
- 20 g milk powder, optional in the source — omission does not make the remaining milk and butter dairy-free.
- 1 teaspoon vanilla extract and zest of one orange.
- 200–250 g candied fruit and raisins — drained and dried if soaked; the source also suggests 200 g chocolate chips as a different version. Check gluten-free status and other allergens.
- 1 extra egg for glazing — or a suitable alternative glaze, depending on the complete recipe.
- Appropriate baking moulds — use the size and dough load specified by the gluten-free recipe. The source’s entire batch should not be assumed to fit one 1 kg mould.
Method considerations for a gluten-free trial
- Starter: the source combines yeast, a teaspoon from the measured sugar, 50 ml of the milk and 100 g of the blend. This is a stiff mixture, not a liquid sponge. Use the starter method required by a tested gluten-free recipe.
- Dry ingredients: distribute the specified binder thoroughly through the flour, sugar, salt and optional milk powder. Do not add the source’s 10 g gum automatically if the blend already contains it.
- Liquids: combine egg, remaining milk, vanilla and any starter as the complete recipe directs. A gluten-free mixture may be a thick batter rather than kneadable dough.
- Mixing: mix until uniformly hydrated using the appropriate utensil or mixer attachment. Gluten-free dough does not develop a wheat gluten network, so prolonged kneading and a windowpane test are not suitable targets.
- Fat: incorporate the softened butter as directed in the validated formula; smoothness, rather than wheat-like elasticity, is the relevant observation.
- Proving schedule: follow the selected gluten-free recipe. Do not automatically use two long rises or wait for doubling, as some mixtures cannot retain that amount of gas.
- Fruit: mix drained fruit gently into the mixture at the stage specified. A batter-like dough should not be rolled out and folded on a floured worktop as though it were wheat bread.
- Filling moulds: spoon a soft mixture into suitable moulds and level with a lightly damp utensil if appropriate. Do not attempt to shape it into a tight wheat-dough ball; leave the headroom required by the recipe.
- Baking: use the temperature and time specified by your tested gluten-free recipe and mould size. The source’s 180°C for 35–45 minutes is not validated for every blend or loaf weight.
- Doneness and cooling: check that the centre is cooked, then cool as the recipe directs. Do not hang a fragile gluten-free loaf upside down unless its formula and mould are designed for that treatment.
- Packing: cool completely before wrapping. Use the storage guidance for the validated recipe and freeze fresh portions if keeping longer.
Important adaptation notes
- Binders: xanthan gum and psyllium have different hydration and structural effects. Neither should be exchanged spoon-for-spoon without a suitable formula.
- Flour blends: their liquid absorption varies. Record any small trial adjustments, but avoid presenting an untested adjustment as a guaranteed recipe.
- Proving: extra time does not always help; overproving can collapse a gluten-free mixture. Follow the relevant volume and timing cues.
- Cross-contact: for coeliac disease or wheat allergy, check all ingredients and avoid contamination from flour, utensils and work surfaces. Gluten-free and wheat-free are not always interchangeable requirements.
- Dry crumb: investigate flour balance, hydration and overbaking in a small trial; do not simply underbake to retain moisture.
- Vegan and gluten-free together: use a recipe developed for both requirements. Egg replacement changes an already delicate structure and liquid balance.
- Even baking: position moulds with adequate airflow and avoid moving them while the structure is fragile.
Beginner reminders
- Weigh ingredients and use a complete formula suited to the flour blend.
- Follow the yeast instructions for liquid temperature; never use excessively hot liquid.
- Prepare hard dried fruit as needed, then drain thoroughly before adding it.
- Monitor the mixture and mixer temperature, taking breaks if necessary.
Vegan panettone: ingredients and adaptation notes
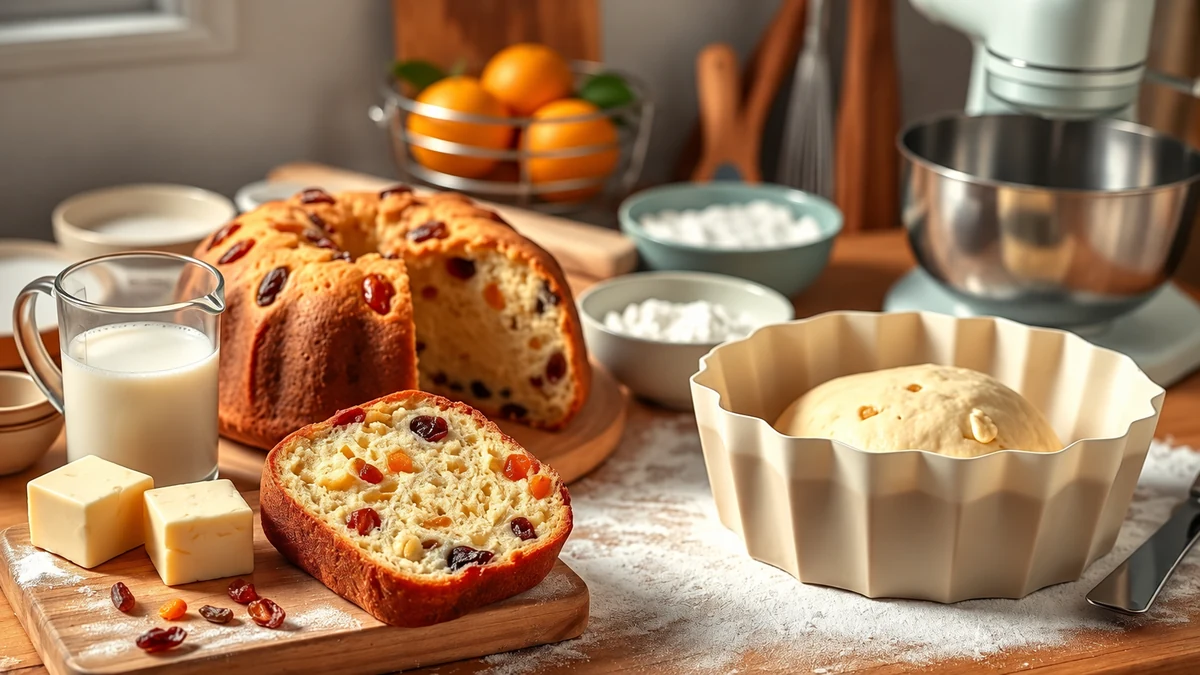
- 500 g wheat flour — suitable for enriched bread. The following source formula is untested; a gluten-free and vegan version requires a recipe developed for both requirements.
- 120 g sugar — including the teaspoon used in the starter. Reductions and coconut-sugar substitutions affect fermentation and texture.
- 8 g salt — weighed.
- 7 g dried yeast — or the source’s suggested 20 g fresh yeast; follow packet directions.
- 200–250 ml lukewarm plant drink in the source outline — oat, almond or soya products behave differently. The correct amount depends on the egg-replacement formula and needs a small trial.
- Egg-replacement options proposed by the source — four tablespoons ground flaxseed with twelve tablespoons water, or 120–150 ml aquafaba, the liquid from chickpeas. These have different weights, hydration and structure and are not verified equivalents to one another or to four eggs. Use a tested vegan dough formula before treating either as a reliable recipe.
- 160 g dairy-free baking block — choose a product suitable for baking rather than a low-fat spread, and verify the formula’s fat and water balance.
- 20 g plant-based milk powder, optional in the source — check its ingredients and effect on the dough.
- 1 teaspoon vanilla extract — or finely grated zest of one orange.
- 250–300 g candied fruit and raisins — prepare and drain if needed. Alternatively, the source suggests 200–250 g vegan chocolate chips; check the full ingredient list.
- Optional emulsifier: follow a validated formula — the source’s generic tablespoon of emulsifier or soya lecithin is not a universal dose and does not establish a longer shelf life. Omit this unvalidated addition and check soya allergens.
- Gluten-free binders: use a separate recipe — do not add an arbitrary tablespoon of xanthan gum to turn this wheat-based formula into a gluten-free one.
- Optional plant-based glaze — one tablespoon agave syrup mixed with two tablespoons plant drink, brushed on lightly. This is a glaze, not an egg replacement within the dough.
- Suitable panettone moulds — weigh the actual batch and divide by recommended dough loading. The entire mixture should not be placed in one 1 kg mould.
Method notes for developing a vegan version
- Starter: the source combines the yeast, one teaspoon from the sugar, 50 ml of the plant drink and 100 g of the flour. Cover until expanded, approximately 45–60 minutes; this ratio makes a stiff starter. Follow the yeast instructions.
- Dry ingredients: combine the remaining flour and sugar, salt and optional plant milk powder, using the quantities from the vegan formula you are testing.
- Egg replacement: prepare the flaxseed mixture or aquafaba as the selected tested recipe directs. The source’s alternative amounts are not equivalent, and whipping aquafaba does not by itself reproduce an egg’s role in enriched bread.
- Liquids and starter: combine the chosen replacement, vanilla, remaining plant drink and starter with the dry ingredients. The source’s remaining 150–200 ml liquid needs checking against the replacement’s water content; do not add more solely to match a fixed number.
- Initial kneading: develop the wheat dough until cohesive, by hand or using a permitted mixer speed. The source’s six to ten minutes is only a starting estimate.
- Fat: incorporate the dairy-free baking block gradually, kneading until absorbed and the dough has developed, without overheating.
- First rise: cover in a lightly greased bowl and watch for the expansion required by your validated formula. Sixty to ninety minutes is not a guaranteed time for all vegan doughs.
- Fruit: drain and dry prepared fruit, using a little reserved flour only if needed to separate sticky pieces, then fold gently into the developed dough.
- Shaping: divide the weighed dough between suitable moulds, keeping within their loading guidance, and smooth the surface without overworking.
- Final proof: cover loosely and allow the correctly loaded dough to rise towards the rim, using the recipe’s volume cues rather than a fixed 60–90-minute deadline.
- Glazing: brush lightly with the syrup-and-plant-drink mixture. A shallow score and a small extra piece of baking block are optional.
- Baking: the source suggests 180°C conventional, but time depends on the validated dough, portion weight and mould. Do not assume every loaf is done in 35–45 minutes; protect the top from excessive browning while the centre finishes.
- Doneness and cooling: check for a cooked centre and follow the recipe’s cooling method. Inverted cooling needs a loaf strong enough for it, appropriate skewers and a stable support; it is not automatically suitable for every vegan formula.
- Packing: cool fully before wrapping and follow storage guidance for the validated recipe. Freeze fresh portions for longer keeping rather than assigning an untested five-day shelf life.
Alternative ingredients
- Egg replacements: flaxseed gel and aquafaba have different functions and water content. Choose a formula designed for one rather than swapping them interchangeably.
- Fat: oil and baking blocks differ in water content and firmness. Oil does not automatically make bread lighter or lower in energy; use the fat specified by the recipe.
- Sweeteners: coconut sugar and agave syrup still contribute sugars. Syrup also adds liquid, so neither is a simple universal replacement for granulated sugar.
- Flavourings: citrus zest adds aroma; an optional tablespoon of rum adds alcohol that may remain after baking. Check extracts and flavourings for the intended dietary requirements.
- Vegan fillings: use properly prepared coconut condensed-milk brigadeiro, plant-based dulce de leche or plant-milk custard, with appropriate chilling.
- Both vegan and gluten-free: use a complete recipe specifically developed for both. Combining isolated substitutions is not enough to guarantee a stable loaf.
- Mini versions: use dough portions suited to the moulds; the source suggests 80–100 g and an initial baking check around 18–25 minutes, but verify the centre and your recipe.
- Getting started: weigh ingredients, follow yeast-temperature instructions, prepare fruit carefully and trial a small batch before scaling up.
Filling panettone with brigadeiro or dulce de leche
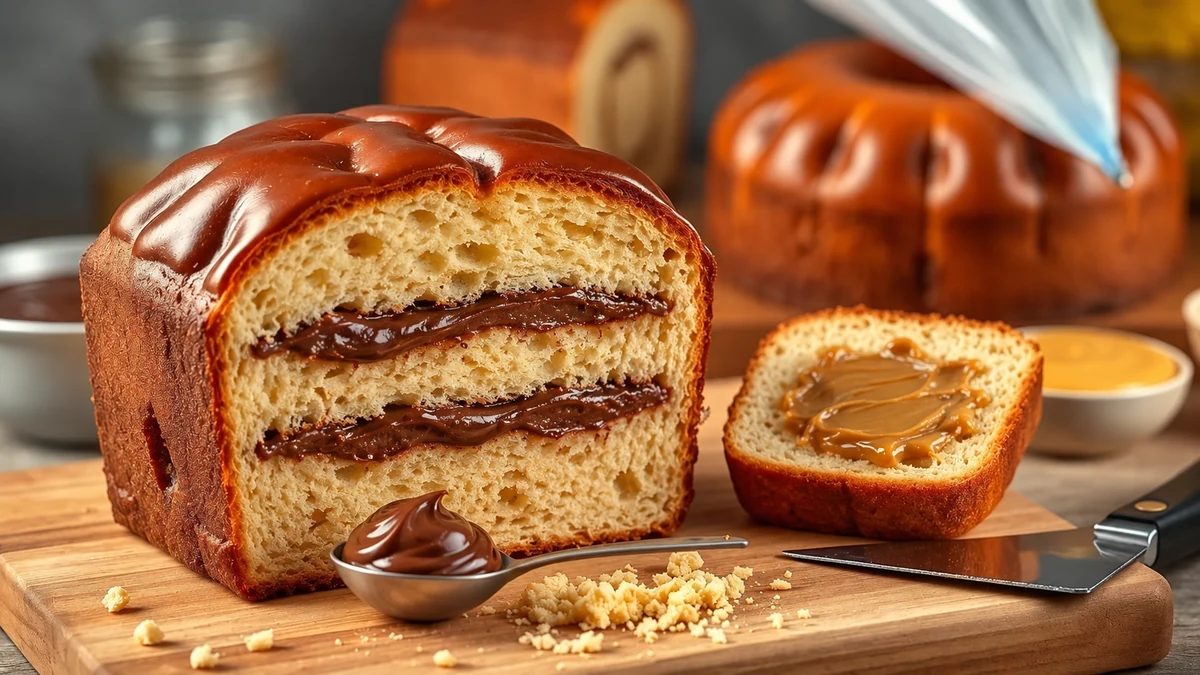
- 1 fully baked, cooled panettone, approximately 1 kg — traditional fruit bread or chocotone; filling amounts depend on its actual size and cavity.
- Brigadeiro filling: one 395 g tin sweetened condensed milk, one tablespoon sifted cocoa and one tablespoon butter. The source’s alternative 100 g chocolate changes the formula and is not an equal replacement for the cocoa.
- Dulce de leche: around 400 g ready-made, thick but spreadable dulce de leche, used instead of brigadeiro or as a smaller additional layer. Do not assume all available filling must go into the loaf.
- Other filling ideas: around 300 g cold pastry cream, dulce de leche with cream cheese in a suitable complete recipe, or around 200 g white brigadeiro. Choose one compatible filling and adjust to the cavity.
- Tools: a piping bag if useful, spoon, bread knife and small spatula, plus a stable serving base.
Making brigadeiro filling
- Combine in a saucepan: one 395 g tin condensed milk, one tablespoon sifted cocoa and one tablespoon butter.
- Cook over a low heat: stir continuously with a heatproof spatula, scraping the bottom so that it does not catch.
- Check consistency: cook until thick enough to pull away from the pan but still spreadable once cool. The original ten to twelve minutes is an estimate; pan size and heat affect it, and a very stiff rolling consistency can be difficult to fill with.
- Cool promptly: transfer to a shallow, lightly greased dish, cool and refrigerate within one to two hours. Use cold filling in fully cooled bread; keep the original preparation time when calculating storage.
Choosing dulce de leche safely
- Use ready-made dulce de leche: this avoids the source’s risky instruction to pressure-cook a sealed condensed-milk tin and top up water during cooking. Do not heat an unopened tin or open or add water to a pressurised cooker; follow the product and appliance safety instructions.
- After opening: follow the dulce de leche manufacturer’s storage instructions, use clean utensils and refrigerate as required. If making caramel from scratch, use a separate complete method with the contents removed from their packaging.
Filling the loaf step by step
- Prepare your workspace: set the cooled bread on a stable plate or board and have the cold filling and clean utensils ready.
- Cut a lid: use a bread knife to remove a top section roughly three to four centimetres deep, adjusting to loaf size, and set it aside.
- Remove some crumb: carefully hollow the centre, leaving a substantial base and side wall, at least about one to two centimetres where the loaf is strong enough. Reserve clean crumb for another use.
- Inspect the cavity: avoid holes through the base or sides. Leave enough bread to support the filling rather than compressing it into a thin shell.
- Add brigadeiro: spoon or pipe in cold, spreadable filling gradually, without forcing or overfilling. Keep room for the lid and any optional top layer.
- Optional dulce de leche layer: spread a thin layer over the brigadeiro if desired, rather than adding a whole second batch regardless of capacity.
- Replace the lid: fit it back into place. Use a snug food-safe box for support; avoid hidden cocktail sticks in a dessert that will be sliced and shared.
- Decorate: an optional light glaze can be made from one tablespoon sugar dissolved in one tablespoon hot water and cooled, or use a suitable ready-made glaze. Add chocolate shavings, almonds or a little coarse sugar as desired.
- Chill before packing: refrigerate promptly for one to two hours to firm the filling, then pack while cold and maintain refrigeration.
Filling combinations
- Crunchy brigadeiro: the source suggests 50–80 g crushed biscuits or praline in the filling; try a small amount first and check allergens. Crunch will soften during storage.
- Dulce de leche and pecans: up to 80 g chopped toasted pecans adds texture to a batch of filling, depending on loaf capacity and preference.
- Two fillings: cold pastry cream and brigadeiro can be layered in a suitable loaf. Use the shorter storage period of the two fillings.
- Vegan version: use a verified vegan bread and suitable plant-based brigadeiro or dulce de leche. Check all ingredients and keep perishable fillings chilled.
- Filled mini panettone: fill fully baked, cooled mini loaves with small amounts using the same method. Do not add these cooked cream fillings before baking or guess a reduced baking time.
Storage and sale
- Storage period: keep perishable filled bread at 1–5°C and use within 48 hours of preparing the earliest perishable component, or sooner if an ingredient’s instructions require it. Filling the loaf does not restart the clock.
- Transport: use a rigid supported box in an insulated carrier with frozen packs. Maintain the cold chain even on a cool day.
- Presentation: photograph a real slice from your own batch to show the filling honestly; distinguish filled and unfilled options clearly.
- Pricing: include filling cost, labour, packaging, waste and refrigerated delivery when calculating your price.
Mini panettone: baking, packaging and pricing
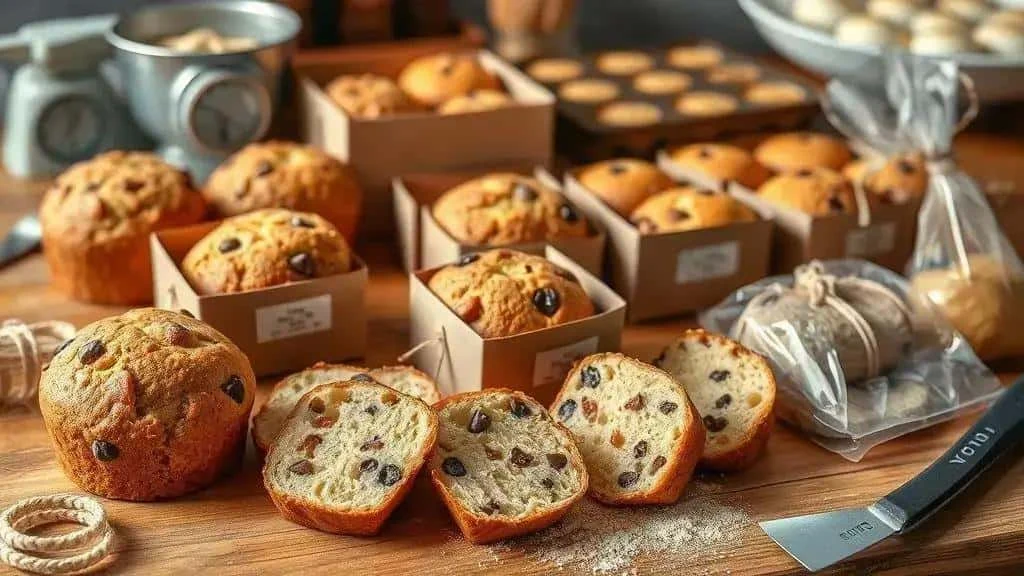
- Yield: the source claims twelve 80–100 g minis, but the ingredient total is substantially larger than 960–1,200 g. Weigh the finished dough and divide by the chosen mould’s recommended dough load; do not rely on that count.
- 500 g wheat flour suitable for enriched bread — use a separate gluten-free recipe if required.
- 120 g sugar — including the teaspoon reserved for the starter.
- 8 g salt — weigh accurately.
- 7 g dried yeast — or the source’s suggested 20 g fresh yeast, prepared according to its directions.
- 200 ml lukewarm milk — 50 ml for the starter and 150 ml for the dough.
- About 200 g beaten egg without shells — not necessarily four UK large eggs; vegan alternatives need a dedicated formula.
- 160 g softened butter — use a suitable separately developed recipe for plant-based fat.
- 20 g milk powder, optional — omitting it alone does not make the recipe dairy-free.
- 1 teaspoon vanilla extract — or orange zest for flavour.
- 200–250 g chocolate chips or 250–300 g candied fruit and raisins — choose one, preparing and draining fruit as needed.
- Mini panettone paper moulds — use oven-safe products and their recommended dough loading; nominal 80–100 g finished size is not necessarily identical to raw dough weight.
- 1 extra egg for glazing — or a suitable alternative glaze.
Step-by-step method
- Starter: combine the yeast, one teaspoon from the sugar, 50 ml of the milk and 100 g of the flour as directed by the yeast packet. Cover until expanded; the source’s 30–45 minutes may need extending.
- Dry ingredients: combine the remaining flour and sugar with the salt and optional milk powder.
- Liquids: mix the weighed beaten egg with the remaining milk and vanilla, then add to the dry ingredients with the starter to form a sticky dough.
- Initial kneading: knead until the wheat dough starts to develop strength, using the source’s six to twelve minutes as a rough guide and respecting mixer instructions.
- Butter: knead in 160 g softened butter a little at a time, then continue until smooth and elastic, taking breaks if the dough becomes too warm.
- First rise: cover in a lightly greased bowl until substantially expanded and nearly doubled. A rich dough may take longer than the source’s 45–60 minutes.
- Add fruit or chocolate: gently fold in the chosen quantity, distributing it evenly through the developed dough.
- Divide: weigh portions according to the mini mould’s guidance, shape and place centrally. Count the actual portions instead of assuming twelve.
- Final proof: cover loosely and allow to rise towards the mould’s rim without overflowing. The suggested 40–60 minutes depends on dough and room temperature.
- Glaze: brush gently with egg or your chosen glaze; optional almonds or edible decorations introduce additional ingredients and possible allergens.
- Bake: preheat to 180°C conventional and start checking small portions around 18–25 minutes. Continue until the centres are cooked, protecting from excessive browning and reducing to 170°C if needed.
- Cool: follow the recipe and mould guidance, usually using a rack for small loaves. If a delicate formula requires inverted cooling, use suitable secure equipment. Do not stack or pack while warm.
Practical packaging
- Options: food-safe clear bags, individual boxes or suitable food wrap with ribbon outside the food-contact layer.
- Protection: use food-safe supports to prevent crushing during transport.
- Labels: record flavour, ingredients, relevant allergens, weight and appropriate storage/date information. UK labelling requirements depend on how food is packaged and sold, including prepacked-for-direct-sale rules.
- Storage: plain bread is best enjoyed promptly or frozen fresh. Perishable filled minis need 1–5°C storage and a limit of 48 hours or the shortest ingredient instruction. A commercial shelf life must be established for the actual product and process.
A simple pricing calculation
- Ingredients: total the actual ingredient cost and divide by the number of saleable minis your batch really produces.
- Packaging: add the bag or box, label and other packaging cost per unit.
- Labour and overheads: include time at your chosen hourly rate, energy, waste, fees and delivery costs where relevant; avoid counting packaging twice.
- Markup versus margin: adding 70% of cost is a 70% markup, not a 70% profit margin. Choose a price that covers full costs and suits your market, rather than assuming a universal percentage.
- Illustrative Brazilian example: if a mini costs R$2.00 in total — R$1.20 ingredients, R$0.30 packaging and R$0.50 labour/energy — a 70% markup gives R$3.40. The difference is R$1.40, about 41% of the selling price before any omitted costs. This is arithmetic, not a current UK price recommendation.
- Boxes of minis: calculate six- or twelve-piece boxes from actual costs, including the box, and check that any discount still covers them.
Selling and delivery tips
- Use accurate photographs of your own finished bread and filling rather than illustrative images that imply a tested result.
- Offer seasonal packaging or flavours only where you can produce them consistently.
- Choose batch size around oven capacity, cooling space and demand; producing 24–48 minis is not automatically more efficient if it creates waste.
- Record production dates and storage limits, rotate stock and use the earliest expiry first.
- Compare local prices and include delivery and refrigeration costs before offering promotions.
Storing, freezing and wrapping homemade panettone
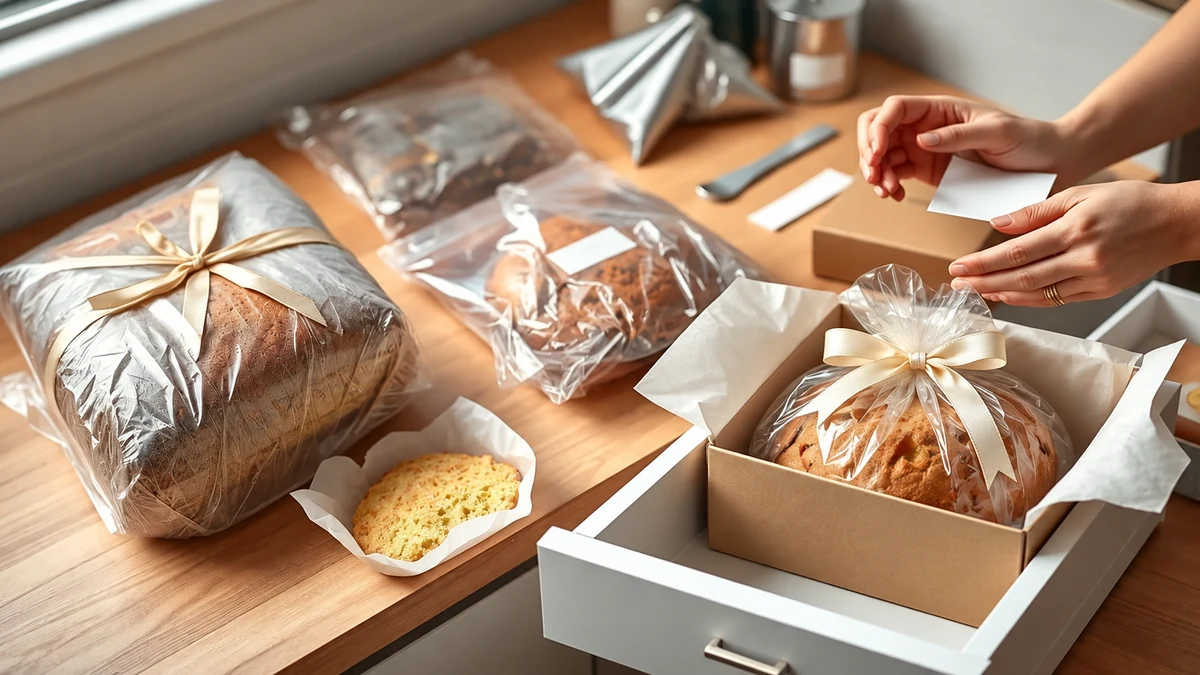
Storing and packaging panettone depends on whether it is plain or has a perishable filling. Cool baked bread completely before wrapping, and keep cream-filled versions refrigerated.
Short-term storage of plain bread
- Cool before wrapping: let the unfilled bread cool completely to avoid trapping condensation.
- Protect from drying: wrap in suitable food-safe material and place in a closed bag or container without crushing the loaf.
- Storage place: choose a cool, dry cupboard away from sunlight and heat. The source suggests around 18–22°C for plain bread, not for cream-filled products.
- How long: aim to enjoy this homemade unfilled bread within two to three days for quality or freeze it fresh. The original five-day claim was not validated for the formula or storage conditions; discard bread showing mould rather than trimming it.
- Fridge or freezer: refrigeration can stale plain bread, so freezing portions is often better for longer keeping. Perishable fillings override this texture consideration and require chilling.
Freezing correctly
- Prepare: freeze plain bread once fully cool. For filled bread, first confirm the filling is suitable for freezing and cool it safely; freezing does not rescue food already stored too long.
- First wrapping: wrap the loaf or slices closely in food-safe freezer wrap.
- Outer protection: add foil or a robust freezer bag, removing excess air without crushing the crumb.
- Vacuum packing, optional: it may reduce freezer burn but can squash soft bread. It does not make a perishable filling safe at room temperature or establish a longer shelf life.
- Label: record the type and freezing date. As a practical quality target, use plain bread within one to three months and suitable filled versions within about one month; these are not guarantees of unchanged texture.
- Keep its shape: freeze level on a tray until firm, then store without heavy items pressing on it.
- Thaw: thaw filled bread covered in the fridge until fully defrosted and use within 24 hours. A whole loaf may take longer than eight to twelve hours. Plain bread may be thawed covered for serving according to its recipe; do not give perishable fillings an extra one to two hours warming as a routine step.
Gift wrapping
- Food-contact layer: use packaging explicitly suitable for food, protecting the loaf from drying and handling.
- Outer box: choose a sturdy box with support; decorative tissue or filler should stay outside the food-safe inner wrapping unless itself approved for food contact.
- Finishing: add ribbon, an ingredient/allergen label and clear storage instructions with appropriate dates.
- Transport protection: use a suitable internal support to prevent tipping or crushing, keeping non-food-safe card away from exposed bread.
- Filled bread: clearly label the need for refrigeration and use insulated cold transport for any delivery, not just long journeys.
Transporting products for sale
- Rigid box: choose packaging that supports the loaf and prevents damage.
- Temperature control: perishable filled products need a maintained cold chain using insulated carriers and frozen packs, regardless of the weather.
- Honest presentation: use photographs of your actual product and provide the required weight, ingredient, allergen and storage information.
Food-safety checks
- Cream and other perishable fillings: keep at 1–5°C and use within 48 hours of the earliest perishable preparation, or a shorter ingredient limit. Minimise time out of the fridge; as a cautious home-serving rule, keep the cumulative time below two hours and less in very hot conditions.
- Hygiene: clean hands, utensils and surfaces are essential. Gloves do not replace handwashing or prevent allergen cross-contact by themselves.
- Allergens: check the complete recipe, including wheat, milk, eggs, nuts, soya and any other relevant allergens. Requirements depend on the product and way it is sold; do not rely on a generic four-item label.
Final reminders
- Record batch weights, preparation dates, ingredients and storage conditions for traceability.
- Different packaging options can have different prices, but all must protect the food appropriately.
- Test the thawed texture of a small batch before promising frozen products for gifts or sale.
Filling, topping and decoration ideas
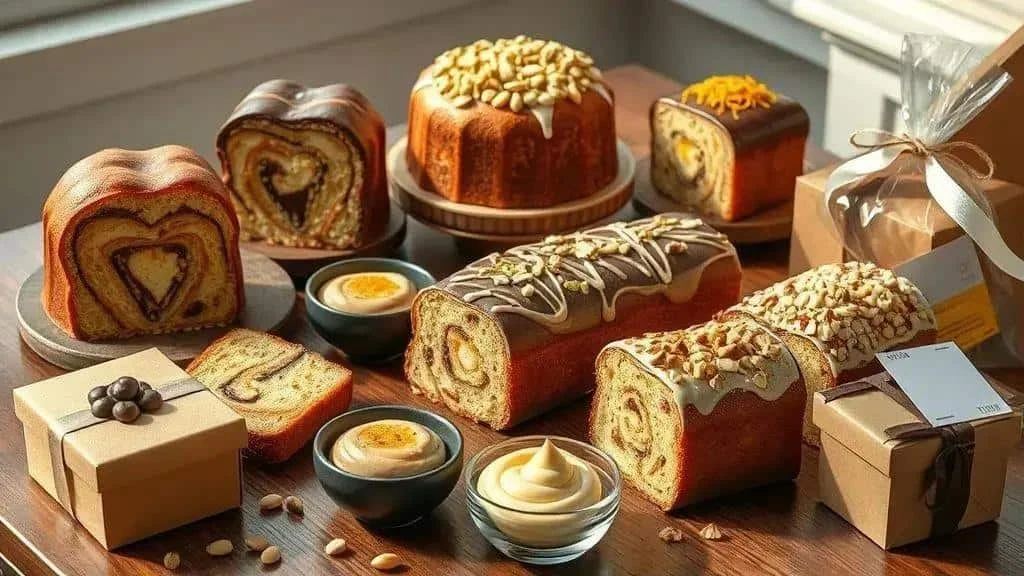
- Chocolate brigadeiro: a cooked condensed-milk, cocoa and butter filling, cooled before use; optional nut praline adds texture and allergens.
- Salted dulce de leche: add a small pinch of flaky salt to a suitable ready-made filling, tasting before adding more.
- Vanilla pastry cream: use a properly cooked complete recipe and chill promptly before filling the cooled bread.
- Chocolate ganache: use a filling formula matched to milk or dark chocolate; orange zest adds a citrus note.
- Pistachio and white chocolate: a suitable pistachio cream with white chocolate gives flavour and texture; check milk and nut allergens.
- Citrus mascarpone: sweetened mascarpone with orange or lemon zest is a perishable chilled filling, not a shelf-stable spread.
- Vegan fillings: use complete recipes for coconut brigadeiro or plant-based dulce de leche and follow appropriate refrigeration instructions.
Flavour combinations to try
- Orange, almond and honey: citrus-scented bread with a little honey and toasted flaked almonds. Honey is not vegan and must not be given to babies under one year.
- Chocolate, pistachio and sea salt: combine chocolate chips with toasted pistachio and a restrained salty finish within a tested dough’s addition allowance.
- Caramel and custard: layers of dulce de leche and cold pastry cream offer contrasting textures; use the shorter storage limit.
- Tropical fruit: candied pineapple and desiccated coconut can flavour a separately tested variation, with rum optional and clearly identified as alcohol.
Toppings and finishes
- Glossy ganache: use a suitable coating recipe and let it cool to a workable consistency before applying to cooled bread. Refrigerate if the topping is perishable.
- Sugar icing: a simple icing can be coloured with a product specifically intended for food.
- Nut crunch: sprinkle chopped praline over a soft topping and label the nuts clearly.
- Toasted crumb topping: clean reserved bread crumb can be toasted with a little butter and sugar, then cooled before use. Do not reuse crumbs contaminated by raw dough or old filling.
- Simple garnishes: icing sugar, citrus zest, flaked almonds or chopped pistachios offer different finishes.
Gift decoration and packaging
- Box: use a sturdy box, with a food-safe inner layer and decorative paper or ribbon outside it.
- Information: include ingredients, clearly identified allergens, preparation and appropriate date/storage information, meeting the rules for your type of sale.
- Finishing touch: add a bow or dried citrus decoration outside the food wrapping. Keep non-edible decorative foliage separate from the bread.
- Gift presentation: an internal support and a storage card can be more useful than elaborate packaging that does not protect the food.
Practical checks
- Moisture: very runny fillings can soak or weaken the crumb. Use a suitable filling consistency and cool both bread and filling before assembly.
- Small trials: test flavour, texture and portion sizes before producing a large batch.
- Chilling: clearly label and maintain refrigeration for perishable fillings, including many plant-based creams.
- Allergens: check and declare all relevant allergens in the actual ingredients, not merely those in the basic bread.
- Product photography: show a real slice of your own bread and filling so that buyers can judge the product accurately.
Adapting recipes, controlling costs and selling at Christmas

Plan ingredients, batch sizes and packaging carefully, but establish a reliable recipe before scaling up. For UK sales, check food-business registration, hygiene and labelling requirements with your local authority; home baking for sale is still a food business.
Ingredient choices and cost
- Flour: a trial with some wholemeal flour changes absorption and dough strength. Oat flour contains no wheat gluten and is not equivalent to wholemeal wheat; cost savings depend on local prices.
- Fat: oil and butter are not equal in water content or behaviour. Choose a tested oil-based formula if that suits your budget rather than replacing part of the butter blindly.
- Sugar: changes affect fermentation, browning and moisture. Coconut sugar still contributes sugar; do not describe it as making the bread automatically healthier.
- Fruit and chocolate: compare actual costs and test blends within the total allowance. A mixture of 60% fruit and 40% chocolate is one flavour idea, not a guaranteed cheaper option.
- Eggs: use a developed egg-free formula if needed. Partial flaxseed or aquafaba substitutions need testing for structure, taste and cost.
Planning production
- Buy quantities you can use within their storage limits. Freeze butter only as directed and store chocolate according to its manufacturer’s instructions to avoid moisture and bloom.
- Standardise recipes in grams and choose batches suited to mixer, oven, cooling and storage capacity.
- Use clean fresh crumb and trimmings in suitable toppings or other recipes, keeping allergens and preparation dates traceable.
- Spread work using a recipe designed for overnight refrigerated proving. Do not simply leave the source’s egg-and-milk dough warm overnight or assume it needs no final proof after chilling.
Cost-conscious presentation
- Simple boxes can work well for everyday products; more elaborate gift packaging should justify its extra cost without compromising food protection.
- Consistent labels and modest ribbons can create a neat finish without excessive expense.
- Offer multi-buy boxes only after checking that the price covers ingredients, packaging, labour and other costs.
Pricing clearly
- Direct cost: calculate the ingredients used and divide by the actual saleable yield.
- Other costs: include energy, packaging, labour, waste, fees and delivery without counting the same item twice.
- Markup and margin: distinguish an addition to cost from profit as a proportion of selling price. There is no universal 40–80% figure appropriate for every business.
- Market comparison: compare similar products, quality and service while ensuring your price covers your own costs.
Christmas sales ideas
- Offer special flavours only when the recipe and production method are reliable; describe them accurately.
- Pre-orders with clear collection times can help match production to demand and reduce leftovers.
- Use truthful photographs of your own loaves and provide allergen and storage information before purchase as required.
- Local cafés or events may provide sales opportunities; agree storage, labelling and responsibility for unsold food before supplying them.
Logistics and quality
- Keep a recipe specification with ingredient weights, mould loads, process observations and actual baking results.
- Use appropriate ingredient, allergen and date labelling. Establish storage periods for the real product rather than copying an unverified blog estimate.
- Transport in supportive boxes and maintain refrigeration for perishable filled products with suitable insulated equipment.
Starting small
- Trial new flavours in small quantities before offering large batches for sale.
- Weigh ingredients and dough portions consistently.
- Record actual costs and review prices when ingredients, labour or delivery costs change.
These panettone ideas can help you plan festive flavours and gifts. Begin with a complete recipe that suits your ingredients and equipment, test adaptations and record what works before increasing production.
Thank you for reading
Follow our social channels for more Christmas baking ideas and practical tips. Share photographs of your own bakes and tell us how they turned out.
For more seasonal inspiration, follow the I Love Christmas blog. Thank you for visiting, and enjoy your Christmas baking.
FAQ: homemade panettone
Can I replace eggs and milk with vegan ingredients without changing the texture?
Not reliably through simple swaps. Eggs, milk and butter affect structure, hydration and fermentation. Flaxseed gel and aquafaba are not equivalent to one another or to a fixed number of eggs. Use a complete tested vegan enriched-bread recipe and trial it before making a large batch.
How do I know the yeast and starter are working?
Check the yeast’s date and preparation instructions, then look for expansion and fermentation. The source’s 100 g flour to 50 ml milk makes a stiff starter, so it may not bubble like a liquid sponge. Timing varies; if there is no activity, investigate yeast and temperature before proceeding.
What is the best way to store and freeze homemade panettone?
Cool plain bread completely before wrapping and enjoy it promptly or freeze fresh portions in airtight freezer packaging. Perishable filled bread needs 1–5°C storage and use within 48 hours or a shorter ingredient limit. Thaw filled bread in the fridge and use within 24 hours; a large loaf may take longer than eight to twelve hours to thaw.
How can I make gluten-free panettone without a dry crumb?
Use a complete recipe designed for the specific flour blend, binder and liquid level. Xanthan gum and psyllium are not equal-spoon substitutes, and some blends already contain binders. Gluten-free dough may be batter-like and needs its own mixing, proving and cooling method; do not apply wheat-dough kneading rules or underbake it to retain moisture.
What should I check before selling homemade panettone at Christmas?
Establish a reliable recipe, weigh actual yields, calculate full costs and use protective food-safe packaging. Check local food-business registration, hygiene, allergen and labelling requirements, including the rules for prepacked-for-direct-sale products where applicable. Maintain the cold chain for perishable fillings and do not claim a shelf life that has not been established.
Sources and Further Reading
- Food Standards Agency: chilling and storing food
- NHS: foods to avoid for babies and young children
- King Arthur Baking: a complete overnight panettone recipe
- IRCA: panettone baking and cooling guidance
- Food Standards Agency: starting a food business