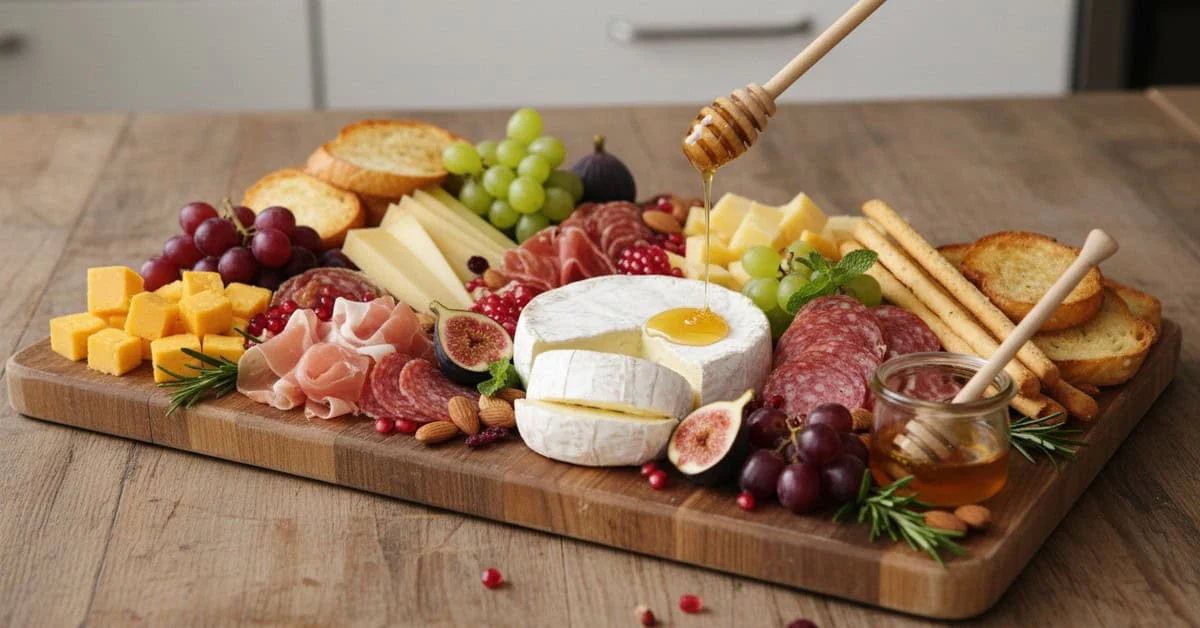
Chilled Brazilian Christmas desserts suit the country’s summer celebrations. Ideas include coconut pavê, passion fruit mousse, coconut pudding, soaked sponge cake, chocolate wafer dessert, ice cream and mosaic jelly. Plan fridge and freezer space, check dietary substitutions and serve manageable portions.
Chilled Brazilian Christmas desserts offer a cool finish to a festive meal. Explore eight ideas, with methods for seven and a fruit sorbet suggestion. The recipes are presented as guidance, not as independently kitchen-tested formulas; substitutions and setting agents need checking before a large celebration.
Why choose chilled Christmas desserts?

Chilled desserts are especially welcome at a Brazilian Christmas, when the weather is warm. They can also be enjoyed during a British winter celebration if you prefer a cool pudding after a rich meal.
Main advantages
- A cool finish: a refreshing contrast after the main course, although a chilled dessert is not necessarily light in calories.
- Convenience: many can be prepared the day before and stored in the fridge; freeze only recipes suited to freezing.
- Variety: citrus, cream, fruit and chocolate offer different flavours.
- Accessibility: familiar ingredients can make preparation straightforward and costs manageable.
- Flexibility: dietary adaptations are possible, but require checking all ingredients and testing the resulting texture.
Choosing a suitable dessert
- Consider the weather: ice cream and fruit mousse can be refreshing on warm evenings, but need reliable cold storage.
- Balance flavours: offer a tart option alongside a richer, creamy one.
- Check storage space: allow enough fridge or freezer room for each dessert, according to its recipe.
- Plan preparation time: choose recipes that can be assembled ahead.
- Think about serving: small glasses or pots make portioning easier for larger gatherings.
Ideas for the festive table
- Coconut pavê: a creamy layered biscuit dessert, served in a dish or individual glasses.
- Passion fruit mousse: a tangy contrast to richer dishes.
- Manjar branco with fruit sauce: a traditional coconut pudding that can be adapted with plant-based milk.
- Chilled condensed-milk sponge: a moist cake that can be cut into portions for a party.
- Chocolate wafer dessert: layers of chocolate cream and Bis, a Brazilian chocolate-coated wafer snack.
- Homemade fruit ice cream: a frozen option that can be made without an ice-cream machine.
- Christmas mosaic jelly: colourful jelly cubes set in a creamy base.
Quick preparation tips
- Prepare desserts that need a long chill the day before, observing the shortest storage limit of their ingredients.
- Use reusable serving glasses or food-safe individual pots for convenient portions.
- Label frozen containers with the contents and preparation date.
- Set out spoons and napkins in a convenient place before serving.
Basic ingredients and substitutions for chilled desserts
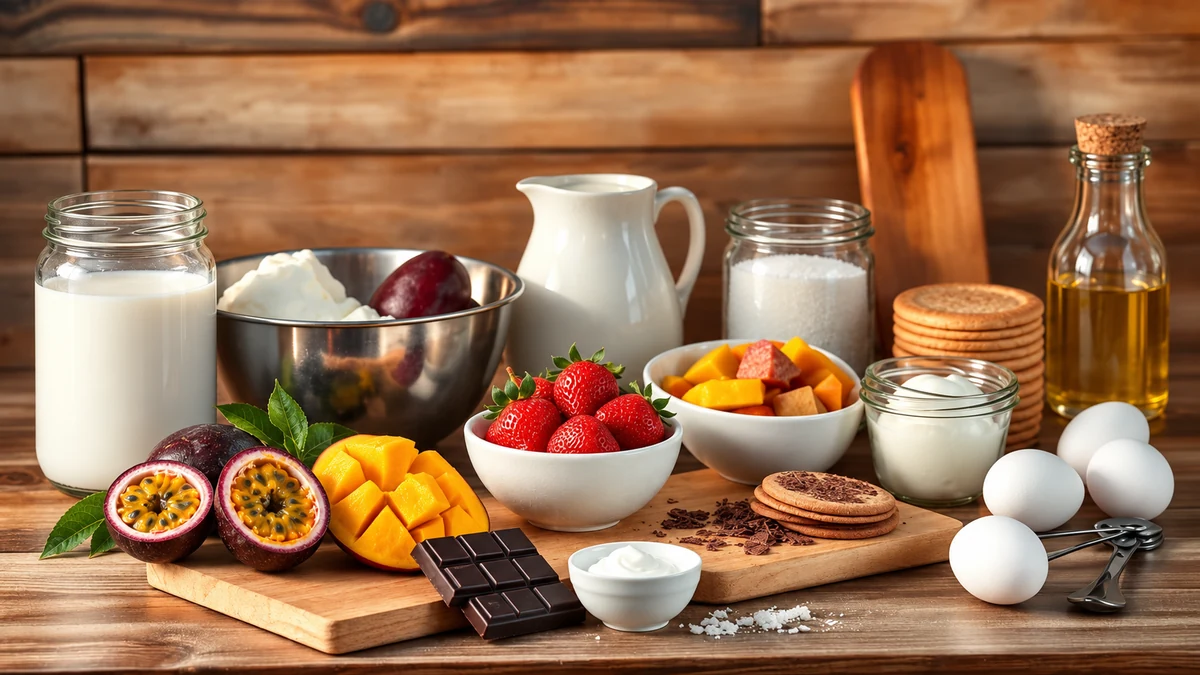
These are common ingredients, not a combined shopping list. Quantities vary between recipes. Alternatives may change the sweetness, fat content, texture or setting behaviour, so do not assume every swap works in the same proportions.
Common ingredients
- Sweetened condensed milk: a 395 g tin — used in many fillings. A plant-based version is an adaptation; compare its consistency and sweetness.
- Cream: 200 g — for richness. Soya or coconut cream can be alternatives, but not every product whips or sets like dairy cream.
- Coconut milk: 400 ml — adds coconut flavour and fat. A thinner almond drink changes the recipe rather than acting as an identical replacement.
- Unflavoured powdered gelatine: the source recipes use 12 g — check the setting strength and total mixture against your product’s instructions. Vegetarian gelling agents require their own quantities and method.
- Egg whites: 3 — for an aerated mousse. Use pasteurised egg white suitable for whipping and uncooked dishes. Aquafaba needs a separately tested recipe; 3 tbsp is not a reliable replacement for three whites.
- Prepared fruit: approximately 300–500 g — passion fruit, strawberries or mango, depending on the recipe. Prepare frozen fruit according to the packet and cool before use if cooking is required.
- Sugar: approximately 100–200 g — where specified. Sweeteners are not always a direct replacement because sugar affects structure and freezing as well as flavour.
- Biscuits or chocolate-coated wafers: around 200 g — use certified gluten-free products where needed. Wholemeal biscuits normally still contain gluten and are not automatically lower in calories.
- Dark chocolate: around 150 g — for chocolate layers. Check labels for dairy. Cocoa and coconut oil are not a direct substitute for chocolate in a setting recipe.
- Rum or liqueur: 1–2 tbsp where specified, optional — omit for an alcohol-free dessert, or use the recipe’s stated juice alternative. Vanilla flavouring is used in much smaller quantities, following its label.
Practical substitutions
- Plant-based condensed milk: compare sweetness and thickness, then test a small batch before replacing the full amount.
- Gelatine and vegetarian alternatives: strength varies between products. Measure the mixture and follow the manufacturer’s directions; agar and other vegetarian gels are not interchangeable with gelatine gram for gram.
- Dairy and coconut cream: the same starting weight may be useful for a trial, but coconut flavour, fat content and whipping behaviour differ.
- Egg whites and aquafaba: use a recipe designed for the chosen ingredient. The original’s three-tablespoon substitution for three whites is not a dependable conversion.
- Sweeteners: follow product instructions and test the texture as well as the flavour; reduced sugar can make frozen desserts harder.
Texture and stability
- For an airy mousse: fold whipped cream or suitable pasteurised whipped egg whites in gently.
- For a firmer set: use the recipe’s setting agent at an appropriate product-specific dose and chill thoroughly; extra time cannot correct an unsuitable formula.
- For watery fruit: drain or reduce it as the recipe directs. Do not increase gelling agents at random.
- For ice cream without a machine: stirring during early freezing can reduce large ice crystals. Results vary with the recipe and freezer.
Storage
- Mousses and pavês: keep covered at 1–5°C and use within 48 hours of preparing the earliest perishable component, or any shorter ingredient limit. Freeze only suitable versions; a month is a quality guide, not a guarantee of unchanged texture.
- Homemade ice cream: keep frozen in an airtight container and aim to eat within two weeks for best texture. Do not refreeze melted ice cream.
- Avoid taints and drying: cover containers securely, using food-safe wrapping suitable for contact with the dessert when needed.
Eight chilled dessert ideas at a glance

- Coconut pavê — coconut cream and biscuit layers, with a soft texture. Portion count depends on the dish and serving size.
- Passion fruit mousse with a fruit topping — a tangy, aerated dessert; allow preparation time plus at least four hours for the base and further chilling for the topping.
- Rum and candied-fruit ice cream — a creamy adults-only flavour, with an alcohol-free option.
- Coconut manjar with prune sauce — a smooth pudding served moulded or in glasses.
- Chilled condensed-milk sponge — a moist, soaked cake for cutting into portions.
- Chocolate wafer dessert — a no-bake combination of chocolate cream and Bis-style wafers.
- Christmas mosaic jelly — colourful cubes in a pale creamy base, particularly convenient in individual glasses.
- Fruit gelato or sorbet — a further serving idea using mango, passion fruit or strawberries. Use a complete recipe for the chosen fruit; no separate sorbet formula is supplied here, and fruit does not automatically make it low-calorie.
Serving suggestions
- Use individual portions to make serving easier and reduce leftovers.
- Pair a tart dessert with a richer, creamy option.
- Identify alcohol and allergens clearly, and verify any lactose-free or other dietary claims.
- Keep preparation dates and storage instructions with the containers so helpers know how to handle them.
Coconut pavê: ingredients and preparation
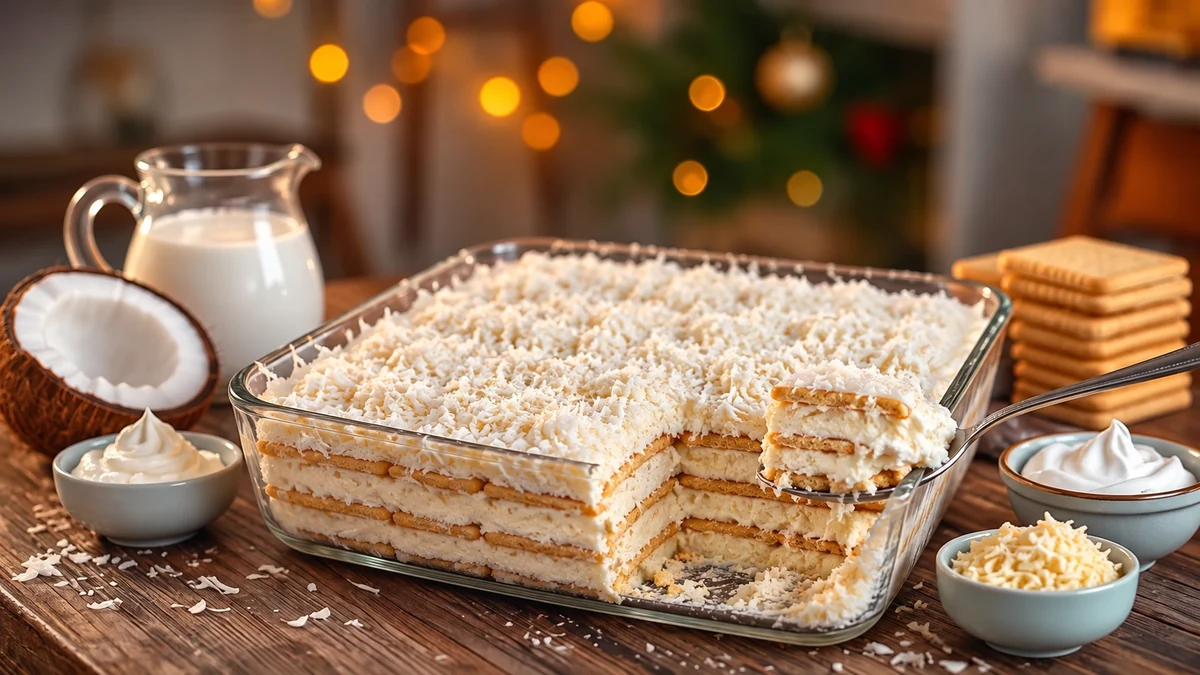
Coconut pavê is a creamy, layered dessert for the festive table. Check your gelatine’s setting strength against the full mixture and use glasses if a small test does not set firmly enough to slice.
Ingredients
- 1 tin sweetened condensed milk (395 g) — a plant-based product changes the result.
- 200 g cream — coconut or plant-based cream can be trialled for an adapted version.
- 400 ml coconut milk — a thinner plant drink is not an identical substitute.
- 200 g plain sweet biscuits — or suitable gluten-free biscuits. Allow extra milk or a plant drink for dipping, as needed; this is separate from the 400 ml coconut milk.
- 100 g grated or desiccated coconut — for the filling and between layers.
- 12 g unflavoured powdered gelatine in the source formula — verify against your product’s instructions and the total mixture. Use a tested vegetarian formulation if replacing it with agar.
- 1 tsp vanilla extract
- Lemon zest or 1 tbsp lemon juice, optional — for flavour; extra acidity may affect the set.
- 50 g lightly toasted coconut flakes — for decoration, not burnt coconut.
Preparation and assembly
- Prepare the gelatine: hydrate and dissolve it using the water quantity, time and heating method on its packet. A fixed ten seconds in a microwave is not reliable for every product or appliance; avoid boiling unless the product specifically requires it.
- Mix the filling: combine the condensed milk, coconut milk and cream until smooth. Stir in vanilla and the optional lemon zest or juice.
- Add the gelatine: follow the packet’s method for incorporating it into a cold mixture, usually blending a little filling into the dissolved gelatine before combining. Avoid pouring it directly into a very cold mixture if this causes lumps.
- Add coconut: stir most of the 100 g coconut into the filling, reserving a little to scatter between layers.
- Dip the biscuits: briefly dip them in the extra milk or suitable plant drink. Do not soak until they fall apart.
- Layer the dessert: alternate dipped biscuits and coconut filling, with the reserved grated coconut between layers. Finish with filling.
- Chill: cover and refrigerate for at least four hours. Do not rely on a brief freeze to fix a mixture that cannot set; serve it in glasses instead.
- Serve: slice with a clean, damp knife if firm enough, or spoon into bowls. Individual glasses are another option.
Final tips
- Keep covered at 1–5°C and use within 48 hours, or the shorter limit of an ingredient. The original’s seven-day chilled suggestion has not been retained.
- For a less sweet result, test a small altered batch; removing a third of the condensed milk changes the structure and is not corrected merely by adding lemon zest.
- Individual glasses or food-safe pots simplify serving and storage.
- Finish with washed mint and lightly toasted coconut just before serving.
Passion fruit mousse with a chilled topping

Ingredients
- 1 tin sweetened condensed milk (395 g) — a plant-based version needs the other ingredients adapted too.
- 200 g cream — a coconut or plant-based alternative changes the texture.
- 200 g passion fruit pulp — prepare frozen pulp according to its packet and cool if cooked.
- 12 g unflavoured powdered gelatine in the source formula — check its strength against the full mousse mixture; vegetarian gelling agents require a different method.
- Pasteurised egg white equivalent to 3 whites — choose a product labelled suitable for whipping and uncooked use. Aquafaba is not a three-tablespoon direct substitute here.
- 50 g sugar — for the mousse; optional changes affect sweetness and the whipped structure.
- For the topping: 100 g passion fruit pulp, 2 tbsp sugar and 1 tbsp water. The source adds 6 g gelatine, which may give a very firm layer for this small amount of liquid; follow your product’s dose for the measured topping, or omit it for a simple fruit sauce. Allow separate hydration water as directed.
- Fruit, seeds or washed mint for decoration — optional.
Method
- Prepare the mousse gelatine: hydrate and dissolve the chosen amount exactly as its packet directs, rather than relying on a fixed microwave time.
- Mix the base: combine the condensed milk, cream and 200 g passion fruit pulp until smooth.
- Incorporate gelatine: follow the product’s instructions for adding it to a cold mixture, blending in a little base first if directed to avoid lumps.
- Whip the whites: in a clean bowl, whip the pasteurised egg whites as the product permits, gradually adding the 50 g sugar to form a stable foam. Do not substitute untreated raw whites or assume freezing will make them safe.
- Fold together: gently fold the whipped whites into the base in three additions, keeping as much air as possible.
- Chill the mousse: divide between glasses or a serving dish, cover and refrigerate for at least four hours until set.
- Make the topping: heat 100 g pulp with 2 tbsp sugar and 1 tbsp water until the sugar dissolves. If using a product-appropriate gelatine dose, dissolve and incorporate as directed off the heat. Cool promptly until no longer warm but still pourable.
- Finish: spoon the cooled topping over the set mousse and refrigerate for a further one to two hours, or until ready. Do not pour hot topping over the mousse.
- Serve chilled: decorate with prepared fruit or washed mint just before serving.
- Variations: a lactose-free version needs suitable condensed milk and cream. A vegan version also requires an egg-free, gelatine-free formula. Test changes to condensed milk rather than removing an arbitrary percentage.
Practical tips
- For a different set, follow the gelling product’s guidance and test a small quantity; adding an arbitrary extra spoonful can make mousse rubbery.
- Let the topping cool before adding it so it does not melt the mousse underneath.
- Small covered glasses or food-safe pots simplify transport and refrigerated storage.
Rum and candied-fruit ice cream

Rum and candied-fruit ice cream combines a creamy base with festive fruit. The method can be made without a machine. Rum remains alcoholic in the finished dessert, so use the alcohol-free option where appropriate.
Ingredients
- 480 ml whipping cream — a suitable whipping coconut cream requires an adapted recipe.
- 1 tin sweetened condensed milk (395 g) — plant-based condensed milk changes the result. Date purée and plant drink are not an identical replacement.
- 4 egg yolks, optional — for the cooked custard version. For an egg-free version omit them and follow the no-custard route below; do not replace them with four tablespoons of uncooked cornflour.
- 120 ml whole milk — or an appropriate plant drink for an adapted version.
- 150 g finely chopped candied fruit — chopped dried apricots or raisins give a different texture.
- 3 tbsp dark rum, optional
- 1 tsp vanilla extract
- A pinch of salt
Method
- Start the custard, if using yolks: gently warm the milk with half the condensed milk. For the egg-free route, keep the milk and all the condensed milk chilled for the mixing stage and skip the custard steps.
- Temper the yolks: whisk them in a bowl, then slowly whisk in a ladleful of warm milk mixture.
- Cook the custard: return the egg mixture to the pan and stir over a low heat until it thickens. Check with a clean food thermometer that it reaches 70°C for two minutes or 75°C for 30 seconds; coating a spoon alone is not a safety test. Avoid boiling and curdling it.
- Cool promptly: strain into a shallow clean container if needed, cool and refrigerate within one to two hours. Chill fully before combining with whipped cream.
- Whip the cream: beat to soft peaks, stopping before it becomes grainy.
- Combine: gently fold the whipped cream into the cold custard with the remaining condensed milk, vanilla, salt and optional rum. For the egg-free route, mix the chilled milk and all the condensed milk with the flavourings, then fold in the whipped cream; the result may be less rich and icier.
- Add fruit: fold in the finely chopped candied fruit, reserving a little for decoration if wanted.
- Freeze without a machine: transfer to a shallow freezer-safe container. Stir briefly every 30–40 minutes during early freezing to break up larger crystals, repeating four or five times as the mixture firms. Return it promptly to the freezer each time.
- Finish freezing: smooth the top, cover tightly and freeze until firm, allowing at least six hours. The actual time depends on the freezer, container and alcohol content.
- Serve: soften only as briefly as needed to scoop, then return the main container promptly to the freezer. Add reserved candied fruit; do not refreeze portions that have melted.
Variations
- Alcohol-free: omit rum or use 1 tbsp concentrated orange juice. If using alcohol-free rum flavouring, follow its label’s dose, not a tablespoon-for-tablespoon swap.
- Plant-based: use a tested no-churn recipe designed for whipping coconut cream and plant-based condensed milk. Omit yolks; cornflour is not a direct uncooked replacement.
- Fruitier: a small amount of finely diced mango or pineapple can add flavour, but its water content may make hard icy pieces. Test a small batch.
- Chocolate: fold in 100 g dark chocolate chips with the fruit for added texture.
- Less sweet: use a recipe formulated with less sugar rather than simply removing a third of the condensed milk, which changes the freezing behaviour.
Coconut manjar with prune sauce
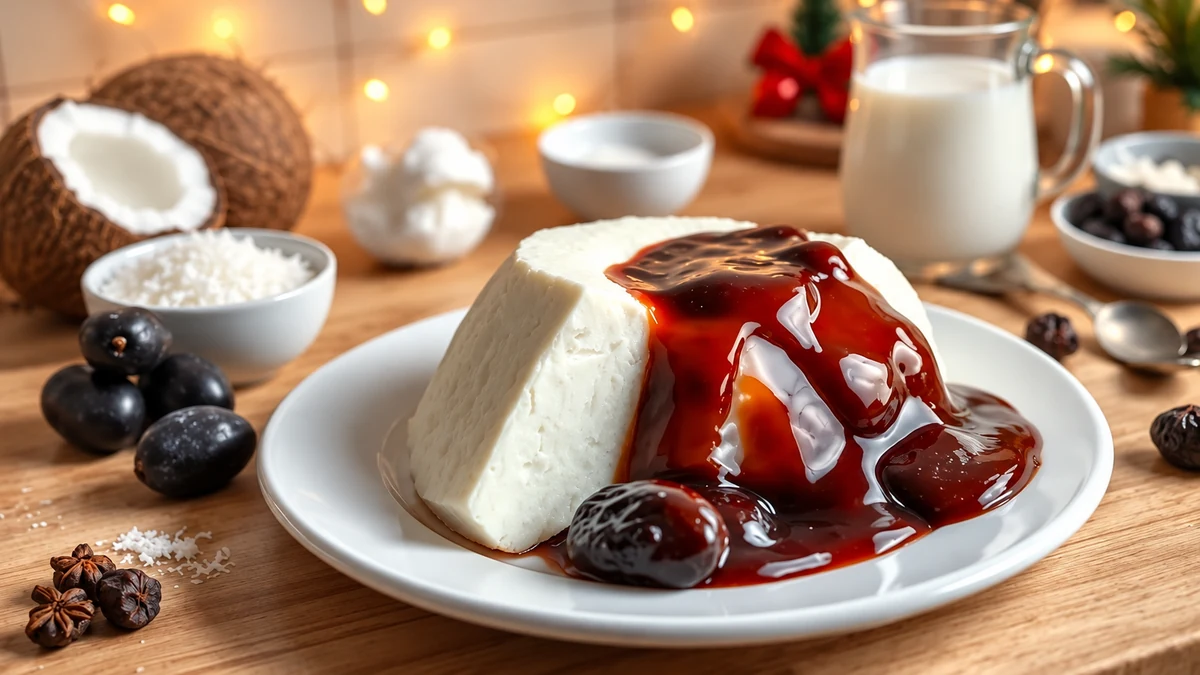
Manjar branco with prune sauce is a traditional smooth coconut pudding. Suitable plant-based milk can be used for a dairy-free adaptation; cornflour is already plant-based.
Ingredients
- 400 ml coconut milk — a thinner almond drink changes the richness and set.
- 600 ml whole milk — or a suitable plant drink for an adapted version.
- 200 g sugar — adjustments or sweetener replacements may alter texture and flavour.
- 60 g cornflour — weigh it rather than relying on differing spoon sizes. Rice flour and gelatine are not direct equivalents. This amount may give a soft pudding depending on the products; use serving glasses if a test does not unmould cleanly.
- A pinch of salt
- 1 tsp vanilla extract
- 200 g pitted prunes — dried apricots give a different sauce; ready-made prune jam needs no identical cooking method.
- 120 ml water — for the sauce; orange juice is a flavour variation.
- 100 g sugar for the sauce — adjust optional sweetness to the prunes.
- 1 tbsp rum, optional — omit for an alcohol-free sauce, or use a little lemon juice to taste rather than treating it as an identical flavouring.
Method
- Mix the cornflour: stir it into 200 ml of the cold milk until smooth; this is part of the 600 ml total.
- Warm the remaining ingredients: combine the other 400 ml milk, coconut milk, 200 g sugar and salt in a pan and heat gently.
- Add the slurry: stir the cornflour mixture again, then whisk it into the warm milk.
- Cook until thickened: stir continuously over a medium-low heat until the mixture thickens and gently bubbles, cooking the cornflour through. The source suggests about 5–8 minutes, but pan size and heat vary.
- Finish: remove from the heat and stir in vanilla. Strain if needed. Optional butter mentioned in the original method is omitted from this version’s ingredient list and preparation.
- Transfer: pour into a lightly oiled mould, using a little extra vegetable oil, or divide between serving glasses. Smooth the top and cover with suitable food-safe wrapping.
- Cool and chill: cool promptly and refrigerate within one to two hours. Allow at least four hours, preferably overnight, for the pudding to set.
- Make the sauce: simmer prunes, 120 ml water and up to 100 g sugar for about 10–12 minutes, until the fruit softens and the sauce thickens. Watch that it does not boil dry.
- Choose the texture: leave the fruit whole or chopped, or cool sufficiently before blending in an appliance suitable for it. Add the optional rum or a little lemon juice, then cool promptly and refrigerate. Rum added here remains alcoholic.
- Serve: if firm enough, loosen the edges with a thin knife and briefly warm the outside of the mould in warm water before turning out. Otherwise serve in glasses with the chilled sauce.
Preparation and storage tips
- For a firmer pudding: trial an adjusted cornflour quantity in a small batch, or use a tested moulded manjar recipe. More chilling alone cannot guarantee a clean slice.
- Plant-based: choose suitable plant-based milk and keep the cornflour; there is no need to replace it with agar merely to make the dish vegan.
- Storage: refrigerate covered at 1–5°C and use within 48 hours or a shorter ingredient limit. Freezing can make starch-thickened pudding watery.
- Presentation: spoon sauce and prunes over slices or individual glasses shortly before serving.
Chilled condensed-milk sponge: method and variations
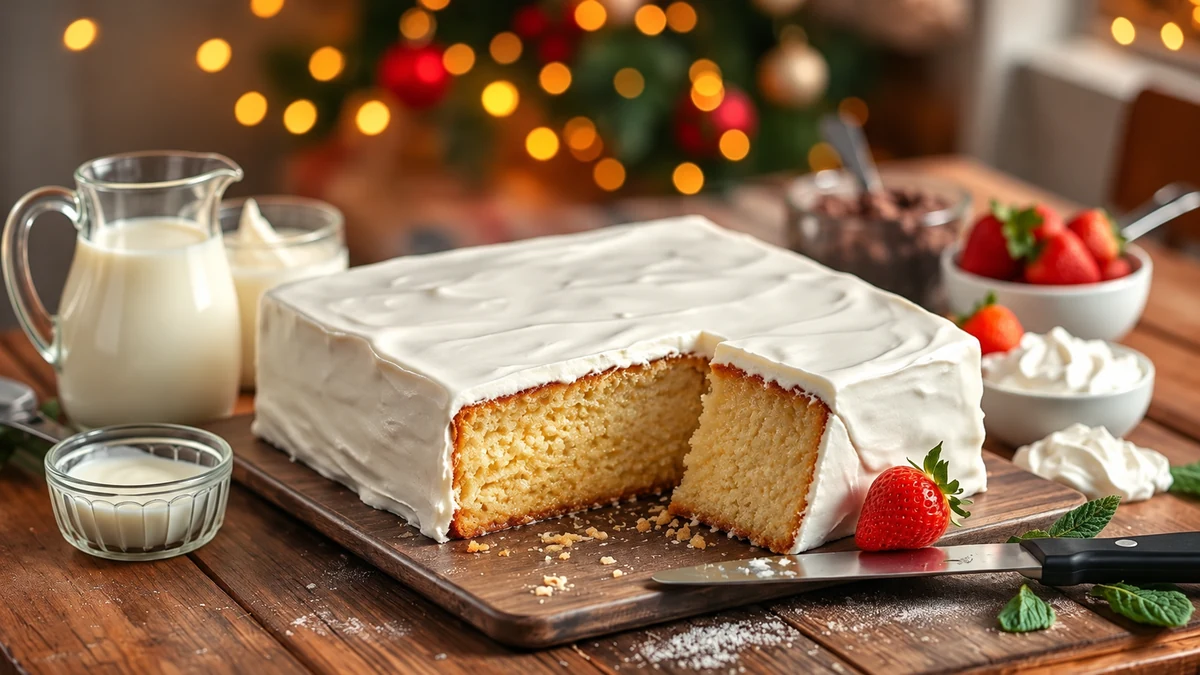
This soaked sponge is served cold. The original lists one tin of condensed milk but then calls for a second in the topping. The version below explicitly uses two tins, one for each stage, rather than leaving an undeclared ingredient in the method. A tin size was not supplied, so the baking time remains a guide and a small trial is sensible.
Ingredients
- 3 eggs, separated
- 240 g plain wheat flour — a gluten-free cake needs a suitable tested flour blend and method, not an assumed universal one-for-one swap.
- 200 g sugar — sugar contributes to the cake’s structure; major reductions require testing.
- 120 ml vegetable oil — melted butter changes the fat and water balance rather than being identical.
- 240 ml milk — a suitable plant drink can be trialled in an adapted version.
- 1 tbsp baking powder — check the product’s instructions and measure level.
- 2 tins sweetened condensed milk, 395 g each — one for the soaking mixture and one for the separate topping used in the method.
- 200 g cream — for the topping; a suitable coconut cream changes the flavour.
- 200 ml coconut milk or whole milk — for the soaking mixture, separate from the 240 ml batter milk.
- 1 tsp vanilla extract or a little lemon zest, optional — plus a little butter and flour for preparing the baking tin, or suitable alternatives.
Method
- Prepare the tin: grease and flour a suitable rectangular cake tin and preheat the oven to 180°C conventional. The source does not give tin dimensions; do not overfill it, and check doneness rather than relying solely on its suggested time.
- Mix the wet ingredients: beat the yolks and sugar until paler, then gradually mix in the oil and 240 ml milk on a low speed.
- Add the dry ingredients: sift flour and baking powder together, then gently fold them into the mixture.
- Fold in the whites: whisk the whites in a clean bowl until firm, then gently fold into the batter. Do not taste raw batter.
- Bake: transfer to the prepared tin. Start checking around 30–35 minutes, but allow longer if needed: the centre must be set and a clean skewer should emerge without wet batter. Timing depends on the tin and oven.
- Make the soaking mixture: mix one 395 g tin condensed milk with the separate 200 ml coconut milk or milk and the optional vanilla or zest.
- Soak the cake: while the baked cake is still warm, prick the surface and gradually pour over the soaking mixture, allowing it to absorb rather than flooding it.
- Make the topping: gently heat the second 395 g tin condensed milk with the 200 g cream, stirring until slightly thickened. Cool promptly in a shallow container.
- Assemble and chill: spread the cooled topping over the soaked cake. Cool promptly and refrigerate within one to two hours of preparation, then chill for at least four hours or overnight within the storage limit.
- Serve: cut with a clean knife, warming and drying it between slices if helpful. Keep the cake chilled until serving.
Variations
- Chocolate: a cocoa sponge with ganache is a related idea. Adding cocoa changes the dry ingredients, so use a tested chocolate sponge rather than assuming three extra tablespoons leave this batter unchanged.
- Fruit: add well-drained pineapple or prepared strawberries as a filling or topping, keeping the cake refrigerated and observing the shorter fruit storage limit.
- Lactose-free: use suitable condensed milk, cream, milk and greasing fat throughout. Lactose-free dairy is not safe for a milk allergy.
- Plant-based: start with a tested egg-free sponge. Apple purée and flax mixtures cannot simply replace the separately whipped eggs without changing the cake’s structure.
- Filled: a completely cooled sponge can be split and filled with a suitable soft brigadeiro or fruit jam before soaking lightly and topping; adjust the amount of soaking liquid to avoid collapse.
Quick tips
- Add liquid gradually: stop if the cake cannot absorb more without becoming excessively wet.
- Individual portions: layer pieces in small glasses for convenient serving.
- Decoration: use chocolate curls, lightly toasted coconut or prepared fruit.
- Storage: refrigerate covered at 1–5°C and use within 48 hours, or sooner if an ingredient requires it. Freezing may change the soaked cake’s texture.
Chocolate wafer dessert: ingredients and assembly
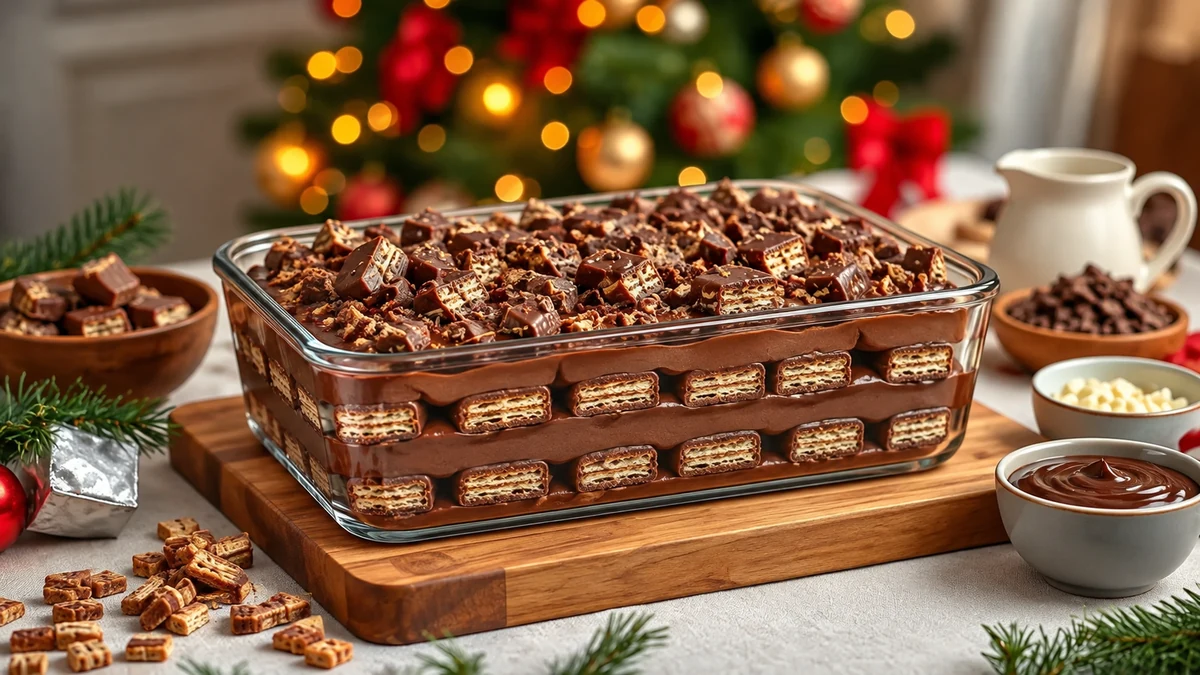
Chocolate wafer dessert layers cream with Bis, the Brazilian chocolate-coated wafer snack. Similar wafers may be used. Serve in a dish or glasses unless a small trial confirms the mixture sets firmly enough to unmould.
Ingredients
- 1 tin sweetened condensed milk (395 g) — a plant-based version requires suitable ingredients throughout.
- 200 g cream — coconut cream is a flavour variation, not an identical substitute.
- 200 g dark chocolate — milk chocolate gives a sweeter, softer result.
- 300 g Bis or similar chocolate-coated wafers — divided between layers and garnish; pack weights vary, so weigh the amount.
- Up to 200 ml milk for optional dipping — the wafers can instead be layered dry for more initial crunch. Use a suitable plant drink only with other compatible ingredients.
- 50 g melted butter, optional — only for an alternative pressed crumb base made from some of the 300 g wafers. It is not needed for the regular layered version.
- Unflavoured gelatine, optional — the source suggests 12 g, but use the product’s instructions for this mixture and test the set. Agar requires its own method and is not a direct swap.
- 1 tsp vanilla extract
- A little cocoa or reserved chopped wafer for decoration
Assembly
- Make the chocolate cream: melt the chocolate gently over a bowl of hot water or in short microwave bursts, stirring. Mix with the condensed milk, cream and vanilla. If using gelatine, prepare and incorporate it according to the packet. Cool promptly before layering.
- Prepare the wafers: reserve some dry pieces for decoration. Briefly dip the layering pieces in milk if you want a softer dessert, or leave them dry. For the optional pressed base, crush some wafers and gradually add melted butter only until the crumbs bind; you may not need all of it.
- Start the base: cover the bottom of the serving dish or glasses with wafers. If using the optional crumb base, press it lightly into the bottom instead, keeping enough wafers for the remaining layers.
- Add cream: spread a layer of cooled chocolate cream evenly over the wafers.
- Repeat: alternate wafers and chocolate cream, finishing with cream.
- Finish the top: dust lightly with cocoa if wanted. Keep the reserved dry wafers for serving time so they retain more crunch.
- Chill: cover and refrigerate for at least four hours, or overnight within safe storage limits.
- Serve appropriately: spoon from the dish or glasses. Only unmould and slice if the recipe has set sufficiently; longer chilling alone does not guarantee a stable cake-like structure.
- Individual portions: add reserved dry wafers or chocolate curls just before serving chilled.
- Transport and storage: keep covered and refrigerated, and use an insulated cool box with ice packs for transport. Refrigerate on arrival.
Practical tips
- Less sweet: use darker chocolate or a little cocoa. Test any reduction in condensed milk, as it affects the structure.
- More crunch: add the reserved dry wafer pieces only at serving time.
- Without gelatine: expect a potentially soft dessert and serve in glasses. The chocolate provides some body, but extra chilling is not a guarantee of sliceability.
- Small servings: glasses simplify portioning and help avoid leftovers.
Christmas mosaic jelly: assembly and decoration
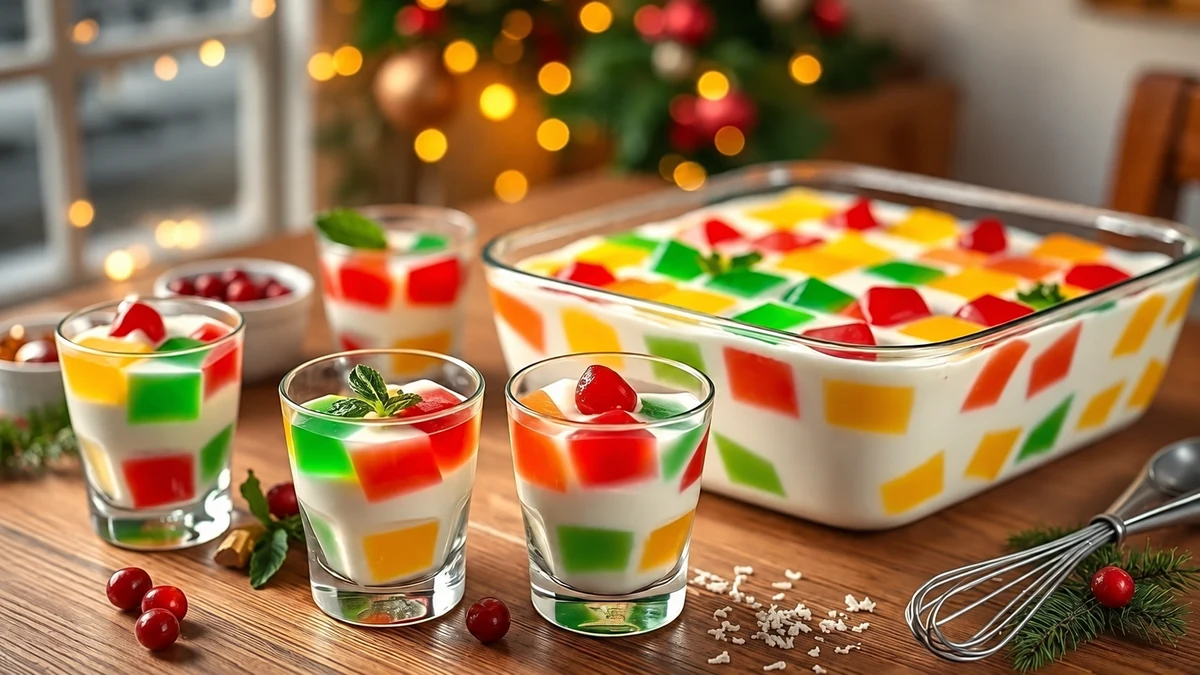
Prepare the coloured jelly cubes and creamy base separately before assembling. Check all setting products for animal gelatine if a vegetarian version is required.
Ingredients and equipment
- 3–4 packets of flavoured jelly, such as strawberry, lime and passion fruit — prepare each according to its packet. Fruit-and-agar versions require a separate tested formulation, not the same method by assumption.
- 1 tin sweetened condensed milk (395 g) — use a suitable plant-based product only with vegetarian jellies and an adapted setting method.
- 250 ml milk or coconut milk
- 12 g unflavoured powdered gelatine in the source formula — check the packet dose for the whole creamy mixture. Vegetarian alternatives differ in strength and heating requirements.
- Clear glasses or food-safe individual pots — a larger mould is suitable only if the tested mixture sets firmly enough.
- Edible decorations — washed mint, prepared berries, lemon zest, lightly toasted coconut or suitable sprinkles.
Assembly
- Prepare the coloured jellies: follow each packet, refrigerate until firm and cut into cubes roughly 1.5 cm across.
- Make the creamy base: hydrate and dissolve the unflavoured gelatine according to its packet. Mix condensed milk with the 250 ml milk, then incorporate the gelatine as directed for a cold mixture, avoiding lumps.
- Cool the base: it should be no longer warm but still pourable, so it does not melt the jelly cubes.
- Arrange the cubes: distribute the colours evenly between glasses or a suitable mould.
- Pour in the base: gently cover the cubes with the cooled liquid. Leave space at the top and tap lightly to settle the mixture.
- Chill until set: cover and refrigerate for at least four hours, or overnight within the ingredients’ storage limits.
- Optional extra layer: a separately prepared, cooled clear jelly can form a transparent top if desired. Milk jelly is opaque, not transparent; follow a suitable recipe rather than adding an unspecified extra mixture.
Decoration and presentation
- Individual glasses: add a washed mint leaf and an age-appropriate prepared berry for colour.
- A larger mould: turn out only when firm enough, then finish with toasted coconut or chocolate curls.
- Festive labels: place flavour and allergen cards beside the desserts. Keep sharp picks and non-edible decorations out of children’s portions.
Quick tips
- Avoid warm liquid: cool the base before adding it so the coloured cubes keep their shape.
- Use even cubes: similar sizes help distribute the colours; prepare the jellies correctly rather than trying to compensate for a weak set during assembly.
- Allow sufficient chilling: wait until set, but remember that extra time does not fix too little or unsuitable gelling agent.
- Choose festive colours: red, green and yellow can suit the Christmas table.
Adapting desserts for your family
Thoughtful substitutions can accommodate preferences and dietary needs. Check ingredient labels, cross-contact and texture instead of assuming a single swap makes a recipe suitable for everyone.
Ingredients and possible alternatives
- Condensed milk: choose a suitable plant-based product and compare its consistency. Reducing coconut milk with sugar can make a sweet sauce, but the yield and composition are not automatically equivalent to a 395 g tin.
- Cream: trial a suitable plant or coconut cream, checking whether it needs to whip. The same weight does not guarantee the same result.
- Milk: an appropriate plant drink may be used in an adapted recipe; check milk and nut allergies and whether oat products need certified gluten-free status.
- Eggs: flax mixtures and aquafaba serve different functions. Neither is a universal replacement for a whole egg, a whipped white or a cooked yolk custard. Use a recipe designed for the replacement.
- Gelatine: agar or other vegetarian gels need product-specific quantities and heating instructions. Test with the actual fruit and cream mixture.
- Sugar: changing it affects cake structure, texture and freezing. Test reductions gradually rather than promising that removing 20–30% has no effect. Coconut sugar is still sugar.
- Biscuits and crumbs: use certified gluten-free options where required. Wholemeal wheat biscuits are not gluten-free; also check chocolate, wafers and sprinkles.
A practical adaptation process
- Identify requirements: list allergies, intolerances, alcohol restrictions and age-related serving needs.
- Choose suitable ingredients: use a reliable recipe for major changes and compare product labels.
- Make a small trial: assess the flavour and set before making a large dessert for guests.
- Balance flavour: taste only mixtures safe to eat at that stage. Tart fruit changes flavour and may affect setting; do not automatically add extra gelatine.
- Check stability: thinner liquids can change the set. Follow the setting agent’s instructions and test rather than relying on more chilling alone.
- Record the result: note quantities, products and methods so a successful version can be repeated.
Options for children and alcohol-free guests
- Leave out alcohol: use the stated juice alternative or a small label-directed dose of alcohol-free flavouring. Vanilla extract may contain alcohol, so check it where strict avoidance is needed.
- Choose suitable textures: offer age-appropriate soft portions and prepare fruit safely; avoid hard whole nuts for young children.
- Keep decoration edible and simple: use appropriately prepared fruit and small servings without sharp picks or loose non-edible ornaments.
Adjusting sweetness and portions
- Reduce optional sugar first: start with toppings or sauces rather than making large untested changes to a cake or frozen base.
- Use fruit for contrast: pineapple, passion fruit and strawberries add flavour, but do not make an otherwise rich dessert automatically low-sugar.
- Check sweeteners: follow the product’s directions and test texture. They are not always suitable in the same amount as sugar.
Storage and preparation ahead
- Prepare ahead: many chilled desserts can be made the day before, within the shortest ingredient storage limit.
- Use the right storage: keep ice cream frozen and aim to use within two weeks for quality. Suitable cakes may freeze for a month with texture changes; covered mousses and pavês should generally be used within 48 hours at 1–5°C, or sooner if required. Thaw suitable frozen desserts in the fridge and use within 24 hours; do not refreeze melted ice cream.
- Portion individually: covered food-safe pots simplify transport and reduce handling.
- Label clearly: record flavours, allergens, preparation dates and whether alcohol is present.
Scaling up for more guests
- Scale ingredients consistently: double every component for a double batch. Avoid casually rounding eggs; use a suitable scaling method or make separate standard batches.
- Check equipment and space: allow room for safe cooling and cold storage before making larger quantities.
- Allow enough setting time: larger, deeper dishes may take longer, but no fixed 25–30% increase applies to every recipe. Smaller containers make cooling and portioning easier.
Good practice and food safety
- Prevent cross-contact: use clean equipment and keep allergen-free ingredients separate from ingredients containing those allergens.
- Taste safely: do not taste raw flour or untreated raw egg mixtures. Follow the preparation instructions for pasteurised egg products.
- Trial unfamiliar recipes: a small batch ahead of the celebration helps reveal texture and timing problems.
Enjoy a cool finish to the celebration
These chilled dessert ideas bring variety to a Brazilian Christmas table. Choose flavours your guests enjoy and check dietary adaptations carefully rather than treating them as guaranteed one-for-one swaps.
Plan storage space, trial unfamiliar recipes and use manageable portions. This leaves more time to enjoy the meal while keeping the desserts properly chilled.
Thank you for reading. Follow our social channels for festive recipes and practical ideas, and visit I Love Christmas for more seasonal inspiration.
FAQ: chilled Brazilian Christmas desserts
How should I store chilled desserts before the meal?
Keep mousses, pavês and dairy-topped cakes covered at 1–5°C and use within 48 hours of preparing the earliest perishable component, or a shorter ingredient limit. Keep ice cream frozen and aim to use within two weeks for best quality. Do not refreeze melted ice cream.
Can I make these desserts ahead?
Many benefit from being made the day before, within safe storage limits. Cool cooked fillings promptly and refrigerate within one to two hours. Freeze only suitable recipes, as creams and starch-thickened puddings may change texture.
How can I make a lactose-free or vegan version?
Check all milk, cream, condensed milk, chocolate, biscuits and toppings. A vegan version also needs an egg-free and animal-gelatine-free formulation. Aquafaba and agar require suitable recipes and product-specific methods. Lactose-free dairy still contains milk proteins and is not suitable for a milk allergy.
Can I reduce sugar without changing the texture?
Not always. Sugar affects the structure of cakes and the freezing of ice cream, as well as sweetness. Reduce optional sugar in sauces first, and trial major recipe changes in a small batch rather than assuming a fixed percentage will work.
How should I serve and transport individual portions?
Use covered food-safe glasses or pots, label flavours and allergens, and transport chilled desserts in an insulated cool box with ice packs. Refrigerate on arrival and keep chilled until serving. Frozen desserts need a transport method that keeps them frozen.
Sources and Further Reading
- Food Standards Agency: chilling and storing food
- Food Standards Agency: cooking and reheating
- Food Standards Agency: safe handling and use of eggs
- Dr. Oetker: leaf gelatine preparation and strength