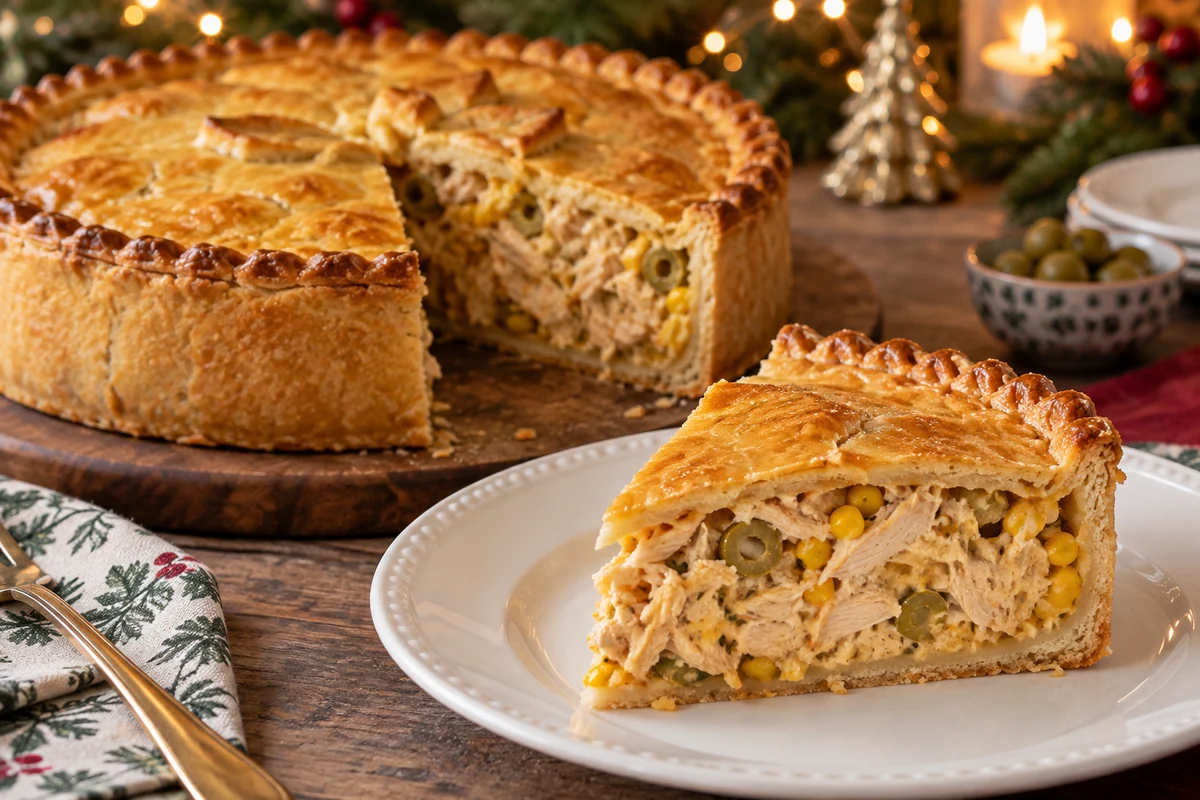
Chocolate Christmas desserts include filled panettone, orange-scented mousse, brigadeirão, layered pavê, truffles and chilled chocolate bonbons. Explore six ideas, with methods for four and ingredient-planning notes for the panettone and pavê, plus serving and storage guidance.
Chocolate Christmas desserts can bring familiar flavours and a festive finish to dinner. These six ideas range from individual sweets to sharing puddings. The panettone and pavê sections are ingredient guides, not complete recipes; the other four include methods. These formulas have not been independently kitchen-tested for this translation, so try your chosen version before preparing it for a crowd.
Why choose chocolate for Christmas dinner?

Chocolate Christmas desserts combine familiar flavours with plenty of choice, from simple rolled truffles to more involved filled breads.
Main advantages
- Versatility: chocolate works in cakes, truffles, mousses and bonbons, in individual portions or larger sharing desserts.
- Familiar flavours: chocolate can evoke happy memories and appeal to guests of different ages.
- Convenience: several desserts can be prepared the day before, provided they are stored correctly.
- Value: simple homemade truffles and bonbons can look special with just a few well-chosen ingredients.
- Dietary options: suitable recipes can be made vegan or lactose-free, but check every ingredient. Dark chocolate is not automatically milk-free, and lactose-free dairy is unsuitable for a milk allergy.
- Flavour pairings: chocolate combines well with citrus fruit, nuts and coffee, or an optional alcoholic drink for adults.
- Choosing chocolate: compare cocoa content, sweetness and origin to suit your preferences; an attractive handmade presentation does not require a particular brand.
Quick tips for adding chocolate to the menu
- Choose 60–70% cocoa chocolate for a balance of sweetness and intensity, or 70% or higher if you prefer a more bitter flavour.
- Use oranges or berries to contrast with sweetness. Choose fresh or properly prepared frozen fruit according to availability.
- Offer small tartlets or dessert glasses if you want variety without excessive leftovers.
- Check allergies before choosing alternatives. Plant drinks, coconut products and sweeteners are not universal substitutes for dairy, butter or sugar, and may introduce other allergens.
- Keep decorative pine sprigs and unidentified berries away from food. Garnish desserts only with ingredients confirmed as edible.
- Label dessert ingredients and allergens, and offer drinks such as coffee or citrus tea, with wine or liqueur optional for adults.
- Prepare suitable components ahead and finish delicate decorations on the day for the best appearance.
Planning the dessert table
- Balance creamy textures with nuts or biscuits, checking allergies and keeping crunchy toppings separate until needed.
- Start with one or two small items per guest when several desserts are offered, then adjust for appetites and the rest of the meal.
- Try unfamiliar recipes in advance to check sweetness, setting and serving portions.
Adapting desserts to the weather and your budget
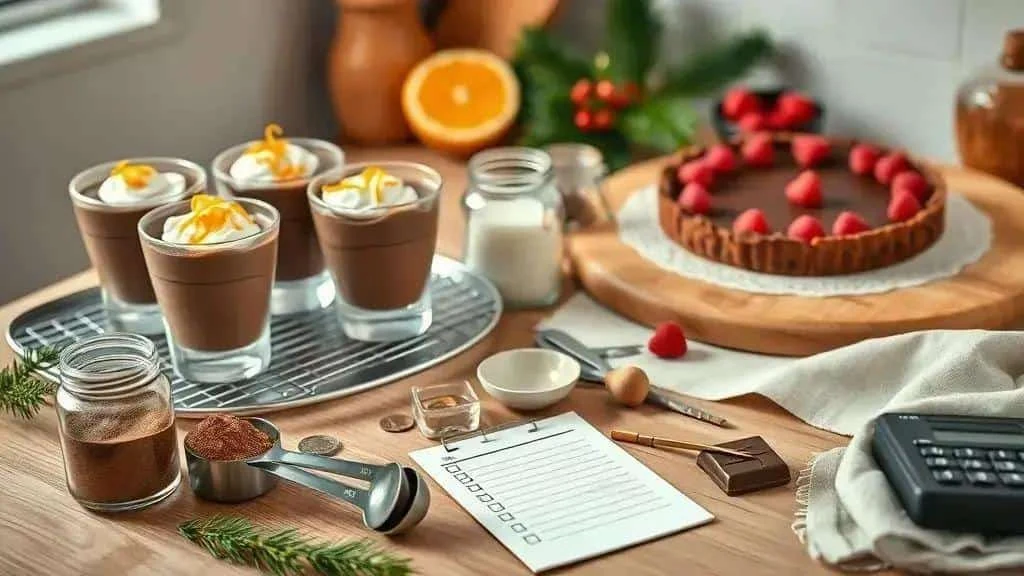
Planning around the weather and your budget can make Christmas desserts easier to prepare and serve without unnecessary expense.
Planning for the weather
- Warm weather: chilled mousses and dessert glasses suit a Brazilian summer Christmas, but they remain perishable and need reliable refrigeration.
- Cold weather: baked desserts and filled breads suit a British winter celebration too. A cold room or outdoor temperature is not a substitute for controlled fridge storage.
- Setting: use gelatine or another setting agent only in a recipe designed for it, following its instructions. A firmer mousse is not safer to leave warm, and agar is not a direct replacement for gelatine.
- Transport and service: finish suitable decorations at the venue and use insulated cool boxes with frozen packs to keep chilled desserts cold.
Saving money without losing flavour
- Choose the right recipe: a cocoa-based pudding can cost less than one made with a large amount of chocolate. Do not replace chocolate with cocoa and oil without a formula designed for that change.
- Compare unit prices: larger packs may be economical for a big batch; compare price per weight and buy only what you can use.
- Use available fruit: oranges, mandarins or apples can add flavour at a reasonable price, depending on the season and where you shop.
- Share ingredients across dishes: plan recipes using the same milk, eggs or butter, while keeping track of quantities and use-by dates.
Substitutions and measurements
- Milk and plant drinks: a plant drink may work in some recipes, but protein, fat and thickening behaviour differ. Check the recipe and allergens rather than assuming every swap works equally.
- Butter and coconut oil: butter contains water as well as fat; coconut oil behaves differently when chilled. They are not interchangeable in every dough or filling.
- Sugar and sweeteners: sugar affects texture, volume and setting as well as sweetness. Use a recipe developed for your chosen sweetener; never taste raw egg or flour mixtures to adjust them.
- Chocolate and cocoa: cocoa lacks the same balance of fat and sugar as chocolate. Natural and alkalised cocoa can also affect baking differently, so follow the specified ingredient.
Five steps for adapting a recipe
- Identify its structure: determine whether an ingredient provides flavour, aeration, thickening or a baked structure before replacing it.
- Choose a serving format: individual glasses can simplify portioning, while a sharing pudding suits a seated meal; both still need appropriate storage.
- Use a suitable formula: make small trials with established substitutions instead of assuming all liquids and fats can be exchanged in equal amounts.
- Plan the cost: list shared ingredients and compare larger packs where that genuinely saves money.
- Test beforehand: make a trial well before Christmas to assess flavour and consistency; prepare the actual festive batch within its safe storage period.
Affordable presentation
- Small dessert glasses allow variety and help control the amount you prepare.
- Decorate with orange zest, suitable fresh fruit or toasted nuts, making allergens clear.
- A compatible ganache can finish more than one dessert. Keep portions reserved for later clean and refrigerated.
Final checks
- Food safety: keep perishable desserts at 1–5°C and bring out small batches. As a cautious home-serving rule, limit total time out of refrigeration to two hours, and less in very hot conditions; cooling them again does not reset that time.
- Timing: schedule cooking, cooling, chilling and finishing so that everything is ready without extended storage.
Six chocolate desserts at a glance

Here are six Christmas dessert ideas. Preparation times below are approximate planning guides, not guarantees; allow extra time for chilling, setting and any recipe testing.
The six ideas
- Chocolate-filled panettone – a festive bread with a creamy centre. This article provides an ingredient outline only; making the bread requires a complete kneading, proving and baking method. Filling a bought panettone is a separate, quicker option.
- Chocolate and orange mousse – roughly 20–30 minutes of preparation plus at least three hours in the fridge; around six to eight small servings, depending on size.
- Christmas brigadeirão – a Brazilian chocolate custard pudding, baked in a water bath for approximately 50–60 minutes, plus preparation, cooling and chilling. It is delicate and needs careful cold transport.
- Chocolate and nut pavê – a layered biscuit dessert with creamy and crunchy elements. The ingredient outline below needs a complete preparation method before use.
- Christmas truffles – approximately 30–40 minutes of hands-on work plus chilling; the number depends on the size of each truffle. Suitable for small chilled gifts.
- Chilled filled bonbons – around 45–60 minutes of hands-on preparation, plus cooling and setting. They have a cooked condensed-milk filling and a chocolate coating.
Choosing your desserts
- For warm weather: choose desserts you can keep reliably refrigerated, such as mousse, truffles or chilled bonbons.
- For cold weather: panettone, brigadeirão and pavê are equally welcome, but filled breads and creamy desserts still need chilling.
- For a smaller budget: homemade truffles and bonbons use relatively few ingredients; calculate the cost of chocolate and decorations before deciding quantities.
- For dietary needs: choose a complete recipe suitable for the restriction, checking eggs, dairy, nuts, gluten and decorations as well as the chocolate.
Simple drink pairings
- For adults who drink alcohol, choose a wine you enjoy with the chocolate’s sweetness and bitterness; there is no single required pairing.
- Espresso can complement the flavour of chocolate mousse and truffles.
- Citrus fruit or berries provide a fresh contrast to rich chocolate.
Ingredient guide for chocolate-filled panettone
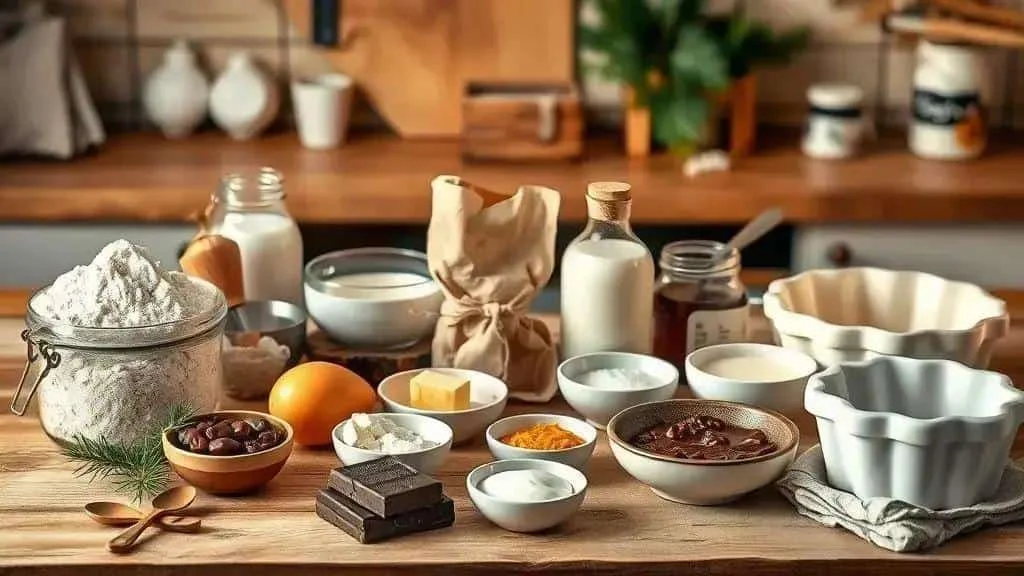
For a chocolate-filled panettone, organise the dough and filling separately. The following is an ingredient outline from the original article, which did not supply a dough method or baking instructions. Use a complete, tested panettone recipe before making the bread; this list alone is not sufficient.
Dough ingredients in the original outline
- 500 g wheat flour – use the flour specified by your complete bread recipe. A gluten-free blend needs its own formula and method.
- 100 g sugar – retain the sugar required by the dough formula; an equal weight of sweetener is not a reliable substitute in enriched bread.
- 10 g salt – weigh it; this is not reliably equivalent to one teaspoon.
- 10 g dried yeast – the outline also suggests 30 g fresh yeast. Check the product and complete recipe; baking powder does not replace yeast in this bread.
- 4 medium eggs – use as directed in the dough recipe. Apple purée and flaxseed are not a verified replacement for these four eggs.
- 120 ml lukewarm milk – a plant-drink variation needs testing within a suitable formula.
- 150 g unsalted butter – softened as required by the method. Coconut oil is not a direct substitute for butter in this enriched dough.
- 1 teaspoon vanilla extract – or vanilla seeds to taste.
- Zest of 1 orange – mandarin zest gives a different citrus flavour.
- 100 g raisins or candied fruit, optional – if soaking in orange juice or rum, follow your recipe and drain well. Rum adds alcohol.
Chocolate ganache filling ingredients
- 300 g dark chocolate, 60–70% cocoa – chopped. Milk chocolate makes a sweeter, differently textured filling and may require different proportions.
- 200 ml fresh cream – plant-based cream changes the flavour and setting; check a suitable formula and all allergens.
- 50 g unsalted butter – adds softness and gloss. Do not assume an arbitrary amount of coconut oil gives the same result.
- 1 tablespoon cocoa powder, optional – adds a stronger cocoa flavour and may thicken the filling.
Other filling ideas
- Firm brigadeiro filling: the original suggests one tin of condensed milk, two tablespoons of cocoa and one tablespoon of butter, cooked until thick. Use a complete brigadeiro method and cool it before filling.
- Chocolate hazelnut spread: a convenient filling option; check milk and nut allergens and the manufacturer’s storage instructions.
Planning notes
- Bread size: this dough list weighs more than 1 kg before baking and filling. The original claim that it makes one finished 800 g–1 kg panettone was inconsistent; use the yield and tin size from your complete recipe.
- Filling amount: approximately 300–400 g may be suitable for some breads, but depends on their size. The ganache list makes more than this; refrigerate any unused filling separately.
- Storage: refrigerate cream-filled panettone and homemade ganache at 1–5°C and use within 48 hours, or sooner if an ingredient’s instructions require it. An airtight box does not make cream filling shelf-stable.
How to make festive chocolate and orange mousse
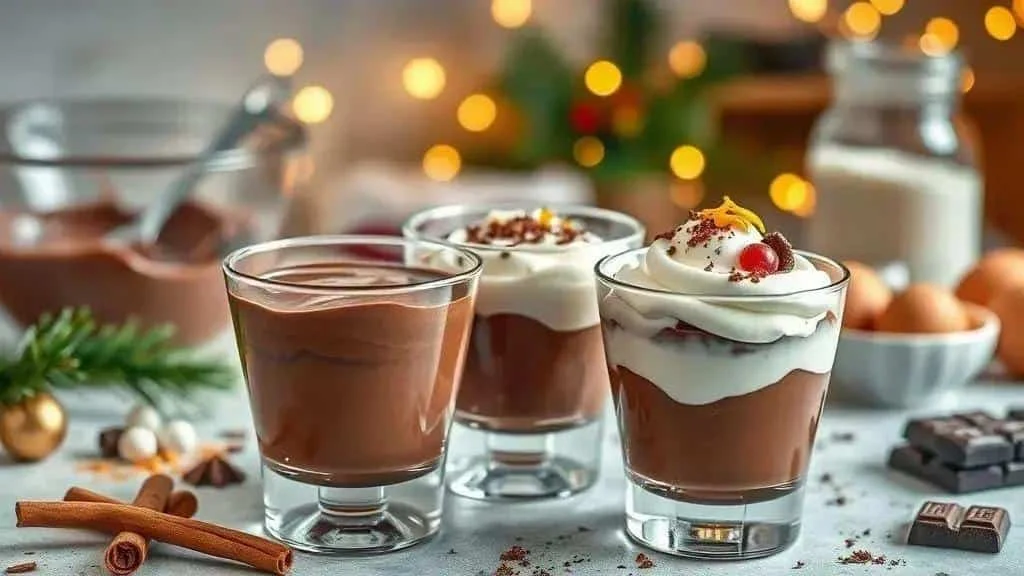
Prepare the ingredients and serving glasses first. Choose pasteurised egg products suitable for uncooked dishes and whipping, because the whites are not cooked in this method.
Ingredients
- 200 g dark chocolate, 60–70% cocoa – chopped. Milk chocolate will give a sweeter, softer result, so test that variation separately.
- 200 ml whipping cream – divided into 50 ml for warming and 150 ml kept cold for whipping. Coconut cream needs a suitable variation rather than an assumed equivalent.
- Pasteurised yolks and whites equivalent to 3 medium eggs – kept separate, using the product’s quantity guidance and whites suitable for whipping. Aquafaba is not a direct replacement for both yolks and whites.
- 4 tablespoons sugar – for the yolk mixture. A sweetener requires a separately tested variation.
- Zest of 1 orange – or mandarin zest. Concentrated orange flavouring should be dosed according to its label.
- A small pinch of ground cinnamon and a pinch of salt – cinnamon is optional; salt is used when whipping the whites.
- Gelatine, optional – the original suggests one leaf, but leaf strengths vary. Use only an amount and method suitable for the complete mixture. One teaspoon of agar is not an equivalent substitute.
- Optional decorations: berries, chocolate shavings, chopped nuts or washed edible mint leaves.
Method
- Prepare optional gelatine: soak and dissolve it according to the packet instructions. Omit it for a softer mousse served in glasses rather than improvising an agar substitution.
- Melt the chocolate: use a bowl over gently simmering water or short 20–30-second microwave bursts, stirring between each. Keep water out and leave the chocolate to cool slightly while still fluid.
- Warm 50 ml cream: use this to incorporate the optional prepared gelatine as directed, then stir into the melted chocolate. Keep the other 150 ml cream cold.
- Whisk yolks and sugar: place them in a heatproof bowl over gently simmering water and whisk continuously until paler and thickened. Use pasteurised yolks: merely warming for three to five minutes does not reliably cook raw eggs. If cooking an egg mixture for safety, verify 70°C for two minutes or 75°C for 30 seconds with a thermometer.
- Combine yolks and chocolate: stir the yolk mixture into the chocolate until smooth, then allow to cool enough that it will not melt the whipped cream.
- Whip the remaining cream: whisk the cold 150 ml cream to soft peaks. Stop before it becomes grainy.
- Whip the whites: whisk the pasteurised whites with the pinch of salt to firm peaks, following the product’s guidance for whipping.
- Fold in the cream: mix about a third into the cooled chocolate to loosen it, then gently fold in the remainder.
- Fold in the whites: add them in two stages, folding gently to retain as much air as possible.
- Add the festive flavour: gently fold in the orange zest and optional cinnamon.
- Portion and chill: spoon into individual glasses or a serving dish, cover and refrigerate for at least three hours, until set sufficiently for serving.
- Finish before serving: add chocolate shavings, berries or a little cinnamon and serve chilled.
Practical tips
- A firmer texture: follow a tested mousse formula with the appropriate setting agent rather than increasing gelatine or reducing cream at random.
- Keep utensils dry: stray water can make melted chocolate seize; add only the liquids deliberately required by the recipe.
- Portions: use small glasses and divide the finished mixture according to the number of guests; around 120–150 g is a possible serving, not a guaranteed recipe yield.
- Egg safety: both yolks and whites need consideration. Heating only the yolks does not make raw whites safe. Use pasteurised products suitable for uncooked dishes, especially for vulnerable guests, or choose a fully cooked, egg-free mousse recipe.
Christmas brigadeirao: ingredients and method
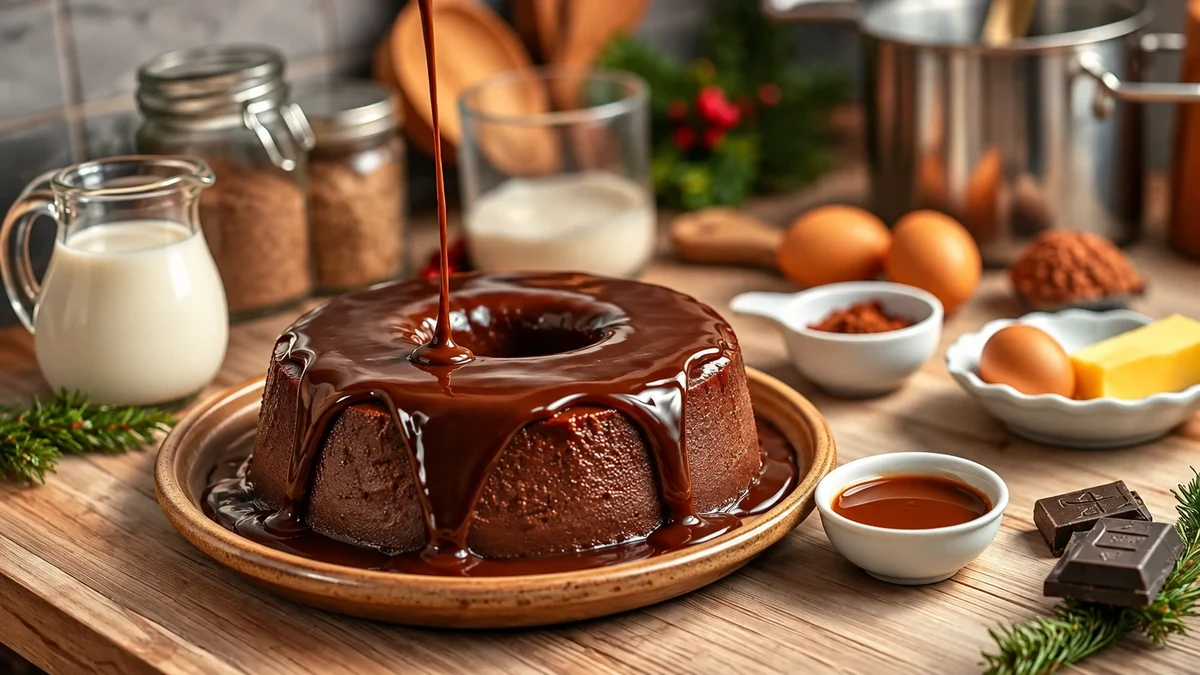
Christmas brigadeirão is a creamy Brazilian chocolate custard pudding, with optional caramel or chocolate sauce. It needs thorough cooking, cooling and refrigeration, and careful transport.
Ingredients
- 1 tin sweetened condensed milk, 395 g – plant-based condensed milk alone will not make this egg-based pudding vegan.
- 1 empty condensed-milk tin filled with whole milk – use the original tin as a volume measure. The 395 g weight of condensed milk does not mean 395 ml milk.
- 3 large eggs – they set the custard. Whipped aquafaba is not an equivalent replacement here.
- 40 g unsweetened cocoa powder – weigh it, as tablespoon weights vary. Do not replace it with 200 g chocolate without a different formula.
- 25 g unsalted butter – weigh it rather than using an uncertain spoon conversion; extra butter is needed if greasing the mould.
- 1 teaspoon vanilla extract, optional – complements the chocolate.
- Optional chocolate sauce: 100 g dark chocolate and 100 ml cream – check all allergens if choosing a plant-based cream.
- Optional caramel: 5 tablespoons sugar – melt carefully in a suitable saucepan before coating the mould.
Method
- Preheat the oven: set it to 180°C conventional, or the equivalent recommended for your oven.
- Prepare the mould: carefully melt the caramel sugar in a suitable saucepan, then coat a heatproof pudding mould. Do not place a mould directly on the hob unless it is explicitly hob-safe. Alternatively, grease it with extra butter and dust with a little extra cocoa. Hot caramel can cause severe burns.
- Blend the mixture: blend the condensed milk, measured milk, eggs, cocoa, 25 g butter and optional vanilla for about one minute until smooth.
- Strain if desired: pass through a fine sieve to remove any lumps for a smoother custard.
- Fill the mould: pour into the prepared mould, gently over the caramel if used, leaving room at the top.
- Prepare a water bath: stand the mould in a larger roasting tin and carefully add hot water to about halfway up its sides, without splashing into the pudding.
- Bake: allow approximately 50–60 minutes, but mould size and oven performance affect timing. The edges should be set and the centre gently wobbling, not liquid. Check that the centre reaches 70°C for two minutes or 75°C for 30 seconds; appearance alone is not a food-safety check.
- Cool and refrigerate: carefully remove from the water bath, cool promptly and refrigerate within one to two hours. Chill for at least four hours or overnight until fully set.
- Make optional chocolate sauce: heat the cream until almost simmering, pour over the chopped chocolate, leave for a minute and stir smooth. Cool before using on the chilled pudding.
- Unmould carefully: loosen the edge with a thin knife. Briefly warm the outside base in hot water if needed, keeping water out, then invert onto a serving plate.
Practical tips
- Consistency: a properly cooked custard can still wobble slightly and will firm in the fridge; do not use wobbling alone to judge whether the eggs are cooked.
- Optional flavouring: one tablespoon of rum or orange liqueur adds an adult flavour. Baking does not guarantee that all alcohol disappears; omit it when an alcohol-free dessert is required.
- Portions: around 120–150 g may suit a single dessert, with smaller portions if offering several sweets.
- Storage: keep covered at 1–5°C and use within 48 hours of preparation, or sooner if an ingredient requires it.
- Transport: keep cold in an insulated box with frozen packs and a stable, level base. Transporting in the mould and unmoulding at the venue may protect the delicate pudding.
Chocolate pave ingredients and variation ideas
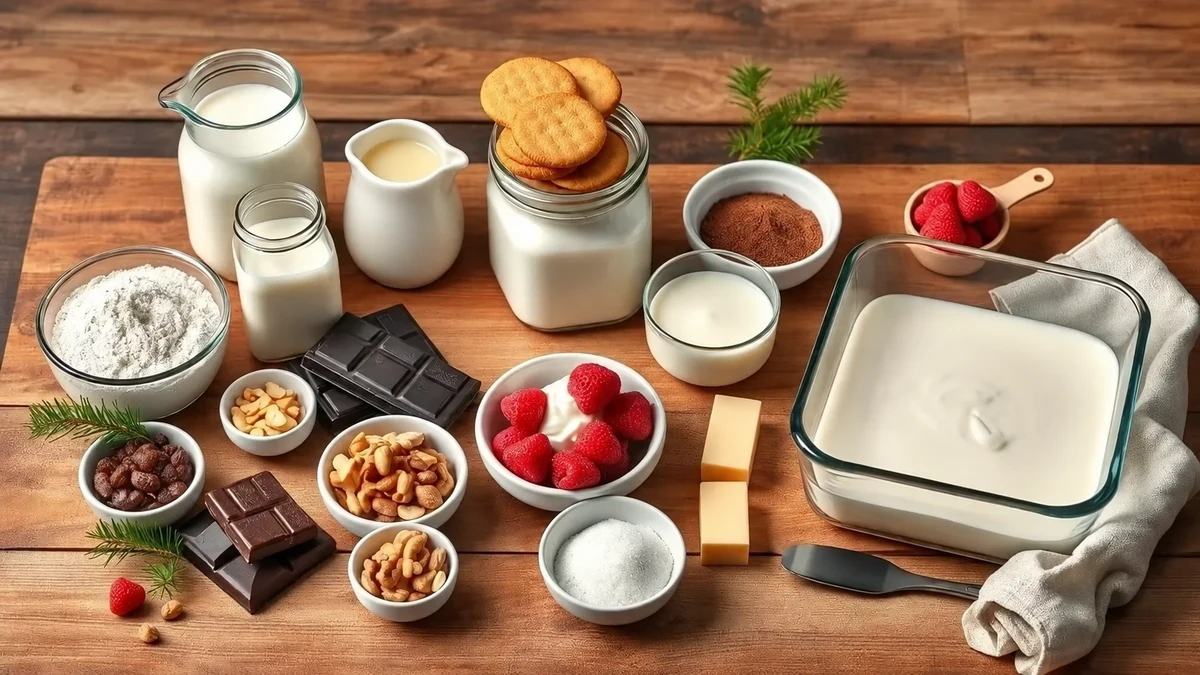
A chocolate pavê combines biscuits, cream and contrasting toppings. The source supplied this ingredient outline without a complete cooking or assembly method, including no allocation of milk between dipping and custard. Use a complete pavê recipe before preparing it; the list below is for planning flavours, not a ready-to-follow formula.
Ingredients in the original outline
- 200 g plain sweet biscuits or sponge fingers – check gluten and egg content; gluten-free biscuits may soften differently.
- 1 tin sweetened condensed milk, 395 g – a plant-based version needs to be part of a suitable dairy-free or vegan recipe.
- 400 ml whole milk – intended for both dipping and cream, but the source did not specify the split. Do not guess it; use the allocation in your complete recipe.
- 200 ml cream – for creamy or ganache layers; different plant creams do not necessarily set in the same way.
- 150–200 g dark chocolate, around 60% cocoa – chopped. Milk chocolate changes sweetness and texture.
- 30 g unsweetened cocoa powder – use weight rather than assuming a fixed tablespoon equivalent.
- 50 g unsalted butter – listed for the cream; a coconut-oil version needs its own proportions.
- 2 egg yolks, optional in the original outline – any yolk custard needs proper cooking. One tablespoon of cornflour is not a verified equivalent without a complete method and liquid allocation.
- 1 teaspoon vanilla extract – or orange zest for a different flavour.
- A pinch of salt and optional sugar – adjust only a mixture safe to taste. Sweeteners do not automatically make a dessert containing sweetened condensed milk sugar-free.
Optional crunchy additions
- 100 g chopped walnuts, almonds or hazelnuts – toasted if desired. Granola can provide a different texture, but may also contain nuts or gluten.
- 50–100 g crunchy biscuits or biscuit crumbs – keep some separate for adding shortly before serving.
- 50 g white chocolate pieces – or milk-chocolate shavings, checking dairy and other allergens.
Flavour variations
- Berry pavê: add around 200 g prepared fresh raspberries or strawberries to a suitable complete recipe. Jam gives a different texture and sweetness, so is not an automatic equal-quantity substitute.
- Salted caramel pavê: the outline suggests 100 g thick caramel and up to a quarter teaspoon of flaky salt; taste the caramel first and adjust. Dulce de leche is a different, dairy-containing option.
- Vegan pavê: use a complete vegan recipe with suitable biscuits, chocolate, plant-based condensed milk and cream. Eggs, butter and any gelatine also need appropriate replacements; aquafaba and starch are not interchangeable.
- Lactose-free or reduced-sugar pavê: these are different requirements. Check every ingredient and use a recipe developed for the need; replacing milk or adding a sweetener does not remove sugar already in biscuits or condensed milk.
- Coffee pavê: a suitable recipe can include two tablespoons of concentrated espresso in the dipping liquid and, optionally for adults, one tablespoon of rum or amaretto. Omit alcohol when required and check nut allergens.
Portions and layering
- Serving size: the source estimated eight to ten servings in a 20 × 30 cm dish, but this is unverified without a complete method. Follow the yield and dish size of the recipe you use.
- Layering: two or three cream layers alternating with biscuits can give a balanced texture, depending on the chosen recipe and dish.
Substitution notes
- Condensed milk: plant-based products vary in sugar and thickness. Sweetened cashew purée is not an equivalent replacement by weight and introduces a nut allergen.
- Thickeners: cornflour mixed with cold liquid and then properly cooked can thicken an egg-free cream, but the amount and cooking method must match the recipe.
- Sweetness: choose chocolate to suit your taste and reduce only optional added sugar where appropriate. Extra cocoa also affects texture.
How to make Christmas truffles and store them

Christmas truffles are versatile little gifts. Chill the ganache until it is firm enough to shape, and remember that cream-filled homemade sweets need refrigerated storage.
Ingredients
- 300 g dark chocolate, around 60% cocoa – chopped. Milk chocolate gives a softer ganache and may need a different cream ratio.
- 150 ml fresh cream – plant-based cream needs checking for fat content and setting behaviour in a suitable variation.
- 25 g unsalted butter – for a softer, glossy ganache. Use a separate vegan formula rather than assuming coconut oil behaves identically.
- 2 tablespoons unsweetened cocoa powder – for dusting or rolling instead of a chocolate shell; icing sugar gives a sweeter finish.
- 1 tablespoon liqueur, optional – rum, orange or chocolate liqueur. Omit for alcohol-free truffles, or test a little concentrated orange juice; use vanilla extract only in an appropriate small amount, not automatically a tablespoon.
- Orange zest, chopped nuts or edible sprinkles – optional flavourings and decorations.
- 150–200 g coating chocolate, optional – for dipped truffles. Real chocolate needs suitable tempering for a firm, glossy shell; compound coating follows its own packet instructions.
Method
- Chop the chocolate: place the 300 g chopped chocolate in a heatproof bowl.
- Heat the cream: warm until small bubbles appear at the edges, without boiling vigorously.
- Make the ganache: pour the hot cream over the chocolate, wait one minute and stir gently until smooth.
- Add butter and optional liqueur: stir in the butter in pieces and any chosen flavouring until evenly combined.
- Chill the ganache: cover and refrigerate for around one to two hours, or until firm enough to shape. Cool promptly rather than leaving it on the counter for hours.
- Shape the truffles: use a spoon or small scoop and clean, lightly greased hands to form small balls. Food-safe gloves, if used, do not replace hand hygiene.
- Firm briefly if needed: a short 10–15-minute spell in the freezer may help shaping, but avoid freezing hard or allowing condensation before dipping. Chilling in the fridge is usually simpler.
- Prepare the coating: melt gently over water or in short microwave bursts, stirring frequently. Temper real chocolate according to its manufacturer’s guidance; melting alone is not tempering. Alternatively, skip the shell and roll the truffles in cocoa.
- Dip if coating: lower each truffle into the prepared chocolate with a fork, drain excess and place on baking parchment.
- Decorate and set: add a little cocoa, edible sprinkles or nuts before the coating sets, then chill for around 20–30 minutes as needed. Keep refrigerated after setting.
Flavour ideas
- Orange truffles: add one teaspoon of orange zest to the ganache and finish with fine zest shortly before serving.
- Crunchy truffles: add 50 g crushed biscuits or praline, bearing in mind they may soften during storage and can contain allergens.
- Vegan truffles: choose a complete recipe using dairy-free chocolate, suitable plant cream and fat, and check the coating and decorations too.
Storage tips
- Refrigeration: store covered at 1–5°C and use within 48 hours, or any shorter ingredient limit. Separate layers with baking parchment.
- Freezing: freeze fresh truffles on a tray, then transfer to an airtight container. Aim to use within one month for quality; thaw covered in the fridge until fully defrosted and use within 24 hours. Texture and coating may change.
- Transport: use an insulated box with frozen packs, keeping the food container dry and reliably cold.
- Condensation: keep truffles covered during fridge thawing and avoid repeated temperature changes. Bring out only the portions needed for serving.
- Gift labels: identify ingredients, allergens, alcohol if present, preparation date and refrigeration instructions. Do not promise a week at room temperature or an unverified shelf life.
Chilled chocolate bonbons and presentation ideas

- 1 tin sweetened condensed milk, 395 g – a plant-based version requires a suitable variation and allergen checks.
- 2 tablespoons unsweetened cocoa powder – 150–200 g melted chocolate is not an equivalent substitute in this filling.
- 25 g unsalted butter – plus a little extra for the cooling plate and hands if needed. A coconut-oil version requires testing.
- 1 teaspoon vanilla extract, optional – adds flavour.
- 150–200 g coating chocolate – dark or milk chocolate, prepared according to its tempering guidance, or compound coating used as directed on its packet.
- Cocoa powder, chocolate strands or edible sprinkles – for optional decoration.
- Small paper cases or baking parchment – for holding the finished bonbons.
Method
- Start the brigadeiro filling: combine the condensed milk, cocoa and butter in a medium saucepan.
- Cook gently: stir continuously over a moderate heat, lowering it if the mixture catches, until thick enough to pull away from the bottom of the pan.
- Add vanilla and cool: remove from the heat, stir in the optional vanilla and spread on a lightly greased plate. Cool promptly and refrigerate within one to two hours; chill until firm enough to shape, approximately 30–60 minutes or longer if needed.
- Roll into balls: with clean, lightly greased hands, shape portions of about 15 g and place on baking parchment.
- Firm before dipping: chill the balls until they hold their shape. An optional 10–15 minutes in the freezer can help, but avoid hard freezing and surface condensation.
- Prepare the chocolate: melt gently over water or in short 20–30-second microwave bursts, stirring between them. Keep utensils dry and follow the chocolate’s tempering instructions for a firm shell.
- Coat the bonbons: dip each ball using a fork, drain the excess chocolate and set on baking parchment.
- Decorate before setting: add a little cocoa, edible sprinkles or chopped nuts while the coating is still soft.
- Chill to finish: refrigerate for around 20–30 minutes, until the coating is firm, and keep chilled until serving.
Presentation ideas
- Use small food-safe paper cases for individual portions and tidy serving.
- Arrange a platter with different finishes: cocoa dusting, dark chocolate coating, orange zest or red edible sprinkles.
- Cut a few bonbons in half to show the filling. Keep decorative foliage off the food, and use only washed edible fruit as a garnish.
- For gifts, use food-safe bags or boxes with ribbon and an ingredient label, clearly noting allergens, any alcohol and the need for refrigeration.
- Try white-chocolate drizzles, toasted nuts or gold decoration explicitly labelled edible and intended for food; a non-toxic craft product is not suitable.
Storage and portions
- Refrigeration: store covered at 1–5°C and use within 48 hours of making the filling, or sooner if required. Separate layers with baking parchment.
- Freezing: freeze fresh bonbons on a tray, then pack airtight. Aim to use within one month for quality, thaw covered in the fridge until fully defrosted and use within 24 hours; the coating may lose its gloss.
- Transport: keep cold in an insulated box with frozen packs and use dividers to protect the coating.
- Portions: two small bonbons per person may be enough alongside other desserts, with extra available if desired. Small portions are not necessarily low in sugar or energy.
Tips for beginners
- Keep stray water out of melted coating chocolate to reduce the risk of seizing.
- If the coating thickens, check its temperature and preparation instructions. Adding a teaspoon of oil is not a universal fix for seized chocolate and can soften the shell.
- Use a thermometer and the manufacturer’s tempering curve for the particular chocolate. Dark, milk and white chocolates do not all use the same working temperature.
- Test the coating on one bonbon before dipping the whole batch, checking that it sets properly.
Final thoughts
These six chocolate Christmas dessert ideas offer different flavours and serving styles. Start with a complete recipe, test unfamiliar variations and plan portions and refrigeration before the celebration.
Thank you for reading. Follow our social channels for more festive recipes, practical tips and Christmas inspiration.
Visit and follow the I Love Christmas blog for more seasonal ideas, and share your creations with us on social media.
FAQ: chocolate Christmas desserts
How should I store chocolate desserts before Christmas dinner?
Keep homemade cream-filled desserts, mousse, custard puddings and filled panettone at 1–5°C. Use within 48 hours of preparation or any shorter ingredient limit. Transport in an insulated box with frozen packs and minimise time out of refrigeration.
Which substitutions make these desserts vegan or lactose-free?
Use a complete recipe designed for the requirement. Plant drinks and creams may replace dairy in some formulas, but eggs, butter, chocolate, biscuits and decorations also need checking. Agar, cornflour and aquafaba have different functions and are not direct equivalents. Lactose-free dairy still contains milk proteins.
Can I prepare the desserts ahead?
Preparing them the day before is usually the simplest approach. Keep them properly chilled and within a 48-hour limit, or less if ingredients require it. Suitable truffles and bonbons may be frozen fresh for longer preparation, then thawed in the fridge and used within 24 hours. Add delicate decorations on the day.
How do I estimate portions for ten people?
For a single creamy dessert, roughly 120–150 g per person is a possible starting point. If offering several sweets, reduce each portion and allow perhaps two small bonbons per guest, adjusting to appetites. Check the actual yield of your complete recipe.
Which drinks go well with Christmas chocolate desserts?
Espresso, citrus tea and sparkling water with citrus are useful alcohol-free options. Adults may enjoy wine or a little liqueur according to taste. Pair the drink with the dessert’s sweetness and bitterness rather than relying on one fixed rule.
Sources and Further Reading
- Food Standards Agency: chilling and storing food
- Food Standards Agency: cooking and reheating
- Food Standards Agency: safe handling and use of eggs
- Callebaut: chocolate tempering methods