Choose from four Christmas turkey recipes and ten flavour ideas, with simple sides and preparation tips. Follow the bird’s cooking instructions and check that its thickest parts reach 75°C for 30 seconds, or an equivalent safe time and temperature. The guide also covers fridge thawing, separate stuffing and leftovers.
These Christmas turkey recipes combine familiar roast flavours with Brazilian accompaniments. There are four detailed preparations below, plus six further flavour ideas, so you can choose a manageable meal without mistaking a brief suggestion for a fully specified recipe.
Why Choose a Straightforward Christmas Turkey Recipe?
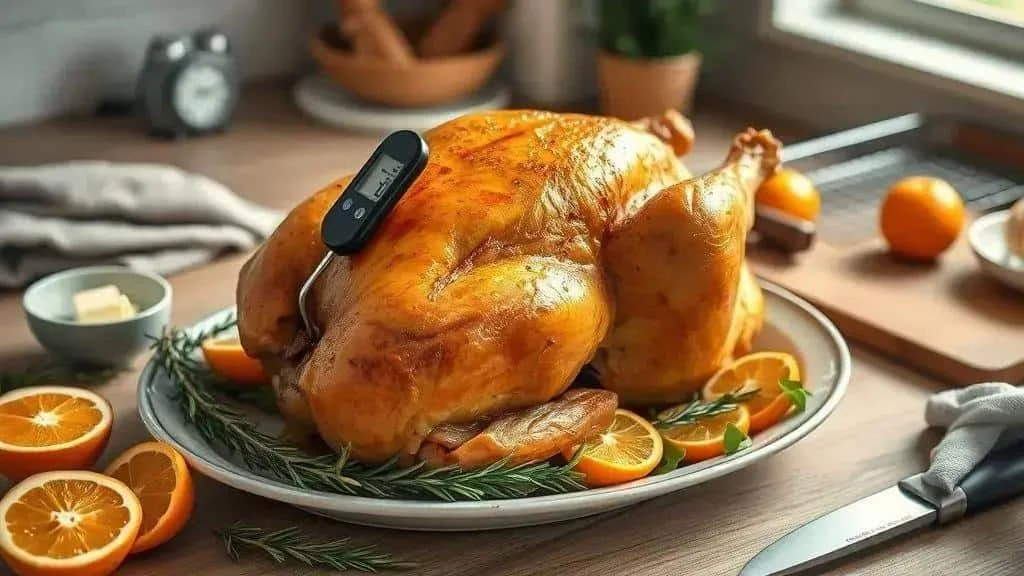
A simple turkey recipe can make Christmas cooking easier to organise. Fewer steps leave more attention for timing, safe cooking and the rest of the meal.
Practical Advantages
- Manageable preparation: a smaller joint or a professionally prepared spatchcocked bird may cook more quickly than a large whole turkey, depending on size and method.
- Clear instructions: a straightforward method makes it easier to coordinate the oven and side dishes.
- Flexible spending: choose a cut and accompaniments that suit your guest count and budget; boneless meat is not always cheaper per kilogram.
- Better checks: a clean food thermometer gives a more useful doneness check than judging the colour of the skin alone.
Who These Ideas Suit
They are useful for first-time turkey cooks, hosts with limited oven space and families who want to prepare part of the meal ahead.
Buying the Right Size
- Plan by the cut: use the supplier’s serving guide for whole birds, crowns and boneless joints. Their bone content differs, so one raw-weight allowance cannot reliably cover all three or guarantee leftovers.
- Choose manageable pieces: a uniform boneless joint can be easier to carve. Check its centre carefully because a tightly rolled joint still needs thorough cooking.
- Read the label: check the use-by date, storage requirements, thawing instructions and whether the bird is already seasoned or brined.
Planning the Timing
- Thawing: follow the packaging. As a rough fridge guide, Food Standards Scotland allows 10–12 hours per kilogram at 4°C, but a large bird can take several days. Check it is fully thawed, not just that the estimated time has passed.
- Seasoning: prepare herb butter ahead and keep it chilled. If marinating for 2–4 hours, keep the turkey refrigerated and stay within its use-by date and post-thaw storage instructions.
- Roasting: follow the bird’s instructions and check the thickest breast and thigh without touching bone. Aim for 75°C held for 30 seconds, or 70°C for 2 minutes, before removing it from the oven.
Basic Equipment
- A sturdy roasting tin with a rack
- A food thermometer
- A sharp carving knife and, where needed, sturdy poultry shears
- A pastry brush and kitchen foil
Food Hygiene
Keep turkey refrigerated until preparation, do not wash raw poultry, and clean hands, boards and utensils after handling it. Check the cooked centre with a clean food thermometer before serving.
Less Work, Plenty of Flavour
- Prepare seasoned butter to spread carefully under the breast skin, without tearing it.
- Serve a simple herb stuffing or Brazilian farofa separately rather than packing it inside the bird.
- Smaller cuts can simplify serving, but each still needs its own cooking instructions and temperature checks.
Planning for Leftovers
Have shallow containers ready for cooked turkey that will become sandwiches, salads or another meal. Cool and refrigerate it promptly rather than leaving the whole carcass on the table for hours.
Alternative Cuts and Methods
A boneless breast, turkey leg joint or spatchcocked bird may suit your oven better. Ask a butcher to prepare it if you are not comfortable removing bones or cutting the backbone.
A Few Final Planning Tips
- Try a smaller version beforehand if the technique is new to you.
- Choose sides that can be prepared ahead and safely chilled or reheated.
- Delegate table-setting and vegetable preparation, leaving hot trays, raw poultry and carving to a confident adult.
Choosing, Thawing and Preparing Your Turkey
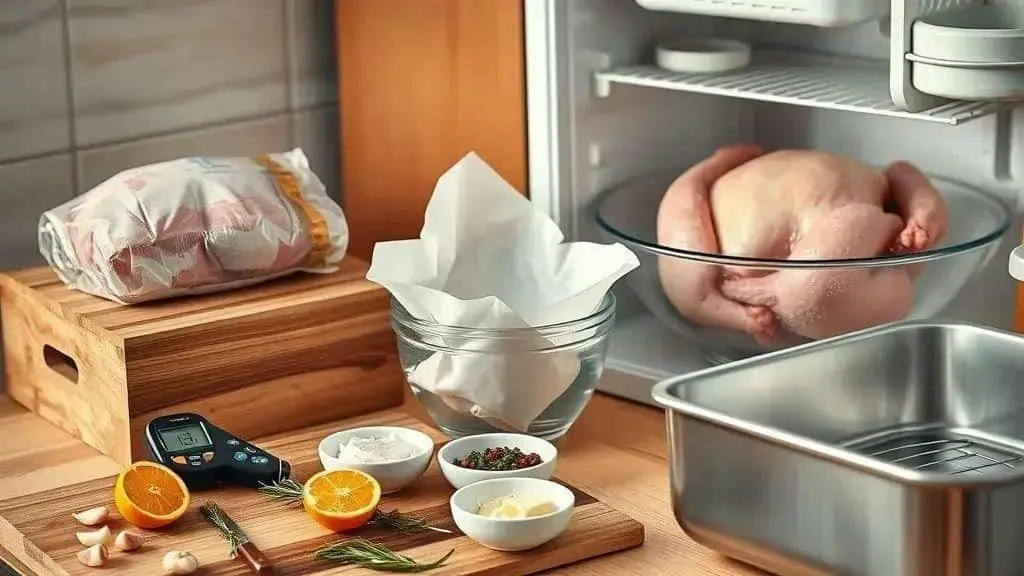
A suitable cut, enough fridge space and time to thaw are the foundations of an organised Christmas meal.
Choosing the Bird
- Fresh or frozen: both can work well. Check packaging condition, dates and storage instructions before buying.
- Size: follow the serving guide for the exact cut and allow for the other dishes you will serve. For a small gathering, consider a crown, breast joint or leg rather than a large whole bird.
- Cut and shape: whole, boneless and spatchcocked turkey cook differently. A change of cut needs an appropriate method, not simply the same time with a fixed percentage deducted.
- Seasoning and brine: a pre-brined or pre-seasoned bird needs less additional salt. Check the ingredient list and cooking instructions.
Thawing Safely
Defrost in the fridge, with enough time for the centre to thaw. Do not thaw a turkey on the worktop or in a warm room.
- Fridge thawing: follow the packet first. The approximate guide of 10–12 hours per kilogram at 4°C is a planning aid, not proof of thawing. Keep the covered bird in a deep tray on the bottom shelf, away from ready-to-eat food.
- If time is running short: do not improvise with warm water. Only use an alternative thawing method explicitly supported by the supplier’s instructions; otherwise change the meal plan or buy a suitable chilled cut.
- Microwave thawing: this is only practical for a small cut when both the appliance and food instructions allow it. Cook immediately afterwards.
Preparing the Turkey for Roasting
- Remove packaging and giblets: check the main and neck cavities for bags. Refrigerate giblets separately if you will use them for properly cooked stock.
- Dry the skin: pat it with kitchen paper if needed, dispose of the paper and clean the work area. Do not rinse the bird.
- Season lightly: use pepper and herbs, adjusting salt to the bird’s existing seasoning. Leave the cavity open rather than tightly packing it.
- Season under the skin: gently loosen the breast skin and spread in herb butter, for example 100 g softened butter mixed with 2 tbsp chopped herbs.
- Cook stuffing separately: a separate dish is easier to cook evenly and keeps whole-bird timing more reliable. The farofa below is served as a side for this reason.
- Position the bird: tuck the wing tips underneath and place breast-side up on a rack. Do not tightly bind the legs unless the supplier’s method calls for it.
- Preheat the oven: follow the packet. The general whole-bird guide used below is 180°C conventional; use the supplier’s fan-oven setting where supplied.
- Check the centre: probe the thickest breast and thigh, away from bone, and confirm 75°C for 30 seconds or 70°C for 2 minutes. Check more than one place.
- Rest after cooking: cover loosely with foil and allow about 20–30 minutes before carving, then serve promptly.
Useful Seasonings and Substitutions
- Herb butter: mix 100 g butter with 2 tbsp chopped parsley, thyme and rosemary. Olive oil is another coating option; use enough to coat rather than treating it as an exact butter replacement by volume.
- Salt and pepper: season to taste and account for brine, stock and salted butter. Different salt crystal sizes do not have equal weights per tablespoon.
- Citrus: two quartered oranges or one lemon can flavour the roasting juices. Place them around the bird rather than filling the cavity tightly. Apple gives a different, sweeter aroma.
- Garlic and onion: four crushed garlic cloves and one quartered onion make a useful aromatic base in the tin.
Essential Equipment
- A clean digital food thermometer for checking the cooked centre.
- A sturdy roasting tin and rack that fit your oven.
- A sharp carving knife and large clean board.
- A pastry brush and kitchen foil.
Checking That Turkey Is Cooked
For a safe cooked centre, check 75°C for 30 seconds or 70°C for 2 minutes in the thickest parts, avoiding bone. Do not rely on golden skin, the clock or an assumed temperature rise during resting.
Storing Leftovers
- Carve leftover meat into smaller portions, cool promptly and refrigerate in covered containers within 1–2 hours.
- Keep at 5°C or below and use within 48 hours, or freeze promptly. Two to three months is a useful freezer quality target; thaw in the fridge, use within 24 hours of defrosting and reheat only once until steaming hot throughout.
Ways to Save Preparation Time
- Buy a professionally prepared boneless joint if it suits the number of guests and makes carving easier.
- Prepare seasoning up to a day ahead and refrigerate it. Keep the turkey within its own use-by and post-thaw storage limits.
- Choose sides that can be prepared ahead without competing for the same oven space.
Ten Christmas Turkey Flavour Ideas at a Glance
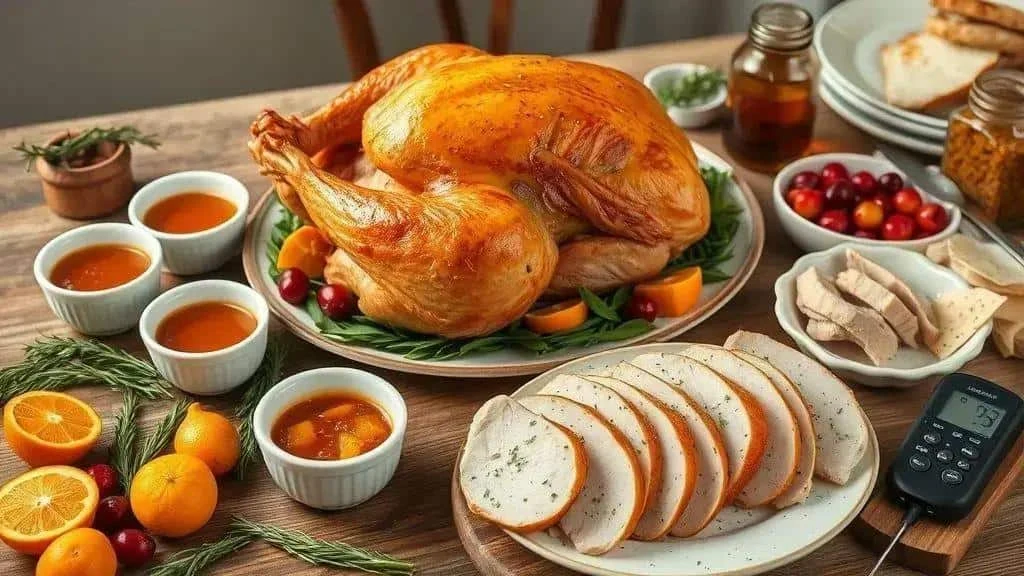
Here are ten Christmas turkey ideas. The first four have detailed ingredient lists and methods below; the other six are flavour and serving suggestions to use with an appropriate tested cooking method.
The Ten Ideas
- Classic roast turkey — familiar herbs and a simple pan gravy. Ingredients | Method | Variations
- Turkey with tropical farofa — dried fruit and nuts in a Brazilian crumb side, cooked separately. Ingredients | Method | Variations
- Turkey with orange and herb gravy — a citrus accompaniment to the roast. Ingredients | Method | Variations
- Provençal-style herb-butter turkey — garlic, lemon and herbs under the breast skin. Ingredients | Method | Variations
- Boneless roast turkey — a joint that is straightforward to carve. Ingredient ideas | Cooking guidance | Variations
- Turkey with wine and cranberry sauce — a sweet-sharp sauce idea. Ingredient ideas | Cooking guidance | Variations
- Turkey with a herb and Parmesan crust — a savoury topping for a suitable roast recipe. Ingredient ideas | Cooking guidance | Variations
- Honey and mustard glazed turkey — a sweet and tangy finish. Ingredient ideas | Cooking guidance | Variations
- Lemon pepper turkey — citrus zest and pepper for a simple seasoning. Ingredient ideas | Cooking guidance | Variations
- Shredded turkey and herb sandwiches — a way to use safely stored cooked leftovers. Ingredient ideas | Preparation guidance | Variations
Using the Overview
Use the ingredients, method and variation links to find the relevant guidance. Brief flavour ideas do not supply a complete cooking schedule for every possible cut.
Choosing an Option
- Available time: choose a cut with a cooking schedule you can accommodate. A glaze does not make a whole turkey cook faster.
- Confidence: herb butter is a simple flavouring, while boning or spatchcocking is best left to a butcher if unfamiliar.
- Planning: check what can be prepared and refrigerated the day before.
Useful Ingredients to Have Ready
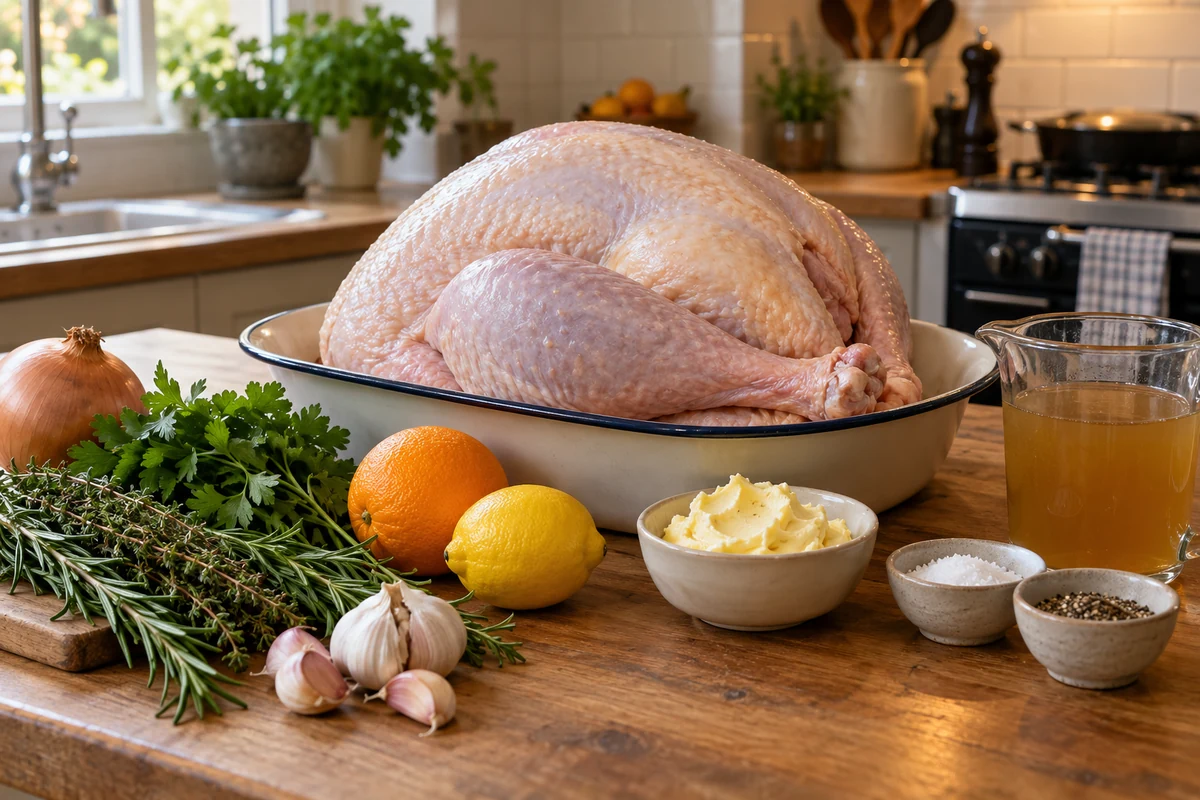
This shopping checklist covers the different Christmas turkey recipes below. It is not one combined recipe: buy and measure only what your chosen preparation needs.
Ingredient Checklist
- Coarse salt: use according to the chosen recipe and existing seasoning. Do not add both a full coarse-salt quantity and a second fine-salt quantity automatically.
- Fine salt: keep some for adjusting cooked sauces and sides, taking account of salty stock, bacon and cheese.
- Ground black pepper: 1–2 tsp is a useful starting quantity for general seasoning; adjust to the recipe. White pepper has a different flavour.
- Unsalted butter: up to 200 g for the herb-butter preparations. Olive oil can coat the bird instead, but is not a universal equal-volume replacement.
- Olive oil: the recipes use different amounts; 100–150 ml may be useful across the meal, not necessarily in addition to all the butter. Rapeseed oil is another option.
- Garlic: 4–6 cloves, crushed or chopped. Adjust ready-made garlic paste to its strength and salt content.
- Onions: 1–2 large onions for the tin or sauces; shallots give a different flavour.
- Rosemary, thyme and parsley: several sprigs of each. When replacing chopped fresh herbs with dried, start with about one-third by volume and adjust; sprig sizes vary.
- Oranges or lemons: about two for the basic roast, or the amount in your chosen sauce. Apple gives a sweeter aroma; vinegar should be added sparingly to taste, not substituted fruit for fruit.
- Chicken stock: keep up to 1 litre available for roasting and gravy, adding only what is needed. Vegetable stock does not make gravy vegetarian if it contains turkey juices.
- Honey or brown sugar: 2–4 tbsp for selected glazes. Maple syrup or apricot jam gives a different finish; honey is unsuitable for babies under 1 year.
- Mustard: about 2 tbsp for sauces or glazes, according to the chosen recipe. Dijon, mild yellow mustard and mustard powder differ in strength.
- Cranberries: 200–300 g for a separately chosen cranberry sauce recipe, or use ready-made sauce. Red berry jam is sweeter and produces a different sauce.
- Dried apricots and raisins: 100–150 g for some farofas or side dishes. Dried apple is another flavour, not necessarily a lower-sugar alternative.
- Nuts: 100–150 g walnuts, Brazil nuts, cashews or almonds for selected sides. Pumpkin seeds are an option if suitable for your guests, but check allergies and cross-contact rather than assuming they are safe for everyone.
- Brazilian farinha de mandioca or breadcrumbs: around 200 g for the relevant farofa or crust. Farinha is the granular cassava meal used for farofa, not tapioca starch. Panko contains wheat unless specifically labelled otherwise.
- Grated Parmesan: 50–100 g for an optional crust, or another suitable hard cheese. These contain milk; traditional Parmesan also uses animal rennet.
- Wine: 150–250 ml for selected gravies. Use extra stock or diluted grape juice if avoiding alcohol; simmering wine does not guarantee that all its alcohol disappears.
- Worcestershire or soy sauce: 1–2 tbsp may add savoury flavour to a chosen gravy. Check fish, soya and gluten allergens; only use tamari labelled gluten-free when required.
- Foil and kitchen paper: useful for covering the roast and drying the skin without washing it.
Getting Organised
- Prepare ahead: make herb butter and suitable sauces a day ahead and refrigerate promptly.
- Store-cupboard backups: dried herbs and stock cubes can be convenient; account for their salt and allergens.
- Measure first: put the ingredients for your chosen recipe into separate bowls before handling raw poultry.
Storage and Dates
Follow ingredient labels and use-by dates. Keep fresh herb butter and prepared sauces covered in the fridge and use within 48 hours unless their instructions require sooner. Store dry ingredients sealed in a cool, dry place according to their packaging.
The Basic Turkey Preparation Method
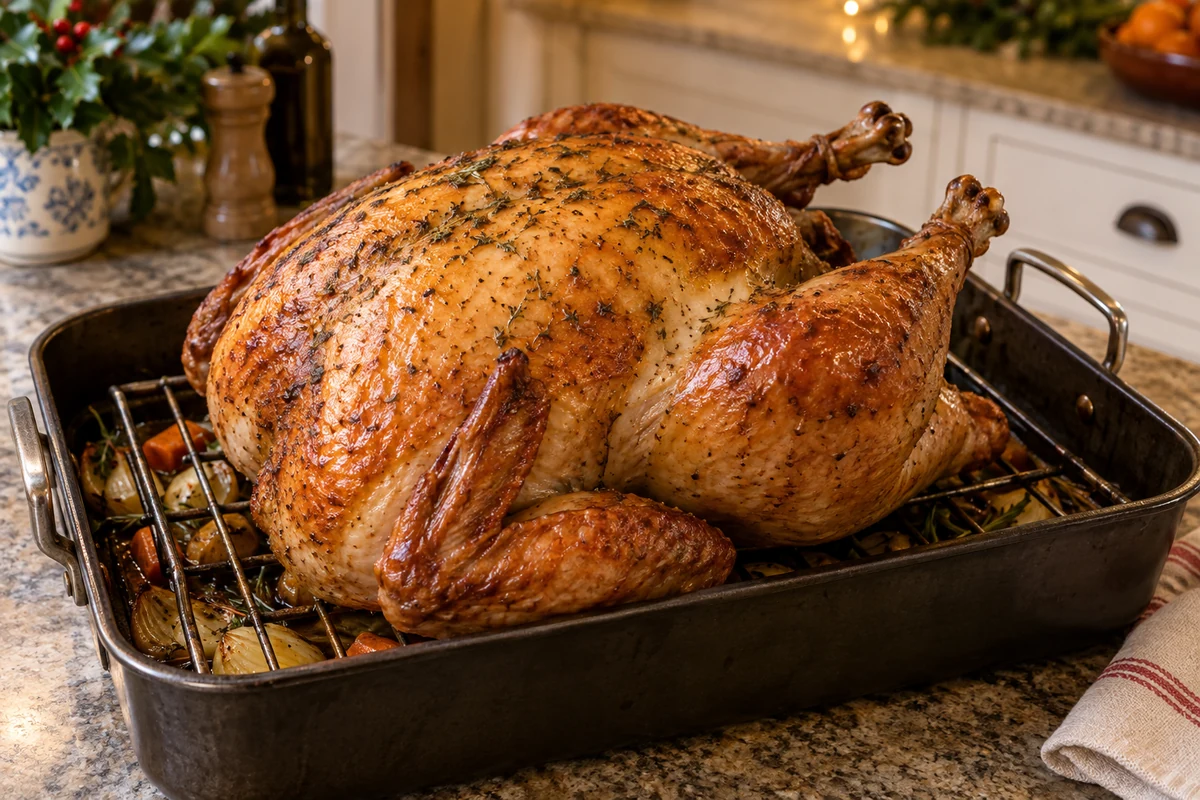
- Read the method: choose the recipe and check the bird’s instructions before starting.
- Check the size: use the serving guidance for your particular cut, allowing for sides and any desired leftovers.
- Thaw in the fridge: allow the packet’s recommended time and check for ice in the cavity and thickest parts. Do not start roasting a partly frozen bird unless it is specifically sold with instructions for cooking from frozen.
- Prepare ingredients: measure seasonings and make herb butter and separate sides before handling the turkey.
- Remove giblets and pat dry: check both cavities, discard packaging and use kitchen paper if needed. Do not wash raw turkey.
- Season the bird: add herbs, pepper and appropriate salt. Keep the cavity unstuffed for the method below.
- Add herb butter: carefully loosen the breast skin and distribute the amount specified in your recipe underneath and over the surface.
- Keep stuffing separate: cook stuffing or farofa in its own dish rather than adding it to the turkey cavity.
Roasting and Checking
- Preheat: follow the bird’s instructions. If no specific instructions are supplied, the whole-bird guide below uses 180°C conventional; adjust fan settings according to your oven guidance.
- Use a rack: put the bird breast-side up in a suitable roasting tin with space for air to circulate.
- Check several thick parts: probe breast and thigh away from bone. The target used here is 75°C for 30 seconds, or 70°C for 2 minutes.
- Plan the time: for an unstuffed 4 kg whole turkey at 180°C conventional, the Food Standards Scotland guide gives about 3 hours 20 minutes. Packet instructions take priority, and temperature checks determine when it is actually ready.
- Add sweet glazes late: brush on near the end of cooking and watch closely so sugars do not burn. Use a separate clean portion for serving.
- Protect the skin: cover loosely with foil if it browns before the meat is cooked.
- Limit oven-door opening: repeated opening loses heat and can extend cooking time.
Other Cooking Methods
- Spatchcocked turkey: the backbone is removed and the bird flattened. Use a method matched to its weight; there is no universal percentage reduction in cooking time.
- Boneless turkey: follow the joint’s instructions and check the centre of the roll. A thicker roll may take longer than its weight alone suggests.
- Stuffed birds: need different timing and a separate check of the stuffing centre. This guide recommends cooking stuffing separately instead.
Resting, Carving and Serving
- Rest the cooked bird: once the safe temperature has been confirmed, cover loosely and rest for about 20–30 minutes.
- Carve: remove the legs and wings, then slice the breast across the grain on a clean board.
- Make pan gravy: strain the juices, skim excess fat and simmer with 150–250 ml stock or wine, as appropriate. Use a hob-safe tin for deglazing or transfer to a saucepan.
- Store leftovers: cool smaller portions and refrigerate within 1–2 hours. Use within 48 hours or freeze promptly; thaw in the fridge and reheat once until steaming hot throughout.
- For first-time cooks: practise with a smaller joint and ask someone experienced to help with carving if needed.
Flavour Variations and Ingredient Swaps
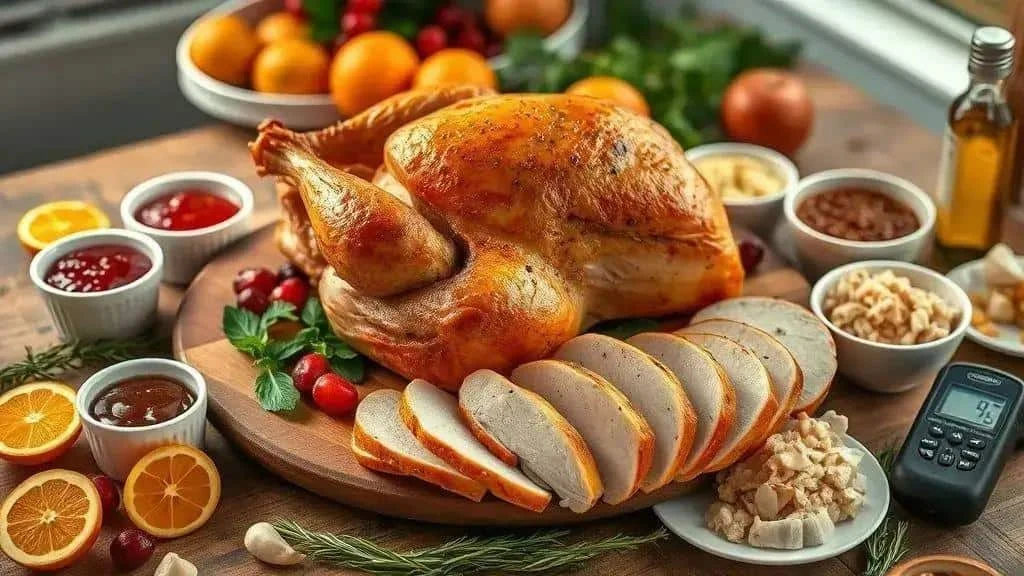
These suggestions adapt the flavours of the four recipes and add six further ideas. Check dietary requirements and use a tested cooking method for the cut you choose.
Classic Roast Turkey
- Variation: use lemon and herbs for a citrus aroma; reduce added salt if using salted herb butter or a brined bird.
- Different coating: use olive oil instead of butter, in enough quantity to coat the surface rather than as an exact equal-volume swap.
- Dairy-free option: choose olive oil or a spread labelled suitable for a milk-free diet. Lactose-free dairy products are not suitable for milk allergy.
Turkey with Tropical Farofa
- Variation: use chopped dried apple instead of apricots for a different flavour.
- Crumb alternative: breadcrumbs or panko create a different side from cassava farofa and normally contain wheat.
- Without nuts: omit them or choose seeds suitable for the guests. Check ingredients and cross-contact for allergies.
Turkey with Orange and Herb Gravy
- Variation: add a little lemon zest for extra aroma; this does not itself reduce the sauce’s sugar.
- Juice alternative: a little apple or white grape juice changes the sweetness, so add gradually and taste.
- Without wine: deglaze with chicken or vegetable stock instead.
Provençal-Style Herb-Butter Turkey
- Variation: use cooled roasted garlic in the butter for a gentler garlic flavour.
- Dried herbs: start with about one-third of the chopped fresh-herb volume and adjust.
- Plant-based meal: changing butter or stuffing does not make turkey vegan. For a vegan guest, prepare a separate vegetable or pulse-based main using its own recipe and utensils.
Boneless Roast Turkey
- Variation: a suitable joint can be wrapped in bacon or prosciutto for a different savoury finish. Account for the added salt and cook the joint fully.
- Accompaniments: serve farofa or apple sauce on the side rather than adding an unspecified filling that changes the joint’s cooking time.
- Cooking schedule: use the supplier’s instructions for the joint and check its centre. Simply raising the oven temperature is not a reliable shortcut.
Turkey with Wine and Cranberry Sauce
- Variation: red and white wine produce different sauces; use a tested sauce recipe and adjust sweetness to the fruit.
- Cranberry alternative: ready-made red berry or pomegranate sauce gives a different sweet-sharp accompaniment.
- Without alcohol: use stock or diluted grape juice instead of wine. Cooking wine does not guarantee an alcohol-free result.
Turkey with a Herb and Parmesan Crust
- Variation: add panko to a Parmesan and herb topping for extra crunch, following a recipe that specifies when to apply it so it does not burn.
- Cheese alternative: Pecorino or another hard grating cheese changes the flavour and saltiness; all require checking for milk allergens.
- Gluten-free option: use suitable gluten-free breadcrumbs or cassava meal and check every other ingredient and preparation surface.
Honey and Mustard Glazed Turkey
- Variation: a little orange juice gives the glaze a citrus note.
- Honey alternative: maple syrup or dissolved brown sugar changes the glaze’s flavour. This does not make a turkey dish vegan.
- Mustard choice: mild yellow mustard can replace Dijon for a different flavour. Mustard is an allergen.
Lemon Pepper Turkey
- Variation: add thyme or rosemary to the lemon zest and pepper.
- Seasoning choice: use lemon zest with ground pepper, or a ready-made lemon pepper blend; check whether the blend already contains salt.
- Milder citrus: use less zest for a gentler aroma. Zest is different from acidic juice, so taste the seasoning rather than adding extra fat automatically.
Shredded Turkey and Herb Sandwiches
- Variation: mix properly chilled cooked turkey with mayonnaise and chopped herbs, or plain yoghurt.
- Dressing alternative: Greek yoghurt or a suitable plant-based dressing changes the taste and allergens. It is not automatically lower in fat or suitable for everyone.
- Fresh flavour: add lemon, parsley and a little olive oil to safely stored leftovers. Making a new filling does not restart the turkey’s storage time.
General Substitutions
- Stock: vegetable stock can replace chicken stock, but gravy containing turkey juices still contains meat.
- Wine: use stock or diluted white grape juice when avoiding alcoholic ingredients.
- Sweet glaze ingredients: brown sugar, maple syrup and apricot jam give different flavours and consistencies; adjust rather than assuming equal sweetness.
- Herbs: dried herbs are more concentrated, so begin with about one-third of the chopped fresh-herb volume.
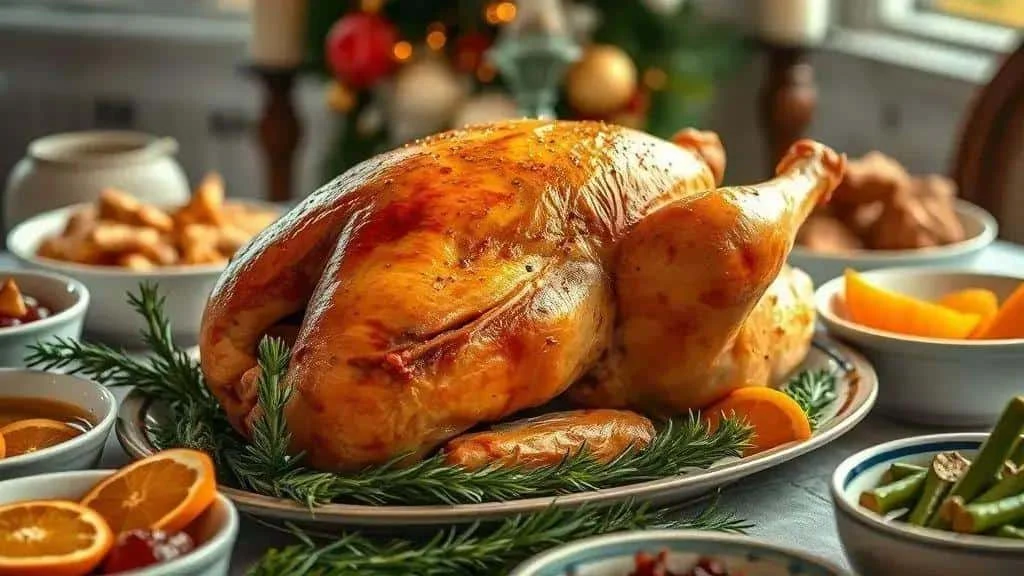
Recipe 1: Classic Roast Turkey — Ingredients and Method
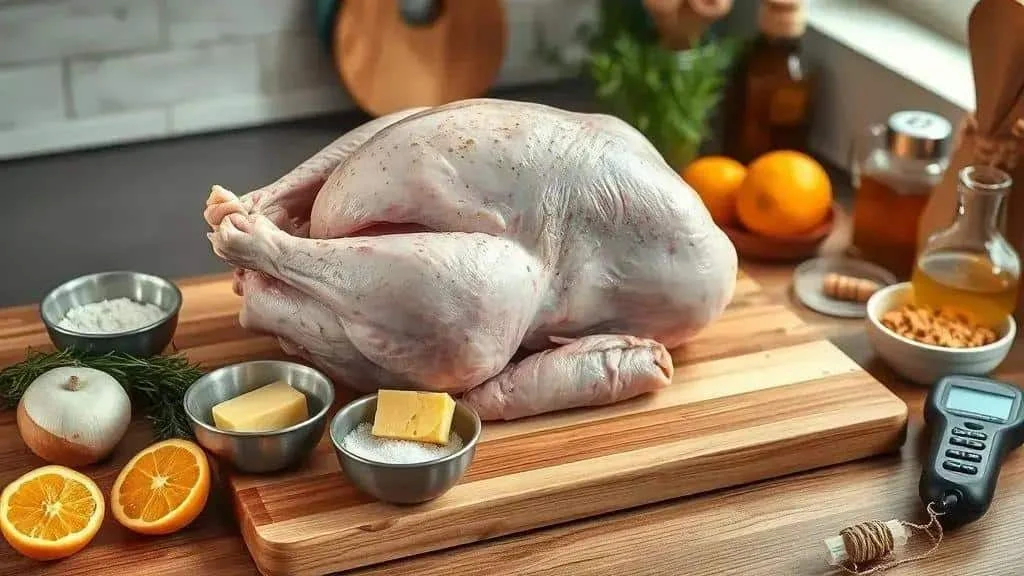
- 1 whole turkey, about 4 kg, fully thawed if frozen. A different cut needs its own cooking instructions.
- 200 g unsalted butter, softened, or up to 150 ml olive oil for a different coating, using only what is needed.
- Coarse salt, to taste. Use up to 2 tbsp only for an unseasoned turkey, but use substantially less or none for a brined or seasoned turkey, and do not swap salt types spoon for spoon.
- Up to 1 tbsp ground black pepper, according to preference.
- 4 garlic cloves, crushed, or garlic paste adjusted to its strength.
- 1 large onion, quartered, or shallots, for the tin.
- 4 fresh rosemary sprigs, or about 1 tsp dried rosemary, to taste.
- 4 fresh thyme sprigs, or about 1 tsp dried thyme, to taste.
- 2 oranges, quartered, for the tin and gravy. Lemon or apple gives a different aroma.
- 250 ml chicken or vegetable stock, plus a little extra if the tin becomes dry. Vegetable stock does not make this turkey dish meat-free.
- Optional glaze: 3 tbsp honey or 2 tbsp brown sugar, loosened with a little orange juice if needed. Keep honey away from food intended for babies under 1 year.
- 150 ml white wine, optional, for gravy, or extra stock if avoiding alcohol.
- Optional farofa side: use ready-made farofa or the separate recipe below. Uncooked cassava meal is an ingredient, not a finished side or an equal substitute for prepared farofa.
- Optional Parmesan variation: 50–100 g grated Parmesan. This is a separate crust idea; omit it for the plain classic roast or use a tested crust method.
- Foil, kitchen paper, roasting tin and food thermometer.
Method and Key Checks
- Plan your temperature checks: the thickest breast and thigh must reach 75°C for 30 seconds or 70°C for 2 minutes, away from bone. Do not rely on time alone.
- Prepare the bird: remove packaging and giblet bags from the thawed turkey and pat dry with kitchen paper. Do not wash it.
- Season: mix butter with crushed garlic, some chopped herbs, pepper and suitable salt. Spread under the breast skin and over the outside. Put onion, oranges and remaining herbs in the tin with the stock, then set the turkey on its rack.
- Check thawing first: there must be no ice crystals in the cavity or frozen thick parts. Follow the packet’s thawing instructions and keep raw turkey refrigerated until preparation.
- Preheat and roast: follow the packet, or use the 180°C conventional whole-bird guide below. Cover loosely with foil, leaving room around the bird for heat to circulate.
- Allow sufficient time: an unstuffed 4 kg bird at 180°C conventional has a guide time of about 3 hours 20 minutes. Uncover for roughly the final 30 minutes to brown, and verify the centre before finishing.
- Optional glaze: brush on near the end and watch closely for burning. If a brush has touched undercooked turkey, do not use that glaze as an uncooked serving sauce.
- Rest: once fully cooked, move to a clean board or platter, cover loosely and rest for 20–30 minutes before carving.
- Make gravy: strain the tin juices into a saucepan, skim excess fat and add the optional wine or stock. Bring to a simmer and reduce to taste; loosen with extra stock if necessary. Serve hot with the carved turkey.
- Practise if helpful: a smaller trial roast can help you judge your equipment, although its timing will not transfer directly to a larger bird.
Recipe 2: Turkey with Tropical Farofa — Ingredients and Method
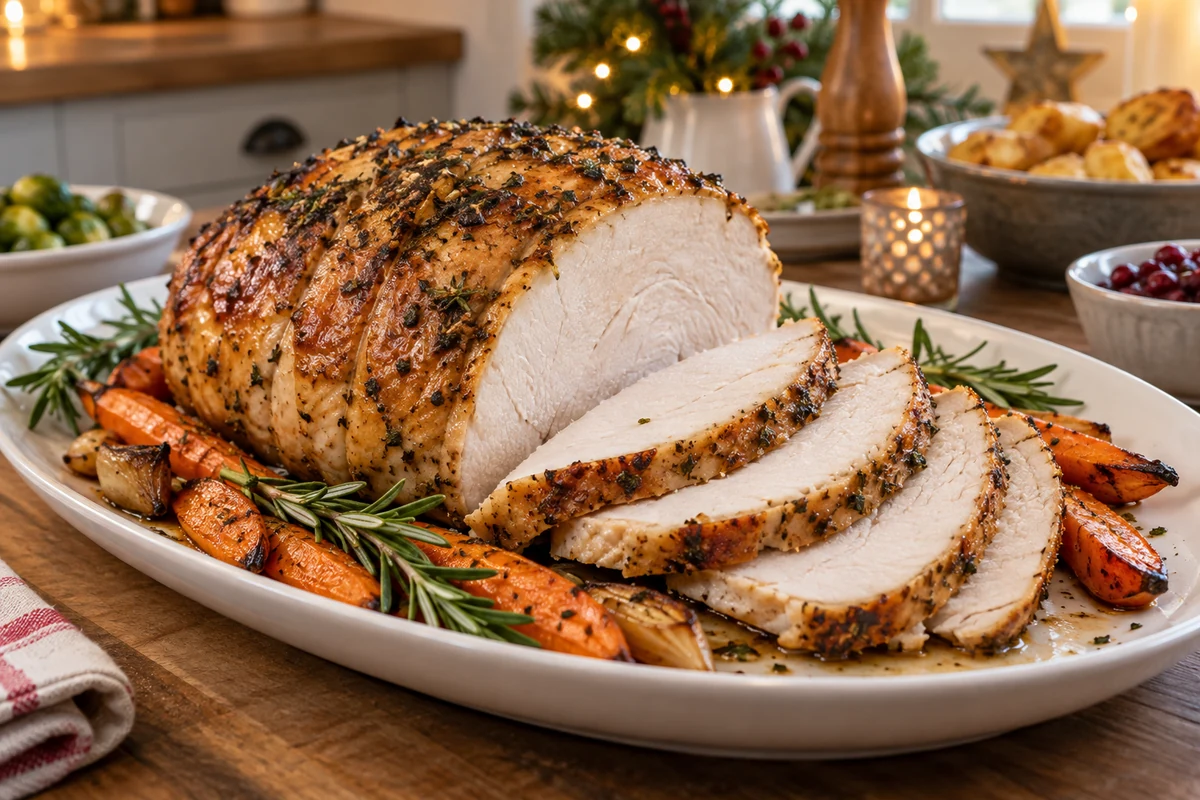
This turkey with tropical farofa pairs a roast bird with a Brazilian cassava crumb side containing dried fruit and nuts. Cook and serve the farofa separately rather than stuffing the cavity, for more predictable cooking.
- 1 whole turkey, about 4 kg, fully thawed if frozen. A boneless joint needs its own instructions.
- 150 g unsalted butter, softened, for the bird; alternatively use up to 120 ml olive oil as a coating, as needed.
- Coarse salt, to taste. Up to 2 tbsp was specified for an unseasoned bird, but account for salt type, brine and stock; a seasoned bird may need little or none.
- Up to 1 tbsp ground black pepper, to taste.
- 4 garlic cloves: reserve 2 for the bird and 2 for the farofa.
- 1 large onion: finely chop half for the farofa and cut the remaining half into wedges for the tin.
- 2 oranges, washed, for zest, juice and roasting-tin wedges.
- 250 ml chicken or vegetable stock, for the roasting tin, with extra only if needed.
- 200 g Brazilian farinha de mandioca, the granular cassava meal used for farofa, not tapioca starch. Around 150 g panko makes a different wheat-based crumb side.
- Up to 100 g butter for the farofa. This is a rich version: add gradually, particularly if using bacon. If choosing oil instead, use enough to moisten the crumbs rather than assuming an exact butter conversion.
- 100 g chopped dried apricots, or dried apple for a different flavour.
- 80 g raisins, dark or golden.
- 100 g chopped Brazil nuts or cashews. Omit them or use suitable pumpkin seeds if required, checking allergy needs and cross-contact.
- 100 g chopped bacon, optional. Smoked tofu can replace bacon in the separate farofa, but the overall turkey meal is not meat-free.
- 2 tbsp chopped parsley and spring onion greens.
- Salt and pepper for the farofa, to taste, allowing for bacon and butter.
Step-by-Step Method
- Prepare the turkey: thaw fully in the fridge according to the packet, then remove packaging and giblets. Keep raw poultry separate from the farofa ingredients.
- Pat dry: use kitchen paper if needed, then discard it. Do not wash the turkey or splash raw juices around the sink.
- Prepare the roasting tin: put the reserved onion wedges, some orange wedges and the 250 ml stock in the tin. Keep the cavity unstuffed.
- Start the farofa: in a separate frying pan, cook the optional bacon thoroughly. Add some of the farofa butter as needed, allowing for the fat released by the bacon.
- Add aromatics: soften the chopped half onion and 2 chopped garlic cloves in the pan without burning the garlic.
- Add fruit and nuts: stir in the apricots, raisins and chopped nuts for 1–2 minutes.
- Toast the cassava meal: add it gradually and stir over moderate heat until evenly coated and lightly toasted. Follow any cooking requirement on the packet.
- Finish the farofa: remove from the heat, stir in the parsley and spring onion and taste. Add a little reserved butter if too dry; it should remain a loose crumb side, not a wet stuffing.
- Keep it separate: do not put the farofa inside the raw bird. If preparing it ahead, cool promptly, refrigerate and reheat once until steaming hot before serving.
- Season the turkey: mix its 150 g softened butter with orange zest, the remaining 2 crushed garlic cloves, pepper and appropriate salt. Spread under the breast skin and over the surface.
- Position the bird: tuck the wing tips underneath and place it breast-side up on the rack in the prepared tin. Leave the cavity open and do not tightly bind the legs unless directed by the supplier.
- Roast: follow the packet or the unstuffed whole-bird guide at 180°C conventional. For 4 kg, allow about 3 hours 20 minutes as a guide, but confirm 75°C for 30 seconds or 70°C for 2 minutes in the thickest breast and thigh before finishing.
- Optional citrus finish: brush lightly with reserved orange juice near the end of cooking. A honey glaze is a separate optional addition; watch closely to avoid scorching and omit honey for babies under 1 year.
- Protect and check: cover with foil if browning too quickly, uncover near the end and check the thickest parts with a clean thermometer. Avoid constant oven-door opening.
- Rest: once the turkey is fully cooked, cover loosely and rest for 20–30 minutes before carving.
- Serve: carve and serve with the separately cooked hot farofa, orange wedges and chopped herbs.
Practical Tips
- Taste the farofa: once all its ingredients are cooked, adjust the sweet-savoury balance and seasoning.
- Keep the crumbs loose: avoid excessive stock or other liquid. Separate cooking also avoids relying on a stuffed bird’s more complicated heating pattern.
- Leftovers: cool turkey and farofa in separate shallow portions and refrigerate within 1–2 hours. Use within 48 hours or freeze promptly; reheat only once until steaming hot throughout.
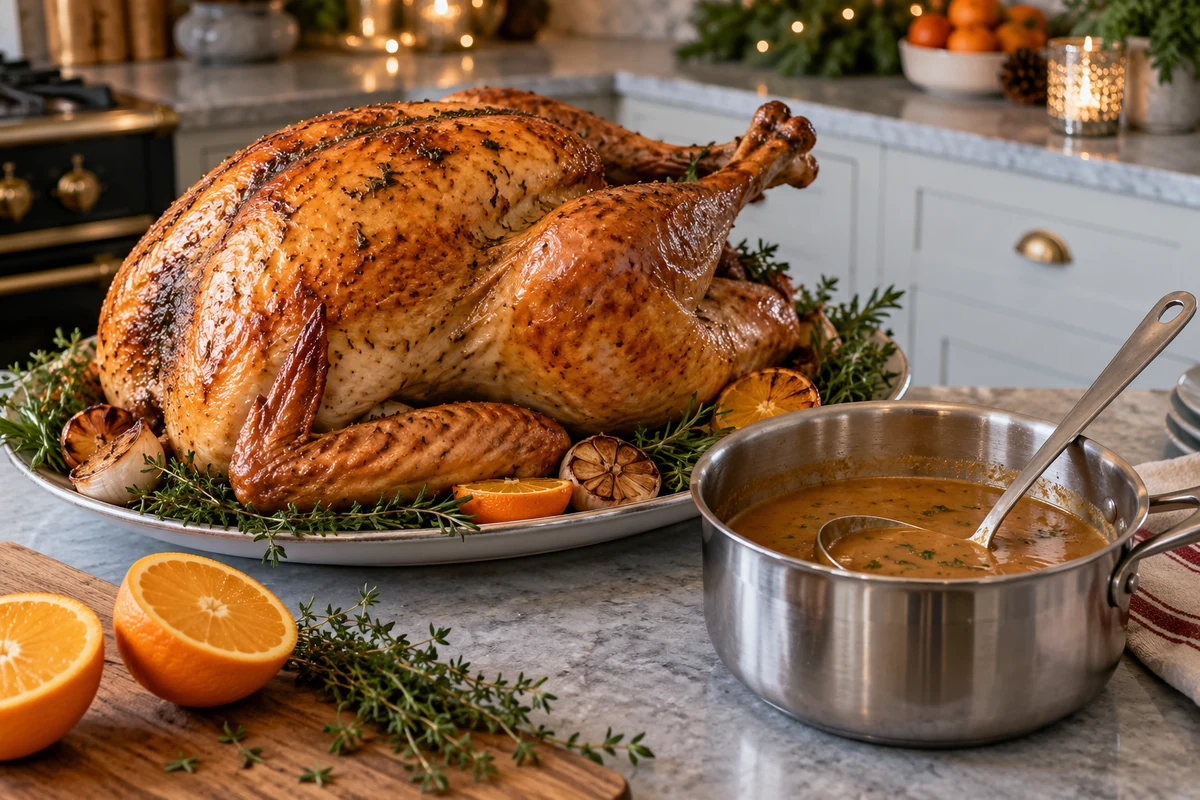
Recipe 3: Turkey with Orange and Herb Gravy — Ingredients and Method
- 1 whole turkey, about 4 kg, fully thawed if frozen. Other cuts require their own cooking instructions.
- 150 g unsalted butter, softened, or up to 120 ml olive oil as a coating, as needed.
- Coarse salt, to taste. The maximum of 2 tbsp should be reduced for brined birds, salty stock or a denser salt type.
- Up to 1 tbsp ground black pepper, to preference.
- 4 garlic cloves, crushed.
- 1 large onion, cut into wedges, or shallots.
- 3 oranges, washed: use the zest of one in the butter, one orange in wedges for the tin and the juice of the other two for the gravy.
- 2 tbsp honey, to taste, or maple syrup or dissolved brown sugar. Honey is unsuitable for babies under 1 year.
- 1 fresh rosemary sprig, or a smaller amount of dried rosemary to taste.
- 4 fresh thyme sprigs, or a smaller volume of dried leaves.
- 1 small bunch parsley, chopped, for finishing the gravy and serving.
- 250 ml chicken or vegetable stock, divided between the tin and gravy as needed. Vegetable stock does not make gravy containing turkey juices vegetarian.
- 150 ml dry white wine, optional, or extra stock if avoiding alcohol.
- 1 tbsp Dijon mustard, or mild yellow mustard for a different flavour.
- Up to 1 tbsp cornflour, optional, mixed with a little cold water for thickening. Add only as much slurry as the gravy needs.
- Foil, a food thermometer and a roasting tin with rack.
Step-by-Step Method
- Prepare the bird: remove packaging and giblets from the fully thawed turkey and pat dry if needed. Do not rinse it.
- Prepare the tin: add onion wedges, the orange wedges, some thyme and a little of the stock. Keep the turkey cavity unstuffed.
- Season under the skin: mix half the softened butter with one crushed garlic clove and the orange zest, then spread beneath the breast skin without tearing it.
- Season the outside: coat with the remaining butter, pepper and suitable salt. Add the remaining garlic and rosemary to the tin.
- Position the turkey: place breast-side up on the rack with wing tips tucked underneath. Keep space around it for air circulation.
- Preheat and roast: follow the packet or use the 180°C conventional unstuffed whole-bird guide. Cover loosely with foil initially.
- Continue until cooked: for a 4 kg whole bird, allow about 3 hours 20 minutes as a guide. Uncover near the end and confirm 75°C for 30 seconds or 70°C for 2 minutes in the thickest breast and thigh, away from bone.
- Start the gravy: once the turkey is cooked, move it to a clean platter to rest. Strain the roasting juices into a saucepan and skim excess fat. Add the optional wine or extra stock; deglaze the tin only if it is hob-safe.
- Add citrus and herbs: add the juice of the remaining two oranges, the honey, mustard, reserved stock and a little thyme. Bring to a simmer, then add some chopped parsley near the end.
- Reduce and thicken: simmer until the flavour is balanced. If needed, stir in a little cornflour slurry and simmer until thickened; do not add all of it automatically.
- Taste: adjust salt, pepper and sweetness. Dilute with a little stock if too concentrated; more orange juice may make it sharper rather than milder.
- Optional glaze: if desired, reserve a little of the measured orange juice and honey before making the gravy and brush it on during the final roasting stage. Do not return glaze used on undercooked poultry to the serving sauce without thorough cooking.
- Rest before carving: allow the fully cooked bird about 20–30 minutes under loose foil while you finish the gravy.
- Serve: carve the turkey and serve with the hot orange gravy and remaining parsley.
Practical Tips
- Use the thermometer: confirm the safe time and temperature in several thick parts rather than trusting the roasting time alone.
- Balance the gravy: oranges vary in sweetness. Taste before adding extra honey, juice or stock.
- Keep the cavity unstuffed: cook stuffing separately so the timing and temperature checks remain more straightforward.
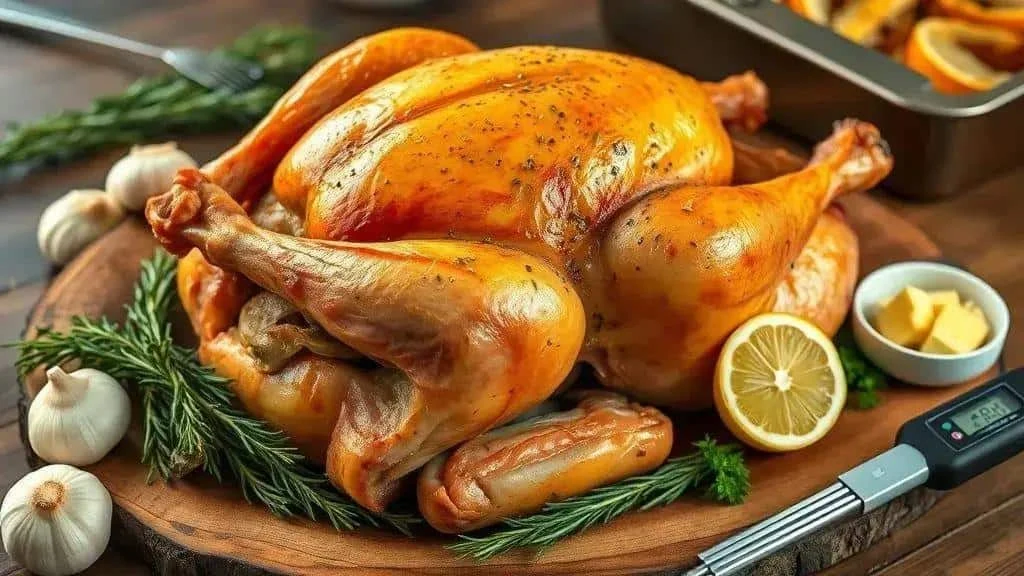
Recipe 4: Provençal-Style Herb-Butter Turkey — Ingredients and Method
- 1 whole turkey, about 4 kg, fully thawed if frozen. Use separate instructions for other cuts.
- 200 g unsalted butter, softened. A suitable dairy-free spread can make a different herb coating; olive oil is another option, used sparingly to coat rather than as an exact volume swap.
- Coarse salt, to taste. Reduce the maximum of 2 tbsp according to salt type and any existing brine or seasoning.
- Up to 1 tbsp ground black pepper, according to preference.
- 6 garlic cloves, crushed, or garlic paste adjusted to its strength.
- 1 large onion, cut into wedges, or shallots.
- Fresh rosemary, thyme and parsley, about 4 sprigs of each. Chop some leaves for the butter and reserve the rest for the tin; exact volume depends on sprig size.
- 2 tsp finely grated lemon zest, or orange zest for a different aroma.
- 2 tbsp lemon juice.
- Up to 50 ml olive oil, optional, for a light additional coating if needed. There is no need to use it all on top of the butter.
- 250 ml chicken or vegetable stock, plus a little extra if needed for the gravy.
- 1 tbsp Dijon mustard, optional, to mix into the butter. Check mustard and milk allergens.
- Foil, a food thermometer and a roasting tin with rack.
Step-by-Step Method
- Prepare without washing: remove the packaging and giblets from the fully thawed turkey. Pat dry with kitchen paper if needed, but never wash raw poultry.
- Mix the herb butter: combine the softened butter, garlic, lemon zest, lemon juice and chopped herb leaves. Add the optional mustard, pepper and appropriate salt.
- Loosen the breast skin: gently create a pocket without tearing the skin and distribute about two-thirds of the herb butter underneath.
- Coat the surface: spread the remaining butter over the skin. Use a little optional oil only where needed.
- Prepare the tin: arrange the onion and remaining herb sprigs in the roasting tin rather than packing the bird’s cavity.
- Position the turkey: set it breast-side up on the rack, tuck the wing tips underneath and pour the stock into the bottom of the tin.
- Preheat: follow the packet or use the 180°C conventional unstuffed whole-bird guide. Cover the bird loosely with foil initially.
- Roast and check: allow about 3 hours 20 minutes as a guide for an unstuffed 4 kg bird at 180°C conventional. Uncover near the end to brown, but finish only when the thickest breast and thigh reach 75°C for 30 seconds or 70°C for 2 minutes.
- Baste occasionally if desired: spoon over pan juices around once an hour, keeping the oven opening brief. Basting does not replace temperature checks or guarantee moist meat.
- Protect the surface: replace the foil if the herbs or skin darken too quickly.
- Rest: move the fully cooked bird to a clean platter and rest loosely covered for 20–30 minutes before carving.
- Make a quick gravy: strain and skim the pan juices into a saucepan, add a little extra stock if needed and simmer to the desired flavour and consistency. Adjust seasoning and serve hot.
Practical Tips
- Make the butter ahead: mix it up to 24 hours beforehand and keep covered in the fridge, then soften just enough to spread.
- Adjust salt carefully: the recipe uses unsalted butter, but the turkey and stock may already contain salt.
- Check the cooked centre: thermometer readings must meet the safe time and temperature before resting; golden skin alone does not show this.
- Dairy-free option: use a suitable milk-free spread or oil and check the stock. A product labelled lactose-free can still contain milk proteins.
Simple Side Dishes to Serve with Turkey
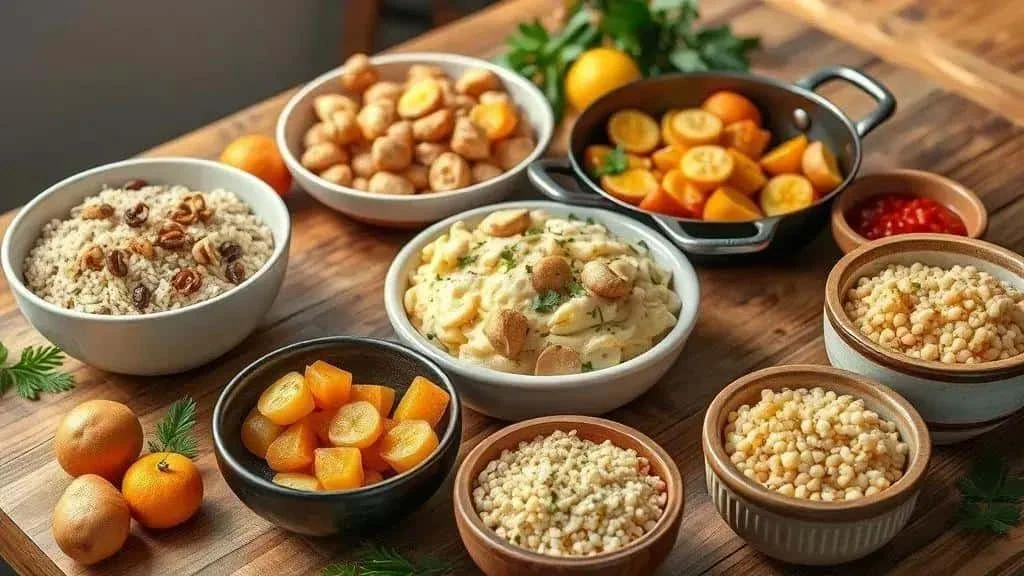
These sides bring together British Christmas staples and Brazilian favourites. For recipes expressed in cups below, use a 240 ml measuring cup; a cup of dry food is not 240 g. Packet instructions take priority for rice and couscous.
Rice with Raisins and Walnuts
- 2 cups long-grain white rice, rinsed if the packet directs.
- 4 cups water or stock as an initial guide; use the ratio required by your rice packet if different.
- ½ cup raisins, or golden raisins or dried cranberries.
- ⅓ cup chopped walnuts, or suitable cashews or almonds. Omit for guests who cannot eat nuts.
- 1 tbsp butter or olive oil.
- Salt, to taste.
- Start the rice: heat the butter or oil and stir in the drained rice for about a minute.
- Add water: pour in the measured water or stock, season appropriately and bring to the boil.
- Cook: cover and simmer gently for the packet’s time, often around 15–18 minutes for long-grain white rice, until tender and the liquid is absorbed.
- Finish: fluff with a fork and fold in raisins and nuts. Serve promptly. Cool leftover rice quickly, ideally within 1 hour, refrigerate and use within 24 hours; reheat only once until steaming hot.
Creamy Mashed Potatoes
- 1 kg potatoes, peeled and cut into chunks.
- 100 ml milk, warmed, or a suitable unsweetened plant-based alternative.
- 50 g butter, or olive oil added gradually to taste for a different texture.
- Salt and nutmeg, to taste.
- Boil: simmer the potatoes in lightly salted water until tender, usually around 15–20 minutes depending on chunk size.
- Drain and mash: drain thoroughly, let steam escape briefly, then mash while hot.
- Add dairy: fold in the butter and warm milk a little at a time until creamy.
- Season: taste, add a little nutmeg and serve hot.
Simple Banana Farofa
- 2 cups Brazilian farinha de mandioca, the granular cassava meal for farofa, not tapioca starch. Breadcrumbs make a different, usually wheat-based version.
- 2 tbsp butter or oil.
- 2 firm bananas, sliced. Banana-prata is the Brazilian choice; firm ripe bananas available locally can be used. Diced apple is a different variation.
- 1 small onion, chopped.
- Salt and pepper, to taste.
- Soften the onion: cook gently in the butter or oil.
- Cook the banana: add the slices and turn carefully until lightly golden.
- Toast the meal: add gradually, stirring over moderate heat until lightly toasted and evenly coated. Follow any required cooking instructions on the packet.
- Finish: adjust salt and pepper and serve as a crumbly side.
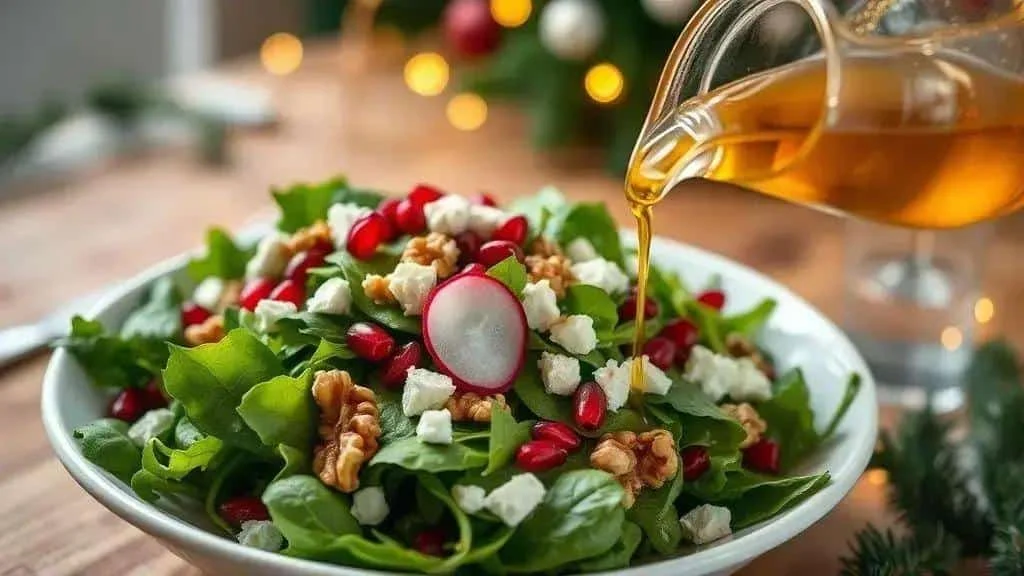
Fresh Citrus Salad
- 200–300 g salad leaves, such as lettuce and rocket.
- 1 orange, segmented, or ½ mango in slices.
- ¼ cup thinly sliced red onion.
- 2 tbsp olive oil.
- 1 tbsp vinegar or lemon juice.
- Salt and pepper, to taste.
- Combine: prepare leaves according to their packet, wash fruit before cutting, and combine the leaves, orange and onion in a clean bowl.
- Dress: whisk the oil, vinegar, salt and pepper and add just before serving.
Rustic Roast Potatoes
- 1 kg potatoes, washed and cut into evenly sized chunks.
- 3 tbsp olive oil.
- Up to 1 tsp salt and ½ tsp ground black pepper, to taste.
- 1 tsp dried rosemary or thyme.
- Preheat: heat the oven to 200°C conventional or 180°C fan.
- Season: toss the potatoes with oil, seasoning and herbs.
- Roast: spread in a single layer and roast for about 30–40 minutes, turning halfway, until browned and tender through the centre. Larger chunks may take longer.
Quick Couscous with Parsley
- 1 cup instant couscous. Ordinary couscous is made from wheat and is not gluten-free.
- About 1 cup hot water or stock, or the quantity directed on the couscous packet.
- 1 tbsp olive oil.
- ¼ cup chopped parsley.
- Salt, to taste, allowing for stock.
- Hydrate: place the couscous in a heatproof bowl, add the packet’s quantity of hot liquid and the oil, cover and leave for its recommended time, often about 5 minutes.
- Fluff and finish: separate with a fork, fold in parsley and adjust seasoning. Serve promptly or cool and refrigerate rather than leaving it out for hours.
Quick Red Berry Sauce
- 1 cup red berry jam. This makes a sweet berry sauce, not cranberry sauce unless the preserve itself contains cranberries.
- 2 tbsp orange juice.
- 1 tbsp water, plus more if needed.
- A little black pepper and optional salt, to taste.
- Warm: gently heat the jam, orange juice and water in a small pan, stirring until smooth.
- Adjust: add a little more water if too thick and season only if needed.
- Serve: transfer a small amount to a serving dish. Cool and refrigerate reserves promptly.
Saving Time and Money
- Use leftovers thoughtfully: safely stored turkey can be added to rice or couscous. Follow the shortest storage limit of the ingredients, especially rice.
- Scale sensible sides: rice, mash and farofa can feed several guests, but make only what you can serve or chill safely.
- Prepare ahead: make suitable sauces and farofa the day before, cool promptly and refrigerate. Keep salad dressing separate until serving.
- Balance the meal: combine a warm side with a fresh salad so not every dish needs the oven at the same time.
Turkey Roasting Times and Temperature Checks
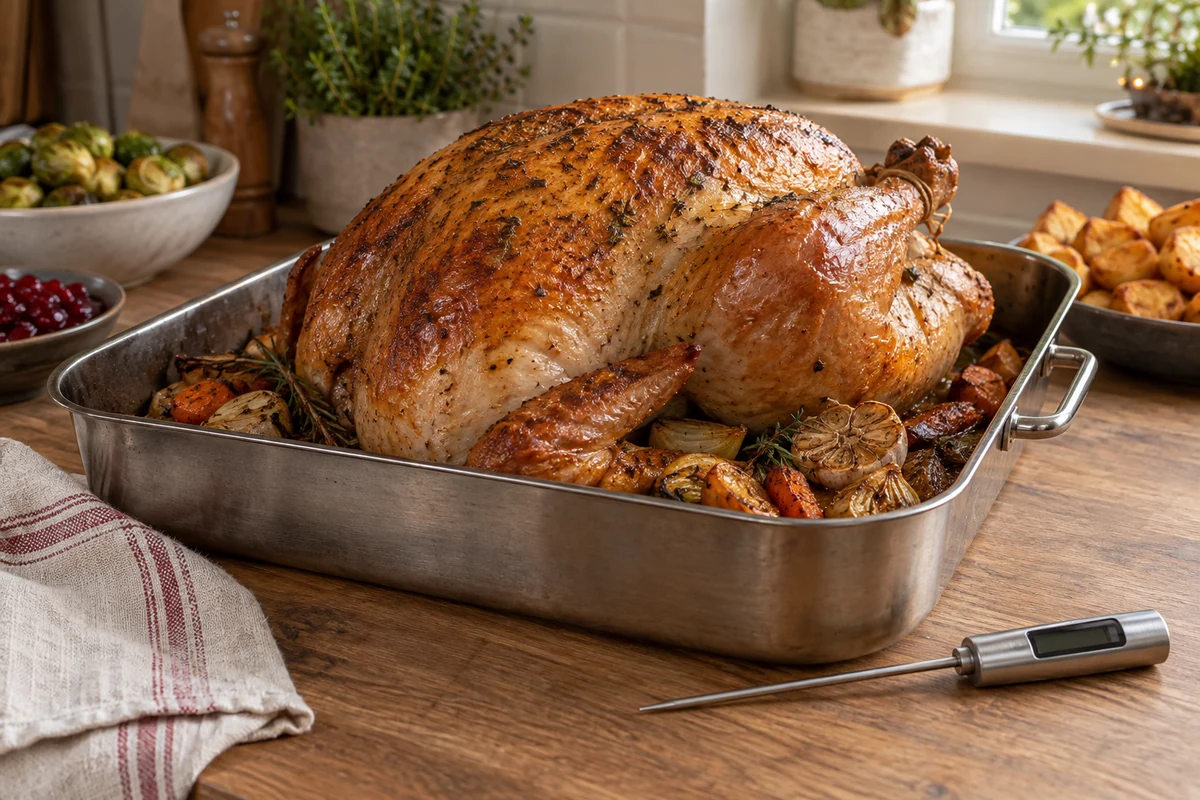
Use cooking times to plan, and temperature checks to confirm a fully cooked turkey. The clock alone cannot account for the cut, oven load or starting temperature.
Whole-Bird Timing Guide
- Unstuffed whole turkey at 180°C conventional: Food Standards Scotland gives 45 minutes per kilogram plus 20 minutes for birds under 4.5 kg; 40 minutes per kilogram from 4.5–6.5 kg; and 35 minutes per kilogram above 6.5 kg. Use packet instructions where supplied.
- Fan ovens: follow the bird’s fan instructions and your oven handbook. Do not automatically reduce both temperature and time by arbitrary percentages.
- Boneless joints: use the supplier’s schedule for that joint and check the centre. The whole-bird table does not apply directly.
- Spatchcocked birds: use a recipe matched to the weight and shape; a fixed 20–30% time saving is not guaranteed.
- Stuffing: cook separately for this guide. A stuffed bird needs a method that accounts for the filling, including a separate centre-temperature check.
Working Out Your Schedule
- Check the weight: use the prepared bird’s weight and identify whether it is a whole turkey or a joint.
- Choose the correct guide: packet instructions come first. If using the whole-bird table above, choose the appropriate weight band.
- Calculate: for a 4 kg unstuffed bird at 180°C conventional, 4 × 45 minutes + 20 minutes = 200 minutes, or 3 hours 20 minutes, as an estimate.
- Allow for your method: a different cut, a heavily loaded oven or frequent door opening changes the timing. Use checks rather than a blanket reduction.
- Add resting time: allow another 20–30 minutes after the fully cooked turkey leaves the oven, plus time to carve.
Checking Doneness
- Probe several places: check the thickest breast and thigh, avoiding bone. Clean the probe before and after use.
- Safe time and temperature: reach 75°C for 30 seconds, or 70°C for 2 minutes, through the thickest parts before serving.
- Do not rely on carry-over cooking: temperature may rise during resting, but the rise varies. Do not deliberately remove the bird below the safe target and assume resting will make it safe.
- Separate stuffing: cook according to its own recipe and check that its centre is steaming hot. Stuffing containing raw meat must also meet a safe time and temperature.
Adjustments During Roasting
- Browning: the guide here uses a steady oven temperature and uncovers the bird near the end. A hotter start is only appropriate when the chosen recipe specifies it; it does not seal juices into meat.
- Protect the skin: cover loosely with foil if it darkens too quickly.
- Glazes: add sugary coatings late in cooking and watch them closely.
- Keep the oven closed: open only when needed for basting, foil adjustment and temperature checks.
Tips for More Reliable Results
- Know your oven: an oven thermometer can help identify a temperature setting that is inaccurate.
- Position: leave room around the roasting tin and use a shelf position that keeps the bird clear of the top element.
- Rack and tin: a rack supports circulation and keeps the bird above the pan juices.
- Keep notes: record the cut, weight, oven setting and actual time for future planning, while still checking every new roast.
A Practical Cooking Checklist
- Check weight, cut and the supplier’s instructions.
- Plan the applicable cooking time, plus resting and carving time.
- Preheat, remove packaging and giblets, pat dry without washing and season.
- Roast according to the chosen method and check the thickest parts with a clean thermometer.
- Confirm the safe time and temperature before removing the turkey, then rest loosely covered for 20–30 minutes.
Safe cooking and good texture depend on more than a timer. Check the centre, avoid unnecessary overcooking, allow a short rest and serve promptly.
Planning Christmas Dinner and Sharing the Work
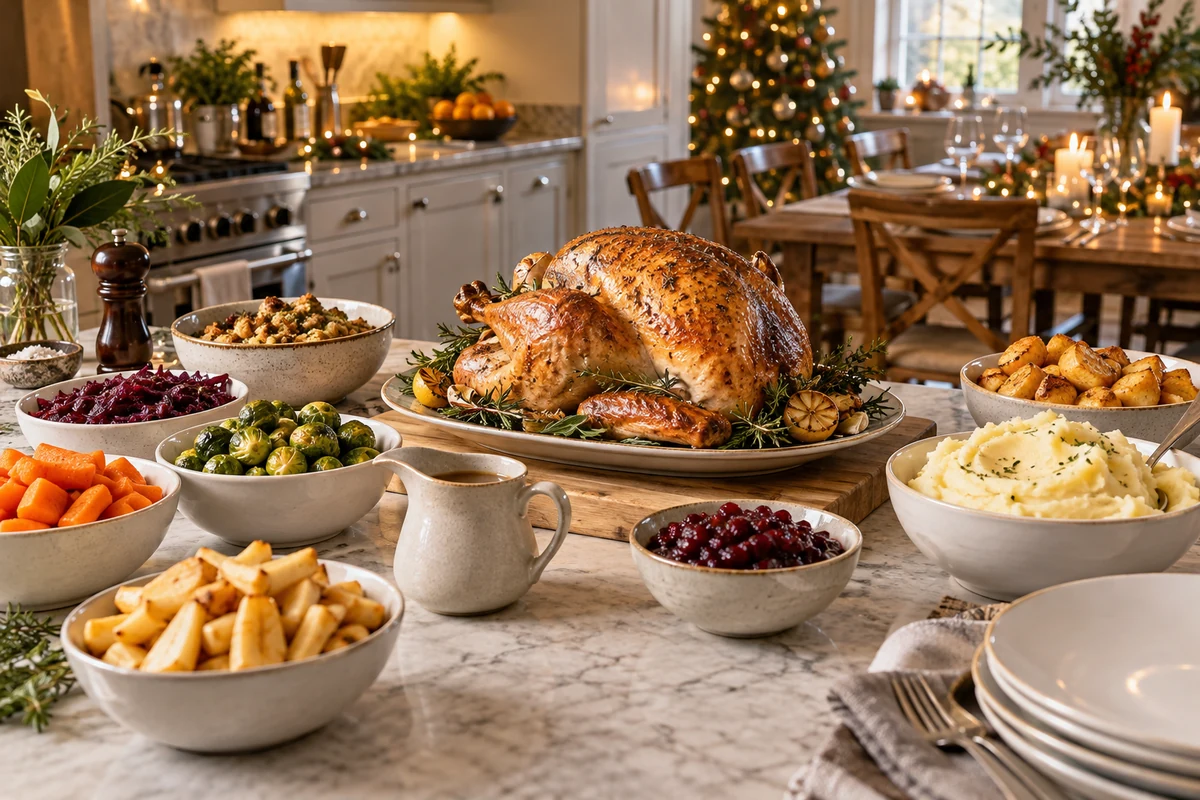
A short plan helps coordinate shopping, cooking and family contributions without making the meal unnecessarily elaborate.
Planning Step by Step
- Choose the menu: select a main and three or four sides that fit the budget, equipment and guests’ dietary needs.
- Plan portions: use serving guidance appropriate to the turkey cut and allow for the sides. Bone-in and boneless weights are not interchangeable.
- Write a shopping list: group fresh produce, meat and dry goods, and note suitable cheaper alternatives.
- Shop ahead: buy shelf-stable ingredients early and freeze suitable items within their dates, with enough time for safe thawing.
- Make a timetable: assign preparation, cooking and chilling tasks to realistic times. Do not partly cook the turkey one day and finish it the next.
Budget Ideas
- Compare cuts: turkey legs or a smaller joint may suit the meal; compare price and usable portions rather than assuming boneless is cheaper.
- Use offers sensibly: buy only quantities you can store and use.
- Choose generous sides: rice, farofa and mash can complement smaller meat portions and provide variety.
- Compare homemade and ready-made: sauces and farofa may be economical to make, but compare ingredient costs and the time available.
- Share contributions: agree which dish or drink each guest will bring, including safe transport and any reheating needs.
Involving the Family
- Give simple jobs: one adult can prepare salad while another handles rice. Children can decorate the table or help with age-appropriate tasks away from raw poultry, hot pans and sharp knives.
- Separate work areas: keep ready-to-eat food preparation apart from raw meat handling, with clean boards and utensils.
- Include favourites: ask guests for a family side or ingredient they would enjoy.
- Make preparation sociable: organise a few manageable tasks together, while still chilling perishable ingredients promptly.
Before the Day
- Check the thermometer and roasting tin, including whether the bird fits the oven.
- Prepare leftover containers and space in the fridge.
- Confirm contributions and avoid accidental duplicate dishes or missing dietary options.
- Make suitable sauces and farofa a day ahead, cooling and refrigerating them promptly.
Final Planning Tips
- Measure ingredients first: this keeps the cooking stage more organised.
- Have a simple extra side: salad or packet-directed couscous can be useful if the guest count changes, provided dietary needs are met.
- Buy seasonally where practical: compare local prices and quality rather than assuming every festive ingredient needs to be expensive.
These Christmas turkey recipes and ideas offer several ways to build a festive meal. Choose one main preparation, plan its timing and use safe handling and temperature checks throughout.
Share the preparation with family or friends and choose sides you enjoy, including Brazilian farofa if you would like a different accompaniment.
Visit I Love Christmas for more festive recipes and practical ideas. Enjoy your Christmas meal!
Christmas Turkey: Frequently Asked Questions
How should I thaw a turkey safely?
Follow the packet and thaw in the fridge in a deep tray on the bottom shelf. A rough guide is 10–12 hours per kilogram at 4°C, but large birds can take several days. Check that the cavity and thickest parts are fully thawed; never use the worktop or a warm room.
What size turkey should I buy?
Use the supplier’s serving guide for the exact cut and allow for side dishes and desired leftovers. Whole birds, crowns and boneless joints have different bone content, so one raw-weight allowance per person does not suit all of them.
How do I know the turkey is cooked?
Use a clean food thermometer in the thickest breast and thigh, away from bone. Confirm 75°C for 30 seconds or 70°C for 2 minutes before removing it from the oven, then rest for about 20–30 minutes. Do not rely on an assumed temperature rise during resting.
Can I prepare parts of the meal ahead?
Yes. Suitable herb butter, sauces and farofa can be made the day before and refrigerated promptly. Cook stuffing separately. Do not partly cook turkey in advance and finish it later; keep ingredients within their use-by and post-thaw limits.
How can I keep turkey moist without a complicated method?
Use an appropriate herb-butter or oil coating, avoid cooking longer than necessary once the safe temperature is reached, and allow a short rest. A hot pan gravy adds moisture when serving; no method can guarantee juiciness regardless of cooking time.
Which substitutions help with dietary requirements?
Use suitable milk-free oil or spread instead of butter, omit nuts or choose tolerated seeds, and use labelled gluten-free crumbs when needed. Replace wine with stock if avoiding alcohol. Check all labels and cross-contact; changing a side ingredient never makes turkey vegetarian or vegan.
Sources and Further Reading
- Food Standards Scotland: turkey cooking guide
- Food Standards Agency: cooking food safely
- Food Standards Agency: chilling and leftovers