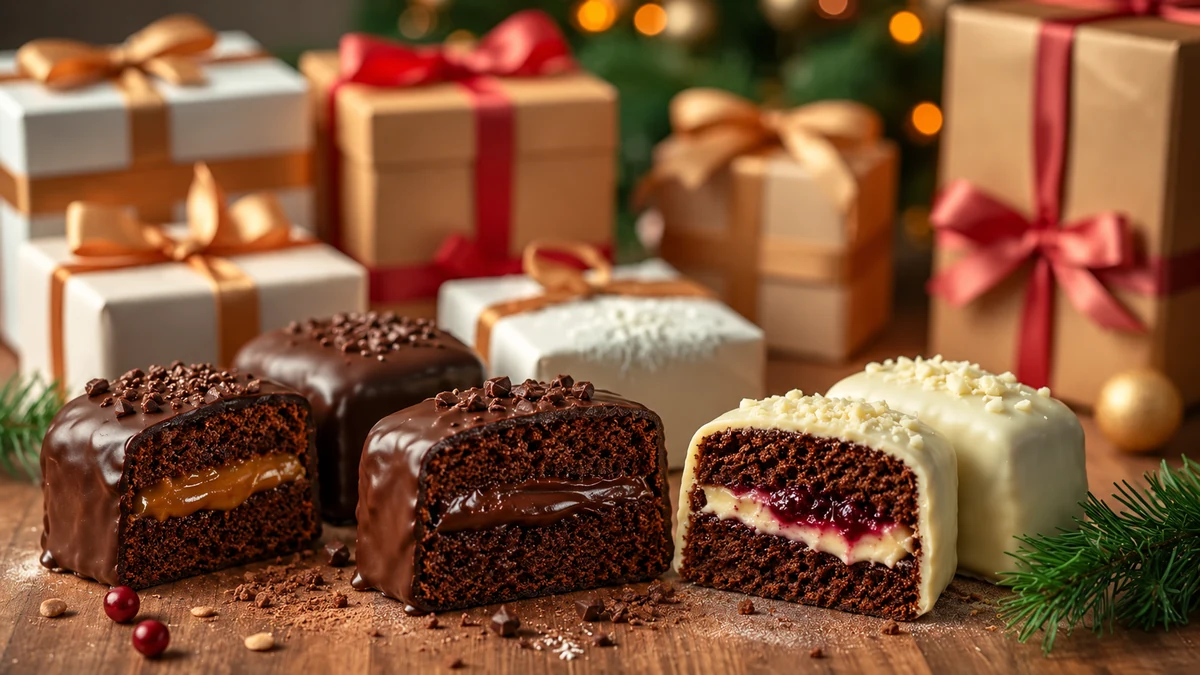
Filled Brazilian honey cakes, known as pão de mel, combine a spiced cake, a creamy centre and a chocolate coating. This guide explores five gift ideas, a basic cake recipe and filling variations, with packaging, cost and storage considerations. There is no verified sales ranking behind the selection.
Filled Brazilian honey cakes make a thoughtful homemade Christmas gift. Explore flavour combinations, preparation steps and ways to present them, with particular care over fillings that need refrigeration.
Why filled honey cakes make appealing Christmas gifts
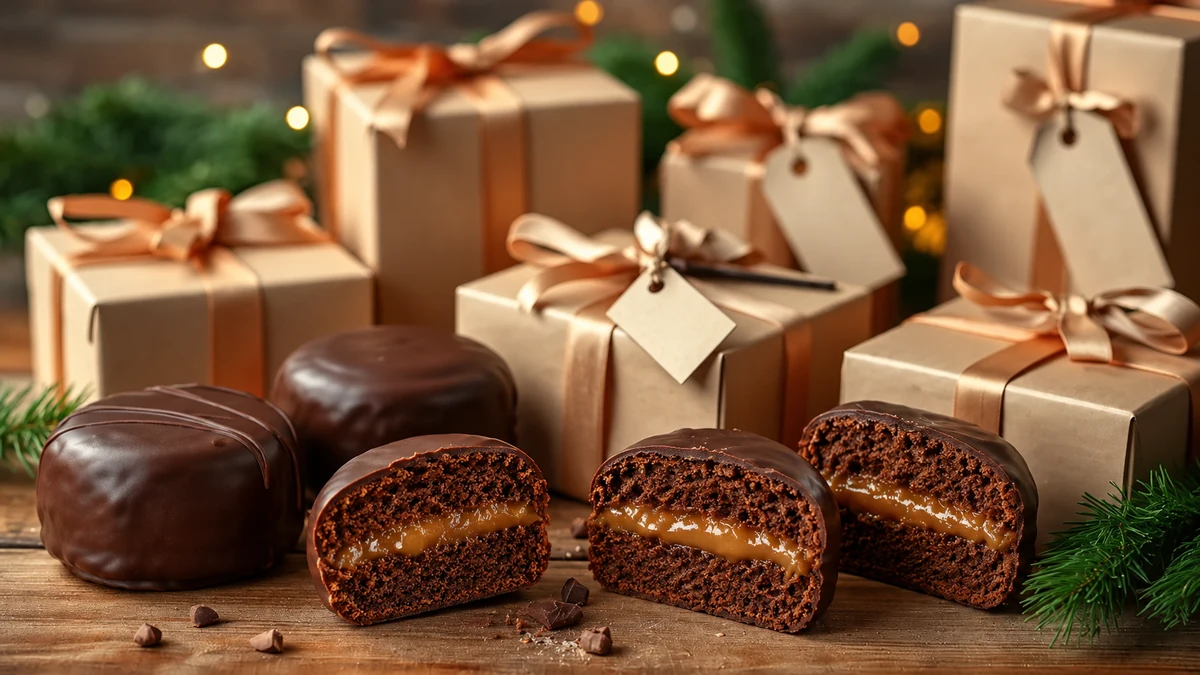
Pão de mel combines spiced cake, a filling and chocolate in a small giftable portion. It is a Brazilian sweet rather than a traditional British Christmas cake.
What makes them appealing
- A personal touch: a homemade gift can connect with family food traditions and the care taken in making it.
- Choice of fillings: chocolate, dulce de leche, brigadeiro and fruit-based combinations offer different flavours.
- Presentation: a neat chocolate coating and simple finish can make each cake attractive.
- Personalisation: vary the flavours, packaging or gift message to suit the recipient.
- Convenient portions: individual cakes fit into divided gift boxes, but their transport and storage requirements depend on the filling.
- Flexible gift sizes: offer a single cake or a selection box. Affordability and any profit depend on actual costs, rather than a guaranteed margin.
- Dietary adaptations: a properly developed vegan or gluten-free recipe can offer another option. The standard honey, egg, wheat and dairy recipe below does not meet those descriptions.
- Contrasting textures: a soft spiced cake, creamy filling and chocolate shell provide a varied bite.
Planning a gift range
- Create a themed selection: combine complementary flavours and sizes in a suitable box, checking the total cost.
- Offer a small tasting: samples can help customers choose, provided they are handled safely and accompanied by allergen information.
- Photograph your actual product: show a cut cake, its filling and the packaging. Illustrative images should not be passed off as photographs of a product you have made.
- Explain ingredients and allergens: name the actual ingredients and verify any dietary claim. A plant-based milk substitution alone does not make the cake vegan or safe for a milk allergy.
Choosing fillings and coatings for gifts
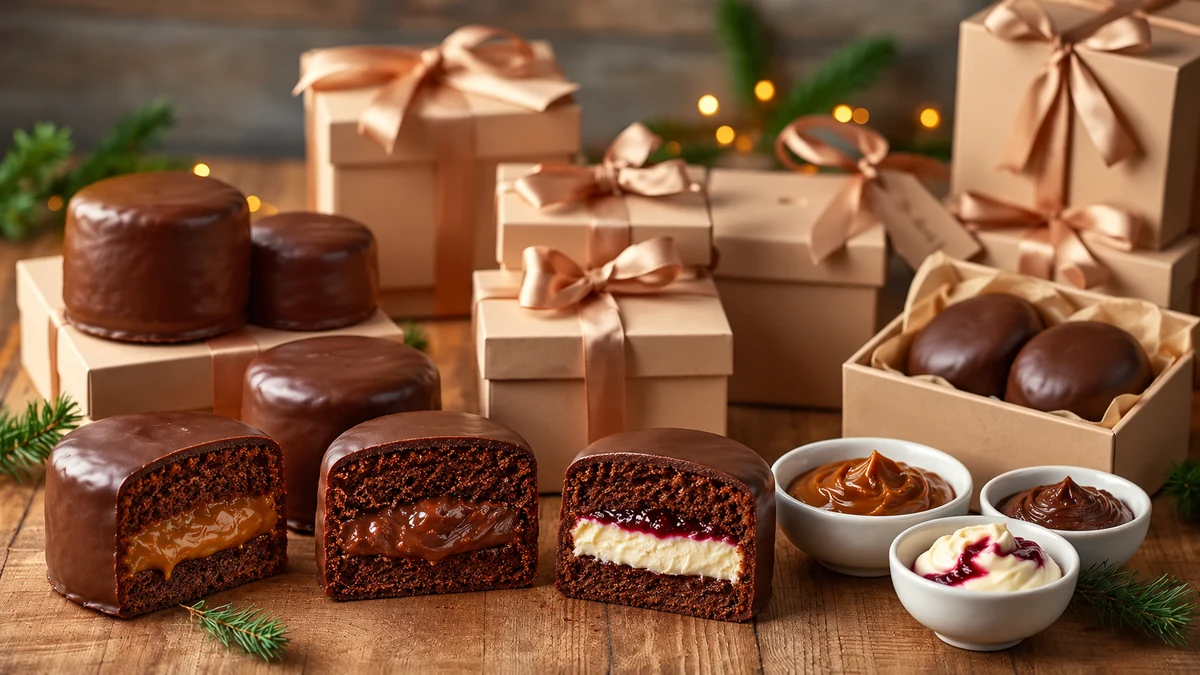
For giftable filled honey cakes, consider flavour and texture alongside the journey and the recipient’s storage arrangements.
Practical selection criteria
- Balanced sweetness: choose a filling that works with the sweetness of the cake and chocolate shell.
- Suitable consistency: very runny fillings can soak the cake. A thick, spreadable cream or ganache is easier to contain.
- Storage: do not assume a firm filling is shelf-stable. Use chilled storage and transport for perishable fillings, following the shortest ingredient or recipe limit.
- Appearance: a distinct filling layer can look attractive when a cake is cut for serving or photography.
- Dietary requirements: only label a cake lactose-free, vegan or gluten-free when the entire recipe meets the claim. Lactose-free dairy still contains milk proteins and is not suitable for a milk allergy.
Flavour combinations to consider
- Dulce de leche and milk chocolate: a creamy caramel-style centre with a sweet coating.
- Traditional brigadeiro and dark chocolate: a Brazilian condensed-milk chocolate filling with a less sweet shell.
- 70% chocolate ganache and orange zest: a deeper cocoa flavour with a citrus finish.
- Cream cheese and berry jam: a tangy filling with a contrasting layer of fruit.
- Walnut or almond praline and milk chocolate: a crunchy nut addition against the soft cake.
- Toasted coconut, dulce de leche and white chocolate: a sweet variation with a pale coating.
- Vegan filling idea: cashew cream with fruit or jam and vegan chocolate, used with a separately tested vegan cake base that contains no honey, eggs or dairy.
- Dairy-free filling idea: a suitable coconut caramel or plant-cream ganache. Check the cake and coating too, and verify the ingredients for the person’s specific needs.
Pairing and packaging
- Combine textures thoughtfully: creamy fillings suit a thin chocolate shell; a crunchy filling works best when it is not packed too tightly.
- Protect the cakes: use food-safe cases, dividers and wrapping to keep the units from rubbing together.
- Provide product information: include the required ingredient and allergen information, storage instructions and an appropriate date indication.
- Keep the presentation simple: a ribbon, personalised tag and windowed box can show the coated cakes without opening the package. The filling itself is visible only in a cut cake.
- Choose the size: small cakes suit mixed boxes, while a larger cake can be an individual gift.
Transport and shelf-life considerations
- Separate chocolate quality from food safety: a cool room may help chocolate retain its appearance, but it is not a safe storage substitute for refrigeration when the filling is perishable. Keep these homemade filled cakes chilled at 0–5°C.
- Use a cautious storage plan: these recipes do not have a validated 5–14-day shelf life. Prepare close to gifting, refrigerate promptly and use within 48 hours or the shortest ingredient limit. Natural ingredients or sealed packaging do not validate a longer period.
- Plan chilled delivery: use suitable insulated packaging and cold packs to maintain refrigeration temperatures for perishable fillings. Check the complete journey, not just the weather on departure.
- Trial the packaging: check that the cakes arrive intact and at the required temperature. A taste or appearance check alone cannot establish a safe shelf life.
Five filled honey cake ideas: flavours, example prices and packaging
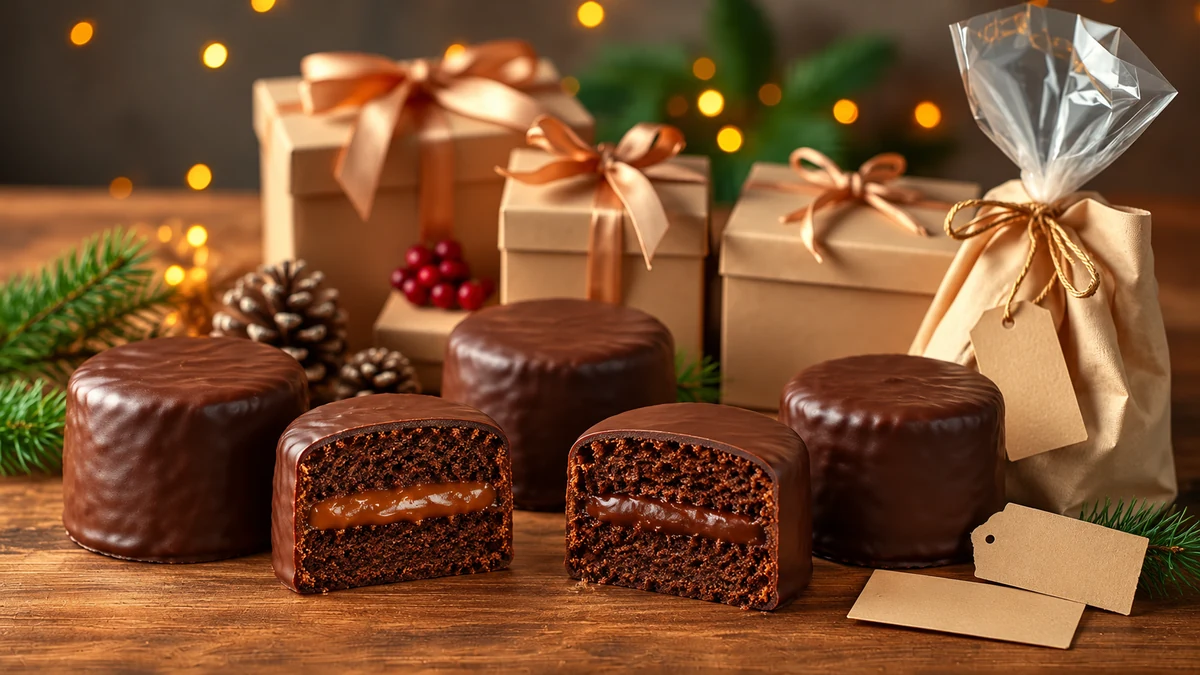
These five filled honey cake ideas include gift presentation and illustrative Brazilian price ranges from the source article. The figures are not verified current market prices or UK recommendations; calculate your own costs before selling.
1. Dulce de leche with milk chocolate
A soft spiced cake with a creamy dulce de leche centre and a milk chocolate shell. Honey cakes are not suitable for babies under one year old.
- Illustrative Brazilian price range: R$8–R$12 for a medium cake or R$35–R$50 for a box of four small cakes. These different pack sizes need their own cost calculation.
- Packaging: a food-safe kraft box with cases, greaseproof paper and an outer ribbon.
- Storage: refrigerate the filled homemade cakes at 0–5°C and use within 48 hours or a shorter ingredient limit. Follow the dulce de leche label after opening; it does not establish the shelf life of the assembled cake.
- Gift idea: include this flavour in a family selection with a small flavour guide.
2. Traditional brigadeiro with dark chocolate
A creamy condensed-milk chocolate filling with a dark shell to balance some of the sweetness.
- Illustrative Brazilian price range: R$9–R$14 for a medium cake or R$40–R$60 for a box of four. Recalculate for the actual size and ingredients.
- Packaging: a divided black box with a clear window and a readable ingredient and storage label.
- Storage: chill promptly and use within 48 hours or a shorter applicable limit. Maintain chilled conditions during delivery.
- Presentation idea: describe the contrast between the brigadeiro filling and dark chocolate coating rather than making unsupported quality claims.
3. 70% chocolate ganache with orange zest
A rich cocoa filling with a fresh citrus note; its sweetness depends on the chocolate and the rest of the cake.
- Illustrative Brazilian price range: R$12–R$18 per cake or R$55–R$80 for six small cakes, subject to your actual costing.
- Packaging: a rigid matt box with food-safe liners and a personalised card; keep decorative tissue separate from unwrapped food.
- Storage: fresh-cream ganache needs refrigeration. Keep the cakes at 0–5°C and use within 48 hours or the shortest ingredient limit; do not assume that high cocoa content makes the filling shelf-stable.
- Gift idea: offer neat, consistently sized cakes in a simple gift box, including for pre-arranged group orders.
4. Cream cheese and berry jam
The slight tang of cream cheese contrasts with sweet jam and creates a distinct layer when sliced.
- Illustrative Brazilian price range: R$10–R$15 per cake or R$45–R$70 for four. Treat these as examples, not current quotations.
- Packaging: use a food-safe windowed box or suitable individual wrapping with ingredient and refrigerated-storage information.
- Storage: keep refrigerated at 0–5°C and use within 48 hours or the cream cheese’s shorter limit. Make chilled delivery and prompt refrigeration clear to the recipient.
- Gift idea: choose this flavour for a local handover where chilled storage can be maintained.
5. Walnut praline with milk chocolate
Crunchy caramelised nuts contrast with the soft cake. Clearly identify the nut variety and consider whether the texture suits the recipient.
- Illustrative Brazilian price range: R$13–R$20 for a larger gift cake or R$60–R$95 for six small cakes, with costs checked separately.
- Packaging: a divided gift box with food-safe cases and a message card outside the food wrapping.
- Storage: keep the assembled homemade cakes chilled and use within 48 hours or a shorter ingredient limit. Airtight packaging helps protect quality but does not prove a longer safe shelf life.
- Gift idea: include in a clearly labelled nut-containing selection, kept separate from products intended for people avoiding nuts.
Planning gift packs and price bands
- Small selection: six assorted small cakes in a kraft box. The source’s R$40–R$55 range is an illustrative Brazilian example only.
- Larger gift box: four large cakes with personalised packaging. The source’s R$80–R$120 range is not a verified market average.
- Group or business orders: use consistent packaging and agree flavour choices, quantities, dates and any personalisation before quoting.
Practical points
- Cost control: account for ingredients, packaging, labour, delivery and overheads before choosing a selling price.
- Allergen information: check the full recipe, including wheat, milk, eggs, nuts and any soya in chocolate. Use the required format for your product and sales method.
- Tastings: offer small, safely handled samples with clear allergen information where the venue permits.
Ingredients for the honey cakes and filling ideas
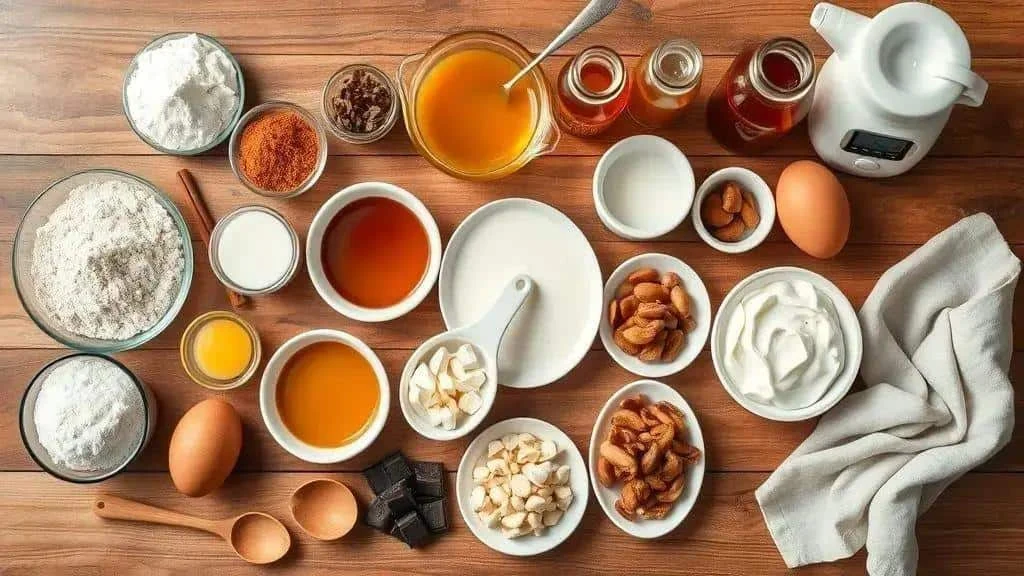
The basic honey cake uses the quantities below. Choose one filling for a batch; the listed filling amounts are alternatives, not all required together, and the amount used depends on cake size. This translated recipe has not been kitchen-tested here. Some adaptation ideas are incomplete in the source and are identified as such rather than presented as tested substitutes.
Basic honey cake ingredients
- 300 g plain flour. The source suggests 250 g gluten-free flour blend plus 50 g starch, but does not specify the blend or starch; that alternative needs recipe testing rather than a guaranteed direct swap.
- 100 g unsweetened cocoa powder. Sweetened chocolate drinking powder changes the sugar and cocoa balance and is not an identical substitute.
- 200 g brown sugar. Demerara changes the texture; the source’s alternative of 150 g sugar plus 50 g molasses also changes moisture and flavour, so test it separately.
- 150 g honey. Molasses gives a different flavour and moisture balance; use a tested vegan cake recipe if omitting all animal ingredients. Do not give honey-containing cakes to babies under one.
- 3 medium eggs. The source gives conflicting, incomplete flaxseed substitutions. No reliable egg replacement quantity is supplied here; use a tested egg-free recipe instead of guessing.
- 120 ml milk. A suitable plant-based alternative changes the recipe and may introduce other allergens; this change alone does not make it vegan.
- 80 g unsalted butter. Vegan baking fat or coconut oil can behave differently, so test any adaptation as a separate recipe.
- 1 tablespoon ground cinnamon
- 1 teaspoon ground cloves
- 1 tablespoon baking powder
- A pinch of salt
Dulce de leche filling
- 400 g ready-made dulce de leche. Use the ready-made option given in the source. Do not pressure-cook a sealed condensed-milk tin; the can manufacturer warns of a risk of bursting when tins are boiled.
Brigadeiro filling
- 1 tin sweetened condensed milk. The source does not state the tin weight; record the size you use and make a small trial rather than assuming all tins are equivalent.
- 1 tablespoon butter. Replacing the butter alone does not make this dairy-based filling vegan.
- 3 tablespoons cocoa powder. The source offers 60 g melted chocolate as an alternative, but this changes fat and sweetness and needs a separate consistency check.
70% chocolate ganache filling
- 200 g chocolate containing 70% cocoa
- 100 ml cream. The source does not specify fat content; different creams, including plant-based products, produce different consistencies.
- Orange zest, optional, to taste.
Cream cheese and berry jam filling
- 200 g cream cheese
- 80–100 g berry jam. A homemade compote may be wetter and have different storage requirements.
Nut praline filling idea
- 150 g walnuts or almonds
- 100 g sugar for caramelising with the nuts. The source does not include a complete praline method; use a tested method or ready-made praline rather than improvising with hot caramel.
- 25 g butter appears in the source’s praline ingredients, but its incorporation is not explained. Confirm a complete recipe before using this ingredient list; coconut oil is not a verified direct replacement.
Toasted coconut and dulce de leche filling idea
- 100 g dried grated coconut
- 50 g sugar is suggested for the toasted coconut variation. The source does not give a full caramelising method; treat this as a flavour idea requiring a complete recipe.
- 200–250 g dulce de leche, ready-made or made using a separate, safe, tested recipe.
Cashew cream: a vegan filling option
- 200 g raw cashews — soak for 4 hours in the fridge, then drain and rinse.
- 120 ml fresh water or suitable plant-based milk
- 2 tablespoons agave syrup or molasses.
- A pinch of salt
Notes on quantities and adaptations
- Yield: the source estimates about 20 small cakes or 8–10 medium cakes, but gives no mould dimensions. Actual yield and baking time depend on your moulds; check a small trial batch before planning an order.
- Allergens: check the complete ingredient list, including wheat, eggs, milk, the specific nuts used and allergens in the chocolate or alternative ingredients.
- Storage: cream, cream cheese and prepared cashew cream need refrigeration. Do not assume ganache or dulce de leche makes an assembled homemade cake shelf-stable.
- Consistency: a firm, spreadable filling is easier to contain than a runny one. A texture test does not establish food safety or shelf life.
How to prepare and fill the honey cakes
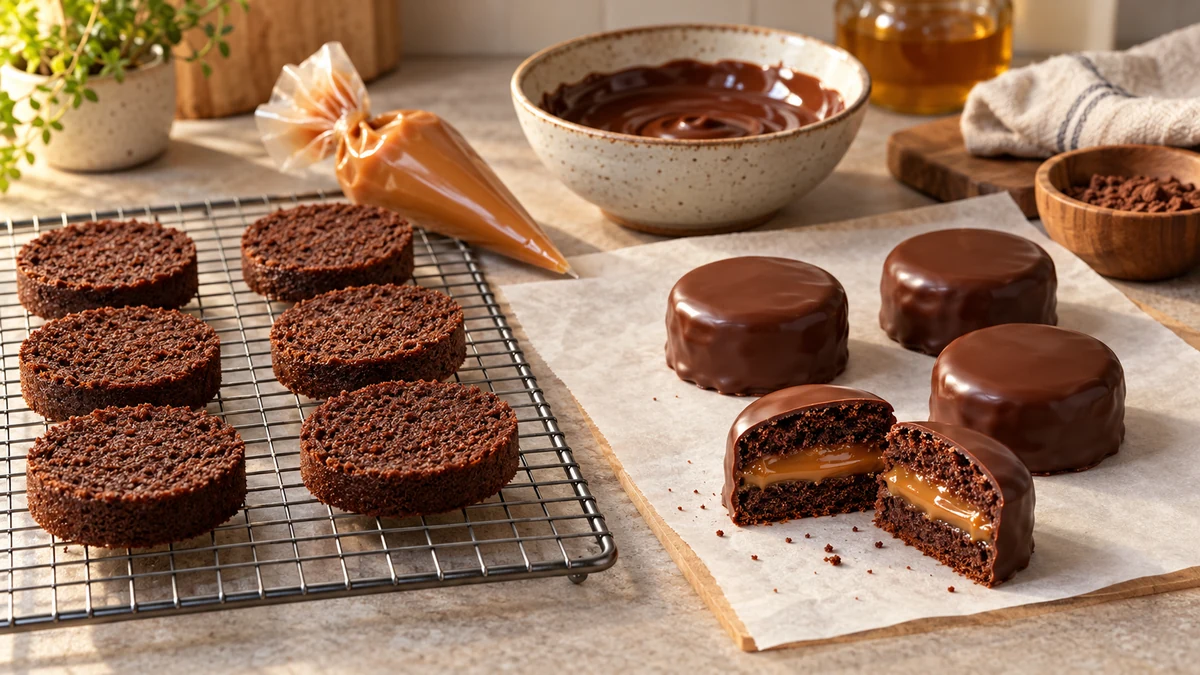
Use the basic filled honey cake ingredients above and choose a suitable filling. Allow time for the cakes and cooked fillings to cool before assembly, while chilling perishable fillings promptly. For the coating, the method below uses 300 g chocolate; the amount needed depends on cake size and coating thickness.
Making the cakes
- Preheat the oven: set it to 180°C, or 160°C fan. Grease suitable cake moulds or prepare silicone moulds according to their instructions.
- Combine the dry ingredients: sift together 300 g plain flour, 100 g cocoa powder, 1 tablespoon cinnamon, 1 teaspoon ground cloves, 1 tablespoon baking powder and a pinch of salt.
- Mix the wet ingredients: beat together 200 g brown sugar, 80 g softened butter, 150 g honey and 3 medium eggs until evenly combined.
- Combine the mixtures: add the dry ingredients alternately with 120 ml milk, mixing just until incorporated. Do not taste raw batter.
- Fill the moulds: divide the batter between them, filling each no more than two-thirds full.
- Bake: the source suggests 12–18 minutes for small cakes and 20–25 minutes for medium ones, but mould sizes are unspecified. Check that the centre is set and a skewer comes out without wet batter; continue baking if needed rather than relying on time alone.
- Cool: let the cakes become firm enough to turn out, then cool on a wire rack before filling.
Filling and assembling
- For brigadeiro: stir 1 tin sweetened condensed milk, 1 tablespoon butter and 3 tablespoons cocoa powder over a low heat until thick enough to pull away from the pan. The tin size is unspecified, so judge consistency carefully. Transfer to a shallow clean container, cool promptly and refrigerate within 1–2 hours until needed.
- For ganache: heat 100 ml cream, pour over 200 g finely chopped chocolate and stir until smooth. Add orange zest if using. Cool promptly, then refrigerate until spreadable; do not leave a cream filling out for hours to set.
- For dulce de leche: use the 400 g ready-made option, following the manufacturer’s storage instructions after opening. Do not boil or pressure-cook a sealed tin. For the cream-cheese option, spread or pipe the listed cream cheese and berry jam as separate layers; keep both chilled until assembly.
- Open the cooled cakes: with a small knife, cut a shallow lid and remove a little crumb to make a cavity, leaving the base intact. Alternatively, split a suitable cake horizontally into two layers.
- Add the filling: use a piping bag or small spoon, stopping before it overflows. Work with small portions of chilled filling.
- Close each cake: replace the cake lid or top layer gently without squeezing out the filling.
Chocolate coating and decoration
- Prepare the coating: melt 300 g milk or dark chocolate, as appropriate for your chosen flavour, over a gentle bain-marie or in short microwave bursts, stirring frequently. For a firm glossy finish, follow the chocolate manufacturer’s tempering instructions; simply melting chocolate does not guarantee that finish.
- Coat the cakes: support each cake on a dipping fork, coat it with chocolate and let the excess drain off. Handle gently so the filling stays inside.
- Decorate: add suitable chocolate shavings, chopped nuts or decorations before the shell sets. Check their allergens and suitability for the recipient.
- Set the coating: place the cakes on a lined tray. The source suggests 10–15 minutes in the fridge as an initial setting period; check firmness and keep perishable filled cakes refrigerated afterwards. Chilling alone does not temper chocolate.
- Finish simply: drizzle a contrasting chocolate or dust lightly with sifted cocoa, without obscuring the flavour or allergen information.
Packaging and storage
- Let the coating firm up: package the cakes once the shell has set, working promptly and keeping chilled storage in place.
- Use supportive cases: food-safe dividers or cases help stop the cakes rubbing against each other.
- Label the pack: give the flavour, required ingredients and allergens, storage conditions and appropriate date information.
- Refrigerate: keep homemade filled cakes at 0–5°C and use within 48 hours or the shortest ingredient limit. Count from preparation of the perishable components, not from the moment they are boxed.
- Deliver chilled: use a rigid outer box and suitable insulation and cold packs. Confirm that the recipient can refrigerate the cakes promptly.
- Check the process before selling: trial the packaging and delivery conditions. A safe commercial shelf life requires an appropriate assessment, not just tasting a sample after several days.
Tips for beginners
- Fill piping bags in small amounts: this makes portioning easier and avoids keeping a large batch of perishable filling out of the fridge.
- Melt chocolate gently: stir regularly, keep water out of it and avoid excessive heat.
- Taste a finished trial cake: assess the sweetness and seasoning once the cake is fully baked and the filling safely prepared.
- Keep a recipe record: note actual ingredient weights, tin sizes, mould dimensions, baking times and yield so you can compare batches.
Further Christmas filling variations
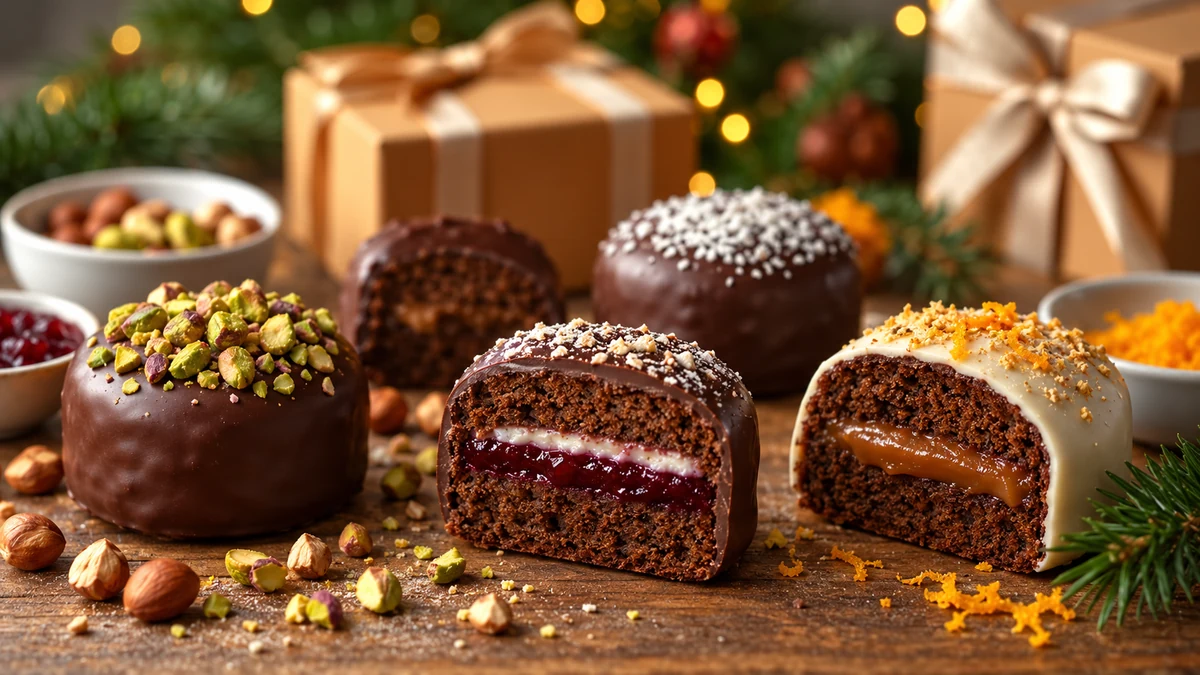
These filled honey cake variations build on the basic recipe. Where the source has incomplete or conflicting instructions, use a small trial or a separate tested recipe instead of treating the variation as validated for sale.
Small honey cakes with pistachio brigadeiro
- Cake base: use the basic recipe above, starting with 300 g plain flour.
- 100 g cocoa powder.
- 200 g brown sugar.
- 150 g honey. A molasses version has a different flavour and should be trialled separately.
- 3 medium eggs. No reliable flaxseed replacement is supplied in the original variation; this is not a vegan cake recipe.
- 120 ml milk.
- 80 g butter. A plant-based baking fat requires a separate recipe trial and does not remove the other animal ingredients.
- 1 tablespoon cinnamon and 1 tablespoon baking powder, as in the basic recipe, plus its 1 teaspoon ground cloves and pinch of salt. The original variation inconsistently changes the baking powder to 1 teaspoon; this version explicitly uses the basic cake rather than presenting that discrepancy as tested.
Method
- Preheat the oven to 180°C, or 160°C fan, and prepare small cake moulds.
- Combine the dry ingredients: flour, cocoa, cinnamon, cloves, baking powder and salt.
- Beat the wet ingredients: brown sugar, softened butter, honey and eggs.
- Combine the mixtures, alternating the dry ingredients with milk and mixing only until incorporated.
- Bake, starting to check small cakes within the source’s 12–18-minute range. Bake until set with no wet batter on a skewer, then cool on a rack. The exact time depends on mould size.
- Make pistachio brigadeiro: stir 1 tin sweetened condensed milk, 1 tablespoon butter and 50 g pistachio paste over a low heat until thickened and pulling away from the pan. Record the tin size and paste used, as sweetness and consistency vary. Cool promptly in a shallow container, refrigerate and use once cool and spreadable.
- Fill and coat the cooled cakes, following the basic assembly and chocolate-coating method. Finish with chopped pistachios and clearly identify the nut and other allergens.
Dulce de leche with a pinch of fleur de sel
- Basic cake recipe as above. The estimated 8–10 medium cakes depends on the size of your moulds.
- 400 g ready-made dulce de leche, or a batch from a separate safe recipe.
- Fleur de sel, used sparingly to taste.
Method
- Bake the cakes using the basic method and let them cool completely.
- Open and fill with dulce de leche, taking care not to overfill.
- Coat with milk or dark chocolate using the coating method above, then add a tiny pinch of fleur de sel before the shell sets.
- Packaging: use a divided food-safe box and a flavour label such as ‘Dulce de leche with a touch of sea salt’, alongside the required product information.
Vegan cake concept with cashew cream and berry jam
- The source suggests 300 g gluten-free blend or plain flour, but does not give a complete vegan batter. This is a flavour concept, not a standalone tested cake recipe. Choose a complete vegan spiced cake recipe before making the base.
- 150 g molasses or agave syrup is suggested for the base in the source; do not substitute that amount into a different recipe without checking its formula.
- 120 ml plant-based milk also appears in the incomplete base. Follow the amounts in your chosen complete recipe, checking any oat or nut allergens.
- 200 g cashews, soaked for 4 hours in the fridge, drained and rinsed, then blended with up to 120 ml fresh water for the filling.
- 100 g berry jam, checked for vegan suitability, to use alongside the cashew filling.
Using the filling concept
- Prepare a complete tested vegan cake base. The source omits necessary batter quantities and gives inconsistent flaxseed instructions; do not treat a honey-and-egg cake as vegan after changing only its milk or butter.
- Bake and cool the cakes according to that complete recipe’s instructions and mould sizes.
- Make the cashew cream using the filling quantities listed earlier: blend the drained cashews with the fresh water gradually, 2 tablespoons agave syrup or molasses and a pinch of salt. Stop adding liquid when it is smooth and spreadable, then refrigerate promptly.
- Fill the cooled cakes with cashew cream and a little berry jam. Keep the perishable cream chilled while working.
- Use suitable vegan chocolate for the coating, following its melting or tempering instructions. Refrigerate the finished cakes and use within the shortest storage limit; vegan fillings are not automatically shelf-stable.
Other flavour ideas
- 70% chocolate ganache with orange zest: a cocoa-rich option for a mixed gift box.
- Crunchy praline: use ready-made praline or a complete tested caramelised-nut recipe, clearly declaring the nuts used.
- Mixed small cakes: a six-piece box can contain several complementary fillings, with a clear flavour and allergen guide.
Practical points for selling
- Sizes: small cakes suit selection boxes; medium cakes can be individual gifts.
- Packaging: choose supportive boxes with dividers and a separate space for a personal message.
- Pricing: calculate the full unit cost before choosing a margin. If aiming for a margin of 30–60% of the selling price, divide cost by 0.70–0.40 respectively; simply adding that percentage to cost is a different calculation called markup. These are examples, not recommended returns.
- Labelling: provide the required allergens and storage information, including refrigeration for these perishable filled cakes.
- Process checks: verify preparation, storage and delivery before selling at scale. Packaging and taste trials are not a substitute for assessing microbiological safety.
- Accurate presentation: use photographs of your own finished cakes, including the filling and the actual packaging a customer will receive.
Packing, costing and assembling gift boxes
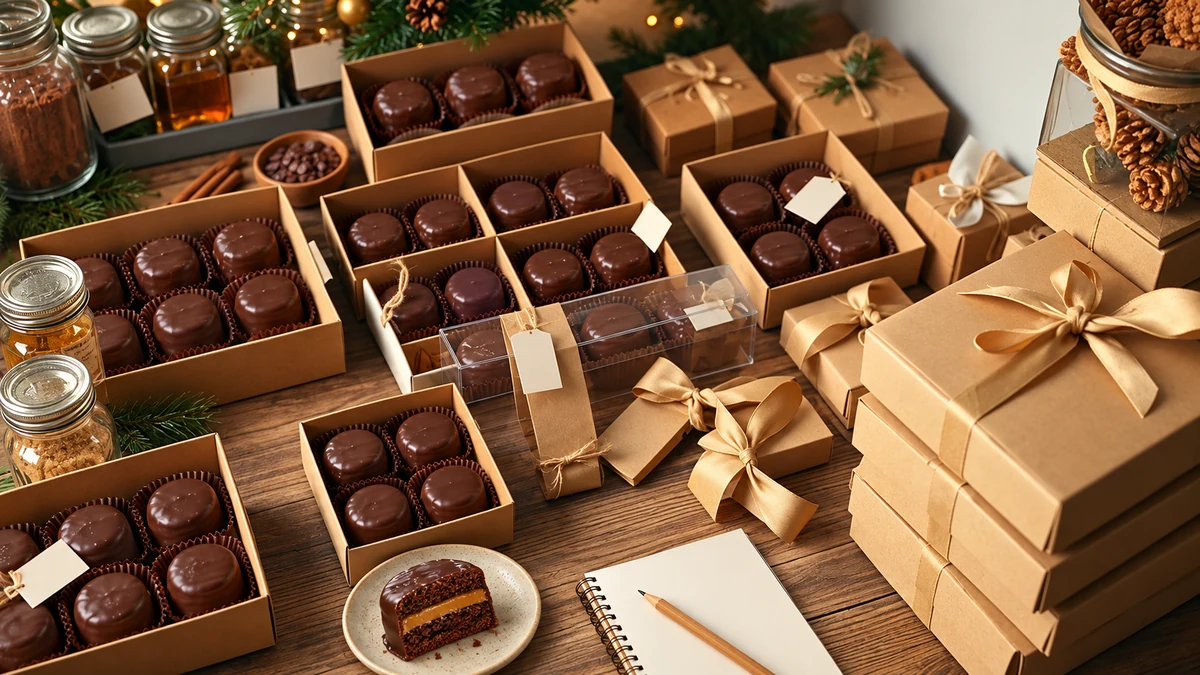
Plan how to pack, price and assemble your honey cake gifts before production, including chilled storage and delivery for the completed boxes.
Packaging materials
- Kraft box with dividers — choose a food-safe design that supports the cakes.
- Rigid matt box — useful for a more substantial gift presentation.
- Food-safe clear bag and ribbon — a possible individual presentation, with adequate protection and chilled handling.
- Cases and greaseproof paper — help separate cakes and protect the coating.
- Product label or tag — provide readable ingredient, allergen, storage and date information appropriate to the sale.
- Outer cushioning — protect the wrapped food during transport. Ordinary decorative tissue or foam should not touch unwrapped cakes unless suitable for food contact.
Assembling a gift box
- Choose the format: for example, six or eight small cakes, or two or four medium cakes.
- Choose complementary flavours: include a chocolate-rich, creamy or crunchy option. Keep any dietary-specific selection appropriately separate and correctly labelled.
- Prepare the box: position food-safe cases and dividers before adding the cakes.
- Arrange the cakes securely: give each one enough space for its decoration without leaving room for it to slide around.
- Protect layers: if stacking is suitable, use food-safe separators and enough support to avoid crushing the bottom layer.
- Add product information: attach the required ingredient and allergen information, storage conditions and appropriate dates.
- Finish the outside: add a ribbon and personalised gift card, keeping decorative materials separate from the food.
- Inspect the pack: check the coating, seal, label and temperature record. A normal smell or appearance does not prove food is safe.
Calculating a selling price
- Full unit cost: include ingredients, packaging, labour and a share of overheads. An illustrative Brazilian calculation is R$2.50 + R$1.20 + R$1.00 + R$0.80 = R$5.50. Replace every figure with your own costs; no currency conversion or current price claim is implied.
- Margin calculation: selling price = cost ÷ (1 − target margin). For example, R$5.50 ÷ (1 − 0.50) = R$11.00 gives a 50% margin before any omitted costs or taxes. Choose a sustainable price rather than assuming a fixed margin is achievable.
- Box price: six cakes at an illustrative R$8 each total R$48. A box priced at R$42–R$46 would be a discount, so check the box, labour and delivery costs before offering it.
- Delivery and offers: account for delivery costs, including cold-chain packaging. A free-delivery offer still has a cost that must be covered.
Product information to check before selling
- Ingredient and allergen details must match the full product. Relevant allergens may include wheat, milk, eggs, specific nuts and soya; the actual list depends on the recipe and bought ingredients.
- Appropriate date information and clear storage instructions are needed. Do not choose a long use-by period without a suitable basis.
- Producer details and traceability should meet the rules for the way you sell. Check food-business registration and labelling requirements before taking orders.
- Storage and delivery instructions should protect food safety as well as the appearance of the chocolate shell.
Presentation ideas
- Personalisation: add the recipient’s name or a short greeting on a separate card.
- Themed boxes: group flavours clearly. Only use a ‘vegan’ label for a fully suitable cake, filling and coating.
- Different sizes: offer a small token gift and a larger selection where the production and packaging costs make sense.
- Real product photographs: show a cut cake and the assembled box so customers know what to expect.
Delivery arrangements
- Trial the journey: check movement inside the box and whether the required temperature is maintained for the whole delivery period.
- Temperature control: use appropriate insulation and cold packs for perishable fillings. Fast delivery or mild weather alone does not replace chilled transport.
- Outer packaging: use a sturdy box with the necessary handling information. A ‘fragile’ sticker cannot replace adequate protection.
Planning orders
- Tastings: offer safely handled samples where appropriate to help customers choose a flavour.
- Larger orders: calculate any discount only after accounting for all costs and capacity.
- Advance bookings: agree quantities, payment terms and delivery dates clearly, leaving enough time for safe production close to delivery.
Presenting your cakes: photographs, descriptions and sales channels
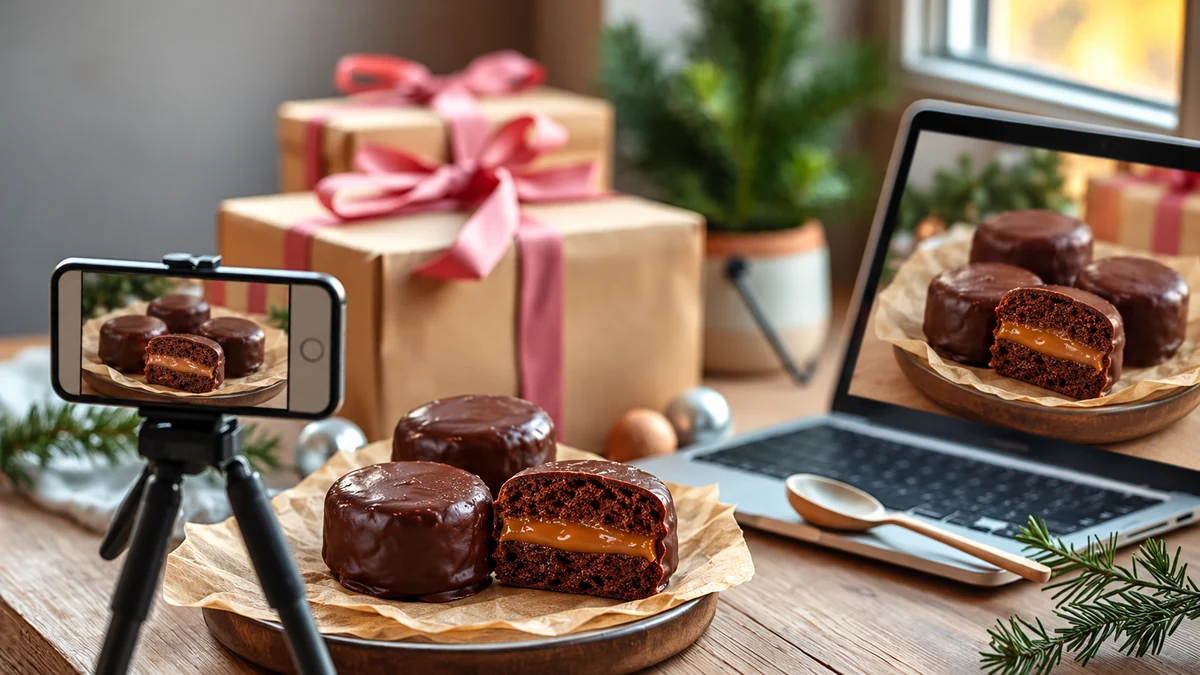
Clear, accurate photographs help customers understand what they are buying. A simple picture of your real product is more useful than an illustration that suggests a result you cannot supply.
Useful product photographs
- Show three views: a cut cake, the packaged selection and the gift in a simple table setting.
- Use soft light: diffused window light helps show colour and texture without harsh reflections.
- Keep the background simple: wood, plain card or a light cloth can keep attention on the cake.
- Show the filling: a cleanly cut cake reveals the proportions and texture the customer can expect.
- Focus on the product: a softly blurred background can highlight detail, while the cake and filling should remain clear.
- Use a consistent style: keep lighting, colour and presentation similar across your range.
Writing useful product descriptions
- Describe the flavour: for example, ‘Spiced honey cake with creamy dulce de leche and a touch of sea salt’.
- Include practical details: size, quantity, ingredients, storage, use-by information and delivery arrangements.
- Make allergen information clear: identify the actual allergens in each flavour using the format required for your sales method, rather than copying a generic list.
- Use natural search wording: phrases such as filled Brazilian honey cakes, ‘Christmas food gift’ and ‘pão de mel selection’ can describe the product without repetition.
- Explain how to order: give a realistic lead time, such as ‘Order at least three days ahead’ only if that matches your actual process.
Possible channels and formats
- Instagram: show the filling, packaging and assembly process, with clear directions for enquiries or orders.
- Messaging channels: a simple catalogue with consistent photographs can support order enquiries, provided customers receive the required food information.
- Online marketplace or your own shop: provide complete descriptions, prices, delivery conditions and storage information.
- Markets and specialist shops: take permitted samples, clear product information and an easy route to enquiries.
Content and search visibility
- Page title and description: accurately describe your filled Brazilian honey cakes and include a real delivery area where relevant, without promising search rankings.
- Relevant tags: use a small number of descriptive tags such as #ChristmasFoodGifts and #PaoDeMel where appropriate.
- Image alternative text: describe what the image shows for people who cannot see it. Include a relevant product term naturally, not a string of search keywords.
Advertising and partnerships
- Paid promotion: if you choose to advertise, set a budget you can afford and measure actual orders rather than assuming a return.
- Local partnerships: discuss a small trial with a café or florist, including chilled storage, product information and responsibilities.
- Business gifts: offer a clearly costed package with agreed personalisation and delivery dates if your production capacity allows it.
Before publishing a product listing
- Accurate photograph showing the filling
- Complete description with the required ingredients and allergens
- Clear price and suitable chilled-delivery options
- Ordering instructions and realistic production time
- A working purchase or enquiry link
A thoughtful homemade Christmas gift
Filled Brazilian honey cakes offer plenty of scope for flavour and presentation. Start with a small trial, choose a complete recipe and make safe storage part of the gift plan.
Thank you for reading. Follow our social pages for more recipes, packaging ideas and Christmas inspiration.
Visit the I Love Christmas blog for more festive food and homemade gift ideas, and share the variations you enjoy.
Filled honey cakes for gifts: frequently asked questions
How long do filled honey cakes keep?
There is no single validated shelf life for these homemade combinations. Keep perishable filled cakes at 0–5°C and plan to use them within 48 hours of preparing the perishable components, or sooner if an ingredient requires it. Do not rely on the original article’s 5–14-day claims; a commercial product needs an appropriate shelf-life assessment.
How can I transport gift boxes without damaging the coating?
Use a rigid box with food-safe cases and dividers, plus suitable insulation and cold packs for perishable fillings. Check that the cakes stay chilled throughout the journey and that the recipient can refrigerate them promptly. Express delivery alone does not ensure temperature control.
Can I make vegan or gluten-free versions?
Yes, using complete recipes developed for those needs. A vegan version must replace honey, eggs and dairy throughout the cake, filling and coating. Gluten-free products need suitable ingredients and protection from gluten cross-contact. The source’s incomplete flaxseed and flour substitutions are not tested formulas.
How should I calculate a selling price?
Add ingredients, packaging, labour, overheads and relevant delivery costs. For a chosen margin on the selling price, divide the cost by one minus that margin: a cost of 5.50 at a 50% margin gives a price of 11.00 in the same currency. Adding 50% to cost would instead give a 50% markup. Check omitted costs and demand before setting prices.
Which packaging works well for gifts?
A supportive food-safe box with cases and dividers, an outer ribbon and a message card gives a neat presentation. Kraft or rigid matt boxes can both work; choose for protection and suitable chilled handling as well as appearance.
What information should go on the product label?
Provide accurate ingredients and allergens, appropriate date and storage information, and the producer and traceability details required for your type of sale. Rules vary between prepacked, non-prepacked and online sales, so check the relevant official guidance and food-business requirements before selling.
Sources and Further Reading
- Food Standards Agency: chilling, freezing and defrosting
- Food Standards Agency: cooking and reheating
- NHS: foods to avoid for babies and young children
- Carnation: frequently asked questions and safe use of canned products