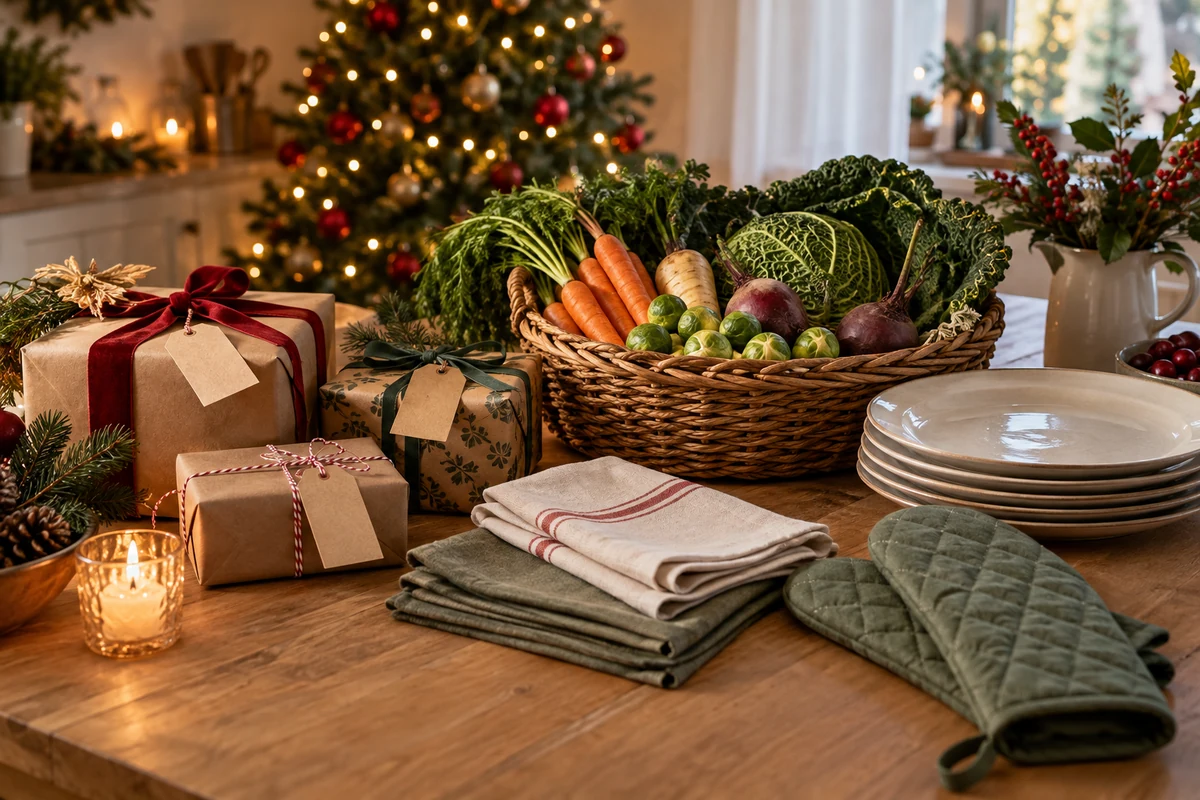
A weekly Christmas preparation plan divides October to December into manageable activities: planning, spreading purchases, making decorations and testing recipes. It can help distribute the cost and workload, involve the family and leave fewer jobs for the last few days.
A weekly Christmas preparation plan gives you a way to spread the work rather than rush through December. This practical guide covers decorations, food and presents, with small steps you can adapt to your household and available time.
How a weekly Christmas plan works, and why start in October?

A weekly Christmas preparation plan turns a few very busy days into a series of smaller jobs. Spreading them out can make spending easier to track and leave more room to enjoy the season.
Putting it into practice
Divide October to December into weeks and give each week one main task. Keep it achievable: choosing a theme, buying materials, testing a recipe or wrapping a group of presents. Smaller supporting jobs can fit around that priority without filling every free evening.
The monthly rhythm
- October: plan the celebration, choose a theme and begin buying suitable non-perishable supplies and craft materials.
- November: make decorations and small gifts, and test recipes for the festive meal.
- December: finish decorating, schedule fresh-food shopping, plan the table and wrap presents.
A repeatable four-week cycle
Use this pattern as a flexible guide, adapting each stage to the month and your routine:
- Week 1 — planning: list priorities, share responsibilities and schedule the main shopping trips.
- Week 2 — shopping and materials: buy suitable non-perishable goods, fabric, ribbon and any missing craft supplies.
- Week 3 — making and testing: assemble decorations, try recipes and note what needs adjusting.
- Week 4 — organising and reviewing: check the gift list, confirm invitations and update the remaining schedule.
Benefits of starting in October
Beginning in October leaves time to spread purchases and make things gradually. It can reduce the December rush and make family participation easier. An early purchase is not automatically a bargain, so compare prices and buy only what fits the plan.
Practical tips
- Keep weekly lists short: three to five manageable tasks can be enough.
- Set aside roughly 30 minutes for a small job such as wrapping presents or assembling an ornament.
- Store decorations in labelled boxes by room or theme so you can find them easily.
- Record tested recipes, quantities and results to help with the final meal.
A flexible routine turns Christmas preparation into a series of visible steps. Adjust it when life gets busy rather than treating the timetable as another obligation.
Monthly checklist: October, November and December

Use the monthly checklist to spread larger projects into shorter sessions. Some jobs need more time than others, so split them further where necessary.
October — planning and advance purchases
- Choose a theme and colours: decide whether you prefer a traditional, rustic or minimal style, starting with decorations you already have.
- Set an overall budget: allow for decorations, presents and food, including delivery or travel costs where relevant.
- List durable supplies: check whether you need ornaments, lights, craft materials or wrapping before buying more.
- Choose a storage area: use boxes with clear labels, colours or symbols rather than loose notes that can become separated.
- Draw up the weekly plan: break large projects into smaller stages.
November — making, testing and adjusting
- Make decorations: reserve one or two afternoons for wreaths and other simple projects.
- Test a recipe: try at least one unfamiliar dish to check seasoning, portions and timing.
- Buy the main presents: compare suitable offers and spread purchases across the weeks without exceeding your budget.
- Check the lights: inspect cables and fittings before use. Replace bulbs only where the manufacturer’s instructions permit it, with the lights unplugged; do not use damaged sets.
- Plan the meal logistics: agree who will bring each dish and check fridge space, equipment and serving utensils.
December — finishing and putting the plan into action
- Schedule fresh-food shopping: choose dates that suit use-by dates and storage instructions, rather than buying all perishables too early.
- Finish the main decorations: arrange the tree, table and any other focal points.
- Wrap presents in stages: allow 30–60 minutes at a time, or shorter sessions if preferred.
- Confirm guests: update the numbers and check dietary needs before finalising quantities.
- Plan the cooking day: work backwards from serving time, allowing for cooking, resting, safe chilling and any reheating.
Practical weekly habits
- Keep tasks manageable: 20–40 minutes can be a useful working block, adjusted to your energy and the job.
- Delegate: family members may be able to help with wrapping, laying the table or a short shopping trip.
- Use clear labels: grouping boxes by room or theme makes decorating easier.
- Compare offers: buy durable goods when a genuine saving suits your needs, rather than simply because they are on promotion.
Monthly checklists make large projects easier to see and share. Review them weekly and adapt them to your household.
A weekly decorating routine: changing the house a little at a time

Spread decorating into smaller sessions to avoid doing everything in one tiring day.
A suggested decorating cycle
- Week 1 — choosing and sorting: settle on colours, remove damaged items from use and sort boxes by room. Allow around 30–45 minutes for an initial session.
- Week 2 — lights and textiles: inspect lights according to their instructions and add throws or cushions in your chosen colours. Try sessions of 20–30 minutes.
- Week 3 — ornaments and crafts: make simple wreaths, table arrangements and ornaments. An afternoon of repeated small projects can be easier than several unrelated designs.
- Week 4 — final arrangement: position the tree and other focal points while keeping routes and exits clear for guests.
A practical weekly checklist
- Plan three to five short tasks for the week.
- Gather materials at the start: ribbon, scissors, suitable glue and labels.
- Check the lights before placing them on the tree, following the instructions for safe testing.
- Store finished items in labelled boxes until they are needed.
Ways to keep the work manageable
- Make a supply kit: keep commonly used tools and materials together so you spend less time searching.
- Use timed sessions: work for around 25–30 minutes, then pause or change tasks if needed.
- Take electrical care: check for damaged cables, do not overload sockets or extension leads, and unplug decorative lights overnight and when you go out. Source: Electrical Safety First: Christmas safety
- Refresh what you own: new ribbon or a different arrangement can change an ornament’s appearance. If using paint, choose a suitable product and follow its ventilation and drying instructions.
- Involve the household: share simple jobs such as unpacking, arranging ornaments or laying the table.
Adapting to space and budget
- A small flat: choose secure wall decorations or a compact display without blocking routes or creating trailing leads.
- A larger home: concentrate on a few places such as the entrance or living room instead of filling every space.
- A limited budget: focus on one or two elements, perhaps lighting and the table, and use suitable materials already at home.
Weekly upkeep
- Check the lights: stop using faulty sets and secure loose leads. Only replace permitted components as directed by the manufacturer.
- Give surfaces a quick clean: dust around decorations carefully before guests arrive, keeping electrical items dry.
- Adjust the arrangement: move objects that obstruct routes or are hidden behind furniture.
Small, clearly defined tasks help build a festive atmosphere without making decorating the only focus of the season.
Planning the meal: recipes, shopping and tests across the weeks

Spreading the work gives you time to test unfamiliar recipes and organise the kitchen. Safe storage and cooking still need their own plan; an early start alone does not guarantee food safety.
Divide recipes into groups
- Main dishes: choose one or two options, such as turkey, another roast bird or a vegetarian centrepiece, then select accompaniments.
- Side dishes: choose around three to five, if suitable for the group. Rice, Brazilian farofa, salad and mash offer different flavours and preparation times.
- Desserts: combine something that can safely be prepared ahead with a simple option for the day. Tarts and filled panettone need storage appropriate to their ingredients.
- Drinks: offer appealing alcohol-free choices and estimate quantities for the length of the gathering and guests’ preferences.
Shopping across the weeks
- October and November: buy suitable tins, drinks, seasonings and other shelf-stable ingredients, checking dates and storage space. Buying ingredients for a marinade is different from preparing it months ahead.
- Early December: purchase frozen products where appropriate and plan safe defrosting time. Check recipe and packaging instructions before preparing pastry or other bases in advance.
- The final week: schedule fruit, vegetables, dairy and other perishables close enough to use, following their storage requirements and use-by dates.
Testing recipes in advance
- Choose what needs a trial: prioritise unfamiliar or complicated dishes.
- Make a suitable smaller batch: a version serving four to six may work for a household meal, but use a reliable scaled recipe and account for changes in tin size or cooking time.
- Record useful details: note ingredient proportions, seasoning and the cooking method that worked.
- Repeat only where necessary: make specific adjustments rather than retesting every dish without a reason.
Planning quantities
- Meat or the main protein: use the recipe’s yield or the supplier’s serving guide. A single allowance of 250–300 g cannot reliably cover both boneless portions and whole birds, because bones, cooking losses and appetites differ.
- Side dishes: estimate portions across the whole menu. The original planning range of 150–200 g per person in total is only a rough starting point and may be insufficient for some meals.
- Desserts: around 120–150 g per person can be a rough catering estimate for some desserts, with smaller servings where several options are offered. Follow the recipe yield where possible.
- Drinks: keep drinking water available and allow for the gathering’s duration. A 500–700 ml estimate is not a hydration target or a ceiling, and nobody needs an allocated number of alcoholic drinks.
Organising advance preparation
- Prepare ahead selectively: do not apply a blanket two-to-seven-day storage period to marinades, cakes or desserts. Follow a reliable recipe and ingredient instructions. Refrigerate cooked leftovers promptly and use within 48 hours or freeze, unless stricter guidance applies. Source: UK food-safety guidance: chilling, freezing and defrosting
- Freeze suitable portions: cool and store food safely, label it, and defrost in the fridge. Once fully defrosted, use within 24 hours; keep the fridge at 5°C or below. Source: UK food-safety guidance: chilling, freezing and defrosting
- Label containers: include the contents, preparation or freezing date and any useful serving instructions.
Arrangements on the day
- Make a timed cooking plan: list when to start and finish each dish, beginning with those needing the longest preparation or cooking time.
- Plan safe reheating: schedule suitable dishes around oven and hob space. Reheat only once until steaming hot throughout; food cooked ahead must first be chilled and stored safely. Source: UK food-safety guidance: chilling, freezing and defrosting
- Share specific jobs: agree who will finish the salad, reheat a side dish and lay the table.
Notes for next year
- Record what worked: note ingredients, serving quantities and preparation time.
- Keep supplier details: record shops and bakeries you found useful, while remembering prices and availability can change.
- Ask about favourites: the dishes guests enjoyed can help shape a future menu.
This approach makes shopping, testing and preparation easier to organise, while leaving room to simplify the meal if the workload becomes too much.
Presents and small gifts: making, wrapping and saving gradually

Making presents in stages gives you time to finish them carefully and check the total cost before committing to a large batch.
A simple gift-making timetable
- October: choose ideas, gather basic supplies such as paper, ribbon, suitable jars and labels, and make a sample.
- November, weeks 1–2: batch-make suitable projects such as cards, fabric pouches or dry baking mixes with appropriate ingredients and storage dates. One or two hour-long sessions a week may be enough.
- November, weeks 3–4: finish small gifts, test packaging and buy additional materials only if needed.
- December, weeks 1–2: complete projects according to their instructions and begin wrapping. Do not assume all homemade candles or soaps will be ready on the same schedule; use tested specialist methods if making them.
- The final week: wrap the remaining gifts, add names and check the delivery list.
Thoughtful lower-cost ideas
- Biscuit or cake-mix jars — use clean food-safe containers, ingredient and allergen information, and complete baking instructions. Calculate the cost from current local prices rather than relying on old Brazilian price estimates.
- Small candles — a ready-made candle can be a simpler option. Homemade versions need suitable candle-rated vessels and a tested formulation; an arbitrary reused jar is not necessarily safe.
- Scented fabric sachets — suitable for someone who enjoys fragrance, but check sensitivities and product instructions. Keep away from children and pets and do not place them where they obstruct a driver’s view.
- Decorated biscuits — pack in suitable food packaging, with ingredient information and an appropriate storage period based on the recipe.
- Personalised cards — a drawing or simple print can be inexpensive and meaningful. Include materials and printing when comparing costs.
Practical packaging with less waste
- Useful materials: plain paper, reusable fabric bags, suitable reused containers, cloth ribbon, paper labels and string. Choose packaging appropriate to the contents.
- A simple wrapping method: fold paper around the present, secure it with string and add a name label. A reusable ornament can provide a finishing touch.
- Economical alternatives: reuse clean boxes or gift bags. Newspaper can be an outer wrap for suitable non-food gifts; keep printing ink away from edible contents by using food-safe packaging.
Personal touches
- Handwritten notes: a short, specific message can make a modest present more personal.
- Instructions: food gifts need ingredients, allergens and reliable storage guidance. Candles need suitable use and safety instructions. Do not invent a shelf life.
- Photographs or shared memories: a small photograph or a note about a shared occasion can suit close friends and family.
Organising a batch
- Separate the stages: cut materials, prepare the contents and wrap in distinct sessions.
- Set up work areas: keep food preparation separate from paints, glue, fragrances and other craft materials.
- Use a timer: work in blocks of around 25–40 minutes, with breaks as needed.
- Label batches: record preparation dates and contents so you can follow the correct storage instructions.
Storage, transport and final checks
- Fragile items: cushion them with clean packing paper or reused protective packaging inside a sturdy box. Avoid loose dusty materials around food gifts.
- Food: use the storage conditions the product needs. A cool cupboard is suitable only for shelf-stable foods; chilled gifts need refrigeration and suitable transport.
- Deliveries: group presents by route or household to reduce unnecessary trips.
Gradual preparation helps you control costs and presentation while keeping gift-giving personal rather than rushed.
Involving family and children: simple, enjoyable jobs

Involving the household starts with clear, manageable responsibilities. Small contributions can share the workload without turning every activity into a task that must be completed perfectly.
Age-appropriate ideas
- Ages 3–5: choose music, add stickers or sort large, non-breakable decorations under close supervision. Avoid small parts, batteries and sharp edges.
- Ages 6–9: make simple paper decorations, decorate labels or help wrap presents with supervision.
- Ages 10–13: assemble gift kits or help with a simple recipe alongside an adult. Leave electrical testing, plugging in lights and repairs to a competent adult.
- Teenagers: help organise shopping lists, photograph progress with permission or assist with the day’s arrangements.
Organising the routine
- Choose short sessions: try 20–30 minutes when convenient, or two weekly craft sessions, adapting to the child rather than insisting on a fixed duration.
- Make jobs specific: ask someone to stick on five paper bows instead of giving them the entire wrapping project.
- Use a simple chart: pictures or stickers can show progress without creating competition.
- Review each week: take ten minutes to adjust responsibilities and appreciate what people have done.
Enjoyable activities with a practical purpose
- An ornament workshop: turn suitable clean materials into decorations and discuss ways to reuse them.
- A baking session: make a familiar biscuit recipe together. Children can decorate cooled biscuits while adults handle the oven and hot trays.
- A festive treasure hunt: hide suitable objects in safe, accessible places and use clues to involve younger children.
- Paired projects: let an adult and child work together on one small item.
Encouragement and recognition
- Simple appreciation: a sticker, shared film evening or a few kind words can recognise the effort. Keep any treats appropriate to dietary needs and avoid making participation a source of pressure.
- Show the results: display completed decorations somewhere they can be enjoyed without obstructing a route.
- Rotate suitable jobs: let family members try different activities while respecting preferences and abilities.
Safety and practical guidance
- Choose suitable materials: use age-appropriate glue, scissors and non-breakable decorations. A plastic object can still be unsuitable if it has small parts or sharp edges.
- Supervise actively: adults should manage electrical lights, sockets and cables. Keep hot glue, blades and other hazardous tools away from children’s activities.
- Set straightforward rules: do not run with tools, put materials away afterwards and wash hands before food preparation and after messy crafts.
Tracking progress
- Mark completed tasks: a paper checklist or shared app can make progress visible.
- Adjust the workload: remove, simplify or redistribute jobs if someone is becoming overwhelmed.
- Record the stages: before-and-after photographs can become pleasant memories, provided everyone is happy to be photographed.
Clear, suitable activities can make preparation part of the celebration itself, with time spent together rather than a demand for perfect results.
Budget and sustainability tips for the plan

Saving money and reducing waste often begins with using what you already own. Consider materials, energy and food together rather than assuming every homemade or natural item has a lower impact.
Thoughtful shopping
- Spread necessary purchases: compare prices and buy gradually where it helps your budget. Avoid buying extra items just to use a promotion.
- Choose versatile items: decorations suitable for several occasions may be useful for longer.
- Consider local suppliers: local collection can be convenient and avoid urgent delivery charges. Cost and environmental impact still depend on the product, transport and how it was made.
Reuse and crafts
- Reuse appropriate packaging: clean boxes and suitable food-safe jars can have another use.
- Refresh older decorations: a new ribbon or arrangement may be enough. Use any paint safely and only on appropriate surfaces.
- Use natural materials thoughtfully: pine cones, fallen twigs or dried citrus can work in decorations, but collect only where permitted, keep dry materials away from heat and remember that natural does not automatically mean sustainable.
Energy and lighting
- Consider efficient LED lights: they generally use less energy than comparable incandescent sets. Buy suitable products and check them before decorating.
- Limit running time: a suitable timer can help control use, but does not replace instructions to unplug lights when away or asleep.
Food and suppliers
- Compare seasonal produce: locally available seasonal fruit and vegetables may suit the menu, but compare actual price and quality rather than assuming they are always cheaper.
- Plan portions: use recipe yields, guests’ preferences and your experience to avoid unnecessary excess.
- Share the menu: willing guests can bring agreed dishes, with dietary information and suitable transport arrangements.
Wrapping with less waste
- Use plain paper or fabric: simple wrapping can look attractive, and reusable fabric can be kept for another occasion.
- Keep ties for reuse: string and fabric ribbon may be easier to reuse than disposable plastic decorations. Check local rules before putting wrapping materials in recycling.
Four practical ways to control spending
- Set priorities: choose three essentials, such as the meal, tree and lighting, before adding extras.
- Set a weekly allowance: divide an affordable total across the weeks without treating unused money as something that must be spent.
- Batch similar tasks: making several matching cards or decorations can save time and materials.
- Plan for what remains: store decorations for reuse and handle leftover food according to safe storage guidance.
Habits worth keeping throughout the year
- Store carefully: protecting items can extend their useful life and reduce replacement purchases.
- Borrow or exchange: share suitable items with friends or neighbours where everyone agrees.
- Keep useful notes: record successful ideas, suppliers and prices as a reference, checking them again next year.
Conclusion
A weekly plan from October to December can make Christmas preparation more manageable. Sharing jobs, testing unfamiliar recipes and pacing purchases leaves room to enjoy the season as well as organise it.
Start simply: choose a few short, repeatable tasks. Small steps are more useful than an ambitious schedule that does not fit your life.
Thank you for reading. Follow our social channels for more practical festive ideas and checklists.
Visit the I Love Christmas blog for more seasonal inspiration, and enjoy preparing at your own pace.
FAQ: planning Christmas from October to December
Why begin in October?
It leaves time to spread tasks and purchases, test unfamiliar recipes and reduce the number of jobs waiting in December. You can also start later and simplify the plan.
How can I manage when weekday time is limited?
Break work into sessions of around 20–40 minutes, choose three to five manageable weekly tasks and remove non-essential jobs when necessary.
How can children help safely?
Offer age-appropriate activities such as stickers, cards and large non-breakable decorations, with active adult supervision. Adults should handle electrical items, hot equipment and sharp tools.
How can I spend less on decorations and presents?
Reuse what you have, choose a few priorities, compare prices and batch-make suitable small gifts. Buying early or making something yourself does not always cost less, so check the full cost.
How can I test recipes without wasting ingredients?
Choose a reliable smaller version that can become an ordinary household meal. Record seasoning and timing adjustments, and repeat only when a specific change needs testing.
How should I store decorations and gifts?
Use labelled boxes, cushion fragile items and keep them in a suitable dry place. Follow separate storage and use-by guidance for food gifts rather than treating them like decorations.
Sources and Further Reading
- UK food-safety guidance: chilling, freezing and defrosting
- Electrical Safety First: Christmas safety