Chicken coxinhas with Catupiry are Brazilian teardrop-shaped snacks made from dough cooked with chicken stock, filled with shredded chicken and creamy cheese, then breadcrumbed and fried. This guide covers the dough, shaping and cooking, with baked variations, safe storage and considerations for making them to sell.
Chicken coxinhas with Catupiry have a crisp coating and a soft, savoury centre. Their distinctive shape takes a little practice, but a well-cooked dough and a firm filling make assembly much easier.
Ingredients for chicken coxinhas with Catupiry
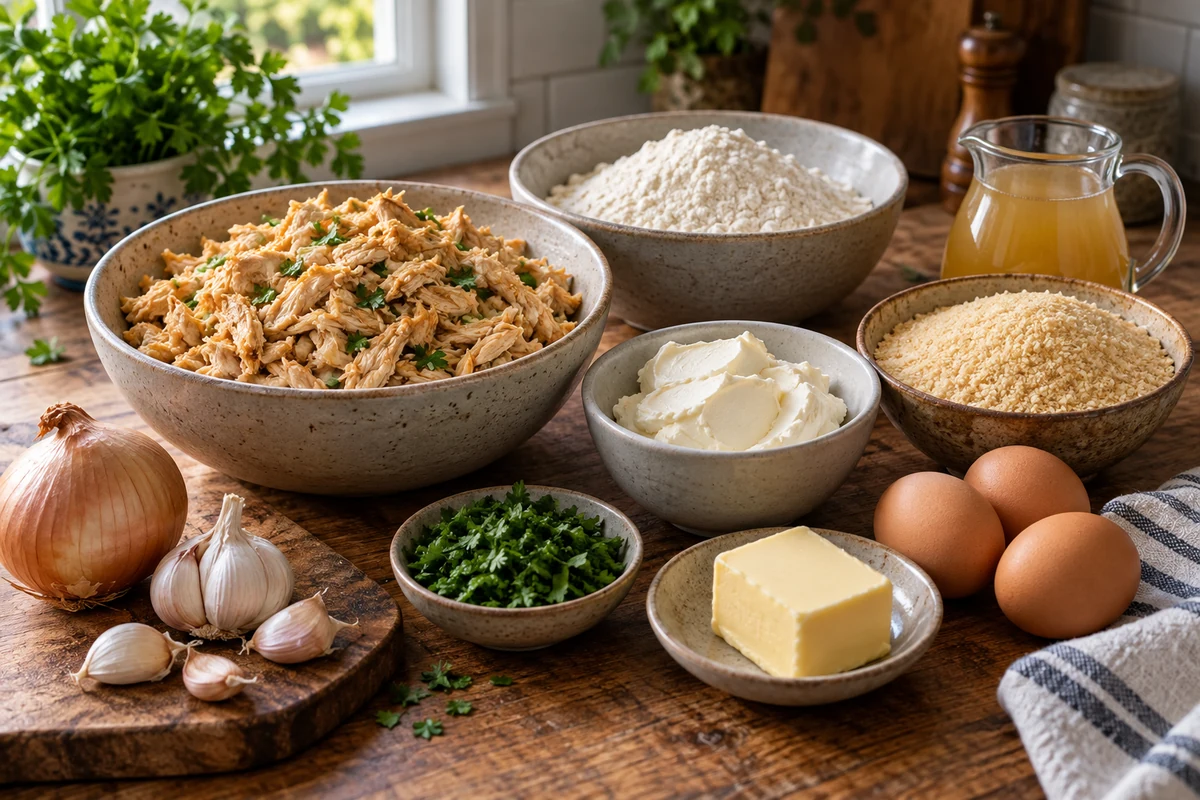
You will need the following ingredients for the chicken filling, cooked dough and breadcrumb coating:
- 1 litre chicken stock – measured after cooking the chicken, or prepared stock made according to its instructions. Choose a lower-salt stock if possible and season to taste.
- 500 g plain flour – for the dough. A gluten-free version needs a suitable tested dough recipe rather than a simple flour swap.
- 3 tbsp butter for the dough, plus 1 tbsp for the filling – vegetable oil can replace the separate tablespoon used to soften the onion.
- 600 g raw boneless chicken breast – cooked and shredded, or around 500 g ready-cooked shredded chicken. These are alternative starting amounts rather than a guaranteed raw-to-cooked yield. Boneless thigh meat also works.
- 250 g Catupiry or thick Brazilian requeijão – alternatively, use 200 g cream cheese, loosening with a little milk only if needed. The filling should remain thick.
- 1 medium onion, finely chopped
- 2 garlic cloves, finely chopped
- ¼ cup chopped parsley and chives – loosely measured, or to taste.
- Salt to taste – up to the suggested 1 tsp may be unnecessary with salted stock and cheese; start with less.
- ½ tsp ground black pepper – or to taste.
- 1 tsp sweet paprika or Brazilian colorau, optional
- 2 eggs, beaten – for coating; the amount needed depends on size and handling.
- 2 cups dried breadcrumbs or panko – for coating.
- Vegetable oil for frying – the amount depends on the pan. Never fill a saucepan more than one-third full with oil. For the baked option, use a little oil to brush the coating.
Substitutions and tips
- Chicken: freshly cooked chicken is simplest. Previously cooked chicken must have been cooled and stored safely; avoid repeatedly heating and cooling it while preparing the filling, and count its earlier storage time.
- Catupiry: thick cream cheese is an accessible alternative. Add milk only if necessary, because a loose filling is harder to seal.
- Gluten-free dough: use a tested gluten-free coxinha recipe and suitable breadcrumbs. Stock, seasonings and preparation surfaces also need checking.
- Baked coating: baking with a light brush of oil gives a different texture from deep-frying. Start checking at the suggested time below and confirm the centre is hot throughout.
- Seasoning: adjust salt and pepper in the fully cooked filling. A small pinch of nutmeg is optional.
How to make chicken coxinhas with Catupiry
- Cook and shred the chicken: simmer the raw chicken in water or stock until fully cooked, with no pink meat and a steaming-hot centre. A clean food thermometer reading of 75°C for 30 seconds is one suitable check. Shred with two forks. Measure 1 litre of the cooked stock, topping up with prepared stock if necessary.
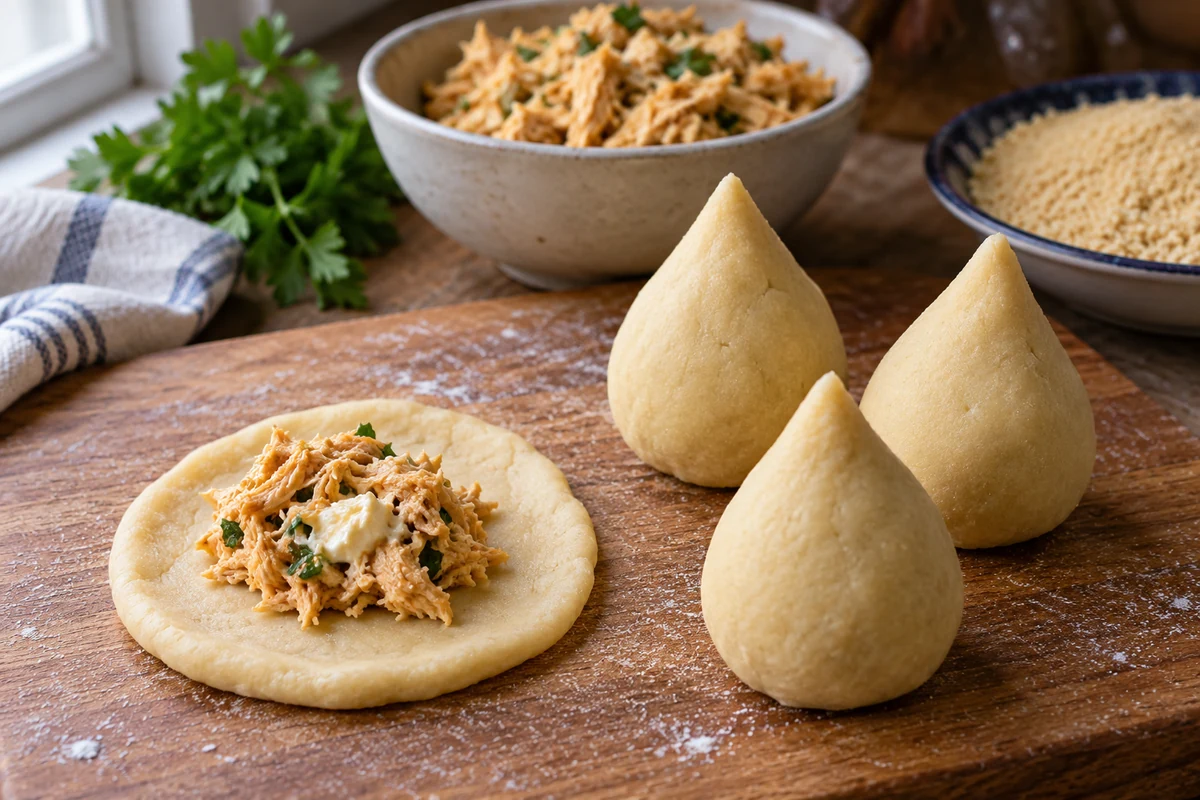
- Make the filling: soften onion and garlic in the separate tablespoon of butter or oil. Add the fully cooked shredded chicken, paprika if using, pepper and salt to taste. Stir in the herbs and Catupiry to make a thick mixture. Cool promptly in a shallow container and keep chilled until assembly.
- Cook the dough: bring the measured litre of stock and 3 tbsp butter to the boil in a sturdy pan. Add the flour and stir firmly until evenly combined and the dough pulls away from the pan. Continue cooking and stirring so there are no dry flour pockets.
- Smooth the dough: transfer to a clean, lightly greased surface and allow to cool until safe to handle. Work briefly until smooth and pliable. If unusually firm, add a little extra prepared stock at a time; do not burn your hands on hot dough.
- Shape: take an even portion of dough and press it into a small cup in your palm. Add a modest spoonful of chilled filling, draw the edges together and seal into a teardrop shape. Avoid overfilling.
- Coat: dip each coxinha in beaten egg, allow excess to drip off and roll in breadcrumbs or panko, pressing gently to cover evenly.
- Fry carefully: use a stable deep pan no more than one-third full of oil, or a thermostatically controlled fryer according to its instructions. Heat the oil to 170–180°C and fry a few coxinhas at a time. Small pieces may take about 4–6 minutes, but check that the filling is steaming hot throughout, not just that the coating is golden. Drain on a rack over a tray.
- Baked alternative: lightly brush the breadcrumbed coxinhas with oil and bake at 200°C conventional/180°C fan. Start checking around 20–25 minutes, turning carefully partway through, and continue until the centre is steaming hot. Size and starting temperature affect the time.
- Test one first: cook a sample to check sealing, dough thickness and centre temperature before cooking the rest.
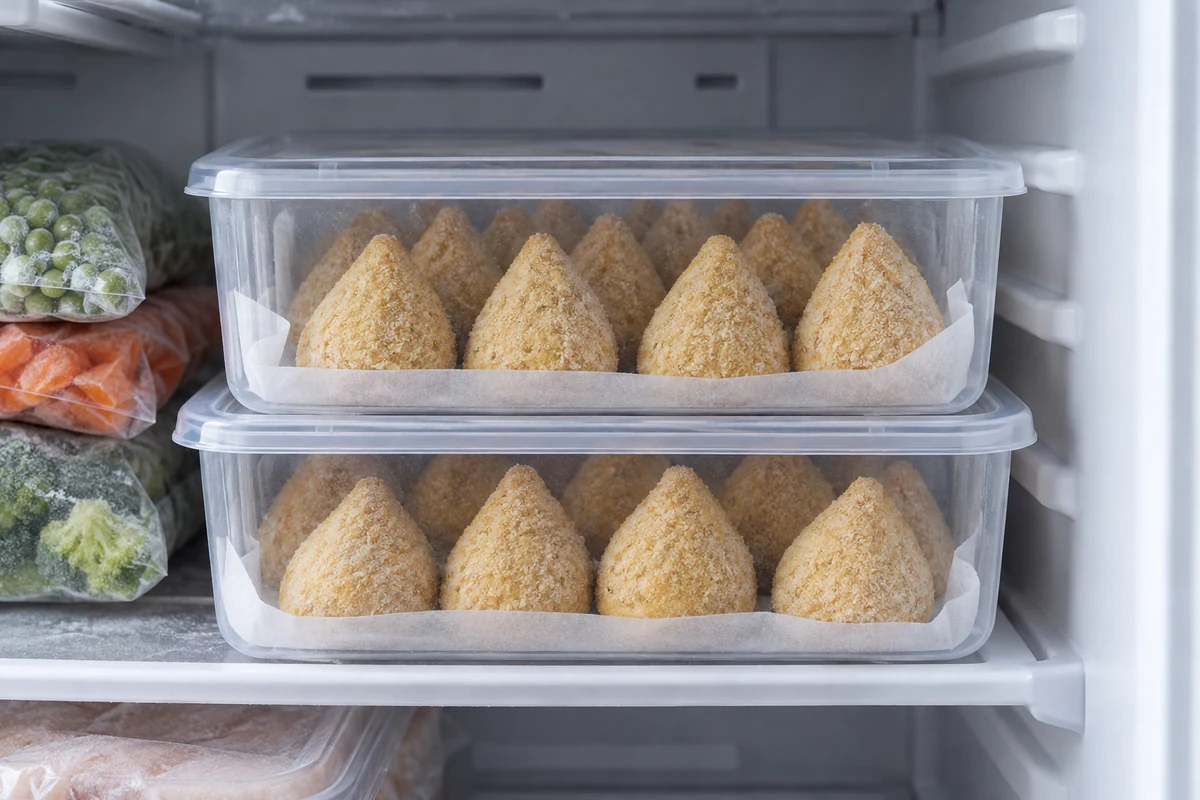
- Freeze for later: freeze shaped, breadcrumbed coxinhas made with cooked, promptly cooled filling in a single layer until firm, then pack securely. For this home recipe, thaw fully in the fridge before cooking rather than putting icy pieces into hot oil.
- Serve: allow a brief rest because the cheese centre can be very hot. Offer chopped herbs and small dishes of sauce, keeping perishable dips chilled until needed.
Quick tips
- Oil temperature: use a suitable cooking thermometer or controlled fryer to monitor 170–180°C. Stop heating if oil smokes.
- Dough structure: cook and stir until the dough is cohesive and comes away from the pan, then smooth it once cool enough to handle.
- Prevent leaking: use a thick, chilled filling, keep the amount modest and seal every seam. Brief refrigeration can help; freezing is not a substitute for a sound seal.
- Safe handling: keep hands and equipment clean, avoid splashing water into hot oil and use appropriate long-handled utensils.
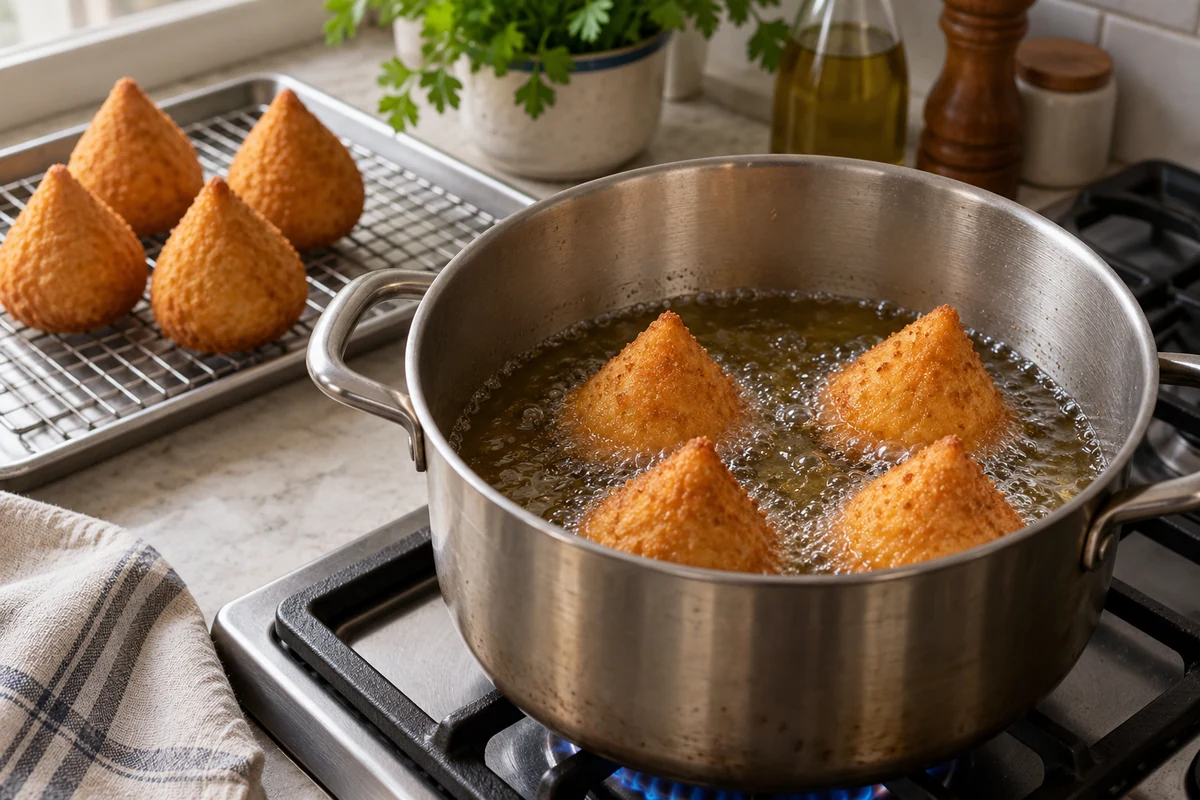
Even dough thickness, a firm filling and controlled cooking are more useful than rushing a large batch. Test one coxinha before cooking the rest.
Shaping
- Check the dough: it should be smooth and pliable, cool enough to handle, and neither sticky nor crumbly.
- Portion evenly: weigh dough portions if useful. Around 40–50 g of dough makes a medium-to-large snack once filling is added; it is not the finished weight.
- Make a cup: press a portion into a disc, then cup it gently to leave space for filling.
- Fill sparingly: add enough filling to flavour the snack while leaving a clear rim for sealing. Gently remove large air pockets without squeezing filling through the dough.
- Form the teardrop: bring the edges together, pinch closed and shape a rounded base with a pointed top.
- Chill if necessary: refrigerate shaped pieces if they soften during handling. If filling is runny, correct its consistency rather than merely freezing it temporarily.
Breadcrumbing
- Set up the bowls: put beaten egg in one shallow bowl and breadcrumbs in another. An additional light flour dusting is optional and requires a little extra flour beyond the dough quantity.
- Coat in order: dust lightly with flour only if needed, then dip in egg and coat with crumbs.
- Press gently: help the crumbs adhere without rubbing away the coating or distorting the shape.
- Drain excess egg: let drips fall back into the bowl before adding crumbs. Discard leftover egg wash after coating.
- Choose your crumbs: panko gives a coarser, crisp finish; fine dried breadcrumbs give a more even surface.
Frying
- Monitor the oil: aim for 170–180°C, using a suitable thermometer or the fryer controls.
- Cook small batches: leave ample room rather than following a fixed number for every pan. Too much food at once lowers the oil temperature and can cause overflow.
- Check doneness: approximately 4–6 minutes may suit smaller pieces, but the centre must be steaming hot. Check a sample and adjust for size and temperature.
- Use a suitable pan: leave generous space above the oil and never fill a saucepan more than one-third full. Choose a deep enough vessel for the food rather than topping up an unsuitable shallow pan.
- Drain well: lift with a suitable slotted utensil onto a rack over a tray, allowing excess oil to drain.
- Inspect a sample: check the centre, seal and coating before cooking the full batch.
Practical frying tips
- Seal carefully: gaps in the dough allow the cheese filling to escape.
- Recover the temperature: allow the oil to return to the target range between batches without overheating it.
- Freeze for storage, not a shortcut: firm shaped pieces on a tray before packing, then thaw safely in the fridge before cooking this recipe.
- Keep excess moisture out: a watery filling makes shaping difficult and can cause splattering if it leaks.
- Stay at the hob: never leave heating oil unattended and keep water away. Never put water on an oil fire.
Chicken coxinha variations: baked options and fillings
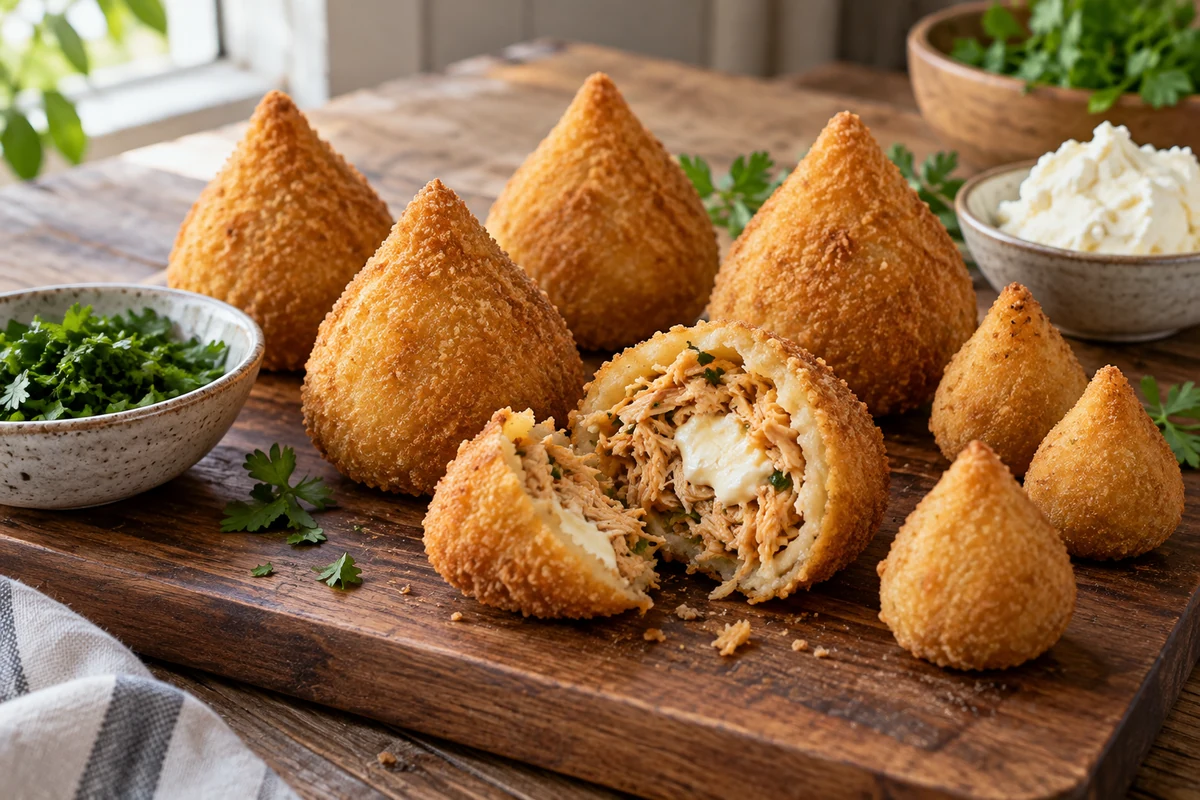
Try a baked version, a different dough recipe or another filling once the basic shaping method is familiar. Changes to ingredients can affect sealing and cooking time.
Baked coxinhas
Baking avoids immersing the snacks in oil, though it gives a different crust. The result is not identical to the fried version.
- Dough: use the same cooked dough with 1 litre stock, 3 tbsp butter and 500 g flour.
- Filling: use the chicken-and-cheese filling above, keeping it thick and chilled for shaping.
- Coating: use egg and breadcrumbs or panko. Other coatings change the texture and may need a separate trial.
- Bake: brush lightly with oil and place in a preheated oven at 200°C conventional/180°C fan. Begin checking after 20–25 minutes and continue until cooked through and steaming hot in the centre.
- A crisper finish: panko can help. If briefly using the grill to colour the coating, watch closely and only do so after the centre is thoroughly heated.
Alternative ingredients and cooking methods
Ingredient changes can suit preferences, but they do not automatically make a snack low-calorie, gluten-free or vegan.
- Sweet potato dough: mashed sweet potato with oat or rice flour is a different dough style. Use a tested recipe for its liquid and flour balance rather than adding mashed potato to the full litre of stock in this recipe.
- Less-rich filling: a smaller amount of soft cheese, such as 150–200 g, changes the balance. Yoghurt is a more liquid alternative and may split when heated; keep any experimental filling firm enough to seal.
- Alternative coating: finely crushed cereal crumbs or oats give another texture. An egg-free coating alone does not make a chicken-and-dairy snack vegan; all animal ingredients would need replacing.
- Air frying: follow your appliance’s guidance and test a small batch, checking the centre temperature. Do not assume that a short time based only on surface browning will be sufficient.
- Dietary requirements: a milk-free version needs suitable cheese and dough fat, while a gluten-free version needs an appropriate dough, coating, stock and safe handling. Oats are not automatically suitable for everyone avoiding gluten.
Alternative fillings
Changing the filling is an easy way to vary the flavour. Keep it fully cooked where required, well drained and firm before shaping.
- Chicken and Catupiry: the classic combination of shredded chicken and thick creamy cheese used above.
- Brazilian calabresa sausage and cheese: try 300 g sausage, cooked according to its instructions and finely chopped, with 150 g mozzarella. Drain excess fat and cool promptly.
- Four cheeses: a mixture of mozzarella, Parmesan-style cheese, provolone and blue cheese gives a strong flavour. Keep portions small enough to seal and use vegetarian-labelled products if needed.
- Creamy hearts of palm: combine drained chopped hearts of palm with a little thick white sauce and herbs.
- Vegetarian filling: cooked mushrooms, grated carrot and peas can be combined with tofu or suitable ricotta. Use vegetable stock for the dough as well.
- Sweet and savoury: small pieces of mild Minas-style cheese with a little chilli jam make a different filling. Avoid using so much jam that it leaks.
How to change the filling without leaks
- Consistency: drain vegetables and keep sauces thick rather than watery.
- Proportion: use only as much filling as the dough can enclose securely. A tablespoon may suit a 40–50 g dough portion, but reduce it if the rim cannot close comfortably.
- Cooling: cool cooked filling promptly in a shallow container and refrigerate. Do not assume every batch becomes cold in 10–15 minutes.
- Sealing: pinch all joins closed and shape gently without creating thin spots.
Planning a batch
- Cook a sample: test shaping, coating and cooking before committing the whole batch.
- Freeze separately: firm shaped, breadcrumbed pieces on a tray before packing so they do not stick together.
- Yield: the number depends on the amount of dough and filling used per piece. Weigh the finished batch if planning portions; 40–50 g of dough is not a finished coxinha weight, and a fixed yield should not be assumed.
Making coxinhas to sell: packaging, pricing and storage
Selling food requires a controlled process, suitable premises and packaging, and accurate information for customers. The home-storage notes below are not a validated commercial shelf life.
Packaging and presentation
- Food-safe boxes: choose packaging suited to hot or chilled food as appropriate, with enough space to avoid crushing the coating.
- Individual liners: greaseproof paper can make freshly served portions easier to handle.
- Frozen packs: use suitable freezer packaging. Vacuum packing requires its own food-safety assessment and does not automatically establish a longer safe shelf life.
- Temperature control: choose insulated equipment appropriate to the delivery conditions and verify the food temperature. A promised 30–40 minute journey alone is not a safety control.
- Clear information: use readable labels with the information required for the product and sales format, plus validated storage and cooking instructions.
Working out a selling price
- Calculate unit cost: divide ingredient and packaging costs by the actual number of saleable pieces, allowing for waste.
- Include labour: account for preparation, cooking, packing and cleaning time.
- Allocate overheads: include an appropriate share of energy, rent, equipment and other costs without counting packaging twice.
- Distinguish mark-up from margin: mark-up is calculated on cost; gross margin is calculated on the selling price. They are not the same percentage.
- Illustration only: a unit costing £2 and sold for £4 has a 100% mark-up and a 50% gross margin before any costs excluded from that unit figure. These are example numbers, not a suggested market price.
- Bundles: a small snack-and-drink offer may be convenient, but check its actual cost and profitability before discounting.
Home storage guidance
- Serve promptly: freshly cooked coxinhas have the best texture. Do not plan to leave chicken-and-cheese snacks unrefrigerated for four hours; cool and refrigerate leftovers within 2 hours of cooking.
- Refrigeration: store covered at 5°C or below and use within 48 hours, counting any earlier storage of cooked filling or chicken.
- Freezing: assembled, breadcrumbed coxinhas with cooked filling can be frozen before frying, while freshly cooked ones should be cooled promptly first. Plan to use uncooked-coated portions within about 3 months and fried portions within about 2 months for quality, with clear labels distinguishing them.
- Thawing and reheating: thaw fully in the fridge and use within 24 hours of defrosting. Cook unfried portions thoroughly; reheat already fried ones only once until steaming hot throughout. Do not use short fixed timings or golden colour as the only check.
- Labelling: record the preparation date, storage method and whether the pieces are already cooked. Commercial use-by dates need an appropriate assessment.
Transport and delivery
- Plan the route: minimise delays, but base safe transport on suitable temperature control rather than a universal journey duration.
- Use appropriate equipment: keep chilled food cold or hot food safely hot in containers intended for that purpose, checking temperatures within the business’s procedures.
- Protect the shape: keep trays level and avoid stacking heavy packs on top of delicate snacks.
- Choose delivery arrangements carefully: check that the carrier can maintain the required conditions and deliver the accompanying food information.
Food information and business requirements
- Allergen information: requirements depend on whether food is prepacked, packed for direct sale or sold loose. The standard recipe contains wheat, milk and egg; stock or sauces may add other allergens. Consult the Food Standards Agency’s guidance for the actual product and sales format.
- Food hygiene: use documented safe handling, cleaning and temperature-control procedures. Gloves do not replace handwashing or prevent contamination by themselves.
- Before trading: for a UK food business, consult your local authority about registration, premises and the rules applying where you operate. The Food Standards Agency says registration should be completed at least 28 days before food operations begin. Check the linked official guidance rather than treating this recipe as a complete business checklist.
Practical sales ideas
- Tasting samples: small samples may help customers choose, provided hygiene, allergen information and temperature control are managed properly.
- Different pack sizes: consider single snacks, mini party portions and family packs, with clearly stated quantities.
- Frozen options: offer frozen packs only with a validated process and clear cooking and storage instructions suitable for the product.
- Repeat orders: loyalty offers or regular orders can help planning, but avoid promising income before demand and costs are known.
- Useful instructions: give customers tested directions for the size, state and cooking method of the coxinhas they receive.
Final thoughts
A smooth dough, thick filling and carefully sealed shape help produce crisp chicken coxinhas with a creamy centre. Try the baked option or a different filling if you like, testing a small batch and checking that the centre cooks thoroughly.
Thank you for following the recipe. Visit the I Love Christmas blog for more festive food ideas and practical cooking guidance.
Chicken coxinhas with Catupiry: frequently asked questions
How should I store prepared coxinhas?
Cool cooked coxinhas promptly and refrigerate within 2 hours. Keep covered at 5°C or below and use within 48 hours, counting earlier storage of the filling. Freeze properly prepared portions for longer storage and label whether fried or unfried.
How do I reheat them without losing all the crunch?
An oven or air fryer generally keeps the coating crisper than a microwave. Thaw frozen portions in the fridge and reheat once until steaming hot throughout, following appliance guidance and checking the centre rather than relying on a fixed short time.
How do I stop the Catupiry leaking?
Use a thick chilled filling, avoid overfilling and seal every join carefully. Refrigerate softened pieces if necessary; chilling cannot repair an open seam or a watery filling.
Can I make a baked or gluten-free version?
The same basic coxinhas can be baked with a light brush of oil, with a different crust. For gluten-free coxinhas, use a tested dough recipe and suitable coating, stock and seasonings. Simply replacing some flour with sweet potato or ordinary oats is not enough.
How can I calculate a selling price?
Include ingredients, packaging, labour, waste and an appropriate share of overheads in the unit cost. Then distinguish a mark-up on cost from a margin on sales: a £2 cost and £4 selling price gives 100% mark-up but 50% gross margin before any excluded costs.
Can I freeze coxinhas after frying them?
Yes, cool promptly and freeze well wrapped, aiming to use within about 2 months for quality. Thaw fully in the fridge, use within 24 hours of defrosting and reheat only once until steaming hot throughout.
Sources and Further Reading
- Food Standards Agency: cooking and reheating safely
- Food Standards Agency: chilling, freezing and defrosting safely
- London Fire Brigade: deep-fat frying safely
- Food Standards Agency: registering a food business
- Food Standards Agency: allergen guidance for food businesses
- Food Standards Agency: selling food for delivery