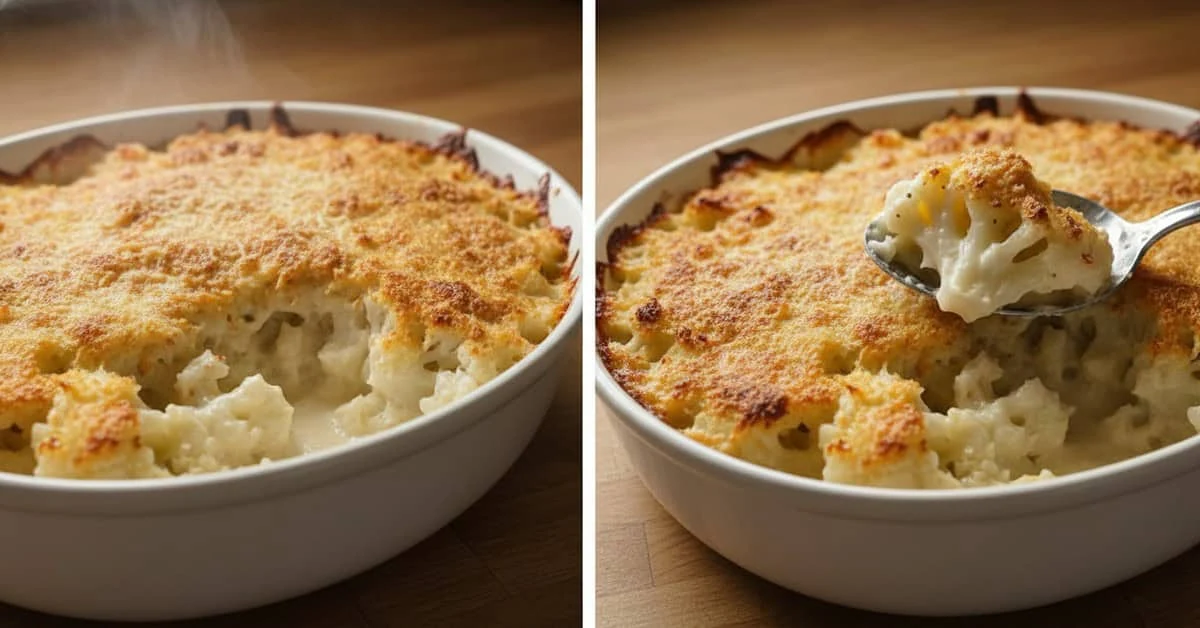
Decorated Christmas biscuits start with buttery, festive shapes and royal icing for outlines and smooth filled areas. Use gel colours, adjust the icing for piping or flooding, and let it dry fully before packing. Storage depends on the icing recipe and any fillings; plain biscuits with suitable, fully dried royal icing generally keep their quality for about 5–7 days in an airtight tin.
Ready to make Christmas biscuits a festive centrepiece? These straightforward steps explain the dough, icing and finishing touches, even if you have never decorated biscuits before.
Ingredients for Christmas Biscuits with Royal Icing

To make Christmas Biscuits Decorated with Royal Icing, gather the following ingredients:
- 375 g plain flour – for a gluten-free version, use a tested cut-out biscuit recipe rather than assuming any flour blend will work gram for gram.
- 1 teaspoon baking powder – gives a little lift; leaving it out produces a denser biscuit and may change the spread.
- ¼ teaspoon salt – balances the sweetness.
- 170 g unsalted butter, softened – a baking block or solid coconut oil changes the flavour and texture, so test a small batch if substituting.
- 200 g caster sugar – reducing it to 150 g changes spread and texture; it does not reliably make the biscuits softer.
- 1 large egg – for an egg-free or vegan version, follow a tested alternative dough; apple purée and chia are not interchangeable with egg in every cut-out recipe.
- 1 teaspoon vanilla extract – or the finely grated zest of ½ lemon.
- 1 tablespoon (15 ml) milk – optional, only if needed to bring the dough together; a suitable plant-based drink can be used.
Royal icing
- 360 g icing sugar – sifted to remove lumps.
- 2 large pasteurised egg whites – alternatively, follow the complete royal icing formula on your meringue powder packet, including its sugar and water quantities. Meringue powder normally contains egg.
- ½ teaspoon cream of tartar, optional – helps stabilise the icing.
- 1–2 teaspoons lemon juice or vanilla extract – add gradually for flavour, allowing for the extra liquid.
- Gel food colours – small amounts give strong colours without adding much liquid.
- Water, a little at a time – to make flowing icing for filling shapes; keep outline icing firmer.
Decorations and equipment
- Sprinkles, ready-made edible decorations and coloured sugar – choose colours and sizes to suit the design.
- Small edible sweets, optional – for finishing touches; choose decorations appropriate for the ages of the people eating them.
- Biscuit cutters, such as stars, trees and bells – shapes about 6–8 cm across are a useful starting point.
- Baking trays lined with baking paper – to prevent sticking and make transferring the biscuits easier.
A note on measuring: weigh ingredients carefully. Changing the sugar or flour affects firmness, spread and baking time. Do not taste raw dough: both uncooked flour and egg can carry harmful bacteria.
How to Make Christmas Biscuits with Royal Icing
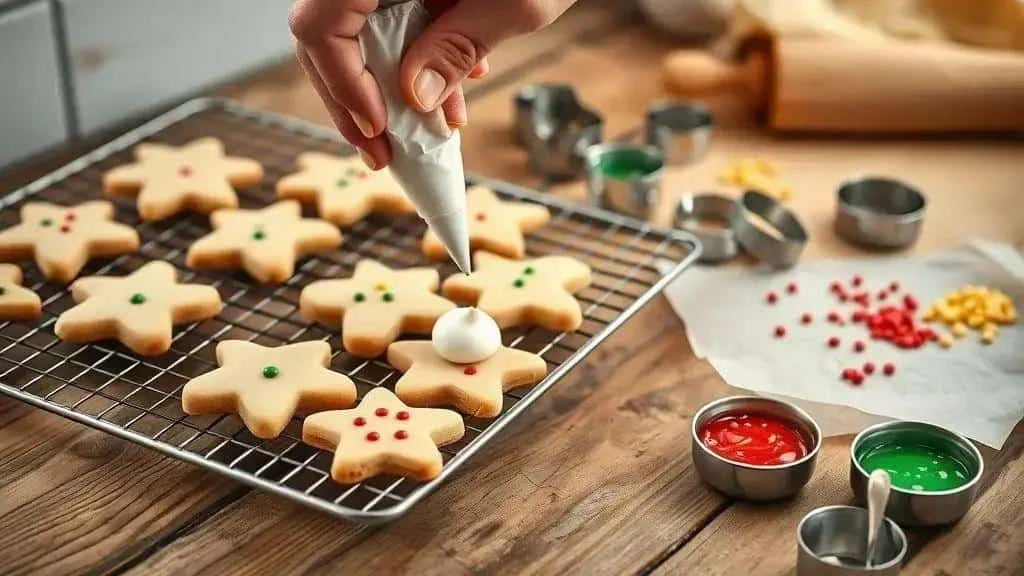
- Cream the butter and sugar: beat 170 g softened unsalted butter with 200 g caster sugar until pale and creamy.
- Add the egg and flavouring: beat in 1 large egg and 1 teaspoon vanilla extract until combined.
- Add the dry ingredients: combine 375 g sifted plain flour, 1 teaspoon baking powder and ¼ teaspoon salt. Add gradually to the butter mixture until a dough forms.
- Adjust the texture: if the dough is crumbly, add up to 1 tablespoon milk gradually. If it is very sticky, chill it before adding a light dusting of flour.
- Chill the dough: shape into a disc, wrap and refrigerate for 30–60 minutes. This makes rolling easier and helps the shapes hold.
- Roll out: heat the oven to 180°C, or 160°C fan. Roll the dough between two sheets of baking paper to an even 3–4 mm thickness.
- Cut the shapes: use 6–8 cm cutters and transfer to lined trays, leaving about 2 cm between biscuits.
- Bake: allow roughly 8–12 minutes, until the biscuits are cooked through with set edges and a lightly coloured underside. Timing varies with the cutter and oven; do not leave the centres raw to keep them pale.
- Cool: leave on the tray for 5 minutes, then transfer to a wire rack. Cool completely before icing.
Making the royal icing
- Sift the sugar: sift 360 g icing sugar to remove lumps.
- Egg white method: combine 2 large pasteurised egg whites with the sifted sugar and optional ½ teaspoon cream of tartar. Beat until smooth and firm enough to pipe; add the flavouring gradually.
- Meringue powder method: use the manufacturer’s complete royal icing recipe. Different powders need different amounts of sugar and water, so do not substitute a fixed number of spoonfuls for the egg whites. Check the allergen label.
- Adjust the consistency: keep outline icing thick enough to hold a line. For flooding, add water about ¼ teaspoon at a time until a ribbon slowly levels out in roughly 10 seconds.
- Colour: divide between bowls and stir in gel colour a little at a time. Liquid colours can thin the icing considerably.
- Fill the piping bags: use a fine nozzle, around size 1–3, for outlines. Put flooding icing in a separate bag with a small opening for controlled filling.
- Pipe outlines: outline each biscuit with firm icing and leave for about 5–10 minutes to begin setting.
- Flood the centres: fill inside the outlines with the thinner icing. Use a clean cocktail stick or small palette knife to guide it into corners and release bubbles.
- Add sprinkles: scatter decorations on while the flooded icing is wet so that they stick.
- Allow to dry: leave in a clean, dry place. A thin layer may firm up in 4–12 hours, but thick decoration can need 24 hours or longer. Follow the icing recipe’s handling advice and let each layer set before adding raised details.
Practical tips for beginners
- Test first: try colours and consistencies on a small plate before decorating the whole batch.
- Watch the humidity: a cool, dry workspace helps icing set more consistently than a humid kitchen.
- Keep equipment clean: wash and dry nozzles and reusable bags between colours to avoid unwanted streaks.
- Pack carefully: once fully dry, put plain iced biscuits in an airtight tin with separators. Follow the storage advice for your icing; cream or other perishable fillings need different handling.
Christmas Biscuit Variations

Vary the flavour, colour and presentation of your Christmas biscuits to suit the occasion.
Flavours and fillings
- Cinnamon and ginger: add 1 teaspoon ground cinnamon and ½ teaspoon ground ginger to the dough for a festive flavour.
- Chocolate: use a tested chocolate cut-out biscuit recipe. Cocoa absorbs liquid differently from flour, so replacing half a cup by volume can make this dough dry.
- Jam sandwiches: sandwich two biscuits with a thin layer of berry jam or dulce de leche. Do not overfill; follow the filling’s storage instructions.
- Citrus zest: add finely grated orange or lemon zest to the dough.
Shapes, sizes and textures
- Mini biscuits: use 2–3 cm cutters for small party portions and start checking them earlier in the oven.
- Larger gift biscuits: shapes around 6–8 cm leave room for more detailed decoration.
- Crisp or tender: thickness and baking time affect the texture. For a tender result, avoid overbaking, but always cook the dough through.
Colour schemes and decorating techniques
- Ombré: mix several shades of one colour by adding white icing, keeping their consistencies similar.
- Marbling: gently swirl two colours of flooding icing together.
- Lace details: use firm icing and a fine nozzle for delicate loops and filigree.
- Metallic touches: brush dried icing with a powder explicitly labelled edible and suitable for food. ‘Non-toxic’ or ‘for decorative use only’ does not mean edible.
Dietary adaptations
- Gluten-free: choose a tested gluten-free cut-out recipe and check the flour, baking powder and decorations. Prevent cross-contact with ordinary flour.
- Vegan: use a tested vegan biscuit dough and aquafaba royal icing recipe. Replace butter, egg and any milk, and check colours and sprinkles. Ordinary meringue powder contains egg and is not vegan.
- Less sugar: test reducing the dough’s sugar to 150 g if desired, accepting a different texture. Use less decoration rather than simply removing sugar from royal icing, which needs the right proportions to set.
Themes and creative sets
- Classic Christmas: trees, stars and bells in red, green and white.
- Modern and simple: clean shapes with smooth white icing and edible gold details.
- Playful designs: bright colours, edible sugar eyes and fondant details.
- Gift sets: arrange 6–12 biscuits in complementary flavours and colours.
Combining variations
- Balance flavour and decoration: simple designs suit strongly spiced biscuits, while a mild base lets intricate decoration take centre stage.
- Keep sizes consistent: bake similarly sized biscuits together for even results and easier packing.
- Try a small batch: test unfamiliar flavours, colours or techniques before making a large quantity.
Royal Icing Decorating Tips: Texture and Colour

These practical pointers make it easier to control icing texture and colour on your Christmas biscuits.
Icing consistencies
- Outline icing: thick enough to hold a piped line and form a firm peak when the spoon is lifted.
- Flooding icing: flows slowly and levels out in about 8–12 seconds, making it useful for filling outlined areas.
- Quick adjustments: add drops of water to thin icing or sifted icing sugar to thicken it, checking on a plate as you go.
Texture techniques
- Wet-on-wet: add dots or stripes while the base is wet so the colours settle into one smooth layer. Sprinkles also stick best at this stage.
- Marbling: drop a second colour onto wet icing and drag a cocktail stick lightly through it.
- Piping and lace: firmer icing and a fine nozzle give delicate lines, loops and flourishes.
- Brush embroidery: pipe a thick outline, then pull it gently inwards with a clean, slightly damp food-use brush to create a petal effect.
- Crunchy finishes: sprinkle coloured sugar or edible decorations onto wet icing.
Working with colours
- Choose gel colours: a small amount gives strong colour without adding much water.
- Mix gradually: add darker colour to lighter icing a little at a time to avoid overshooting.
- Create an ombré palette: prepare three bowls of the same colour at different strengths, then work from light to dark.
- Apply edible metallic powder: brush onto dry icing as directed on the product label; use only products labelled edible.
Tools and organisation
- Piping bags and nozzles: fine nozzles, around sizes 1–3, suit details; use a slightly wider opening where the outline needs it.
- Bowls and cling film: keep colours separate and cover unused icing to prevent a crust forming.
- Cocktail sticks: useful for tiny adjustments and removing bubbles.
- A dry workspace: moderate temperature and low humidity help the icing dry evenly.
Efficient decorating and a neat finish
- Practise first: try colours and piping consistency on baking paper before decorating the biscuits.
- Let layers set: thin details may begin to firm in 20–30 minutes, but check before adding another layer. Full drying takes much longer.
- Avoid damp conditions: moisture can soften the icing and spoil the finish.
- Add finishing touches at the right stage: apply sprinkles to wet icing, but use edible metallic powders on a dry surface unless their instructions say otherwise.
Quick fixes
- Bubbles: pop with a cocktail stick and smooth the wet icing immediately.
- Overly strong colours: stir in white icing to lighten the shade without adding water.
- Gaps in an outline: fill with firm icing and gently join the edges with a cocktail stick.
Royal Icing: Methods, Consistencies and Common Mistakes
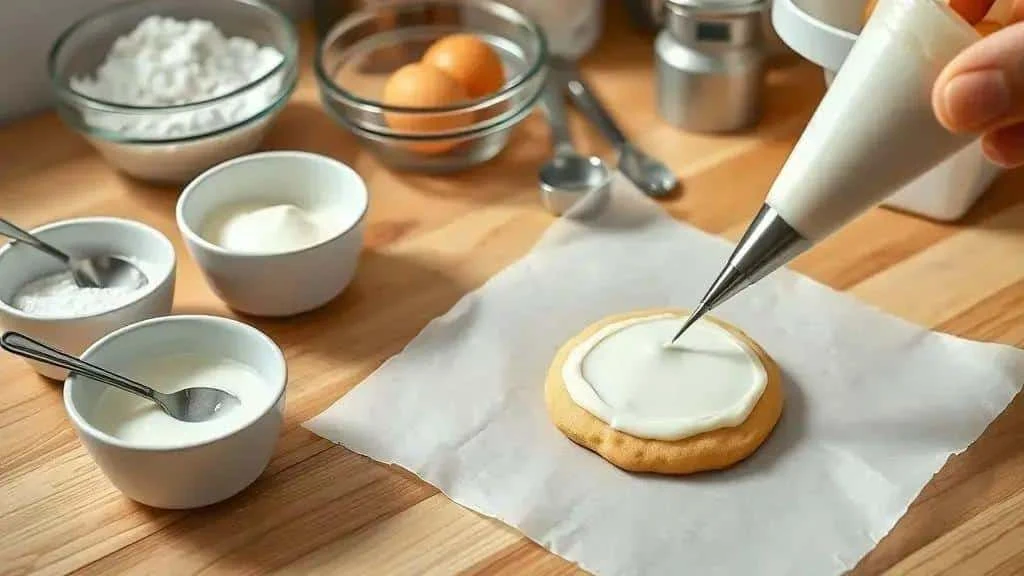
Royal icing dries firm and can hold fine details and layers. Choose either the pasteurised egg white method or your meringue powder manufacturer’s recipe; their ingredient ratios are not automatically interchangeable.
Pasteurised egg white icing
Ingredients:
- 360 g icing sugar – sifted to remove lumps.
- 2 large pasteurised egg whites – follow the pack’s storage and handling instructions.
- ½ teaspoon cream of tartar, optional – helps stabilise the icing.
- 1–2 teaspoons lemon juice or vanilla extract – added gradually for flavour.
Meringue powder icing
Ingredients:
- Sifted icing sugar – use the quantity specified in the powder manufacturer’s royal icing recipe.
- Meringue powder – measure according to that same recipe; most products contain egg.
- Water – start with the manufacturer’s quantity, then make small consistency adjustments.
- Flavouring, optional – use a compatible extract and account for the extra liquid.
Step-by-step method
- Sift the sugar: sift it into a large bowl so lumps do not block the nozzle.
- Prepare the egg whites or powder: briefly mix pasteurised whites to loosen them, or prepare the powder according to its instructions.
- Mix gently: combine with the sugar on a low mixer setting, or as the powder recipe directs, until incorporated.
- Add the stabiliser: add optional cream of tartar for the egg white method and beat to combine. Do not add extra stabiliser to a powder formula unless instructed.
- Add flavouring: mix in lemon juice or vanilla gradually without making the icing too loose.
- Check the consistency: outline icing should hold a firm peak; flooding icing should fall in a ribbon that levels in roughly 8–12 seconds.
- Divide and colour: put into separate bowls and mix in gel colours without beating in unnecessary air.
- Cover while working: press cling film onto unused icing to prevent a crust forming.
Which consistency to use
- Thick icing for outlines: holds a clear line and a peak that does not immediately collapse.
- Medium icing for details: flows slightly, letting fine lines settle without running.
- Flooding icing: thin enough to spread into a smooth surface; a ribbon should level out in about 8–12 seconds.
Common mistakes and fixes
- Too runny: gently stir in sifted icing sugar a little at a time, avoiding extra bubbles.
- Too thick: add water a drop at a time, stirring thoroughly between additions.
- Bubbles in flooding icing: tap the bowl gently before use, then pop visible bubbles with a cocktail stick while the icing is wet.
- Icing that will not set: check the recipe proportions and humidity. Move the biscuits to a clean, dry space and do not pack until the icing is fully hard, not merely dry on the surface.
- Faded or blotchy colour: use suitable gel colours and mix dark shades in small batches, testing them before decorating everything.
- Uneven outlines: keep the nozzle steady and practise consistent pressure, supporting your hand if helpful.
Finishing tips
- Test the flow: pipe onto baking paper before starting a biscuit.
- Work in stages: let outlines begin to set for about 5–15 minutes before flooding, checking that they can contain the filling.
- Use simple tools: cocktail sticks, food-use tweezers and a soft food-use brush help with fine details and edible powders.
- Store leftover icing as directed: keep it covered and follow the egg white or powder manufacturer’s instructions for refrigeration and shelf life. Do not assume every icing keeps for three days; stir back to a smooth consistency before reuse.
Storing, Freezing and Transporting Decorated Biscuits

- Everyday storage: plain biscuits with fully dried, suitable royal icing usually keep their quality for around 5–7 days in an airtight tin in a cool, dry place. Follow the icing recipe’s storage instructions.
- Separate layers: place baking paper between biscuits to protect raised details.
- Consider the filling: damp conditions can soften icing, but biscuits with perishable fillings still need refrigeration. Do not apply room-temperature storage advice to cream-filled biscuits.
Freezing and defrosting
- Prepare for freezing: for the most predictable finish, freeze cooled, undecorated biscuits and ice them later. If freezing decorated biscuits, test a few first and ensure the icing is completely dry before wrapping loosely enough to protect it.
- Use a rigid container: pack wrapped biscuits with baking paper between layers to prevent crushing.
- Freezer quality: aim to use within 2–3 months and seal well to reduce freezer burn.
- Defrost carefully: thaw plain, unfilled biscuits in their closed container in a cool room before opening, reducing condensation on the surface. Perishable fillings need fridge thawing. Colours and delicate icing may still bleed or soften.
Gift packaging and delivery
- Protect the contents: use a rigid box and food-safe cushioning so biscuits cannot slide around.
- Separate layers: add baking paper and, where useful, food-safe card dividers.
- Plan for warm weather: keep plain biscuit gifts cool and dry. If a filling requires refrigeration, use an appropriate chilled delivery method; an ice pack alone does not establish a safe shelf life.
- Posting: choose prompt delivery and a strong outer box with cushioning. A ‘fragile’ label cannot replace protective packing.
Packing biscuits as a gift
- Choose the box: select a rigid container that fits without leaving large gaps.
- Line the base: use baking paper or tissue specifically suitable for food contact.
- Arrange the biscuits: use a single layer where possible, or separate layers with baking paper.
- Fill gaps: use food-safe crumpled paper to prevent movement.
- Close and decorate: add ribbon or a tag outside the food packaging, with storage instructions appropriate to the biscuits.
Shelf life and when to discard
- At room temperature: about 5–7 days is a quality guide for plain biscuits with fully dried royal icing suitable for this storage, not a guarantee for every recipe or filling.
- In the freezer: use within around 2–3 months for best quality.
- Warning signs: discard biscuits with mould, an unusual smell or suspicious stickiness. Do not taste suspect food to check it; harmful bacteria are not always visible or detectable by smell.
Protecting the finish
- Allow full drying: overnight or around 24 hours is often useful, but thick icing or humidity may require longer. Check before packing.
- Keep the workspace dry: avoid humid conditions; a dehumidifier can help if the kitchen is persistently damp.
- Transport gently: several small boxes protect decoration better than one tall, heavily stacked box.
- Tell the recipient: include ingredients, allergens, the preparation date and storage advice matching the icing and filling.
Christmas Biscuit Gift and Party Favour Ideas

Turn your Christmas biscuits into thoughtful gifts with simple, inexpensive packaging.
Presentation ideas
- Mixed gift box: arrange 6–12 decorated biscuits in a lined rigid box with a window or decorated lid.
- Biscuit jar: stack carefully in a clean, dry jar and add a ribbon and personalised tag.
- Individual paper bags: put 1–3 biscuits in food-safe bags for small favours, with a short message.
- Decorating kit: include 3–4 fully baked biscuits, suitable ready-to-use icing, a small piping bag and age-appropriate sprinkles. Do not supply raw dough as a ready-to-eat activity; follow the icing’s storage instructions.
- Festive wrapping: use Christmas paper and red or green ribbons. Keep pine sprigs and other non-food decorations outside the sealed food packaging.
Assembling gift boxes
- Choose a sturdy box: use a size that supports the biscuits without squeezing them.
- Line the base: protect the contents with baking paper or food-safe tissue.
- Arrange the biscuits: place in one layer or separate layers with baking paper.
- Prevent movement: add food-safe cushioning around the biscuits, keeping loose decorative ribbons away from the food.
- Finish the package: include a storage and allergen card, then close with ribbon and a personalised tag.
Party favours and events
- Quick personalisation: pipe names in firm icing or identify the gifts with external labels.
- Dietary options: label ingredients clearly and use validated gluten-free or vegan recipes with appropriate cross-contact precautions.
- Workplace gifts: make matching sets of 12–24 biscuits and add a printed card outside the food packaging.
- Portion planning: allow around 1–3 biscuits per party favour or 6–12 in a gift box, adjusting for their size.
Designs for different recipients
- Children: bright colours and playful designs, with decorations suitable for their age and supervised decorating.
- Adults: white, edible gold and dark green with fine lace details.
- Friends and neighbours: combine vanilla, chocolate and orange flavours, keeping ingredient and allergen information clear.
Final packing checks
- Drying time: allow overnight or around 24 hours where needed, and longer if the icing is still soft. Do not pack by the clock alone.
- Storage label: include a preparation date and recipe-appropriate storage advice. The 5–7 day guide applies to suitable plain iced biscuits, not all fillings.
- Delivery: hand-deliver where practical, or use prompt shipping with a sturdy, well-cushioned box.
Final thoughts
Decorating Christmas biscuits with royal icing combines baking with a creative festive activity. A straightforward dough, the right icing consistency and careful packaging can give attractive results without elaborate equipment.
Thank you for reading. Follow our social channels for more practical ideas, and visit the I Love Christmas blog for festive tutorials and inspiration.
FAQ: Christmas Biscuits Decorated with Royal Icing
How long do decorated biscuits keep?
Plain biscuits with fully dried royal icing suitable for room-temperature storage generally keep their quality for about 5–7 days in an airtight tin. Follow your icing recipe’s advice. Freezing for 2–3 months is a quality guide, and undecorated biscuits usually freeze more reliably. Perishable fillings require refrigeration.
What if the icing will not dry?
Check that the icing has the right proportions and is not too thin. Work in a clean, dry space and allow ample time: overnight or 24 hours may be needed, and thick layers can take longer. Meringue powder is useful when prepared according to its own recipe, but it cannot overcome every mixing or humidity problem.
How can I make gluten-free or vegan biscuits?
Use a tested gluten-free cut-out recipe rather than assuming a flour swap will behave identically. For vegan biscuits, replace butter, egg and milk using a tested dough, then choose a validated aquafaba icing recipe. Ordinary meringue powder contains egg and is not vegan. Check decorations and avoid allergen cross-contact.
How do I transport biscuits without breaking the decoration?
Use rigid boxes, separate layers with baking paper and fill gaps with food-safe cushioning. Avoid heavy stacks and choose prompt delivery. Plain biscuits should stay cool and dry; perishable fillings require proper chilled handling.
How do I colour icing without changing its texture?
Add gel or paste food colours in small amounts and mix thoroughly. Liquid colour can thin the icing; if necessary, gently mix in sifted icing sugar to restore the consistency.
How can I fix a decorating mistake?
While icing is wet, adjust it with a cocktail stick or remove the excess and reapply. Let dry icing set fully before covering a small flaw with firm icing. Larger repairs may need the affected area carefully removed and flooded again, taking care not to break the biscuit.
Sources and Further Reading
- King Arthur Baking: royal icing
- Wilton: using meringue powder
- FDA: edible and non-edible decorative products
- Handling flour and flour products safely