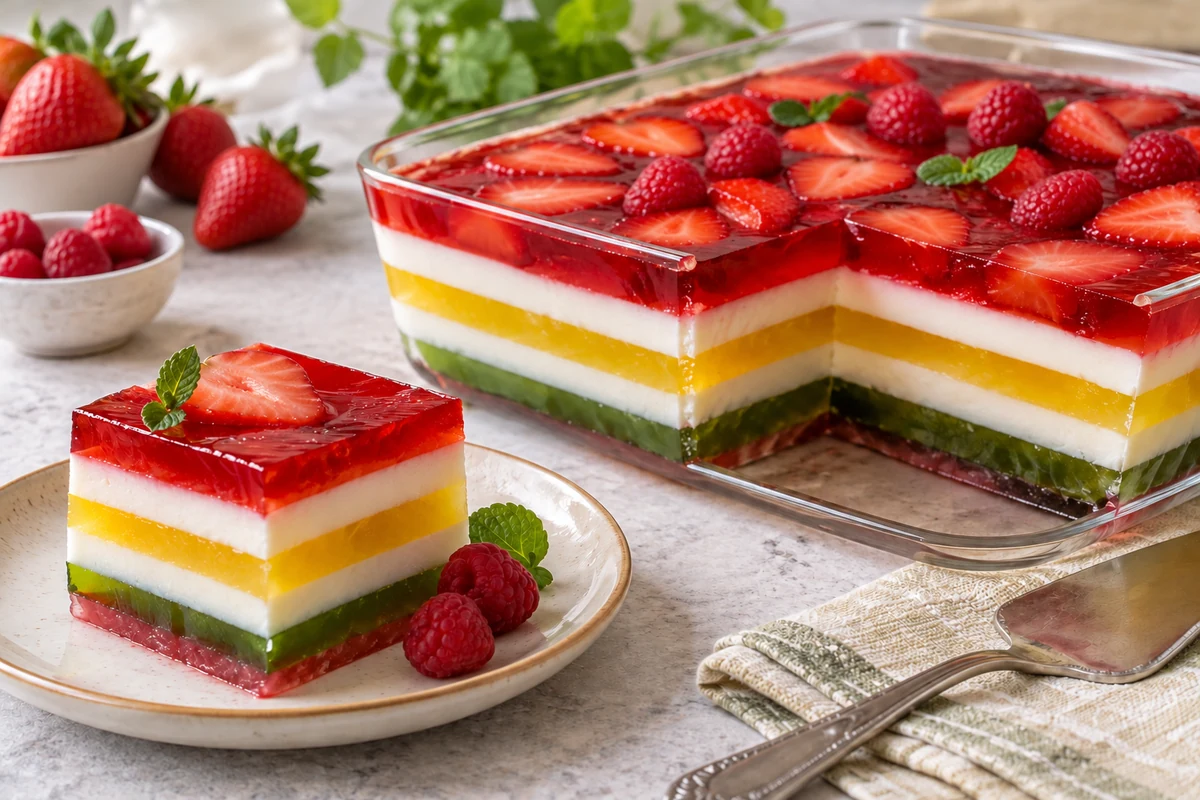
Layered rainbow jelly combines clear, fruit-flavoured layers with a creamy milk layer. Make each jelly according to its packet, let it cool while still liquid, and chill each layer until its surface can support the next. Measure liquids carefully and drain suitable fruit for neat, distinct layers.
Layered rainbow jelly brings colour to a party table with everyday ingredients. A little patience between layers makes all the difference. Here are practical ways to combine flavours, achieve a good set and serve it neatly.
Ingredients for layered rainbow jelly
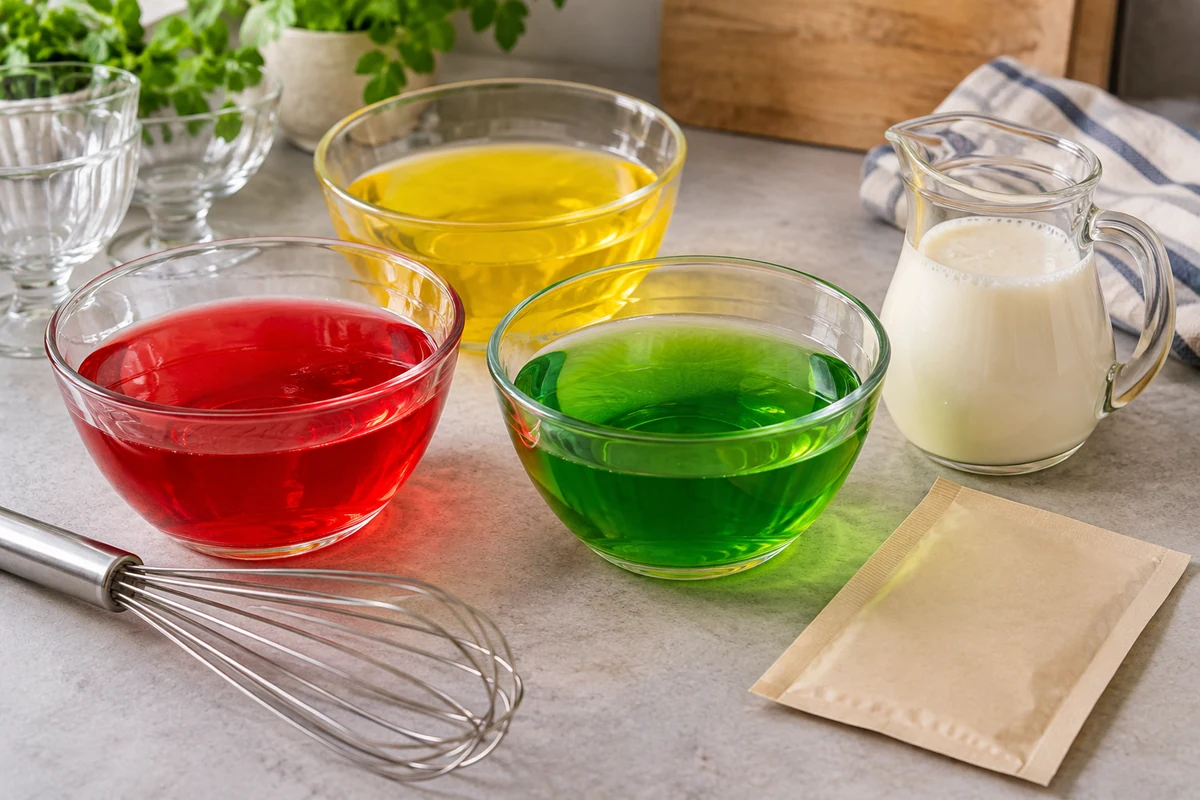
To make layered rainbow jelly, gather the ingredients below. Jelly packet sizes and setting strengths vary, so use the manufacturer’s liquid quantities rather than assuming every sachet makes the same amount.
- 4 packs of fruit-flavoured jelly, each making approximately 500 ml — choose different colours, such as strawberry, lime, passion fruit and grape. If your packs make a different volume, adjust the container capacity accordingly.
- Hot water, as directed on the jelly packets — some products use 250 ml per 500 ml batch, giving 1 litre for four batches, but this is not a universal ratio.
- Cold water, as directed on the jelly packets — add only the amount required to reach each packet’s stated final volume. For products using 250 ml cold water per batch, four batches need 1 litre.
- Unflavoured gelatine for the creamy layer — the original recipe specifies 12 g, but check your product’s instructions against the full volume of the milk mixture, including the water used to dissolve it. Do not reduce the amount arbitrarily.
- 1 tin sweetened condensed milk, 395 g — this sweetens and thickens the creamy layer. Evaporated milk is not a direct equivalent.
- 1 condensed-milk tinful of whole milk — use the empty tin as a volume measure. The condensed milk’s 395 g weight does not mean the tin holds 395 ml. For a dairy-free version, replace both milk products with suitable alternatives.
- Water for the unflavoured gelatine — the source method uses 60 ml cold water followed by 60 ml hot water. Follow your gelatine’s hydration and dissolving instructions, and count all this water in the creamy layer’s total liquid.
- A clear serving dish or suitable jelly mould — four 500 ml coloured layers plus the milk mixture need roughly 3 litres of capacity, with extra room for handling. Measure the actual total first, or divide the dessert between several dishes or individual glasses.
- Optional: chopped fruit or chocolate shavings — try strawberries or well-drained tinned pineapple. Fresh kiwi, pineapple and papaya can prevent gelatine from setting, so do not add them raw between the layers.
Quick tips
Proportions: use each jelly packet’s specified final volume; approximately 500 ml per colour is the working quantity here. Useful alternatives: reduced-sugar jelly can be used according to its own directions. Plant-based milk is not automatically lower in sugar. Equipment: a small ladle and a spoon help you pour gently without disturbing the layer below.
How to make layered rainbow jelly
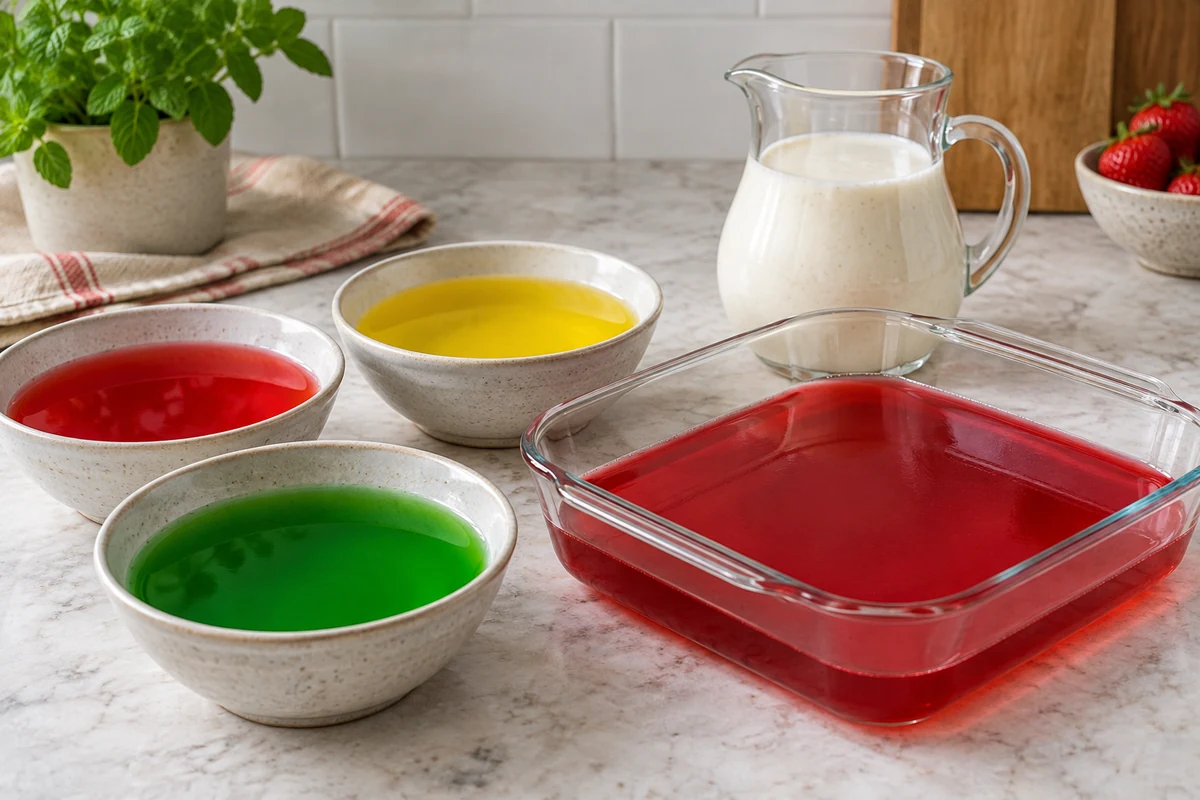
- Prepare your equipment: wash and dry the dish, check its capacity and clear enough level space in the fridge. Have a ladle, measuring jug and mixing bowls ready.
- Dissolve the first coloured jelly: follow the packet directions, using the stated amount of hot water. Stir until fully dissolved; use 250 ml only if that is the amount specified for your product.
- Add cold water: add the packet’s specified cold-water quantity and stir. Allow the jelly to cool to room temperature while remaining pourable; a fixed three-to-five-minute wait may not be enough.
- Pour the first layer: cover the base to your chosen depth. Each colour in this version makes approximately 500 ml, so leave room for all the remaining layers and the milk mixture.
- Chill until the surface has set: begin checking a thin layer after roughly 15–25 minutes, but allow longer if necessary. It should wobble gently without flowing when the dish is tilted slightly, and support a little of the next mixture without breaking.
- Repeat with the other colours: dissolve, dilute, cool and chill each flavour in turn. Do not pour the next layer until the previous one can support it. Prepare each mixture as needed rather than leaving several batches waiting for hours.
- Make the creamy white layer when you are ready to use it: hydrate the appropriate quantity of unflavoured gelatine in cold water, then dissolve it using hot water or gentle heat as directed on the packet. The source uses 60 ml of each, but hydration times vary. Stir in 1 tin sweetened condensed milk, 395 g and 1 tinful of whole milk until smooth. Ensure the gelatine quantity is suitable for this total volume.
- Add the creamy layer gently: let it cool to room temperature while still fluid, then ladle slowly over the set coloured layer. Pour close to the surface or over the back of a spoon so the liquid does not pierce the layer beneath. Refrigerate promptly.
- Chill the finished dessert: once assembled, refrigerate for at least 4 hours, or overnight, allowing longer if your product or the depth of the dish requires it. Check that it has set throughout before unmoulding.
- Unmould carefully: loosen the edge with a thin, blunt knife if suitable for your mould. Dip the base briefly in warm water, starting with 5–10 seconds, then invert onto a serving plate. Avoid hot water, which can melt the outer layers.
- Slice and decorate: warm the knife blade in water, dry it and wipe it between slices. Finish with suitable fruit or chocolate shavings if you wish.
Practical tips
- Chilling times: thin layers may begin setting in 15–25 minutes; thicker ones can take 40 minutes or considerably longer. Judge the actual set rather than relying on the clock.
- Avoid bubbles: hold the ladle close to the surface and skim away any foam with a clean spoon.
- Lactose-free versions: use suitable lactose-free condensed milk and milk, or replace both with plant-based products. Coconut milk and sugar alone are not necessarily equivalent to condensed milk.
- Fruit between layers: use small pieces of suitable fruit, such as drained strawberries or tinned pineapple. Drying raw kiwi does not remove the enzymes that interfere with the set.
How to slice and unmould jelly without damaging the layers
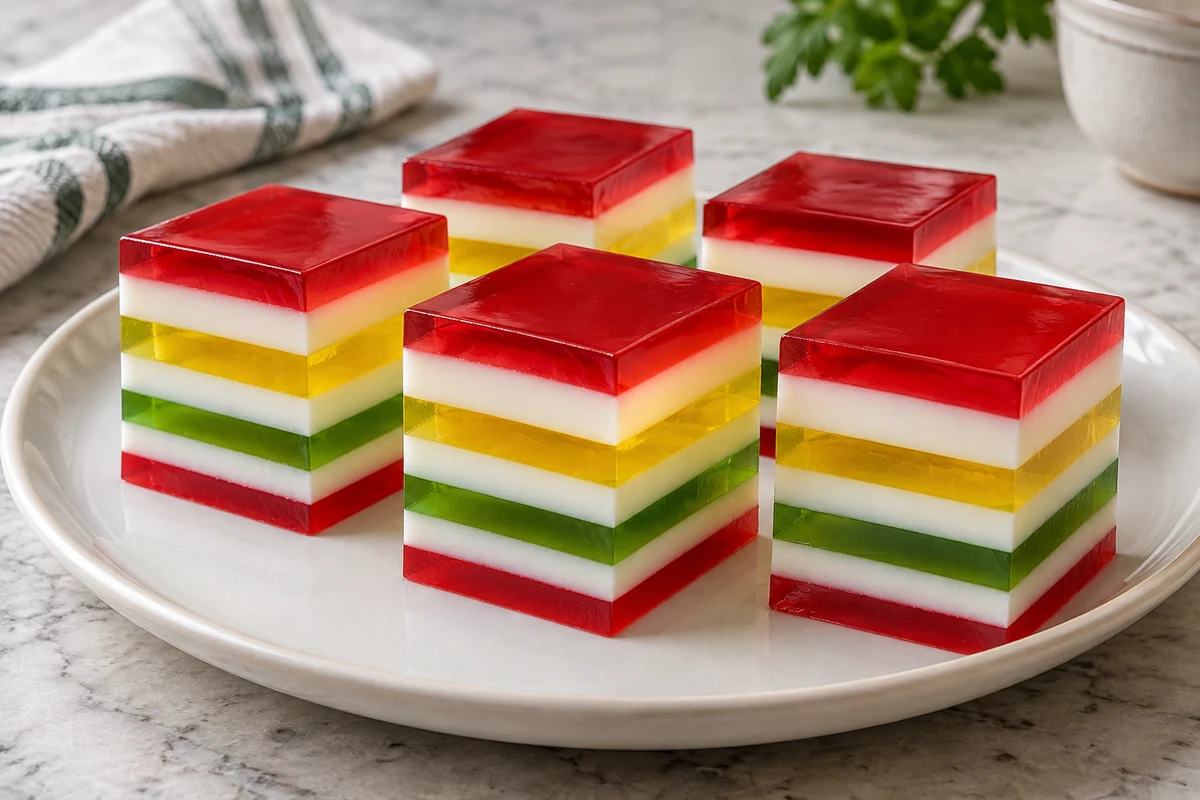
A well-chilled dessert and a few simple serving techniques help keep the layers distinct when you unmould and slice it.
- Chill thoroughly: allow at least 4 hours after assembly, preferably overnight, and check that the centre has set before serving.
- Loosen the edges: carefully run a thin, blunt knife around the edge without cutting into the inner layers or damaging the mould.
- Warm the mould briefly: dip its base in warm, not hot, water for around 5–10 seconds. With a flexible silicone mould, gently ease the sides away before turning it out.
- Prepare the knife: warm the blade in water, dry it and make a clean, deliberate cut. Wipe the blade between slices to prevent smearing.
- Support each slice: slide a broad, thin serving spatula underneath, supporting as much of the base as possible during transfer.
- Handle thin layers gently: make sure each has set properly during assembly. Use a smooth blade rather than sawing through the dessert.
- Chill the serving plate: place it in the fridge beforehand to help keep the dessert cool while you arrange it.
A simple slicing sequence
- Loosen the edge: carefully ease the jelly away from the sides of the mould.
- Warm the blade: dip the blade, not the handle, in warm water and dry it. It should not be so hot that it melts the jelly.
- Cut cleanly: use one controlled movement down and slightly forwards.
- Wipe the knife: clean the blade between slices for distinct edges.
- For a whole unmoulded dessert: briefly warm the mould’s base and turn the jelly onto its plate before slicing.
- Transfer the portions: slide a serving spatula beneath each slice and use a second clean utensil for support if needed.
More quick serving tips
- Limit excess liquid: drain and pat dry suitable fruit before adding it. This prevents puddles but does not solve enzyme-related setting problems.
- Work somewhere cool: keep preparation and serving brief so the jelly does not soften unnecessarily.
- Use clean tools: clean, dry utensils help prevent smears and keep the presentation tidy.
Combining colours, flavours and textures
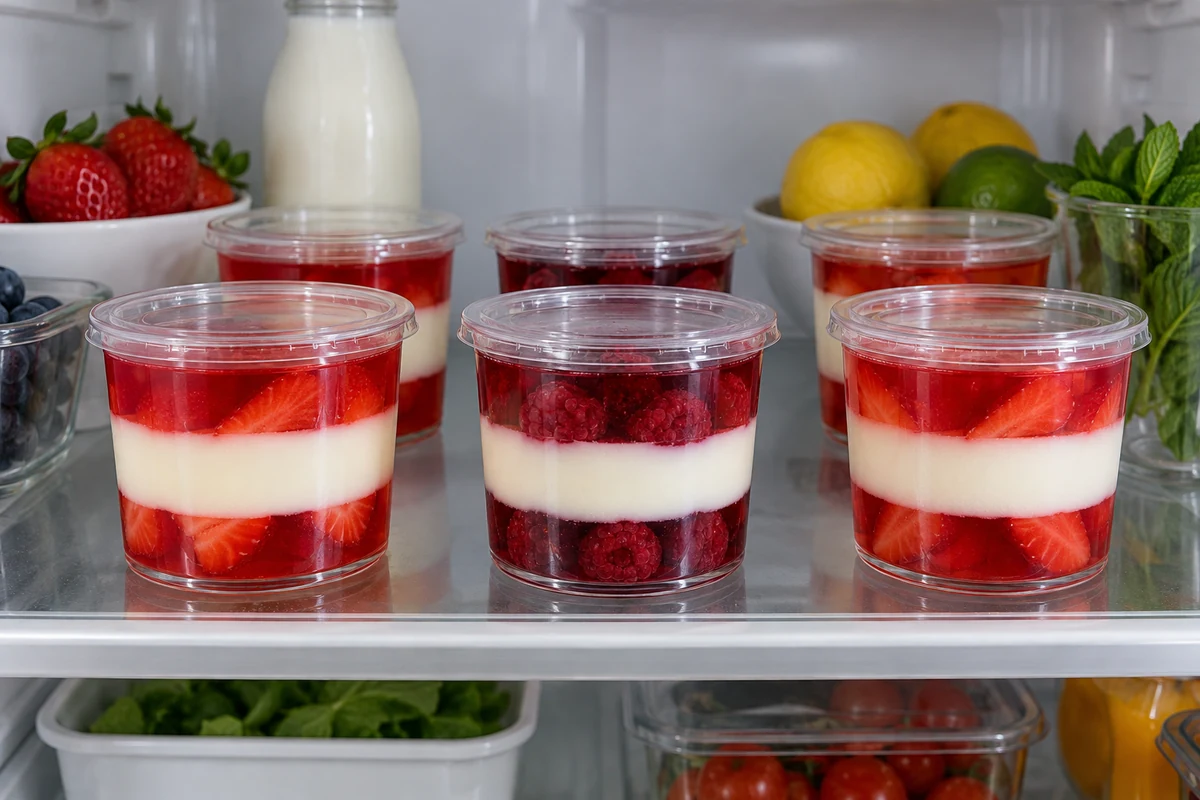
Choose flavours that taste good together as well as colours that stand out against one another.
- Red strawberry jelly with a creamy white layer gives a strong visual contrast and a little fruit sharpness alongside the condensed milk.
- Yellow pineapple or passion-fruit jelly works well beside a pale, clear layer for a bright, fruity combination.
- Green lime or kiwi-flavoured jelly pairs with a coconut or milk layer. Kiwi-flavoured jelly is different from adding raw kiwi fruit, which can stop gelatine setting.
- Purple grape jelly can be balanced with a mildly sharp lime layer or a neutral creamy one.
- A creamy white layer made with condensed milk, milk and gelatine separates the colours and adds a softer, richer texture.
Layer order and contrast
Alternate strong colours with paler layers to make each one stand out. A darker bottom layer can add depth. Layers around 1–1.5 cm deep give a finer striped effect, while 2–3 cm layers look bolder; choose depths that fit your dish and allow for longer setting times in thicker layers.
Texture and setting tips
- Firmness: use your product’s recommended quantity for the total liquid and intended use. Sachet weights and strengths differ, so 12 g per 500 ml is not a universal rule, and reducing the gelatine can make unmoulding difficult.
- The creamy layer: dissolve the unflavoured gelatine properly before mixing in the milks. Changing condensed milk for evaporated or plant-based milk affects sweetness, richness and sometimes setting, so test an adapted version first.
- Fruit between layers: use small amounts of well-drained strawberries or tinned pineapple. Avoid puddles of juice, and do not use raw pineapple in gelatine-based layers.
- Assembly order: pour the first layer and refrigerate until its surface is sufficiently set to support the next.
- Keeping layers separate: check the set with a gentle tilt or a clean spoon before adding more liquid.
- Adding fruit: place small, suitable pieces over a set layer, then cover gently with the next jelly mixture once it has cooled to room temperature but is still liquid.
Balancing the flavours
Several very sweet flavours together can become overwhelming. Pair a sweeter jelly with a sharper or more neutral layer. The contrast between creamy and clear layers makes the dessert more interesting to eat as well as to look at.
Finishing touches: add lime zest, mint leaves or suitable fruit that echoes the flavours and colours inside.
Variations on layered rainbow jelly
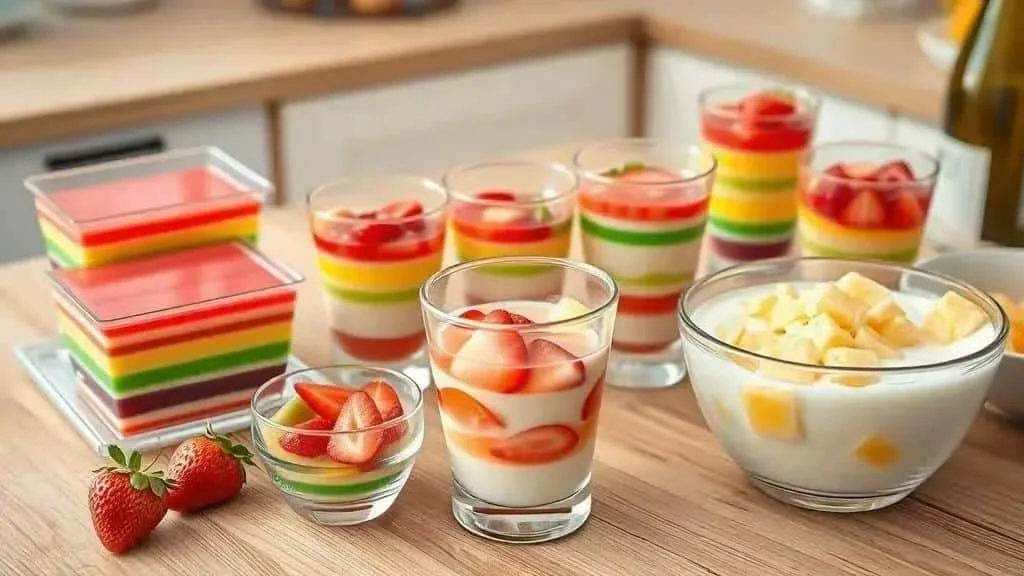
Adapt layered rainbow jelly for different occasions, dietary requirements and serving styles, checking that any changes still produce a reliable set.
Lactose-free and vegan versions
For a vegan version, replace both milk products and every gelatine-containing coloured jelly with suitable plant-based alternatives. Agar has a different preparation method and texture, so use the manufacturer’s instructions or a recipe designed for it rather than substituting gram for gram.
- Plant-based sweetened condensed milk — use a suitable equivalent quantity and check the ingredients for your guests’ dietary needs.
- A tinful of coconut or almond drink — match the measured milk volume, not the condensed milk’s weight.
- A suitable plant-based setting agent — follow its quantity, heating and setting instructions for the complete mixture.
Fruit between the layers
Small pieces of suitable fruit add texture and flavour. Drain away excess juice before assembling the layers.
- Sliced strawberries — wash, drain and pat dry before using.
- Diced tinned pineapple — drain thoroughly; avoid raw pineapple in gelatine-based jelly.
- Kiwi alternatives — use a compatible fruit such as seedless grapes instead of raw kiwi, unless following a method specifically designed to address its setting enzymes.
Individual jelly cups
Build the layers in clear individual cups for easy party portions. Serve them directly in their containers rather than trying to unmould very thin layers.
- Food-safe plastic cups or glasses of around 150–200 ml work well; check their capacity and suitability for the preparation temperatures.
- Use a small ladle and divide each cup’s usable volume by the number of layers. Portions of 30–50 ml per layer only work if the total fits, with space left at the top.
Mosaic jelly: colourful cubes in cream
For a different presentation, set the coloured jellies separately, cut them into cubes and combine with a cooled, still-fluid milk-and-gelatine mixture. Refrigerate until fully set.
- Coloured jelly cubes — cut to roughly 1 cm once firm.
- Creamy setting mixture — use the condensed milk, measured milk and correctly dosed dissolved gelatine from the main method, rather than plain milk alone.
Other creamy layers
Plain yoghurt, smooth ricotta or cream can provide different textures in a recipe formulated for those ingredients. Recalculate the setting mixture when changing its total volume.
- Plain yoghurt — a 200 g portion needs an appropriate gelatine quantity within the adapted recipe; do not simply add it to the existing mixture without adjusting the balance.
- Smoothly blended ricotta — gives a different texture from cream cheese and may need additional blending and recipe adjustment.
An adults-only version with alcohol
Alcohol changes gelatine’s setting behaviour. For a liqueur or sparkling-wine layer, use a recipe specifically formulated for that drink and strength, and clearly label it for adults.
- A liqueur such as orange or passion-fruit liqueur can flavour a suitable adapted recipe, but replacing 60 ml of water with liqueur is not a guaranteed setting formula.
- Sparkling wine also needs a suitable recipe; do not expect the original fizz to remain after mixing and setting.
Themed colours and bold stripes
Choose pastel shades for a gentle palette or brighter colours for a lively party dessert. Plan the order before starting so neighbouring layers contrast well.
- Pastel shades — use a recipe designed for pale or milky layers rather than adding extra water, which weakens the set.
- Vivid colours — use strongly coloured jelly flavours at their correct dilution and alternate thinner contrasting layers.
Tips for every variation
- Test the set: check your setting agent against the total liquid and any substituted ingredients before making a large dessert.
- Avoid surplus liquid: drain fruit and other wet additions thoroughly.
- Build in stages: let each layer support the next before pouring, and keep milk-based mixtures refrigerated rather than holding them at room temperature for long periods.
Common mistakes and how to avoid them
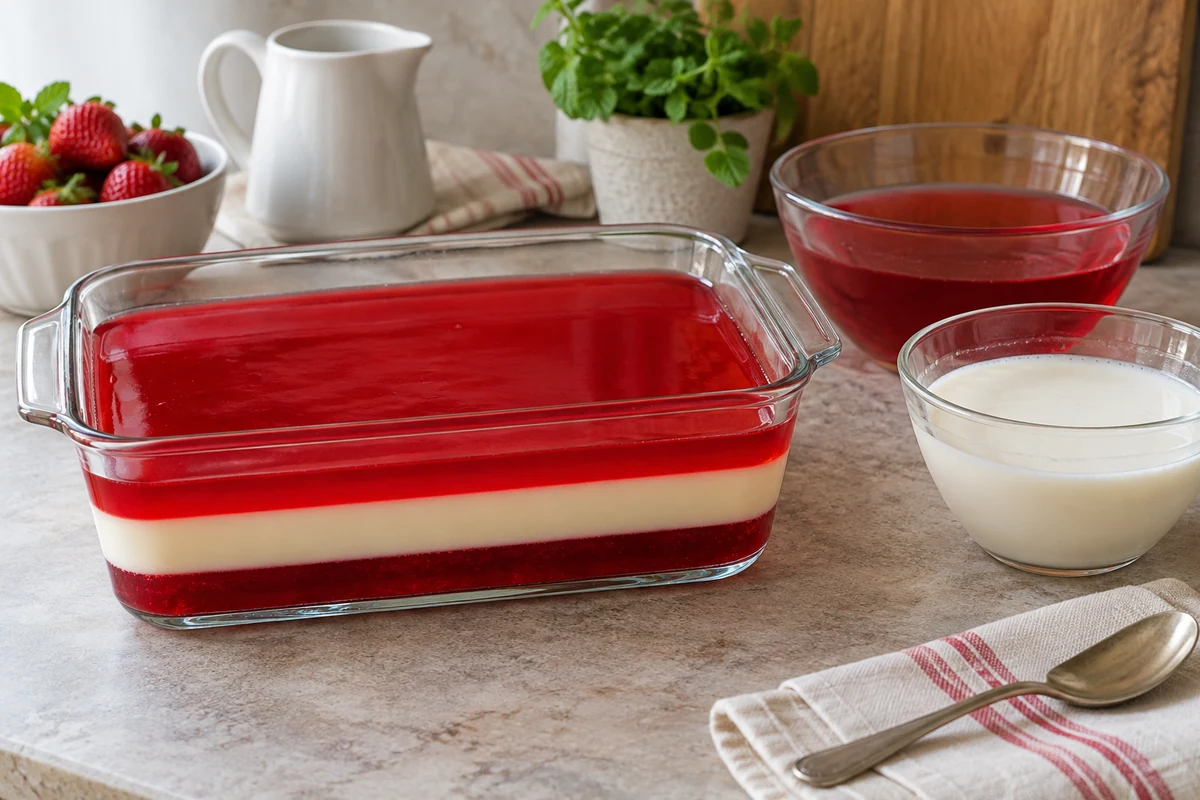
- Colours running together usually mean the previous layer was not set enough, the new mixture was too warm, or it was poured too forcefully. Thin layers may begin setting after 15–25 minutes and thicker ones take longer, but the actual firmness is the deciding factor.
- A soft or liquid layer can result from incorrect dilution, unsuitable fruit or too little setting agent. Follow the particular product’s instructions for the full mixture, rather than using a fixed sachet-to-water rule for every brand.
- Fruit releasing juice can leave watery gaps. Use small amounts of well-drained fruit and pat it dry. Choose tinned pineapple rather than raw pineapple, since drainage does not remove its setting enzymes.
- Jelly failing to set around raw fruit can be caused by enzymes in fresh pineapple, kiwi and papaya. Use an appropriate tinned product, a properly cooked fruit preparation or a recipe designed for a different setting agent. A brief, unspecified warming is not a reliable fix.
- Bubbles and uneven surfaces often come from vigorous stirring or pouring from too high. Stir gently, skim foam and ladle the cooled mixture close to the surface.
- Difficulty unmoulding may mean the jelly needs more chilling or gentle release from the mould. Once fully set, loosen the edge and briefly warm the base; do not keep heating it until the outer layers melt.
- Smudged slice edges are less likely with a clean, gently warmed blade. Dry it and make a controlled cut, wiping between portions.
A few ways to prevent problems
- Measure liquids accurately and include all milk, dissolving water and other liquid ingredients when checking the setting ratio.
- Wait for the right set — gently tilt the dish or check with a clean spoon rather than touching the surface with your fingers.
- Drain suitable fruit and pat it dry with kitchen paper, then add only small amounts.
- Pour slowly from close to the surface, using a mixture that has cooled to room temperature but remains fluid.
- Use an appropriate setting mixture for creamy layers, and test substitutions on a small scale before preparing a party-sized dessert.
What to do if a layer has not set
- Check the cause first: consider the liquid ratio, fruit choice and chilling time. Only attempt to salvage a mixture that has been handled and refrigerated safely.
- Correct the setting ratio before assembly: if the mixture is still separate, consult the gelatine manufacturer’s instructions to calculate any adjustment. Do not scatter an arbitrary spoonful or two of gelatine into an assembled dessert or pour hot gelatine over its layers.
- Allow sufficient chilling: follow the product’s setting time and check the result after several hours. Extra time alone will not correct an unsuitable mixture.
- If it remains soft: a safely stored dessert may be served in glasses instead of unmoulded. Firm sections can become mosaic cubes, but discard anything whose safe storage is uncertain.
Prevention checklist
- Check that the jelly and gelatine are within date and stored as directed.
- Drain suitable fruit and wet ingredients before assembly.
- Allow enough chilling time for the depth of every layer.
- Use a ladle and cool each mixture before pouring it over a set layer.
- Keep equipment clean and use a gently warmed, dry blade for slicing.
Storing and serving layered jelly at parties
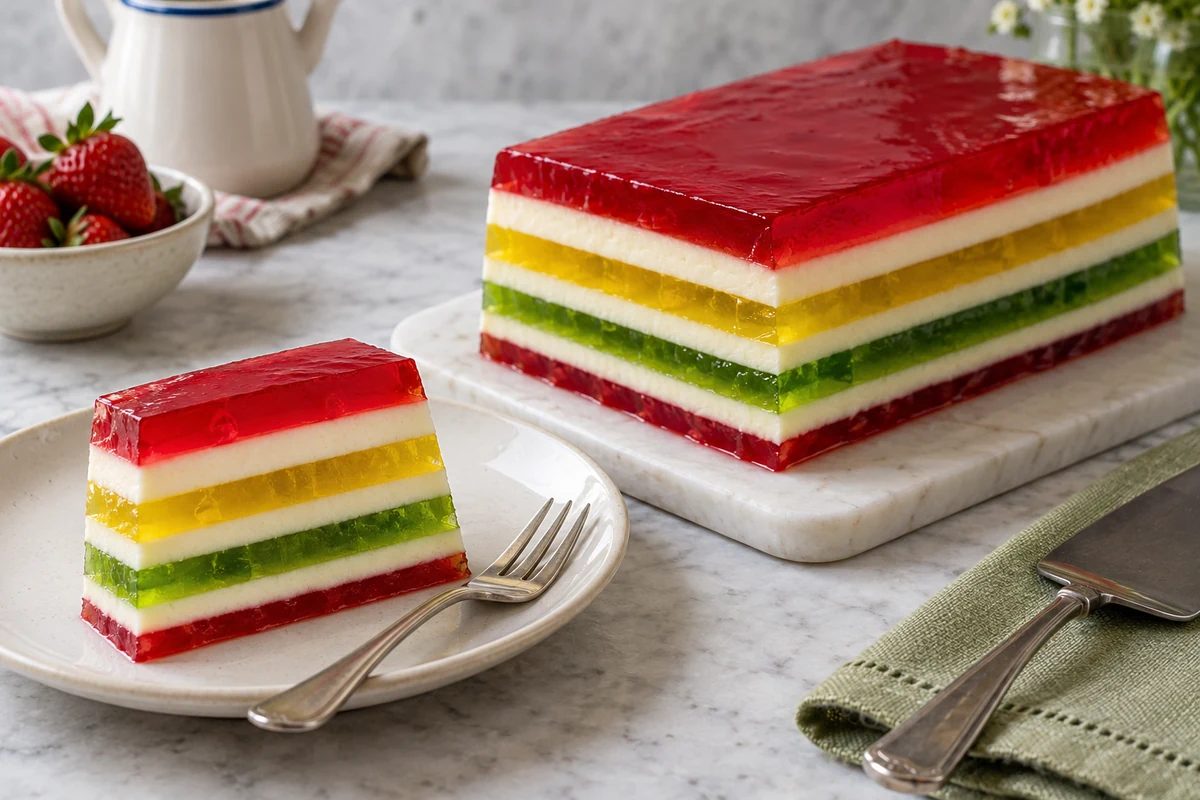
When serving layered rainbow jelly at a party, plan the refrigeration and transport as carefully as the colours so the dessert stays cool and holds its shape.
Refrigerated storage
- Temperature: keep the dessert in a fridge at 5°C or below and return it promptly after serving.
- Covering: use a lid or food wrap to protect the surface and prevent it absorbing fridge odours.
- Storage time: use this homemade milk-based dessert within 48 hours of preparation, or sooner if an ingredient’s instructions require it. Lactose-free versions do not automatically keep longer: use the same cautious limit.
- Avoid freezing: it can damage the jelly’s texture and cause weeping or separation between layers.
Transport and final preparation
- Keep it chilled: use a cool box with enough ice packs to maintain refrigeration during the journey.
- Support the dish: set it on a rigid, non-slip tray so it stays level in transit.
- Unmould at the venue if practical: transport the dessert in its chilled mould and arrange a bowl of warm water there for a brief dip just before serving.
- Avoid direct sun: keep the serving area away from heat and put out only what is needed.
Presenting it on the table
- Clear glass: shows off the coloured layers without needing to unmould the dessert.
- Different heights: stable stands and serving plates create variety without making the display precarious.
- Individual portions: clear cups simplify serving and reduce handling.
- A chilled display: use equipment that actually keeps the food cold; a cloth over an ice-filled box is not proof of a safe temperature. Replenish small portions from the fridge as needed.
- Decoration: finish with mint leaves, citrus zest or suitable fruit that complements the jelly flavours.
Portions and serving tools
- Portion size: slices around 1.5–2 cm thick or small 120–150 ml servings are useful starting points; adjust to the dish and the other desserts on offer.
- Serving equipment: a gently warmed knife and thin serving spatula help lift tidy slices; a spoon works well for individual cups.
- Hygiene: keep serving utensils clean and use a fresh cloth or kitchen paper when wiping the blade.
Before the party
- Keep the dessert refrigerated until it is needed.
- Use a suitable cool box for transport.
- Bring clean serving tools and warm the knife blade at the venue when required.
- Arrange the dessert shortly before serving and keep the rest chilled.
Final thoughts
Layered rainbow jelly makes a colourful party dessert with familiar ingredients. Correct dilution, suitable fruit and patient chilling give the layers their best chance of setting neatly.
Check firmness between layers and use clean serving tools. Individual glasses, fruit additions and carefully planned dairy-free versions let you adapt the presentation to your occasion.
Thank you for following the recipe. Try your own colour combinations and share a photo of the finished dessert if you would like to inspire other readers.
For more recipes and Christmas ideas, follow us on social media and visit the I Love Christmas blog. See you next time!
Layered rainbow jelly: frequently asked questions
How do I stop the layers mixing together?
Let the previous layer set enough to support the next, then pour the next mixture slowly after it has cooled to room temperature but is still liquid. Chilling times vary; check the surface rather than relying on a fixed number of minutes.
Which fruit can I put between the jelly layers?
Use small amounts of well-drained strawberries, seedless grapes or tinned pineapple. Avoid raw pineapple, kiwi and papaya in gelatine-based layers because their enzymes can prevent setting; drying them does not solve this.
How can I make a lactose-free or vegan version?
Replace both condensed milk and milk with suitable alternatives. For a vegan dessert, every coloured jelly and the creamy setting layer must also be free from animal gelatine. Follow a plant-based setting agent’s own preparation instructions rather than substituting it gram for gram.
How can I unmould it without damaging the layers?
Chill until fully set, loosen the edge gently if suitable for your mould, and briefly dip the base in warm water before turning it onto a plate. With silicone, carefully ease the sides away. Avoid overheating the mould.
How should I store and serve the finished jelly?
Keep it covered at 5°C or below and use within 48 hours of preparation, or sooner if ingredient instructions require it. Lactose-free versions do not automatically last longer. Keep portions chilled during a party and avoid freezing, which damages the texture.