Mini party sandwiches combine small rolls or bread squares with creamy spreads, cooked meat and crisp vegetables. Choose a few complementary fillings, estimate portions according to sandwich size and the rest of the menu, and assemble wetter versions close to serving. Keep perishable fillings chilled, use separate utensils for allergy-sensitive food and transport the sandwiches in a cool box with ice packs.
Mini party sandwiches are easy to share and adaptable enough for a Christmas buffet, afternoon gathering or family celebration. These ideas cover fillings, quantities and presentation, along with the practical details that keep bread from becoming soggy.
Ingredients for Mini Party Sandwiches
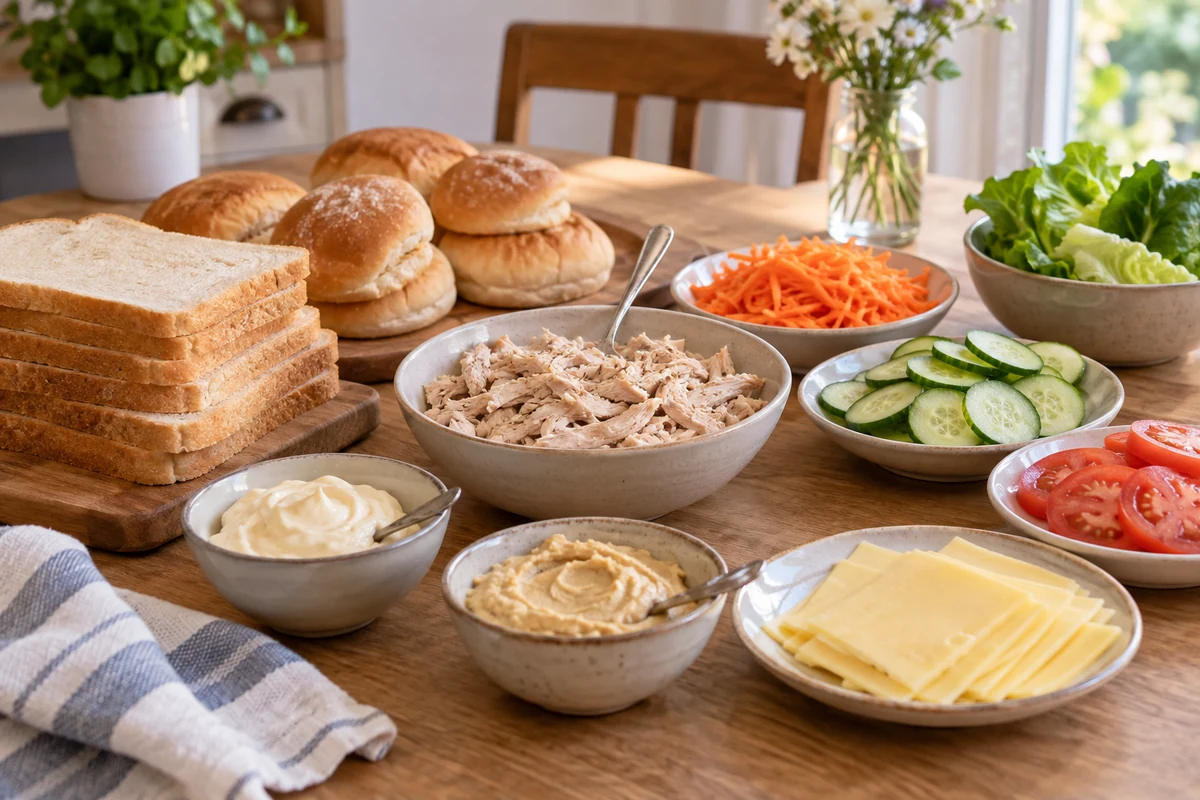
Use this list as a selection of ingredients for mini party sandwiches. You do not need every filling in every sandwich: choose two or three combinations and adjust quantities to the size of your bread.
- 24 mini wholemeal rolls – split horizontally. Alternatively, 12 slices of wholemeal bread make six closed sandwiches, which can each be cut into four small pieces: 24 pieces, but less bread than 24 rolls. Soft brioche is another option; check for egg and milk.
- 200 g plain cream cheese – or mashed ricotta or drained cottage cheese. Fat and salt content vary, so compare labels rather than assuming a substitute is lighter.
- 200 g hummus – homemade or bought. It can replace cream cheese in a vegan filling; check the label, especially for sesame.
- 200 g sliced cooked turkey – choose a ready-to-eat product and follow its storage instructions. Cooked shredded chicken is an alternative.
- 200 g cooked, cooled shredded chicken – season lightly with pepper, lemon and salt if needed. Keep refrigerated until assembly.
- 1 medium avocado – mash with 1 tbsp of the lemon juice listed below. A ricotta spread with a little olive oil makes a different, non-vegan alternative.
- 2 medium firm tomatoes – thinly sliced and patted dry to reduce moisture.
- 1 medium cucumber – thinly sliced. Finely sliced celery gives a different crunch but introduces another allergen.
- 1 medium carrot – finely grated. Grated beetroot adds colour, although it can stain the bread.
- 1 small bunch of lettuce or rocket – washed and thoroughly dried. Rocket has a pepperier flavour.
- 2 tbsp lemon juice in total – use 1 tbsp for the avocado and the remainder for seasoning other fillings as needed. Lemon slows browning but does not replace refrigeration.
- Up to 2 tbsp extra virgin olive oil – for lightly dressing vegetables or seasoning fillings; avoid soaking the bread.
- Salt and black pepper – to taste, allowing for salt already present in the cheese and cooked meat.
- 2 tbsp Dijon mustard – optional. Honey mustard is a sweeter alternative but is not vegan, and honey is unsuitable for babies under one year.
- 50 g nuts or seeds – optional, for suitable adult portions. Check guests’ allergies; seeds are not automatically a safe substitute for nuts. Omit hard nut pieces from food for young children.
- Fresh herbs – chopped parsley, chives, dill or basil, to taste.
Quick Filling Combinations
Cream cheese, cucumber and dill or chives – a mild, fresh-tasting combination for a buffet or afternoon tea.
Hummus, grated carrot and rocket – a creamy and crunchy vegan option when the bread and hummus are suitable.
Cooked turkey, mashed avocado and Dijon mustard – a savoury filling with a creamy spread and a little sharpness.
Practical tip: assemble close to serving and slice fillings thinly so the sandwiches are easy to bite. Avoid overfilling. If using cocktail sticks for adult portions, make them visible and remove them before eating; do not use them in children’s servings.
How to Prepare Mini Party Sandwiches
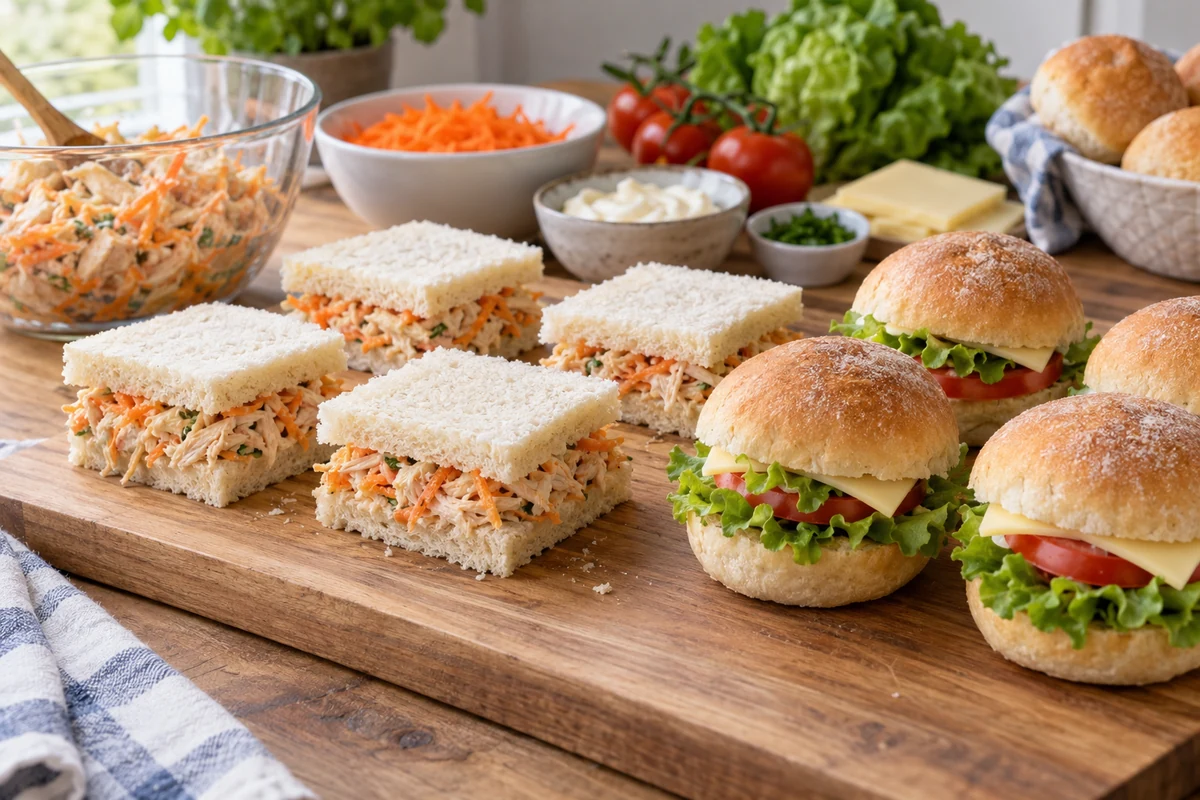
- Set up a clean work area: arrange boards, knives, filling bowls and split rolls. Keep raw meat away from ready-to-eat sandwich ingredients.
- Wash and dry the vegetables: prepare lettuce, rocket, tomatoes and cucumber, then dry them thoroughly.
- Prepare the spreads: put the cream cheese and hummus in separate bowls. Mash the avocado with 1 tbsp lemon juice and a little seasoning, keeping the mixtures chilled until needed.
- Season the cooked meat: use ready-to-eat turkey or fully cooked, safely cooled chicken straight from the fridge. Add pepper, herbs or a little oil as needed. There is no need to warm meat for cold sandwiches and then cool it again.
- Slice finely: thin tomato and cucumber slices fit neatly without pushing the sandwich apart.
- Build light layers: spread a thin layer of your chosen paste, add meat or vegetables and finish with herbs. Keep nuts and seeds optional and separate where allergies are a concern.
- Close gently: put the bread halves together and press lightly with clean hands. A modest amount of filling should stay in place without a skewer.
- Vary the texture: pair something creamy with something crisp, such as hummus with grated carrot.
- Cut and arrange: divide larger sandwiches into small pieces and place on a clean serving tray. Dry salad leaves can add colour beneath them.
- Protect the bread: pat tomato slices dry and use a thin layer of cream cheese or another suitable spread as a barrier. This helps texture but does not preserve the food at room temperature.
- Assemble near serving time: finish wetter sandwiches around 30–60 minutes beforehand, then keep them covered in the fridge until putting out a small tray.
- Adapt to your guests: use mild fillings for children and verified gluten-free ingredients where needed. A change of bread alone does not make the entire sandwich gluten-free or suitable for every allergy.
Storage and Transport
To keep the sandwiches neat and chilled, use these practical steps:
- Pack in a clean, rigid food container with a tight-fitting lid. Food-safe kitchen paper beneath a layer of greaseproof paper can absorb excess moisture without sticking to the bread.
- If stacking is necessary, separate layers with greaseproof paper and avoid compressing soft rolls.
- Carry them in an insulated cool box with enough frozen ice packs to keep the contents at 5°C or below. Keep meltwater away from food and transfer to a fridge on arrival.
- For this party plan, use assembled sandwiches within 24 hours when kept properly chilled, or sooner if any ingredient requires it. Put out small batches and use a cautious two-hour limit out of refrigeration, shorter in hot conditions. Do not leave them out for six hours; discard food whose safe storage is uncertain.
Simple Presentation Ideas
Arrange sandwiches on stable platters, finish suitable varieties with fresh herbs and keep labels visible. Avoid decorative sticks in children’s food.
Mini Sandwich Variations

Choose a few contrasting fillings rather than preparing every option. Separate allergy-sensitive portions before working with ingredients that could contaminate them.
Classic Combinations
- Cream cheese, cucumber and dill – mild and refreshing. Ricotta is an alternative with a different texture; compare labels if fat content matters.
- Cooked turkey, avocado and Dijon mustard – creamy and savoury. Cooked shredded chicken also works.
- Hummus, grated carrot and rocket – a combination of soft spread and crunchy vegetables, using vegan bread if required.
- Seasoned ricotta, sun-dried tomato and basil – drain oily tomatoes well. Goat’s cheese offers a stronger flavour.
Vegan and Gluten-Free Ideas
- Hummus, avocado and baby spinach – use suitable gluten-free bread or cucumber slices as a bread-free base. Spinach replaces raw sprouted seeds in this version.
- Herby chickpea spread and grated beetroot – colourful and earthy. Add sunflower seeds only if they are suitable for the guest; a nut allergy does not automatically make every seed product safe.
- Cooked lentil pâté, tomato and salad leaves – a meat-free filling with a soft spread and fresh vegetables.
Ideas for Children
- Cream cheese, cooked turkey and finely grated carrot – use soft bread and cut into a shape and size suitable for the child’s age and eating ability.
- Smooth peanut butter or a suitable seed spread with banana – spread thinly, never in thick lumps. Check allergies with the child’s parent or carer; a seed spread is not a universal allergy-safe replacement.
Richer Party Fillings
- Smoked salmon, cream cheese and dill – serve on dark bread or mini blinis. Cold-smoked fish is unsuitable for some higher-risk guests, including pregnant people, unless cooked until steaming hot; offer a different cold filling for them.
- Brie, chilli jam and chopped walnuts – a rich sweet-and-savoury option for suitable adult guests. Check milk and nut allergies and avoid uncooked mould-ripened soft cheese for pregnant guests.
Substitutions and Adaptations
- Use wholemeal or verified gluten-free bread as needed. Grilled aubergine or courgette slices can make bread-free bites, although their shape and texture differ from sandwiches.
- Thick Greek yoghurt or drained cottage cheese can replace cream cheese in some fillings. Check the label for fat content and drain well to avoid wet bread.
- Sunflower or pumpkin seeds offer crunch, but use them as an allergy substitute only after checking that the individual can eat them and that the product is suitable.
Presentation and Accompaniments
- Group varieties on separate trays so guests can identify the fillings easily.
- Offer small bowls of herby yoghurt dip, seasoned olive oil or mild chutney, each with its own serving spoon.
- Finish with fresh herbs; add seeds only to clearly identified portions.
- Keep fillings modest so the sandwiches hold together. Any sticks used for adult presentation should be removed before eating.
Texture tip: assemble tomato and avocado varieties close to serving and use a thin spread as a moisture barrier where suitable.
Arranging the Party Buffet

Plan the serving area before guests arrive so you can replenish small chilled batches without crowding the table.
How to Arrange the Trays
- Choose practical platters: combine clean serving boards, ceramic plates and stable cake stands.
- Group by filling: keep similar sandwiches together and label vegan or specially prepared portions clearly.
- Add height safely: use stable, purpose-made stands rather than precarious stacks that could tip when guests reach over.
- Leave room to reach: avoid packing the table too tightly and keep serving utensils accessible.
- Give each dip its own spoon: place it beside the appropriate tray and avoid sharing utensils between different fillings.
How Many Sandwiches per Guest?
- A one-hour gathering: allow around three or four small sandwich pieces per adult when other snacks are available.
- A two- to three-hour reception: around five to seven small pieces per adult may be appropriate, depending on size, appetite and the rest of the food.
- Children: one to three suitably sized pieces is a starting estimate, adjusted for age, appetite and the other food served.
Finishing Touches
- Chopped parsley, basil or dill adds colour and aroma.
- Keep nut or seed garnishes optional and separate. Prepare allergy-sensitive portions with clean equipment before handling the relevant allergens.
- Thoroughly dried salad leaves can line a platter without adding much moisture.
- Small flags can help identify adult buffet portions, but keep sticks away from young children’s food and make removal obvious.
Keeping the Buffet Fresh
- Put out small quantities and replace trays as needed, keeping the reserve sandwiches chilled.
- Keep spreads and prepared fillings in the fridge until assembly rather than leaving all the ingredients on the worktop.
- Use a cool box with ice packs for transport and protect the containers from meltwater.
- Aim to assemble wetter varieties within an hour of serving and refrigerate them until needed, especially in warm weather.
Practical Serving Tips
- Label the actual filling and relevant allergens. Only describe food as gluten-free or suitable for an allergy when its ingredients and preparation justify that claim; vegan does not mean allergen-free.
- Place sturdy napkins and small plates nearby for guests eating while standing.
- Provide a clearly visible container for discarded cocktail sticks, away from children’s reach.
- For a larger gathering, use a main buffet and a few small satellite platters, replenished from the fridge rather than left out for the whole event.
A final flourish: a little lemon zest or a few fresh herbs can brighten selected fillings without making the bread oily.
Vegan, Gluten-Free and Child-Friendly Options

The following combinations offer starting points for vegan guests, gluten-free requirements and children. Confirm individual needs first and adapt bread size, ingredients and preparation accordingly.
Vegan Options
These fillings use plant ingredients. Check bought bread, spreads and garnishes as well as the main filling.
- Hummus, grated carrot and rocket in wholemeal or gluten-free rolls
- Ingredients:
- 200 g homemade or bought hummus
- 1 medium carrot, finely grated
- 1 handful washed and dried rocket
- 12 small wholemeal or suitable gluten-free rolls
- Up to 1 tbsp extra virgin olive oil, optional
- Salt and black pepper, to taste
- Substitution: baby spinach gives a milder flavour than rocket.
- Avocado and baby spinach on cucumber slices
- Ingredients:
- 1 medium ripe avocado, mashed
- 1 tbsp lemon juice
- A small pinch of salt, optional; omit for babies
- ½ loosely filled 240 ml cup of washed, dried baby spinach, finely sliced
- Thick cucumber slices for the base, sized appropriately for adult buffet bites
- Substitution: a chilled spread made with ready-to-eat tofu gives a different flavour. Check its preparation instructions and soya allergy suitability.
Gluten-Free Options
Choose bread and every filling ingredient carefully, and use clean boards, knives and spreads that have not picked up crumbs from ordinary bread.
- Gluten-free mini rolls with cooked turkey and cream cheese
- Ingredients:
- 12 small gluten-free rolls
- 150 g cream cheese or ricotta
- 150 g ready-to-eat sliced cooked turkey
- 12 small washed and dried lettuce leaves
- Substitution: a spread made with drained tinned tuna offers another filling; check all added sauces for gluten and other allergens.
- Grilled aubergine bites with ricotta and tomato, without bread
- Ingredients:
- 2 medium aubergines, sliced, grilled and cooled safely
- 150 g mashed ricotta
- 1 medium firm tomato, thinly sliced
- 1 tbsp chopped fresh basil
- Substitution: grilled courgette slices give a milder flavour.
Options for Children
Use mild flavours and manageable portions. Match texture and shape to the child’s age, check allergies with a parent or carer, and supervise young children while they eat.
- Mini cream cheese, cooked turkey and carrot sandwiches
- Ingredients:
- 6 slices soft bread, paired into three closed sandwiches and each cut into four small pieces, or 6 small split rolls
- 100 g cream cheese or a suitable mild cheese spread
- 100 g sliced cooked turkey
- ½ medium carrot, finely grated
- Substitution: mild, cooked and safely chilled shredded chicken can replace the turkey.
- Smooth peanut butter and banana, or a suitable alternative spread – a sweet filling without added sugar if the chosen products contain none
- Ingredients:
- Up to 3 tbsp smooth peanut butter, spread thinly, or a spread confirmed suitable for the individual guest
- 1 medium banana, thinly sliced
- 6 slices soft bread, paired into three sandwiches and cut into suitable small pieces
- Do not use peanuts for someone with a peanut allergy. Check alternatives and cross-contact warnings rather than assuming sunflower spread is safe. Never serve thick lumps of nut butter, and do not give whole nuts to children under five.
Assembly, Labelling and Safety
- Label clearly: identify fillings and relevant allergens, such as milk, egg, wheat, mustard, sesame, fish, peanuts or tree nuts. Dietary labels do not replace an ingredient check.
- Separate utensils: use clean boards and knives during preparation, and a different serving utensil for each tray.
- Ask about allergies: agree suitable ingredients with the guest or carer and keep the prepared portion protected from contact with other food.
- Add wetter ingredients last: tomatoes and avocado are best assembled near serving to preserve the bread’s texture.
- Size children’s portions appropriately: choose manageable shapes without sticks, hard nut pieces or thick lumps of spread.
How to Store and Transport Mini Sandwiches
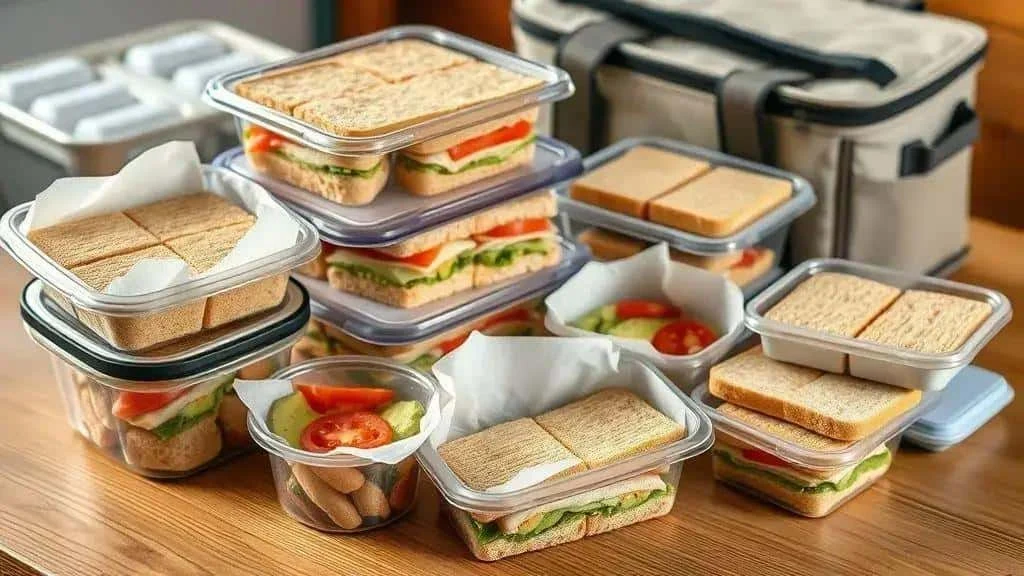
Good sandwich storage and transport depend on keeping perishable fillings cold while controlling moisture and preventing the bread from being crushed.
Packaging and Moisture
- Line containers with food-safe kitchen paper beneath greaseproof paper if needed, keeping paper fibres away from wet fillings.
- Keep especially wet ingredients separate until assembly, or use a thin suitable spread as a moisture barrier. Refrigeration is still essential.
- Place greaseproof paper between stacked layers so the sandwiches do not stick together.
- Use clean, rigid food-safe containers with secure lids. Avoid heavy stacks that squash the bottom layer.
Organising Different Fillings
- Keep varieties in separate containers, with protected portions for specific dietary needs. Separation at serving does not undo cross-contact during preparation.
- Label containers and serving trays with their fillings and relevant allergens so the information remains available throughout transport and serving.
- Carry dips separately and add them to the table only when serving.
Packing and Transport, Step by Step
- Choose suitable containers: use rigid boxes or lidded trays that close securely.
- Line and arrange: lay sandwiches in a single layer where possible, with suitable paper underneath.
- Separate layers: use greaseproof paper if a second layer is needed.
- Close securely: fit lids properly and stack only where the containers are designed to support the weight.
- Pack with ice packs: arrange frozen packs around the containers in an insulated cool box. Keep loose ice and meltwater away from the sandwiches.
- Travel directly: minimise time in the car, keep the box out of direct sunlight and refrigerate the food on arrival. Insulation alone does not chill warm food.
- Finish assembly near serving: keep wetter fillings chilled separately when practical, then assemble around 30–60 minutes beforehand and return to the fridge.
Temperatures and Keeping Times
- Refrigeration: keep perishable sandwiches at 5°C or below. Aim to eat within 24 hours of assembly for this plan, respecting any shorter ingredient deadline and the earlier cooking date of leftover meat.
- On the buffet: use a cautious maximum of two hours out of refrigeration, and less in hot conditions. Include preparation and transport time if food was not kept cold. Replenish small batches and discard food left out too long or whose temperature history is uncertain.
- Freezing: assembled sandwiches with salad or wet spreads often thaw poorly. Freeze suitable bread or cooked components separately according to their instructions; not every pâté or spread freezes well.
Final Practical Tips
- Slice fillings thinly and dry salad leaves to reduce moisture.
- Avoid cocktail sticks in children’s portions. If adults’ sandwiches contain sticks, remove them before eating.
- Carry spare napkins and a clean lidded container for safely handling unserved, still-chilled food.
- Leave delicate fillings until last: avocado and tomato keep their appearance and texture better when assembled close to serving.
Budgeting, Shopping and Useful Substitutions
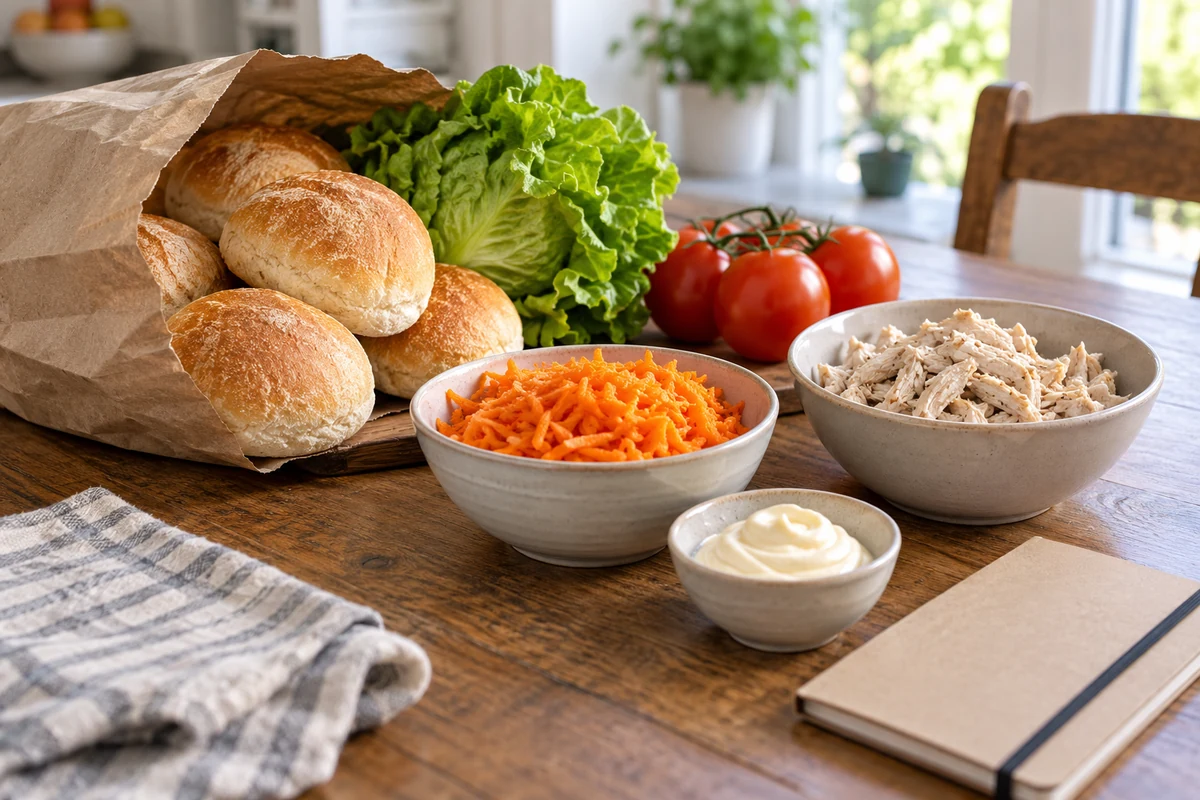
A short, planned menu can cost less and reduce waste while still offering guests a choice of flavours.
Planning the Shopping List
- Estimate portions: start with around three or four small pieces per adult for a short gathering with other food, or five to seven for a longer event. Adjust for whether you are serving tiny bread squares or larger mini rolls.
- Group the list: divide it into bread, spreads, cooked proteins, vegetables and garnishes. A small reserve can help, but avoid automatically overbuying perishable food.
- Compare unit prices: check the price per kilogram or litre and how much usable food the package provides, including drained weight where relevant.
Shopping Economically
- Ask a local bakery about ordering small rolls in advance or in quantity. Compare the price with supermarket alternatives rather than assuming a bulk discount.
- Versatile fillings such as cooked shredded chicken and tinned tuna can be economical alternatives to smoked salmon; local prices and portion sizes determine the saving.
- Compare seasonal vegetables and choose ingredients that work in several fillings. Carrot, cucumber and salad leaves can provide useful variety.
- Buy larger packs only when you can use or store the contents safely. Mustard and unopened dry seeds keep differently from refrigerated hummus; hummus is not a shelf-stable pantry item unless its label specifically says so.
- Supermarket own-brand bread and cream cheese may offer good value. Compare ingredients, allergens and unit prices.
Substitution Ideas
- 200 g cream cheese can be replaced in some fillings with 200 g mashed ricotta or thick drained Greek yoghurt. Texture, cost and energy content differ; check the product rather than assuming a guaranteed saving.
- 200 g smoked salmon can be replaced by a tuna filling using around 300 g drained tinned tuna, if that suits the number of portions. It is a different filling, not a weight-for-weight equivalent.
- 50 g walnuts can be replaced for crunch by 50–70 g sunflower or pumpkin seeds if suitable for the guests. Compare prices and check allergies.
- Brioche rolls can be replaced by ordinary mini rolls or sliced homemade bread. One split mini roll makes one sandwich; bread cut into quarters gives smaller portions.
Preparing Ahead
- Make suitable spreads ahead: prepare homemade cooked mixtures within their safe storage period, generally using refrigerated leftovers within 48 hours. Bought spreads follow their own labels. Do not make everything three days ahead by default.
- Use cooked leftovers carefully: safely cooled roast chicken can become a filling while still within its original storage time. Mixing it with a fresh spread does not restart that time.
- Prepare consistent slices: slice tomatoes and cucumber in a small batch, dry them and keep chilled until assembly.
Reducing Waste
- A safely stored chicken salad or other suitable prepared filling can become small sandwiches, provided its original storage deadline is respected.
- Cut bread efficiently. Clean unused crusts can be toasted for breadcrumbs or croutons; do not reuse scraps contaminated by perishable fillings.
- Offer dips separately so guests choose their own amount and fewer sandwiches become soggy.
Example Shopping List for 20 Adults
- Bread: 60 mini rolls gives three per person, suitable as a starting estimate for a short gathering with other food. Increase for a longer event or a more substantial sandwich meal.
- Cooked protein: around 1.2 kg cooked chicken provides roughly 20 g per roll if all 60 use it. For tuna, buy according to drained weight; six tins labelled 170 g are not automatically equivalent to 1.2 kg chicken.
- Spreads: around 400 g cream cheese or ricotta and 300 g hummus, distributed across the chosen varieties.
- Vegetables: around 6 medium tomatoes, 2 cucumbers, 4 carrots and 2 small bunches or bags of lettuce or rocket, adjusted to the fillings.
- Finishing ingredients: optional nuts or seeds, fresh herbs, a little olive oil and mustard. Buy only what your selected combinations require.
Before buying: compare unit prices and use-by dates, check allergies and make sure you have enough fridge and transport space.
A Flexible Buffet Option
Mini sandwiches make a practical party dish because you can combine a small number of ingredients in several ways. Careful portioning and neat presentation matter more than an elaborate menu.
Prepare suitable spreads ahead, assemble wetter fillings near serving and keep the reserve food chilled. Clear labels and separate utensils make the buffet easier to navigate.
Share your favourite combinations and browse our other recipes for more food to enjoy at family celebrations.
Visit the I Love Christmas blog for festive recipes and gathering ideas.
Frequently Asked Questions About Mini Party Sandwiches
How do I stop mini sandwiches becoming soggy?
Dry vegetables thoroughly, pat tomato slices dry and use a thin suitable spread as a moisture barrier. Assemble wetter fillings close to serving and keep the sandwiches covered and refrigerated until needed.
What is the best way to store and transport them?
Use clean, rigid lidded containers, with greaseproof paper between layers. Carry them in a cool box with ice packs that keep perishable fillings at 5°C or below, protect from meltwater and refrigerate on arrival.
Which vegan and gluten-free options can I offer?
Try hummus, carrot and rocket in suitable bread, avocado and spinach on cucumber slices, or grilled aubergine with a dairy-free spread. Check every ingredient and avoid cross-contact; vegan and gluten-free are separate requirements.
How many should I make per person?
Allow roughly three or four small sandwich pieces per adult for a one-hour gathering with other snacks, or five to seven for a longer event. Adjust for appetite, the rest of the menu and the difference between tiny bread squares and larger mini rolls.
How should I label sandwiches for allergies?
Identify the filling and relevant allergens, check ingredients with the guest and use clean preparation equipment and separate serving utensils. Keep special portions protected. A label alone does not prevent cross-contact, and vegan food can still contain allergens.
Can I assemble everything in advance?
Prepare spreads only within their safe refrigerated storage period and follow bought products’ labels. Assemble wetter sandwiches around 30–60 minutes before serving, then refrigerate. Aim to use assembled sandwiches within 24 hours or any shorter ingredient deadline; previously cooked meat keeps its original storage clock.
Sources and Further Reading
- Food Standards Agency: chilling and storing food
- NHS: foods to avoid for babies and young children
- NHS: foods to avoid during pregnancy
- NHS: food allergies