This Christmas biscuit recipe combines 300 g plain flour, 30 g cornflour and 200 g butter. Chilling the dough and cut shapes helps limit spreading. Follow the royal icing instructions, try a small batch of any dietary variation, and use the storage and gift ideas below.
Looking for a Christmas biscuit recipe for decorating and giving as gifts? This butter dough makes a useful starting point. Careful measuring, gentle mixing and chilling help the biscuits keep their outlines, although results vary with ingredients and ovens.
Ingredients for decorated Christmas biscuits
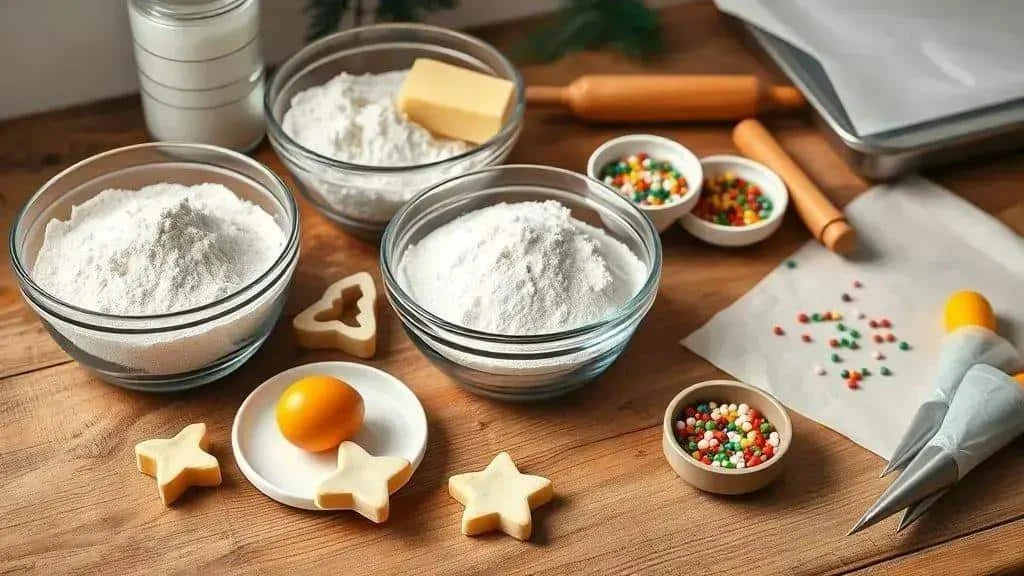
- 300 g plain flour – for the dough. For a gluten-free variation, use a suitable plain flour blend according to its substitution instructions and test a small batch; adding 350 g automatically can make the dough too dry.
- 100 g icing sugar – sift before using. Very finely ground granulated sugar can be used, but may produce a less delicate texture.
- 30 g cornflour – weigh it rather than relying on spoon measures. This helps give the biscuits a tender texture.
- 200 g unsalted butter, softened but still cool – or a firm plant-based baking block for a dairy-free variation.
- 1 large egg – for a vegan trial batch, replace with 60 g unsweetened apple purée or 1 tablespoon ground flaxseed mixed with 3 tablespoons water. The texture and spreading will differ.
- 1 teaspoon vanilla extract – or finely grated lemon zest for a different flavour.
- A pinch of salt – to balance the sweetness.
- 60 g pasteurised egg white, approximately 2 whites, for the royal icing – choose a product suitable for uncooked recipes. An alternative icing product should be used according to its own instructions.
- 300–400 g icing sugar for the icing – add enough to make a firm piping consistency.
- Lemon juice or water, added a few drops at a time – for thinning portions of icing. You may need up to 1–2 tablespoons in total, but do not add it all at once.
- Food-grade gel colours – these colour the icing without adding much liquid. Use liquid colouring sparingly.
- Edible sprinkles and decorations – check the labels, including dietary suitability and allergens.
Useful equipment
- Biscuit cutters in a selection of Christmas shapes.
- Rolling pin – thickness guides are useful for even dough.
- Baking parchment or a baking silicone mat – to line the trays.
- Baking trays – use flat trays that fit comfortably in the oven.
- Piping bags and nozzles – for controlled icing lines.
- Spatula and mixing bowls – for mixing and lifting the cut dough.
Substitutions and preparation notes
Cornflour reduces the proportion of gluten-forming flour and makes the biscuits more tender. If replacing it with plain flour, start with the same weight and test a biscuit: the texture will be different. Chilling remains important.
Butter: soft, low-fat spreads contain more water and can change the dough. Use a firm baking block for a plant-based version; check every other ingredient too if avoiding dairy.
Royal icing combines pasteurised egg white with icing sugar. Aquafaba, the liquid from cooked chickpeas, can be used for a vegan version, but its consistency varies and needs a trial batch.
Temperature: cool dough is easier to cut cleanly. If it becomes soft or sticky, chill it for 20–30 minutes before rolling again.
Yield: approximately 30 medium biscuits, depending on the size of the cutters and the thickness of the dough. Scale all ingredients proportionally for larger batches.
How to make decorated Christmas biscuits
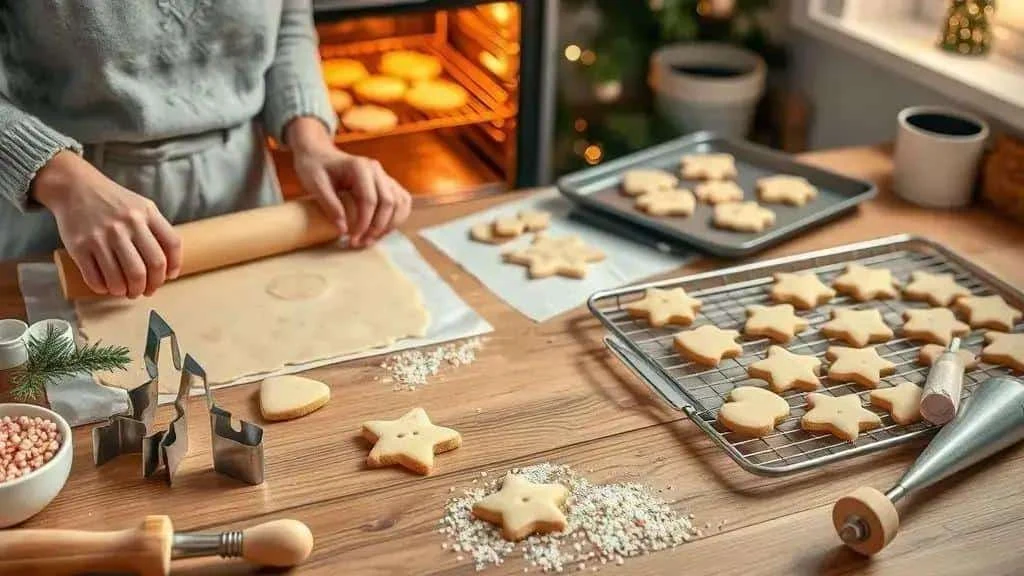
- Mix the butter and sugar: beat 200 g softened butter with 100 g icing sugar until smooth and combined. Avoid whipping in excessive air, which can affect the shapes as they bake.
- Add the egg and vanilla: mix in 1 large egg and 1 teaspoon vanilla extract just until incorporated.
- Add the dry ingredients: sift together 300 g plain flour, 30 g cornflour and a pinch of salt. Fold into the butter mixture until a dough forms, without kneading it heavily.
- Chill the dough: form a flat disc, wrap it and refrigerate for 30–60 minutes, or until firm enough to roll neatly.
- Preheat the oven: heat to 180°C conventional or 160°C fan towards the end of the chilling time.
- Roll evenly: roll the dough between two sheets of baking parchment to 3–4 mm thick. Add only a light dusting of flour if needed to prevent sticking.
- Cut out the shapes: lift them carefully onto lined trays with a thin spatula, leaving around 2 cm between biscuits.
- Chill the cut dough: refrigerate the trays for 10–15 minutes, or until the shapes feel firm, before baking.
- Bake: bake for about 8–12 minutes at 180°C conventional or 160°C fan. Size and oven performance affect the time; the biscuits should be set, with edges just beginning to turn pale gold.
- Cool: leave on the tray for 5 minutes, then move to a wire rack. Let the biscuits cool completely before decorating.
How to make royal icing
- Mix the icing: beat 60 g pasteurised egg white with 300 g sifted icing sugar, adding more sugar as needed, up to about 400 g, for firm peaks. Add lemon juice or water only a few drops at a time when adjusting the consistency.
- Adjust separate portions: keep some icing firm for outlines. Thin another portion with drops of water until a ribbon settles back into the surface slowly and evenly; use this for flooding.
- Add colour: mix in small amounts of gel colouring and transfer to piping bags. Keep unused icing covered to prevent a crust forming.
Decorating tips
- Outline first: pipe a border with firm icing and allow it to set for about 5–10 minutes before flooding the centre.
- Remove air bubbles: pop them with a clean cocktail stick immediately after flooding.
- Add sprinkles: apply them while the surface is still wet so that they stick.
- Allow time to dry: leave the biscuits in a clean, dry place until the icing is fully hard, usually 6–12 hours or longer in humid conditions. Follow the egg-white or icing product’s storage guidance.
- Test the oven: bake one biscuit first and adjust the timing before committing a whole tray.
Storing the finished biscuits
Once the icing is fully dry, store unfilled biscuits in an airtight container with baking parchment between layers. They are usually best within a week in a cool, dry place, provided the icing ingredients allow this. Follow product storage instructions. Cream-filled biscuits need refrigeration and should be eaten within 48 hours; a fridge does not make them safe for a fortnight. Package gifts only when completely dry.
Helping the biscuit dough hold its shape
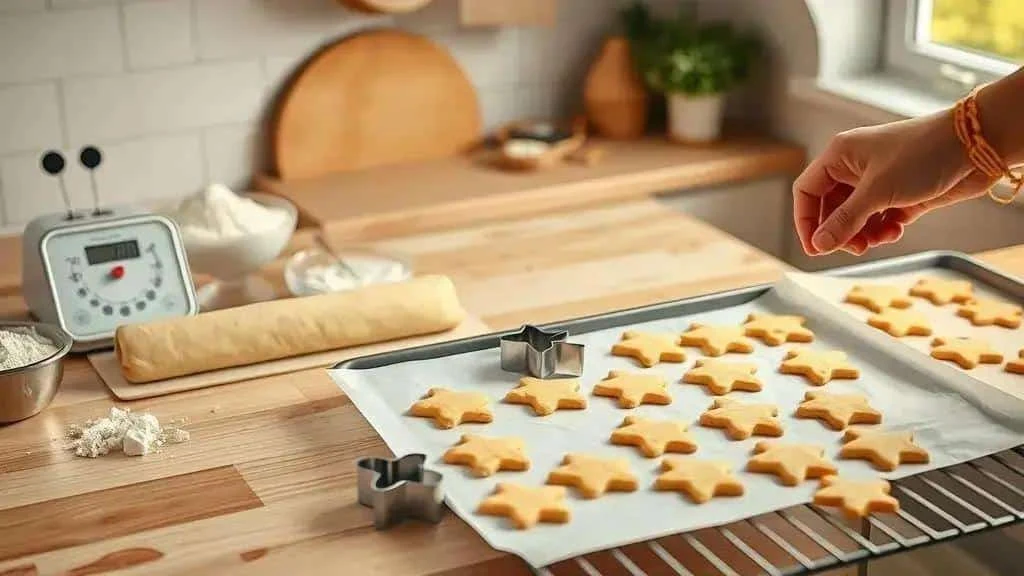
- Weigh the ingredients: this dough uses 300 g plain flour and 30 g cornflour with 200 g butter. Measuring by weight reduces variation between batches.
- Avoid overworking: stop mixing once the dough comes together. Heavy kneading can make biscuits tougher and cause shrinkage.
- Keep the thickness even: aim for 3–4 mm so the shapes bake at a similar rate.
- Keep the dough cool: chill the disc for 30–60 minutes before rolling. If it warms during cutting, return it to the fridge until firm again.
- Chill the cut shapes: refrigerate the tray for 10–15 minutes before baking; very warm dough may need longer.
- Line the tray: baking parchment or a suitable silicone mat prevents sticking. Mats can affect browning, so check the first batch carefully.
- Check the oven: fully preheat it and use an oven thermometer if needed. Start at 180°C conventional or 160°C fan; an oven that runs too cool can allow the dough to spread before it sets.
Cutting and handling the dough
- Roll between parchment sheets: this reduces sticking and helps keep the surface smooth.
- Press cutters straight down: avoid twisting, which can distort the edges.
- Lift with a thin spatula: support each shape rather than pulling or stretching it.
- Leave space: allow about 2 cm between biscuits for even baking.
- Use one oven shelf: this makes a first batch easier to monitor. Avoid repeatedly opening the door; rotate the tray only if your oven browns unevenly.
- Cool before lifting: remove when set and lightly golden at the edges, then wait 5 minutes before transferring to a rack.
Small tests and adjustments
Bake one or two test biscuits to check the timing. If shapes spread, first check that the butter and dough were cool, the quantities were correct and the oven fully heated. Longer chilling often helps; do not automatically lower the temperature.
Decorating Christmas biscuits with royal icing

Use three icing consistencies: firm for outlines, slightly softer for details and fluid enough to settle smoothly for flooding.
Icing consistencies
- Firm icing: start with about 30 g pasteurised egg white and 150–200 g sifted icing sugar. Adjust until it holds a neat piped line.
- Medium icing: take a portion of the firm icing and add water drop by drop until it pipes smoothly while still holding its shape.
- Flood icing: thin another portion gradually until a ribbon settles into the surface. Adding more sugar makes icing firmer, not runnier; avoid pouring in a tablespoon of water at once.
- Vegan icing: begin with about 60 g aquafaba and 300–400 g icing sugar, adjusting as necessary. Different aquafaba products behave differently, so check a small sample first.
Outlining and flooding
- Prepare the piping bag: fit a small round nozzle and fill with firm icing.
- Pipe the outline: follow the shape of the biscuit with an even border.
- Let it set: wait about 5–10 minutes for the outline to firm up.
- Flood the centre: add the thinner icing inside the border, without overfilling.
- Level the icing: gently tap the tray and guide the icing into corners with a clean cocktail stick.
- Add details: once the base is set, use medium icing for dots, lines and small decorations.
Marbling and wet-on-wet patterns
- Apply the base colour: flood the biscuit with one colour.
- Add contrasting dots: drop a second colour onto the wet icing.
- Draw through gently: use a cocktail stick to create a marbled or feathered pattern.
- Work promptly: the colours blend only while the base remains wet.
Brush embroidery and fine details
- Pipe thin lines: use medium icing where you want a textured pattern.
- Draw with a brush: before the icing dries, use a clean, barely damp food-only brush to pull short strokes inwards.
- Build layers: allow each layer to set before adding another so the pattern remains defined.
Choosing and mixing colours
- Use gel colours: they add strong colour with relatively little liquid.
- Add small amounts: build the shade gradually rather than adding too much at once.
- Allow colours to develop: deeper shades can intensify as the icing rests, so wait before adjusting again.
Decorating equipment
- Piping bags with small round nozzles for lines and dots.
- Small bowls for keeping colours separate.
- Fine food-only brushes and cocktail sticks for marbling and details.
- Spatula and wire rack for handling and drying the biscuits.
Practical decorating advice
- Try one biscuit first: check both colour and consistency before decorating the batch.
- Work in layers: let separate layers set to avoid smudging.
- Avoid too much liquid: very thin icing can run over the edges or soak into the biscuit.
- Dry before packing: allow at least 6–12 hours, and longer if necessary, until the icing is completely hard. Keep the drying area clean and follow the icing product’s guidance.
Christmas biscuit variations: flavours, shapes and vegan options
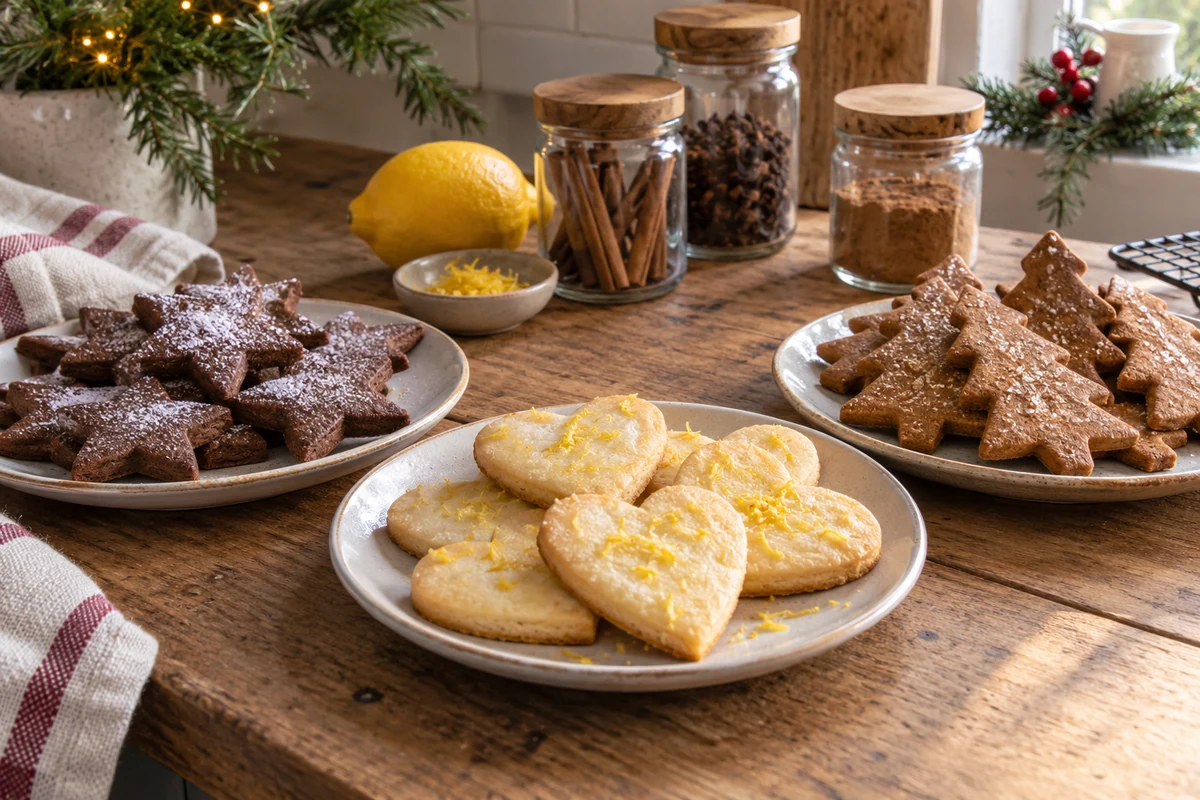
Try different flavours and cutters, testing a small batch whenever you change the ingredients. Dietary substitutions can alter both texture and spreading.
Flavour variations
- Chocolate: replace 30 g of the plain flour with 30 g unsweetened cocoa powder. Keep the original sugar quantity; cocoa is bitter rather than sweet.
- Ginger and spice: add up to 1 tablespoon ground ginger, 1 teaspoon cinnamon and ¼ teaspoon ground cloves, using less ginger for a gentler flavour.
- Lemon: add the finely grated zest of 1 lemon. Zest adds flavour without extra liquid; use lemon juice in the icing instead.
- Almond: replace 50 g flour with 50 g ground almonds. The biscuits will be more tender and may spread differently, so chill well and test a biscuit before making further changes.
- Sandwich biscuits: bake matching discs and fill once cold with ganache or dulce de leche. Follow the filling’s storage requirements.
Shapes and presentation
- Classic cutters: stars, trees and candy canes work well with dough rolled to 3–4 mm.
- Hanging decorations: make a small hole before baking and thread clean, suitable ribbon through once dry. Keep edible gifts protected from dust; remove ribbon before eating.
- Filled biscuits: sandwich two matching shapes with filling, pressing gently to avoid breaking them.
- Mini biscuits: check them 1–2 minutes earlier than the standard size, as small shapes brown quickly.
Vegan variation: ingredients to trial
- 300 g plain flour
- 30 g cornflour
- 100 g icing sugar
- 200 g firm plant-based baking block
- 60 g unsweetened apple purée or 1 tablespoon ground flaxseed mixed with 3 tablespoons water and left to thicken – as an egg replacement
- 1 teaspoon vanilla extract
- A pinch of salt
Vegan icing ingredients
- About 60 g aquafaba, the liquid from cooked chickpeas
- 300–400 g icing sugar
- Lemon juice or water, a few drops at a time, as needed
- Vegan-suitable gel colours, added gradually
Baking and storing variations
- Allow extra chilling: dough made with a plant-based block may need another 15 minutes or so to firm up.
- Oven temperature: begin at 180°C conventional or 160°C fan and assess a small test batch.
- Dry the icing: allow 6–12 hours or longer until fully hard, following the aquafaba or icing product’s storage guidance.
- Storage: keep dry, unfilled biscuits airtight with parchment between layers. Aim to enjoy them within a week if all the ingredients permit room-temperature storage; this is a quality guide, not a validated shelf life for selling.
Storing dough and using up leftovers
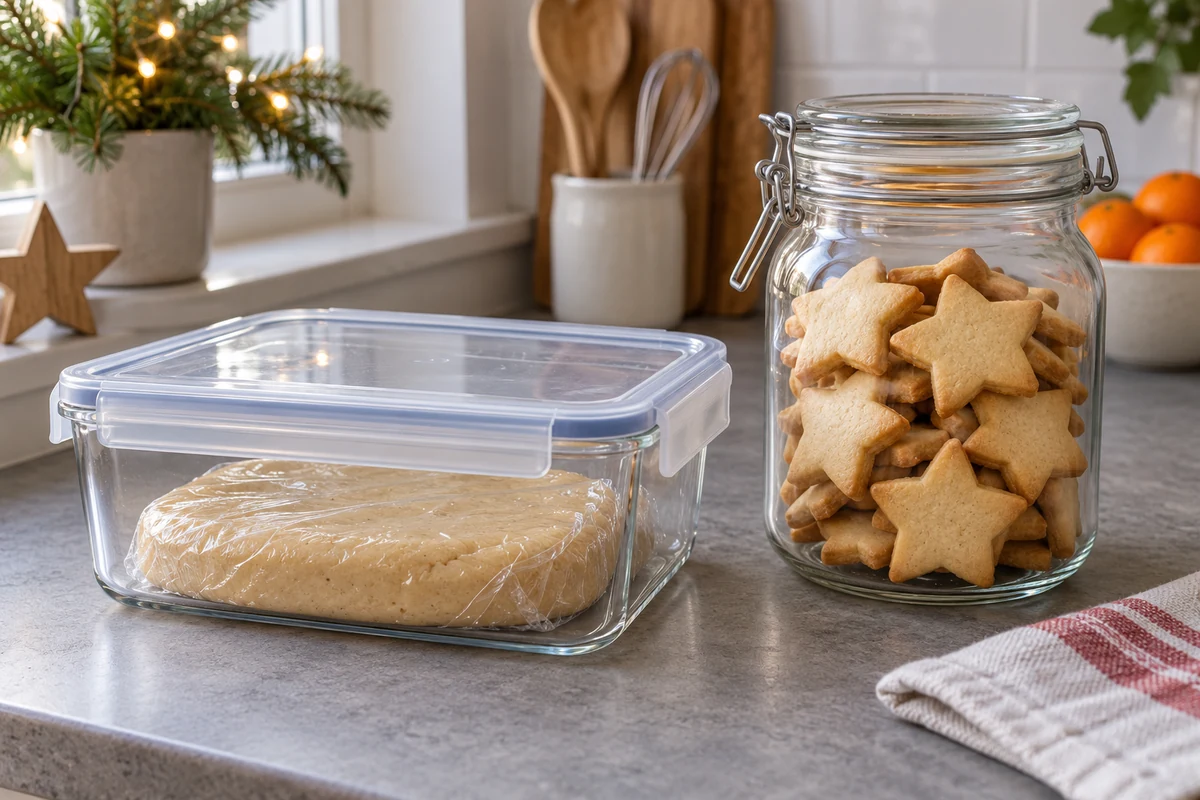
Careful storage helps preserve the texture and quality of your Christmas biscuits. Keep raw dough separate from ready-to-eat food and handle leftover baked biscuits hygienically.
Raw dough: fridge and freezer
- Fridge: wrap the dough and place in a sealed container at 5°C or below. Bake within 48 hours, or sooner if an ingredient’s use-by instructions require it.
- Freezer, as a disc: wrap well and place in a freezer bag. Use within about 3 months for best quality and thaw in the fridge before rolling.
- Freezer, as cut shapes: freeze flat on a lined tray, then transfer to a sealed container. These are easier to bake from frozen than a thick disc or ball.
- Label clearly: record the date, flavour and any relevant allergens so batches are easy to identify.
Baking frozen dough
- Preheat the oven to 180°C conventional or 160°C fan.
- Bake thin cut shapes from frozen: allow a little extra time, checking from 1–2 minutes beyond the usual time. Thick portions need longer and should not be treated like thin biscuits.
- Thaw discs in the fridge: allow several hours or overnight until rollable, rather than assuming 20–40 minutes is enough. Keep the dough cold and use within 24 hours of fully defrosting.
- Check the bake: the centres should be set and the edges lightly golden; do not rely on time alone.
Storing baked biscuits
- Room temperature: dry, unfilled biscuits are usually best within 7 days in a cool, airtight container, subject to the icing ingredients’ instructions.
- Fridge: biscuits with fresh cream, custard or cream cheese filling need refrigeration at 5°C or below and should be eaten within 48 hours, or sooner if the ingredients require it.
- Freezer: freeze plain, unfilled biscuits well wrapped for up to about 3 months for best quality. Thaw while still wrapped to reduce condensation on the surface; icing colours may bleed after freezing.
- Icing and decoration: wait until completely dry before stacking, separating layers with parchment to protect the finish.
Using dough scraps and broken biscuits
- Re-roll gently: gather clean scraps with minimal handling. Let very firm dough soften briefly, or chill sticky dough before rolling again.
- Mini tart cases: press leftover dough into small tins and bake until set and golden. Adjust the time to suit the thickness.
- Biscuit truffles: combine fresh biscuit crumbs with a little cream cheese or ganache, shape into balls and coat in chocolate. Refrigerate promptly and eat within 48 hours, counting from preparation of the earliest perishable component.
- Crunchy topping: crumble clean, fresh broken biscuits over ice cream or a chilled dessert just before serving.
- Filled pairs: join two biscuits with ganache, dulce de leche or vanilla cream. The filling determines storage and transport requirements.
Hygiene and handling
- Do not eat raw dough: uncooked flour as well as raw egg can carry harmful bacteria. Chill dough promptly and bake within 48 hours or freeze; use pasteurised egg white suitable for uncooked icing.
- Keep moisture out: cool biscuits completely and use a dry, airtight container. Parchment separates layers; it does not remove moisture. Do not add loose desiccant granules to food.
- Cool before freezing: let biscuits cool fully, then pack securely to limit condensation and freezer damage.
- Adjust sticky dough carefully: chill it first. If still too wet, add flour a teaspoon at a time; excess flour makes biscuits dry and tough.
Organising larger batches
- Freeze manageable portions as discs or cut shapes so you can bake only what you need.
- Prepare decorating kits with separately packed sprinkles and suitable icing, following the icing product’s storage instructions.
- Record the yield and baking time for each cutter size to make later batches more consistent.
Christmas biscuit gifts and small-business ideas

Present your Christmas biscuits in food-safe packaging with clear ingredient and storage information. If you plan to sell them, check the requirements that apply to your location and sales method before taking orders.
Packaging and presentation
- Food-safe clear bags tied with ribbon work well for one or two fully dry biscuits.
- Windowed gift boxes suit sets of 4–12 biscuits. Use food-safe liners rather than decorative tissue in direct contact with the food.
- Jars or tins make reusable gifts. Separate layers with baking parchment to protect the icing.
- Labels and instructions should give accurate ingredient, allergen and storage information. For sales, use a shelf life you can support rather than simply copying a recipe estimate.
- Protect the finish: use a snug, rigid outer box for transport and pack only fully dry biscuits. Keep non-food decorations separate from edible items.
Working out a selling price
- Calculate ingredient cost per biscuit: divide the total cost by the usable yield. For example, an illustrative £15 batch making 30 biscuits costs £0.50 per biscuit in ingredients; use your actual prices.
- Add packaging: if a box costs £3 and holds 6 biscuits, that adds £0.50 per biscuit in this example.
- Include labour and overheads: account for decorating time, energy, fees and other costs, then divide them across the batch.
- Distinguish mark-up from margin: adding 50% to cost is a 50% mark-up. A 50% gross margin means that half the selling price remains after the included costs, so the price must be twice those costs.
- Worked example: with an illustrative total cost of £1.50 per biscuit, a 50% mark-up gives £2.25. A 50% gross margin on those costs gives £3.00. These are arithmetic examples, not suggested market prices.
Gift sets and product ideas
- Small gift sets: pack 6 mixed shapes with ribbon and a storage card.
- Family boxes: offer 12–24 biscuits in a selection of flavours.
- Mini festive packs: three biscuits in a clear food-safe bag make a compact gift.
- Seasonal variations: try ginger or chocolate flavours with coordinated packaging.
Selling safely and providing information
- Ingredients and allergens: provide the information required for your type of sale. Check flour, milk, egg, nuts and all decorations; never describe a product as allergy-safe without appropriate controls.
- Dates and shelf life: keep batch records and use appropriate date labelling for the product. Ask your local authority about requirements; a homemade recipe does not establish a commercial shelf life.
- Storage information: distinguish dry biscuits from perishable filled versions and give customers clear, suitable instructions.
- Food-business preparation: in the UK, register with the local authority at least 28 days before starting a food business. Check the applicable hygiene and labelling rules, including those for prepacked food. Clean hands and surfaces matter; gloves do not replace handwashing.
Finding customers
- Local outlets: consider Christmas markets, independent shops and cafés, checking each organiser’s requirements.
- Online orders: use clear photos and descriptions, provide required food information and choose packaging that protects the decorations.
- Social media: show your own process and finished products. Share genuine customer feedback only with permission.
- Seasonal offers: plan Christmas, Secret Santa and workplace gift sets around realistic production capacity.
Managing personalised orders
- Set lead times: explain how much notice you need; 5–7 working days is an example, not a requirement.
- Confirm bookings: agree payment arrangements and cancellation terms clearly before reserving materials and time.
- State minimum quantities: for example, a personalised design might require an order of 12 biscuits to cover the work involved.
- Confirm the design: agree a sketch or digital mock-up before production, explaining that handmade results vary slightly.
Giving biscuits as gifts
- Include a note: state when they were made, how to store them and what ingredients they contain.
- Offer a mixture: combine iced and plain biscuits for different preferences.
- Add a handmade touch: use simple ribbon or cotton string around the outer packaging, keeping it away from the food itself.
- Workplace gifts: coordinate packaging colours or offer plain designs without logos.
Ready for your next batch
Accurate measuring, cool dough and a small test bake are the best starting points for neat decorated Christmas biscuits. Practise the icing on a few spare shapes before decorating a whole tray.
Try different flavours gradually, freeze portions to save time and use clean scraps without repeatedly overworking them. Small adjustments are easier to assess than changing several ingredients at once.
Share your festive bakes and follow the I Love Christmas blog for more Christmas recipes, decorating ideas and seasonal inspiration.
Decorated Christmas biscuits: frequently asked questions
How can I stop the biscuits spreading?
Weigh the ingredients, avoid overbeating the butter or kneading the dough, roll evenly to 3–4 mm and chill the cut shapes. Preheat to 180°C conventional or 160°C fan and test one biscuit first. No dough is completely immune to spreading.
How long can I keep the dough in the fridge or freezer?
Keep raw dough covered at 5°C or below and bake within 48 hours, subject to ingredient use-by instructions. Freeze well wrapped for about 3 months for best quality. Thaw discs in the fridge and use within 24 hours of fully defrosting.
Can I make vegan Christmas biscuits?
Try a firm plant-based baking block and either 60 g unsweetened apple purée or a flaxseed-and-water mixture instead of the egg. Use aquafaba icing and vegan-suitable decorations. Test a small batch, as these changes affect texture and spreading.
How do I adjust royal icing for outlines and flooding?
Keep the outline icing firm enough to hold a piped line. Add water drop by drop to a separate portion until it settles smoothly for flooding. Too much sugar makes icing firmer; too much water makes it run over the edges.
Can I freeze baked, decorated biscuits?
Plain biscuits freeze best. Fully dried royal-iced biscuits can also be frozen carefully, but colours may bleed and the finish may change. Test one first, separate layers with parchment and thaw while wrapped. Perishable fillings need their own cold-storage arrangements.
How do I calculate a selling price?
Add ingredients, packaging, labour, energy and fees, then divide by the usable yield. Decide whether you are calculating mark-up on cost or gross margin on selling price: they are different. Use actual costs and check local demand rather than relying on an example price.
Sources and Further Reading
- Food Standards Agency: chilling, freezing and defrosting food safely
- Food Standards Agency: safe storage, handling and use of eggs
- Food Standards Agency: starting a food business
- Food Standards Agency: food labelling guidance