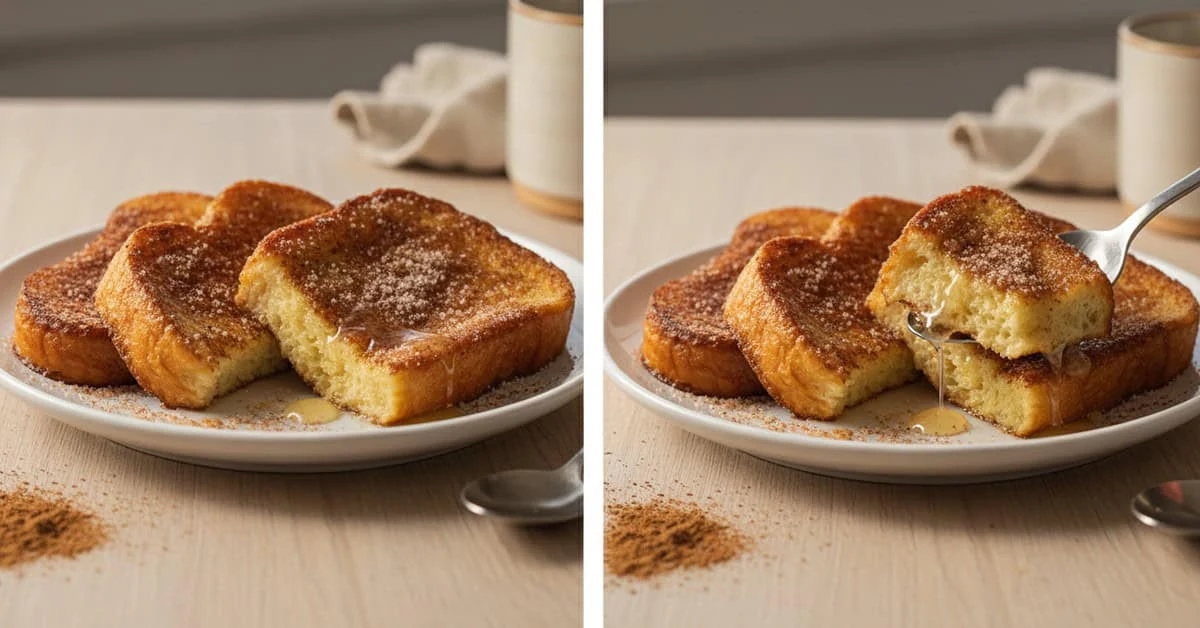
Brazilian rabanada is a Christmas favourite made from bread dipped in milk and eggs, then baked or fried and finished with cinnamon sugar. Follow the method for soft centres and golden edges, with filled, gluten-free and vegan variations, serving ideas and safe storage advice.
Brazilian rabanada is a comforting festive treat, similar to sweet French toast. Choose baking for a convenient trayful or frying for a crisper finish, then coat the warm slices with fragrant cinnamon sugar.
Ingredients for rabanada
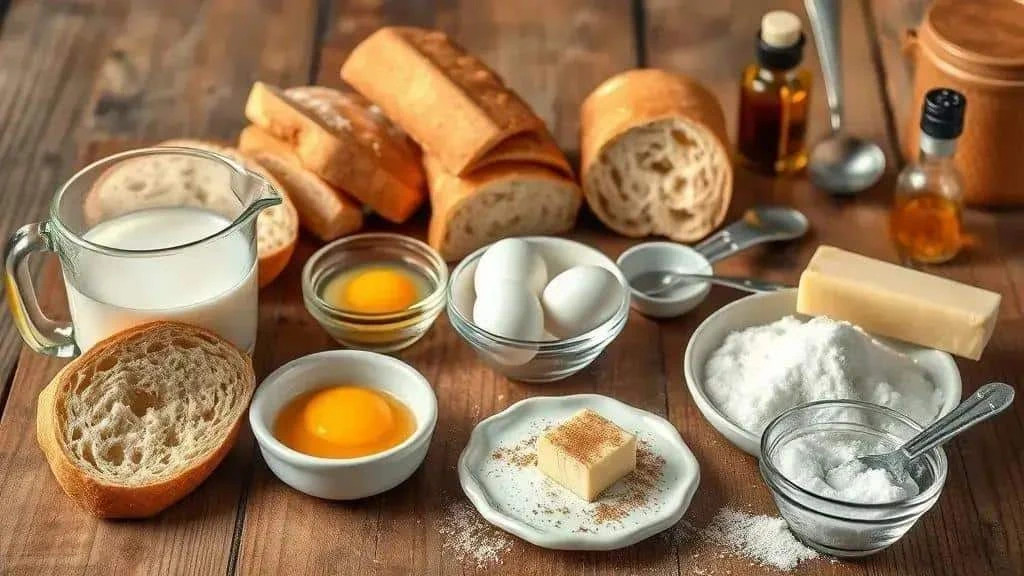
To make Brazilian rabanada, gather the ingredients below. This recipe makes 6–8 slices, depending on the loaf and how thickly you cut it.
Main ingredients
- 6–8 thick bread slices, about 200–300 g — use slightly stale baguette, a firm white loaf or brioche; choose firm gluten-free bread if required.
- 500 ml milk — whole milk gives richness. Unsweetened plant milk can replace it, but a vegan version also needs changes to the eggs, bread and butter.
- 3 large eggs — beaten; for an egg-free version, follow the separate vegan method below rather than swapping the milk alone.
- 4 tablespoons caster sugar — for the dipping mixture; use less with sweet brioche. Sugar substitutes vary, so follow their instructions rather than replacing spoon for spoon.
- 1 teaspoon vanilla extract — optional; finely grated orange zest is another option.
- 1 teaspoon ground cinnamon — for the sugar coating below, not an additional teaspoon; a small pinch of nutmeg can be added.
- Up to 50 g melted butter, for baking — for greasing and lightly brushing the bread. Use a suitable dairy-free spread or oil for a dairy-free version.
- Neutral oil, for frying instead of baking — such as sunflower or rapeseed oil, enough for a shallow layer in a heavy frying pan. Do not add the baking butter to the hot frying oil.
- 4 tablespoons caster sugar mixed with the 1 teaspoon cinnamon — for coating; use as much as needed rather than forcing all of it onto the bread.
- Optional syrup — serve with a little maple syrup or honey. For simple syrup, gently heat 100 g sugar with 50 ml water until dissolved, then cool before serving.
Ingredient tips
Cut the bread about 1.5–2 cm thick so it can absorb the mixture without falling apart. Slightly stale bread works well; lightly dry very fresh slices in a low oven if needed. Use unsweetened plant milk to keep control of the sweetness.
How to make baked or fried rabanada
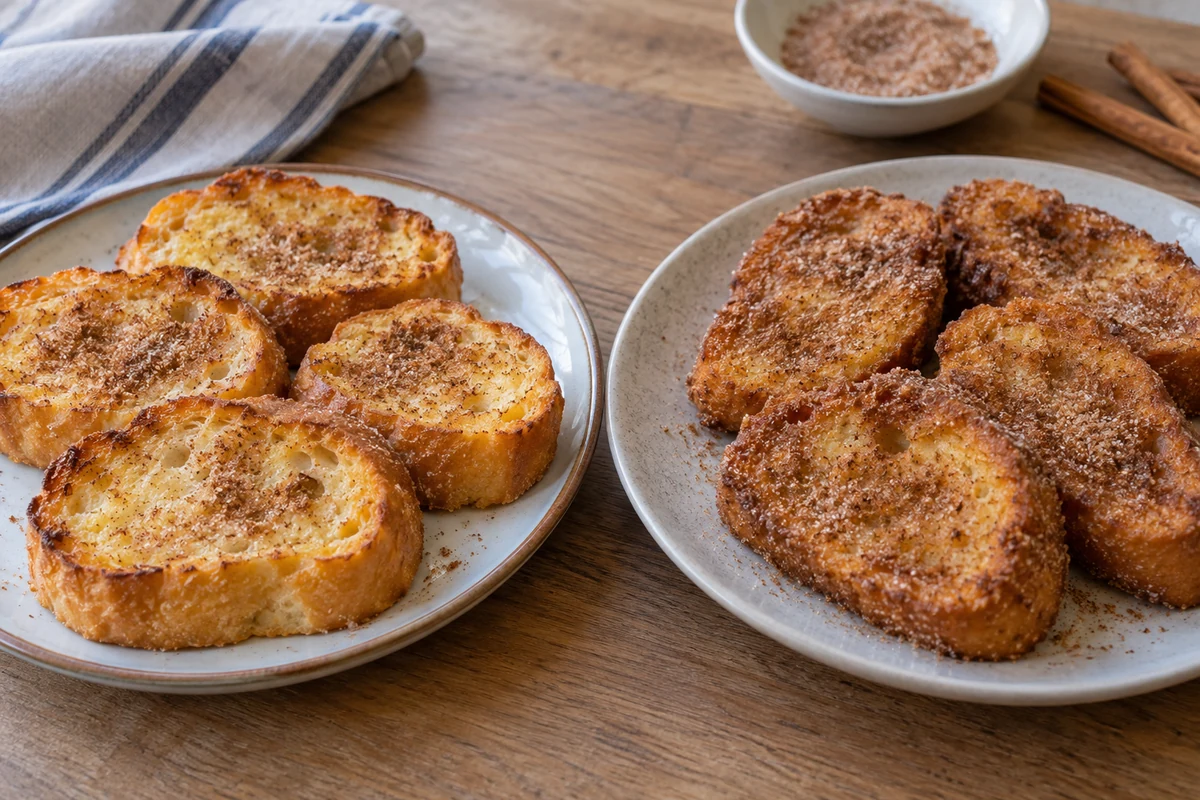
Follow these steps to prepare rabanada, then choose either the oven or frying method.
- Slice the bread: cut 6–8 slices, about 1.5–2 cm thick, from a firm baguette, white loaf or brioche.
- Make the dipping mixture: whisk together 500 ml milk, 3 eggs, 4 tablespoons sugar and the optional vanilla. For a vegan version, use the complete alternative below. Do not taste the raw egg mixture.
- Dip the slices: start with about 5–10 seconds on each side, adjusting to the bread. It should absorb some mixture but remain firm enough to lift.
- Let excess drip off: hold each slice over the bowl briefly or rest it on a clean rack above a tray. Cook promptly and discard leftover raw dipping mixture.
Baked rabanada
Prepare the oven: preheat to 180°C conventional or 160°C fan. Lightly grease a baking tray or line it with suitable baking parchment.
- Brush with butter: lightly brush the soaked bread with melted butter for colour and flavour.
- Arrange on the tray: place the slices in one layer with space between them.
- Bake: allow approximately 20–30 minutes, turning carefully halfway through. The bread should be golden and the egg mixture fully set and hot through in the centre; thick or heavily soaked slices may take longer.
- Add cinnamon sugar: coat or sprinkle the warm slices with the prepared mixture of 4 tablespoons sugar and 1 teaspoon cinnamon.
Fried rabanada
Heat the oil safely: use a stable, heavy frying pan and a shallow layer of neutral oil. Aim for 170–180°C, checking with a suitable thermometer. Never leave hot oil unattended or let it smoke.
- Cook in small batches: carefully lower in one or two well-drained slices at a time, avoiding splashes and overcrowding.
- Fry until cooked through: start with around 2–3 minutes per side, adjusting to thickness and heat. The outside should be golden and the egg-soaked centre fully cooked, not wet with raw batter. Lower the heat if the crust colours too quickly.
- Drain: lift with suitable utensils and briefly drain on kitchen paper.
- Finish: coat with cinnamon sugar while warm and serve with a little optional syrup.
Practical tips and quick variations
- Thickness: 1.5–2 cm slices usually balance absorption with enough strength to hold their shape.
- Bread texture: use bread that is a little dry but still sound, never mouldy. Very fresh bread can be lightly dried in a low oven first.
- Substitutions: dairy-free rabanada needs suitable milk, fat and bread. A vegan version must also replace the eggs and avoid honey.
- Storage: cool promptly and refrigerate within 1–2 hours, then eat within 48 hours. Reheat once until steaming hot throughout; do not keep this milk-and-egg dish at room temperature overnight.
Filled, gluten-free and vegan rabanada
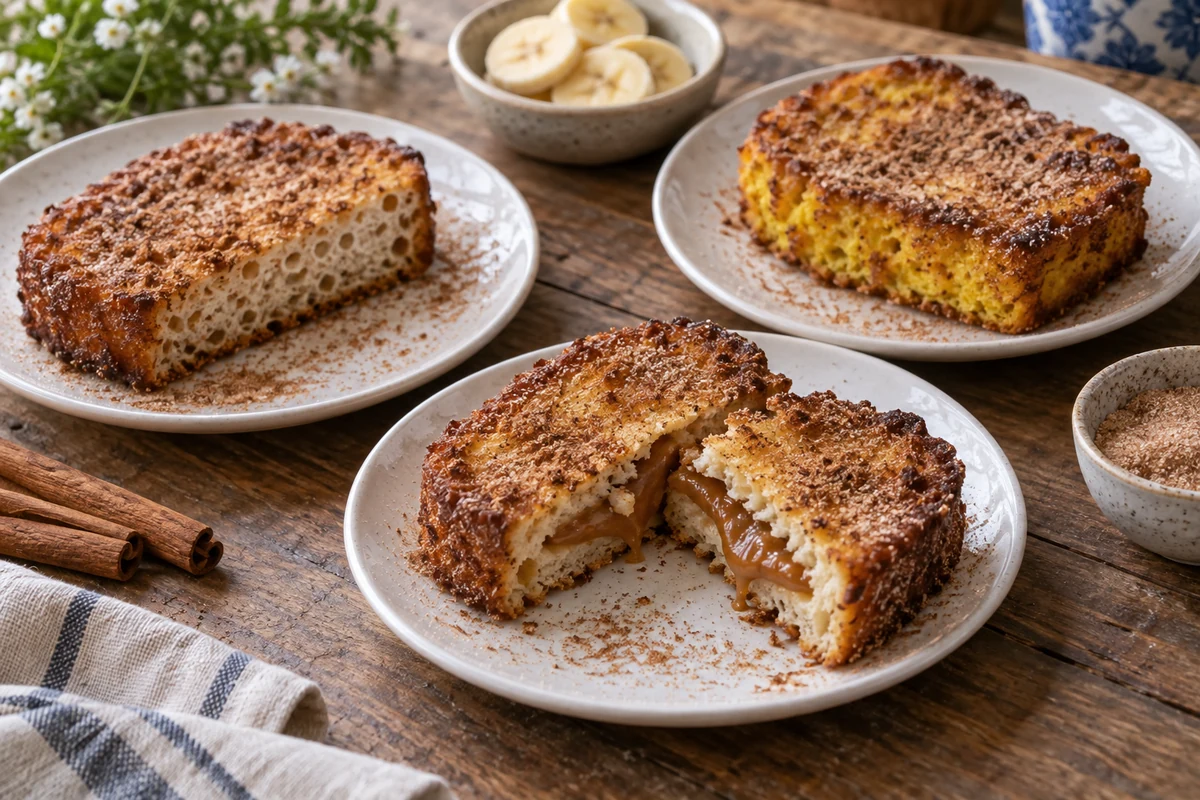
Try these three variations of rabanada, keeping the bread firm enough to handle and checking that the centre cooks fully.
Filled rabanada
A small amount of filling gives a rich festive variation. Use firm bread and avoid overfilling, which makes the slices difficult to turn.
- 6–8 thick slices of brioche or firm white bread — carefully cut a small pocket into each, without cutting through the edges.
- About 100 g dulce de leche — or use jam or cream cheese mixed with lemon zest.
- 1 banana, optional — thinly sliced; use sparingly inside the bread.
- 500 ml milk — or replace a small portion with cream for a richer version.
- 3 eggs — for the dipping mixture.
- 4 tablespoons sugar and 1 teaspoon cinnamon — use 2 tablespoons sugar in the dip and mix the remaining 2 with the cinnamon for the coating.
- Add the filling: put a small spoonful of dulce de leche into each pocket, adding a thin slice of banana if wanted.
- Close gently: press the bread around the pocket without crushing it. If the slice splits, cook it carefully as an open version rather than forcing it shut.
- Mix the dip: whisk the milk, eggs and 2 tablespoons sugar.
- Dip briefly: soak just enough to moisten the bread without making it collapse, then let excess mixture drain.
- Cook: brush lightly with butter and bake at 180°C conventional or 160°C fan, starting to check after 20 minutes. Filled slices may need longer than plain ones. Ensure the egg and filling are hot through; do not use a short fixed cooking time just because the outside is golden.
- Finish: sprinkle the warm slices with the remaining sugar mixed with cinnamon.
Gluten-free rabanada
Choose a firm gluten-free loaf and handle it gently, as absorption and texture vary. Check every ingredient and avoid cross-contact if cooking for someone with coeliac disease.
- 6–8 slices gluten-free bread — about 1.5–2 cm thick.
- 500 ml milk — dairy or a suitable unsweetened plant alternative; check oat products for gluten-free labelling.
- 3 eggs — for an egg-free version, use a suitable gluten-free egg replacer according to its instructions; results will differ.
- 4 tablespoons sugar and 1 teaspoon cinnamon — divide the sugar between the dip and coating as below.
- Butter or a suitable spread — for brushing; gluten-free does not automatically mean dairy-free.
- Make the mixture: whisk the milk, eggs and 2 tablespoons sugar.
- Dip carefully: start with a short dip, lift gently and let excess drain off; adjust according to the bread rather than insisting on a fixed soaking time.
- Bake or fry: follow the main cooking methods, ensuring the egg-soaked centre is fully cooked. Gluten-free bread may brown and absorb liquid differently.
- Coat: mix the remaining 2 tablespoons sugar with the cinnamon and sprinkle over while warm.
Vegan rabanada
An egg-free batter produces a different but enjoyable version. Chickpea flour must be cooked thoroughly, so avoid leaving a wet, floury centre.
- 6–8 slices vegan bread — check for egg, milk, butter and honey; choose gluten-free as well if needed.
- 300 ml unsweetened plant milk — such as soya, oat or almond, chosen to suit dietary needs.
- 3 level tablespoons chickpea flour — whisk directly into the plant milk; do not add the extra water from an unrelated egg-replacement method.
- 4 tablespoons sugar and 1 teaspoon cinnamon — divide the sugar between the batter and coating.
- Neutral oil or a suitable vegan spread — for lightly brushing or shallow frying.
- Make the batter: whisk the chickpea flour with a little of the measured plant milk until smooth, then add the remainder and let stand for 5 minutes.
- Add flavour: stir in 2 tablespoons sugar and an optional teaspoon of vanilla. The batter should coat the bread lightly; add a small splash of plant milk only if very thick.
- Dip: moisten each slice without saturating it, then allow excess batter to drain.
- Cook thoroughly: brush with oil and bake at 180°C conventional or 160°C fan, checking from 20 minutes and turning halfway. Alternatively, shallow fry in small batches. Cook until golden and hot through, with no raw chickpea batter remaining.
- Finish: mix the remaining sugar with the cinnamon and sprinkle over, or serve with a little maple syrup.
Tips across the variations
- Soaking time: drier bread may need longer, but the slice should stay intact when lifted.
- Oil temperature: aim for 170–180°C with a suitable thermometer, and watch the pan throughout cooking.
- Fillings: use small amounts of jam, fruit or cream cheese. Very wet or thick fillings make even cooking harder.
Tips for soft centres and golden edges
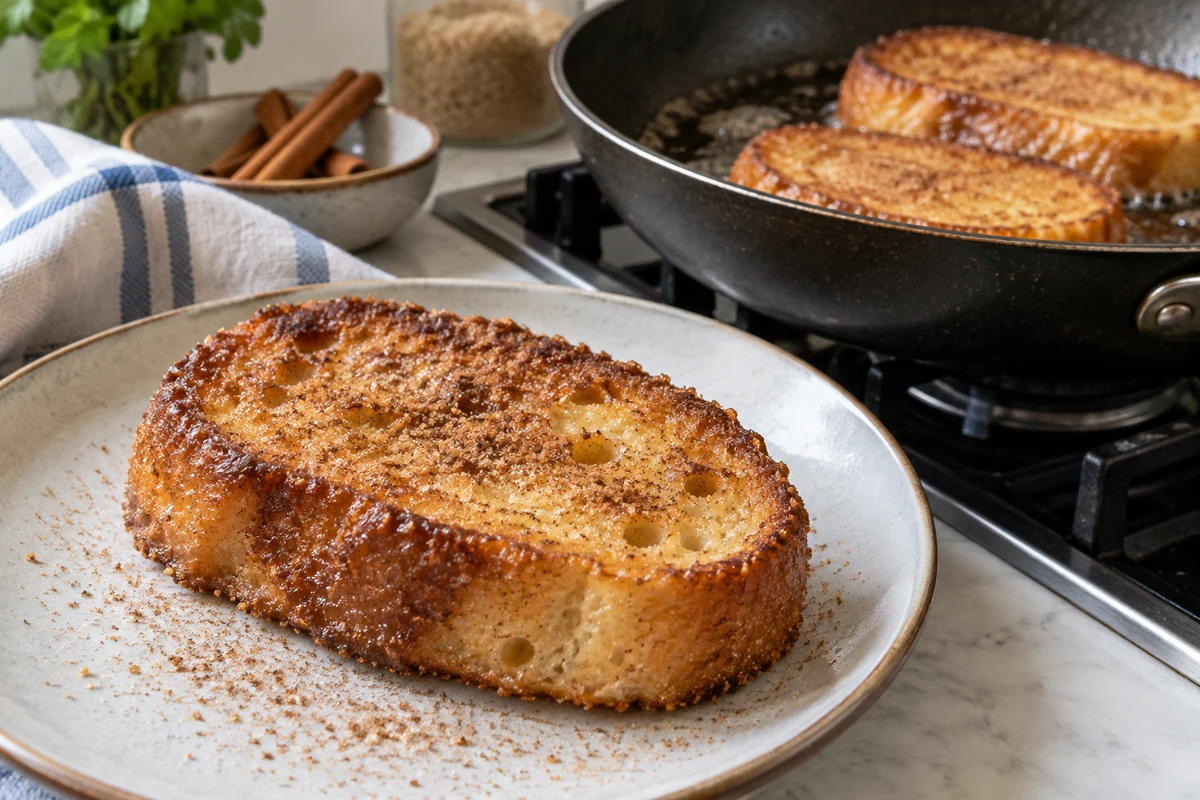
These practical details help you make rabanada that is soft inside without being raw or waterlogged.
Texture and moisture
- Bread: choose slightly stale baguette, brioche or a dense white loaf.
- Thickness: slices around 1.5–2 cm thick are easier to cook through than very thick pieces.
- Dipping mixture: the main recipe uses 500 ml milk and 3 eggs for 6–8 slices. You may not use it all; do not pour surplus over the tray or force the bread to absorb it.
- Soaking: start with a short dip on each side and adjust to the loaf. Stop before the slice becomes fragile.
- Drain briefly: let excess mixture drip off before cooking, reducing splashes and soggy patches.
Careful frying
- Monitor the oil: use a thermometer suitable for hot oil and aim for 170–180°C.
- Do not rely on a crumb test: bubbling or browning speed does not measure the temperature accurately. If the oil smokes, turn off the heat and let it cool safely; never add water.
- Small batches: cook one or two slices at a time so there is space to turn them safely.
- Check the centre: start with around 2–3 minutes per side, but cook longer as needed until the egg mixture is fully set and hot throughout. Turn carefully with suitable utensils.
- Drain well: place briefly on kitchen paper, then add cinnamon sugar while warm.
Oven and finishing tips
- Baking option: lightly brush with butter or oil and bake at 180°C conventional or 160°C fan for approximately 20–30 minutes, turning halfway and checking the centre is fully cooked.
- Finishing: sprinkle with cinnamon sugar or add a little honey, maple syrup or cooled simple syrup.
- Aroma: add vanilla or finely grated orange zest to the dipping mixture.
Storage and reheating
- Storage: cool quickly, refrigerate within 1–2 hours and keep covered at 5°C or below. Eat within 48 hours; cooked rabanada should not sit at room temperature for 24 hours.
- Reheating: use an oven at 180°C conventional or 160°C fan until steaming hot throughout. Reheat once only. A microwave is also suitable, though it makes the bread softer.
- Preparing ahead: keep the dipping mixture covered in the fridge and use the same day, respecting ingredient use-by dates. Dip the bread shortly before cooking rather than leaving soaked slices out.
Serving rabanada at Christmas
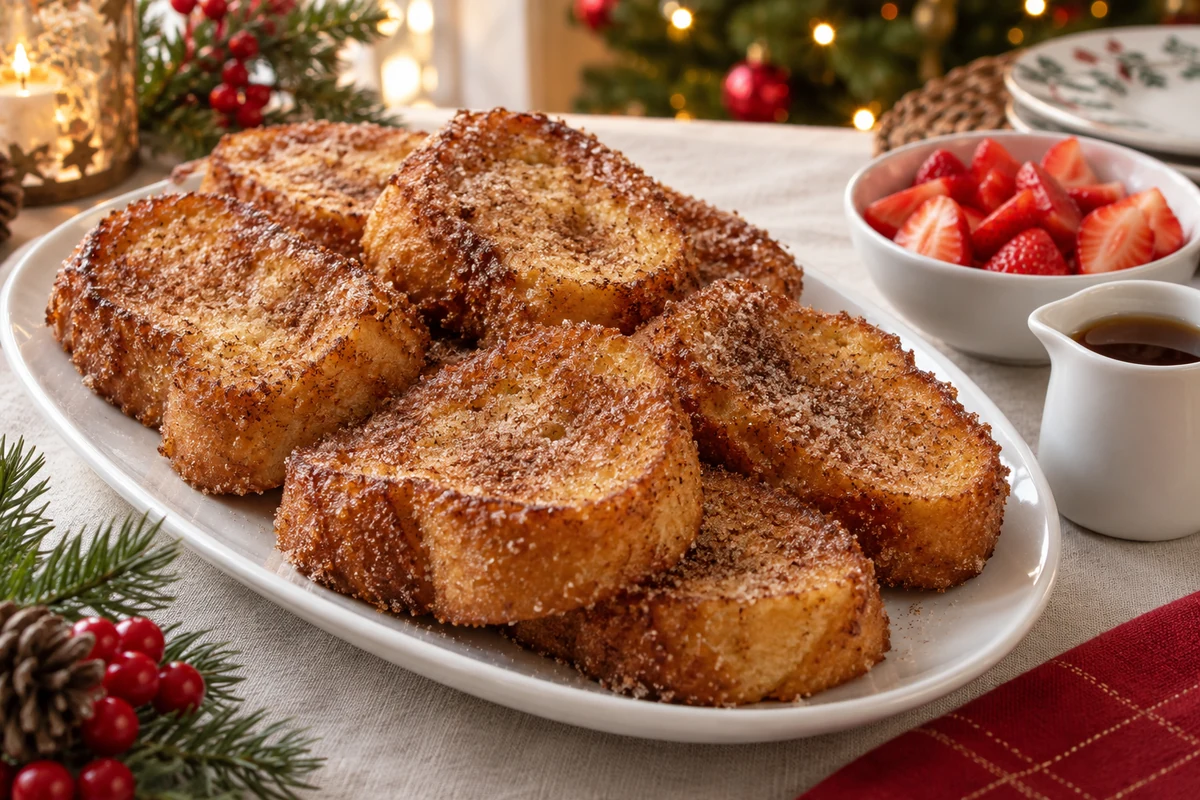
At a Brazilian Christmas meal, rabanada can be served simply with cinnamon sugar or with a choice of toppings.
Serving ideas
- Classic: warm slices dusted with cinnamon sugar on a serving plate.
- With syrup: offer maple syrup, honey or simple syrup separately so guests can add a little.
- With toppings: add dulce de leche, cream cheese or fresh sliced strawberries and banana after cooking.
- Sweet and savoury: pair with a spoonful of mild ricotta and a drizzle of honey.
- Portions: offer one or two slices per person, depending on size and the rest of the meal, with fruit and optional nuts.
Presentation
- Serving dishes: a simple white plate or rustic platter shows off the golden bread.
- Decoration: use a light dusting of icing sugar, orange zest or a little fresh mint.
- Buffet: bring out small batches on a clean platter with serving tongs. Avoid leaving the entire supply out for a long period.
Storing before and after serving
- Cooked slices: refrigerate promptly after cooling, within 1–2 hours. A dry-looking surface does not make milk-and-egg bread safe to keep overnight at room temperature.
- In the fridge: keep in a covered container for up to 48 hours, separating layers with suitable food-safe parchment if needed.
- Freezing: freeze fully cooked slices promptly after cooling, separated on a tray, then pack in a freezer-safe container. Use within 2 months for quality; defrost in the fridge and use within 24 hours.
Reheating methods
- Oven: spread slices on a tray at 180°C conventional or 160°C fan and heat until steaming hot throughout. Thicker or filled slices take longer.
- Frying pan: warm gently with a little butter or oil, turning as needed and ensuring the centre becomes steaming hot before the outside burns.
- Microwave: it softens the crust but is a valid reheating method. Follow appliance guidance, allow for cold spots and heat thoroughly, not for just a few seconds.
Final serving tips
- Prepare ingredients ahead: slice the bread and measure the coating in advance. Refrigerate any milk-and-egg mixture and dip shortly before cooking.
- Offer suitable alternatives: clearly identify vegan or gluten-free versions and use separate clean utensils when required.
- Serve promptly: the texture is best soon after cooking. Refrigerate any portions being saved within 1–2 hours.
A Brazilian Christmas favourite
Whether baked or fried, rabanada combines soft bread, a golden surface and the aroma of cinnamon. Match the soaking time to your loaf and check that every slice is cooked through.
For more festive recipes and practical ideas, visit the I Love Christmas blog.
Try the version that suits your kitchen and share how it turned out.
FAQ: Brazilian rabanada
Which bread is best for rabanada?
Use slightly stale, firm bread such as baguette, brioche or a dense white loaf. Cut slices around 1.5–2 cm thick so they hold together and cook through.
Can I make it gluten-free or vegan?
Yes. Use a suitable gluten-free loaf and check all ingredients for a gluten-free version. For vegan rabanada, use vegan bread, plant milk, the chickpea-flour batter described above and oil or vegan spread; avoid honey.
Is it better to bake or fry rabanada?
Frying usually gives a crisper surface, while baking is convenient for a trayful and uses less frying oil. Both methods need enough time to cook the soaked centre fully.
How should I store and reheat cooked rabanada?
Cool promptly and refrigerate within 1–2 hours, then eat within 48 hours. Reheat once until steaming hot throughout. Do not store this milk-and-egg dish overnight at room temperature.
What temperature should the frying oil be?
Aim for 170–180°C, measured with a thermometer suitable for hot oil. Fry in small batches, never leave the pan unattended and do not rely on a bread-crumb test.
Sources and Further Reading
- Food Standards Agency: cooking food safely
- Food Standards Agency: chilling, freezing and defrosting food safely